
How to Make Cake Pops with a Mold
Unlike making them by hand, cake pops with mold units are simple to make and turn out great - so long as you know some tricks for making these beautiful treats.
Servings: 20 cake pops
Calories: 96kcal
Ingredients
For the Cake Pop Batter:
- 5 oz. vanilla cake mix (from a box) (144 g)
- 1 egg
- 2 ½ tbsp. vegetable oil
- ⅓ cup water
For the Coating:
- 7 oz. (200 g) chocolate
- Sprinkles to decorate
Instructions
- Preheat oven to 350°F. In a large bowl, whisk together the cake pop batter ingredients.

- Lightly oil the inside of the cake pop mold (top and bottom piece). This will make removing them easier later on. Place the bottom part of the mold on a cookie sheet.
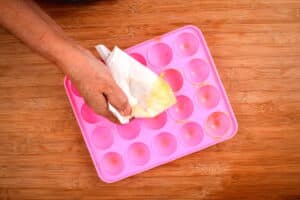
- Fill each of the cavities of the mold with cake batter - leaving about 1 mm between the surface of the batter and the top of the mold (this is important so the cake pops don’t overflow when baking, and also so that they don't end up flat). You can use a piping bag or a spoon. Cover with the top mold, making sure to press all parts of the mold together securely.
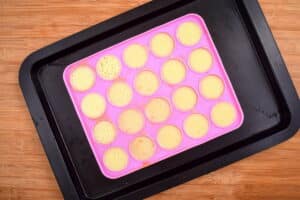
- Place the pan in the preheated oven and bake for about 20 minutes. Stick a toothpick through a hole in the mold to determine if the cake pops are done. There is no need to open the mold to check. Remove from oven and let cool for 5 minutes. Open the silicone mold and let cool another 5 to 10 minutes before removing the cake balls.

- Melt a little bit of chocolate. Dip one end of each cake pop stick into the melted chocolate. Then insert it into the cake pop. Repeat with the rest. Place in a stand and refrigerate for 30 minutes to seal them together.

- Melt the chocolate for the coating (you can use the microwave, mixing every 30 seconds so that it doesn't over-cook. Or you can place a heatproof bowl over a pot of simmering water - double boiler style). Coat the cake pops with the melted chocolate by swirling them in the chocolate and decorate with the sprinkles while they are still wet. Let the cake pops sit in a stand (we poked holes in an egg carton to use as a stand) to harden the coating at room temperature.

- Serve & enjoy!

Notes
If you have any leftover cake batter, it can be frozen for later use.
Nutrition
Calories: 96kcal | Carbohydrates: 12g | Protein: 1g | Fat: 6g | Saturated Fat: 4g | Cholesterol: 8mg | Sodium: 54mg | Potassium: 36mg | Fiber: 1g | Sugar: 8g | Vitamin A: 12IU | Calcium: 19mg | Iron: 1mg