How to Roast Coffee Beans at Home
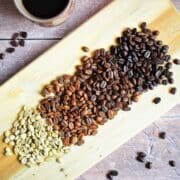
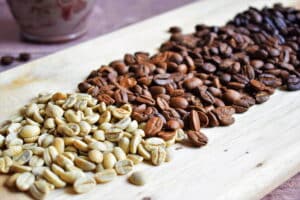
This is a detailed tutorial on how to roast coffee beans at home. It all starts with some green coffee beans and a roaster and you're on your way to a delicious, freshly roasted cup of coffee!
Servings: 1
Calories: 520kcal
Ingredients
- ½ pound green coffee beans use as much as your coffee roaster holds - check manual
Instructions
- To begin, the best place to set up your coffee roaster is outside if you can. The smell from roasting is very strong.

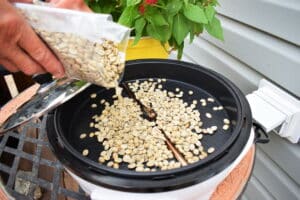
- Add the raw coffee beans to the coffee roaster, with the amount specified in the manual.
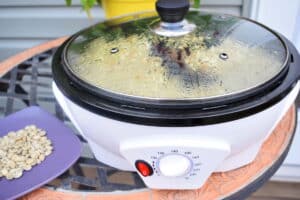
- Cover with the lid and turn the temperature dial to 140°C (285°F) to begin the roasting process.

- Roast the beans until they turn from green to yellow and smell grassy. This took about 14 minutes in our roaster. Water will start evaporating from the beans and the lid of the roaster will steam up.
- Turn the temperature dial to 180°C (355°F). Continue roasting until you hear a cracking noise, about 12 minutes (this is the sound of sugars inside the beans caramelizing). You will start to see chaff (the skin of the beans) in the roaster. This is the point at which your coffee beans are officially lightly roasted and suitable to make a very light coffee with, but it is recommended to roast further.

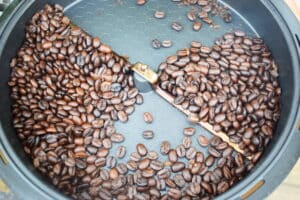
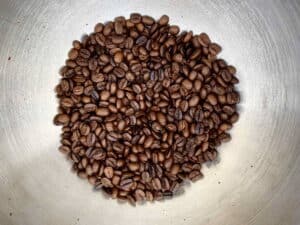
- Turn the temperature dial to 220°C (430°F). Watch the beans for the change in color. Our beans became a nice light roast after about 7 minutes at this temperature. If you want a medium roast, keep roasting until you hear the beans cracking again and have reached medium brown in color. This took about 10 minutes in our roaster. For a dark roast, the beans will be dark and oily looking. This took about 24 minutes. (Times may vary with your roaster. Always look for color and listen for cracking.)
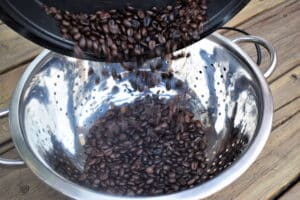
- When the beans are finished roasting, they need to cool quickly to stop cooking. Carefully transfer them from the roaster to a metal colander. Shake them in the colander until they are warm to the touch. If you have 2 metal colanders, you can move them back and forth between the 2 colanders. This will cool them down and help remove the chaff (the skin of the beans). Remove as much chaff as you can (it easily blows away).
- Once they have been cooled, leave the beans out for 1-3 days, as they will off-gas carbon dioxide. Then, store in an air-tight container in a cool, dark place like your pantry.
- Your beans have now reached full-flavor. They are ready for grinding and brewing. Brew the beans within 7 days for maximum freshness.
Notes
- The nutrition information is estimated for 100 grams of roasted coffee beans; not for brewed coffee.
- These are average roasting times that worked in our roaster. It may vary with your own appliance. Remember to watch for the beans to change color and listen for the first and second crack.
- Practice makes perfect! Knowing the proper times for your roaster will come with practice and it will become much easier to achieve your favorite roast over time.
- If you want to add flavor to your coffee beans, add a bit of flavor oil when they are still warm (just after cooling them in the metal colander). Mix them around with a wooden spoon to coat them evenly. Read flavor oil instructions for amounts.
- The best roast for espresso is between medium and medium-dark.
- Best beans for espresso roast: Give robusta coffee beans a try. They are often used for espresso because they produce a better crema from the high density of oils; they also have more caffeine.
- Arabica beans: Coffee from arabica beans will be more full-bodied/thicker as they are grown at higher altitudes, so keep that in mind when searching for green beans.
- Containers with one-way CO2 valves: This valve helps to release carbon dioxide while minimizing oxidation. You can place the beans in the container after they are cooled, in a cool place, and then wait a few days before roasting.
Nutrition
Serving: 100g | Calories: 520kcal | Carbohydrates: 62g | Protein: 8g | Fat: 26g | Saturated Fat: 16g | Cholesterol: 10mg | Sodium: 150mg | Fiber: 6g | Sugar: 52g | Calcium: 160mg | Iron: 5.4mg