
This red velvet cake pops recipe takes the classic Southern dessert and transforms it into a mouth-watering party treat perfect for adults and kids alike. They are covered in white chocolate and topped with some red velvet crumbles to make a stunning and delicious treat for any occasion.
❤️ About These Red Velvet Bites
- Taste: Made with buttermilk and a bit of cocoa powder, this cake's flavor hovers somewhere between vanilla and chocolate, but fully in the tasty category.
- Texture: When it comes to cake pop recipes, red velvet is noted and loved for its moist texture and eye-catching color. The crunchy, chocolate coating on top against the moist ball of cake creates a taste and texture like no other.
- Perfect for: Any holiday such as Valentine's Day, Thanksgiving, birthday celebrations, weddings and more. They also make great Christmas cake pops for their red and white color scheme.
- Serving size: The beauty of this recipe, besides the dreamy flavor, is the fact that you can adjust it as you need to accommodate your guest count. A big family reunion, double the recipe. A small gathering of friends, cut it in half. If you have leftover cake mix, consider making a mug cake food gift.
- Easy prep: It's easier when you make cake pops with cake mix. This makes it a good recipe to share with your children. If your kids are clamoring to help in the kitchen, let them help make the cake pop balls while you deal with heating the white chocolate up. Of course, after everything is done, all the cooks get to try a red velvet cake pop for dessert.
Jump to:
🧾 Ingredients
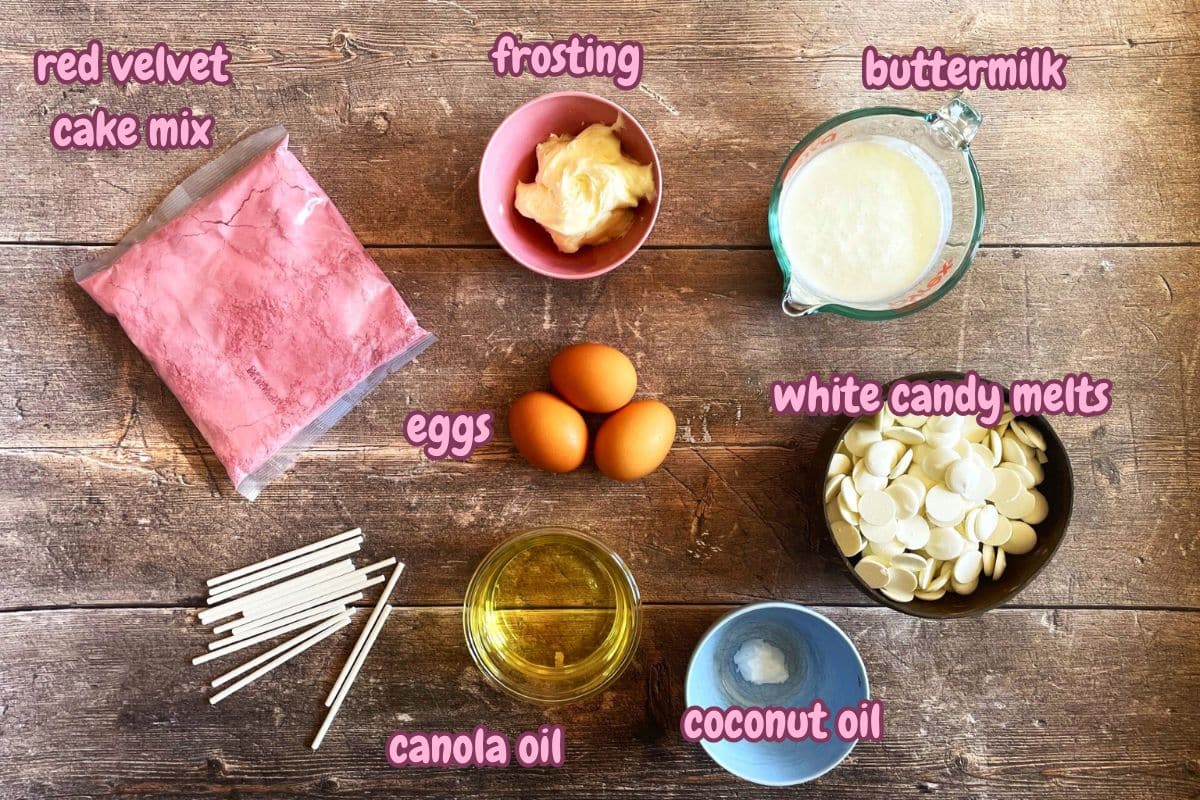
- red velvet cake mix - You can either buy a box of red velvet cake mix or make your favorite red velvet cake recipe. I wouldn't recommend buying a premade red velvet cake as it's already loaded with frosting and you'll have to remove a lot of it, although it can be done if need be.
- cake pop frosting - Cream cheese is a classic for red velvet. Try experimenting with other cake pop frosting options or even simply buttercream. Some cake mix boxes even come with the frosting so you might not need to purchase or make any.
- fine quality white chocolate - Or white candy melts. Additionally, you can choose to decorate with drizzles of red candy melts or holiday sprinkles.
- coconut oil - This is used to thin out the chocolate for dipping. You can use shortening instead if needed.
*Check recipe card for ingredient amounts.
🥣 How to Make Red Velvet Cake Pops
Easy to make and even easier to eat, these pops will be something your guests will love and remember.

Step 1. Bake the cake. Bake the red velvet cake according to the directions on the box and let cool.
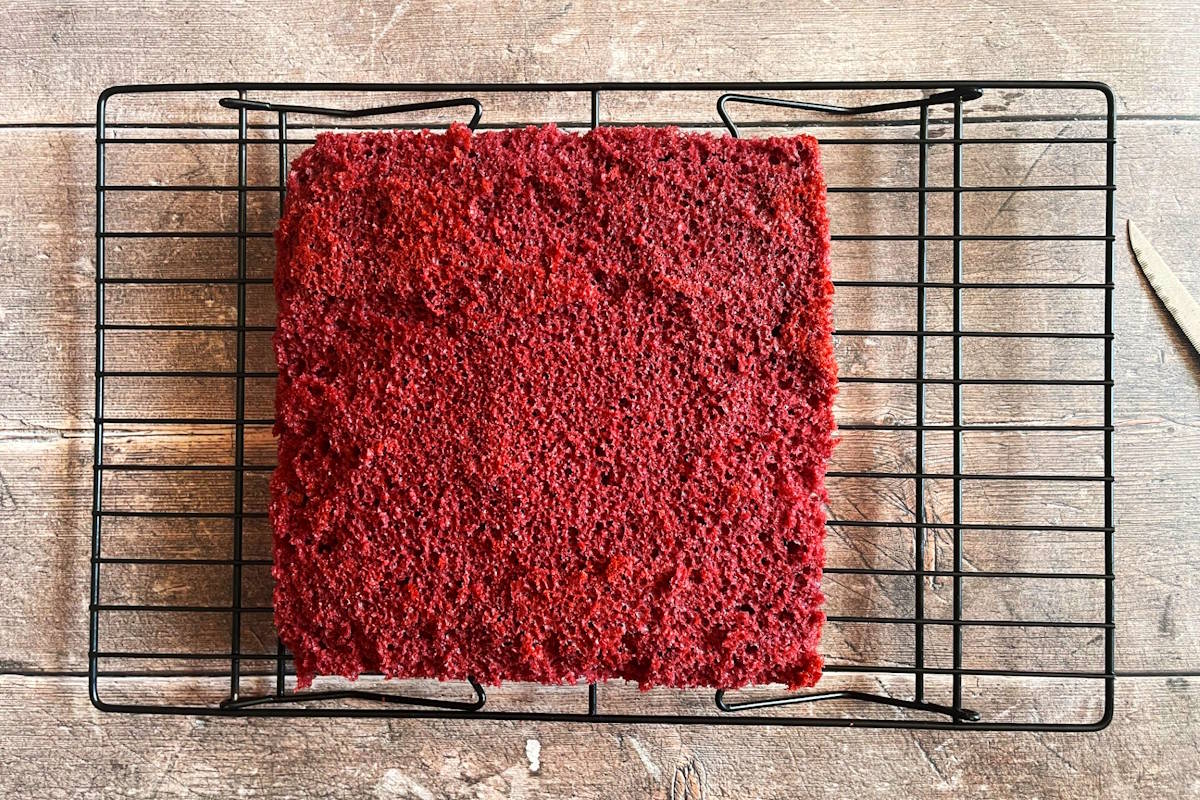
Step 2. Trim. Trim the outer, crispy parts of the cake off so that only the soft parts of the cake remain.
Chef's Note: I use a smaller pan to get more cake height (which means less parts to trim off). The harder, trimmed parts of the cake can be saved for snacking on!
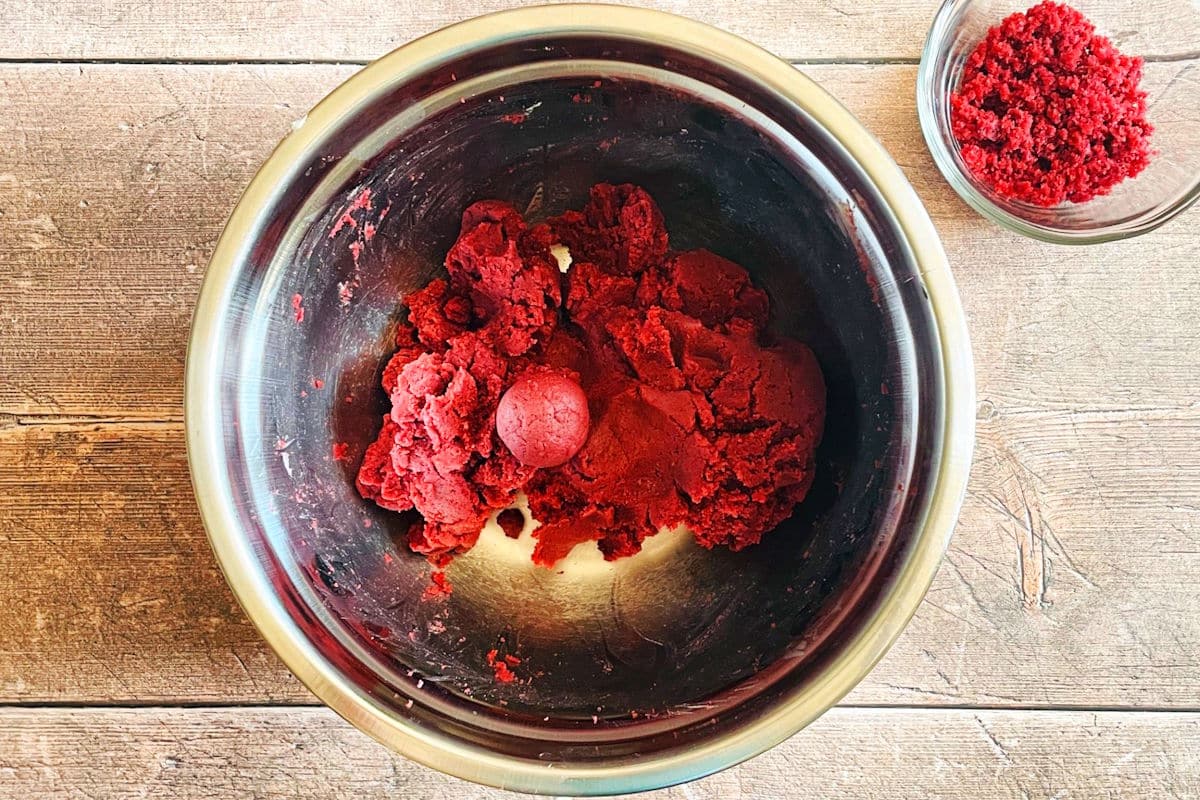
Step 3. Form the balls. Place the cake in a large bowl and crumble it, reserving a couple of tablespoons of the cake for later. Mix in some frosting and form the balls. Place them on a wax paper lined baking sheet.
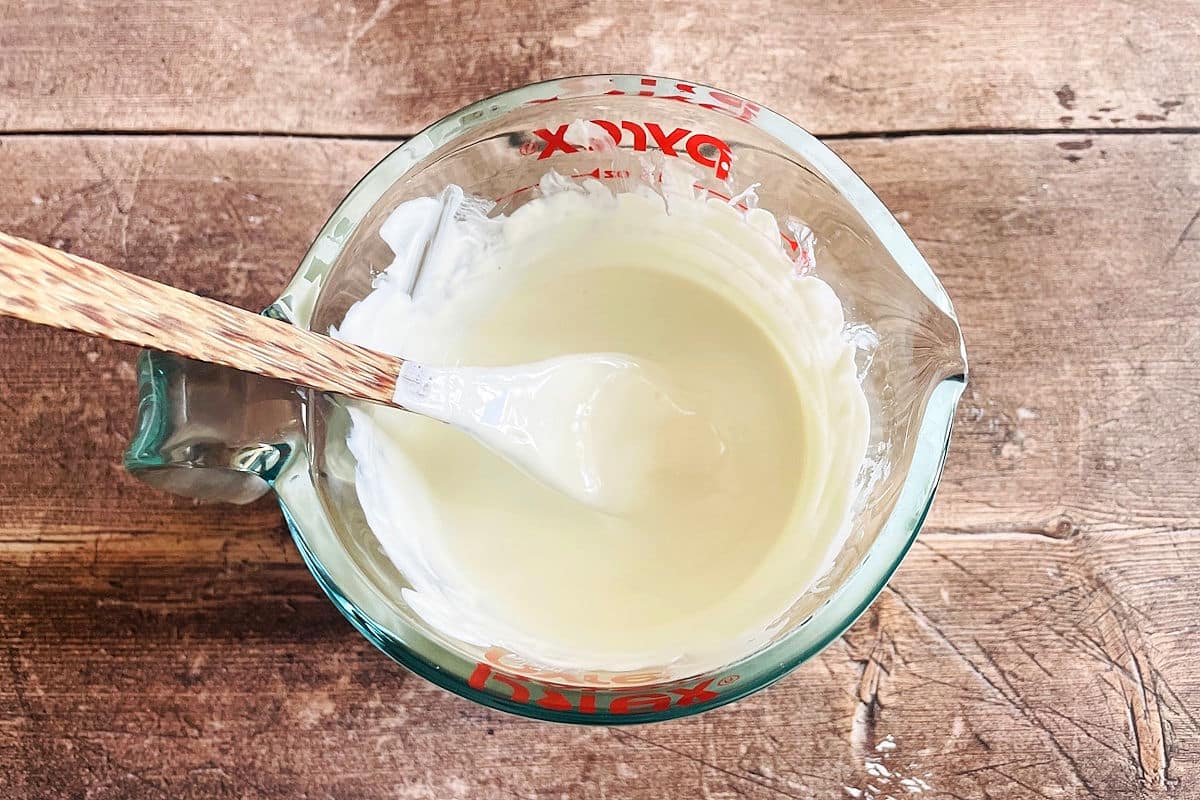
Step 4. Melt. Melt the white chocolate (or candy melts) with the coconut oil and stir well.
Chef's Note: The amount of frosting you'll need is approximate. You need to reach a texture that allows you to form balls with your hands but isn't too heavy--It's going to feel a bit like playdough. If no large cracks appear, it is ready.

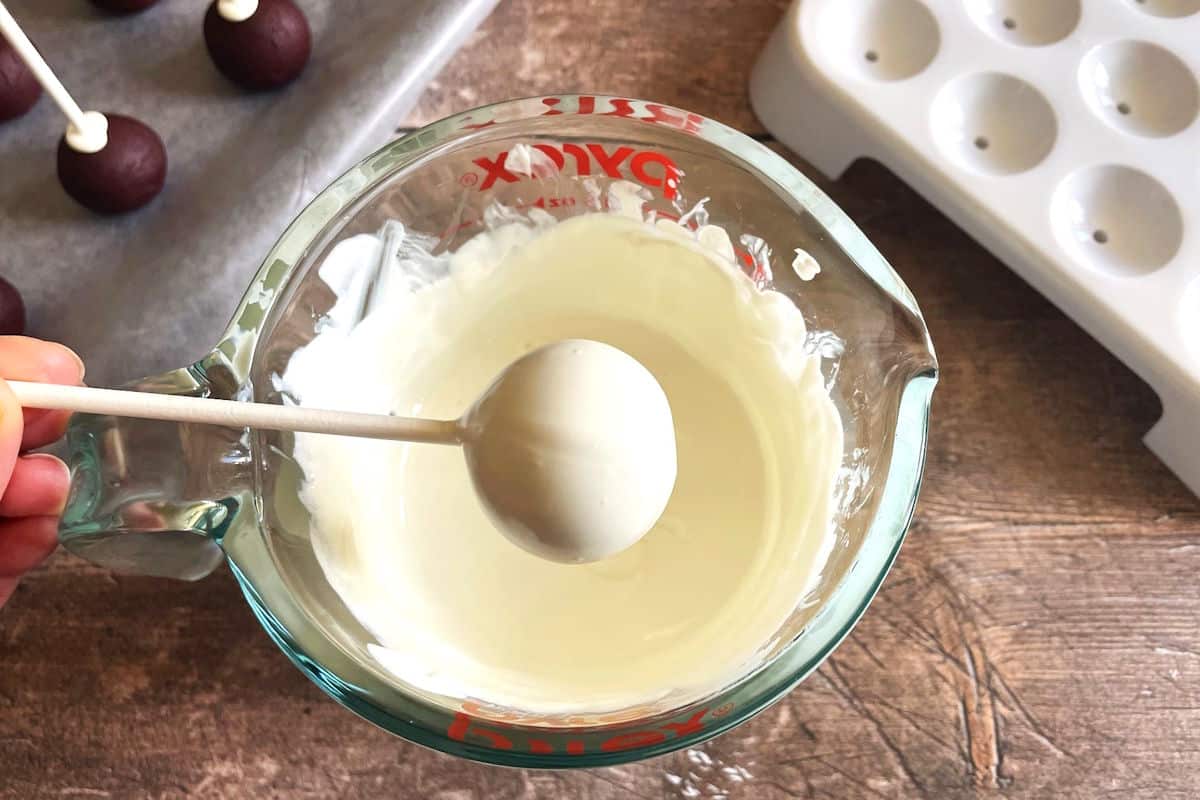
Step 5. Dip the lollipop sticks. Dip the tip of a lollipop stick into the melted chocolate, then insert about halfway into the cake ball. Repeat and refrigerate until firm, about 30 minutes.
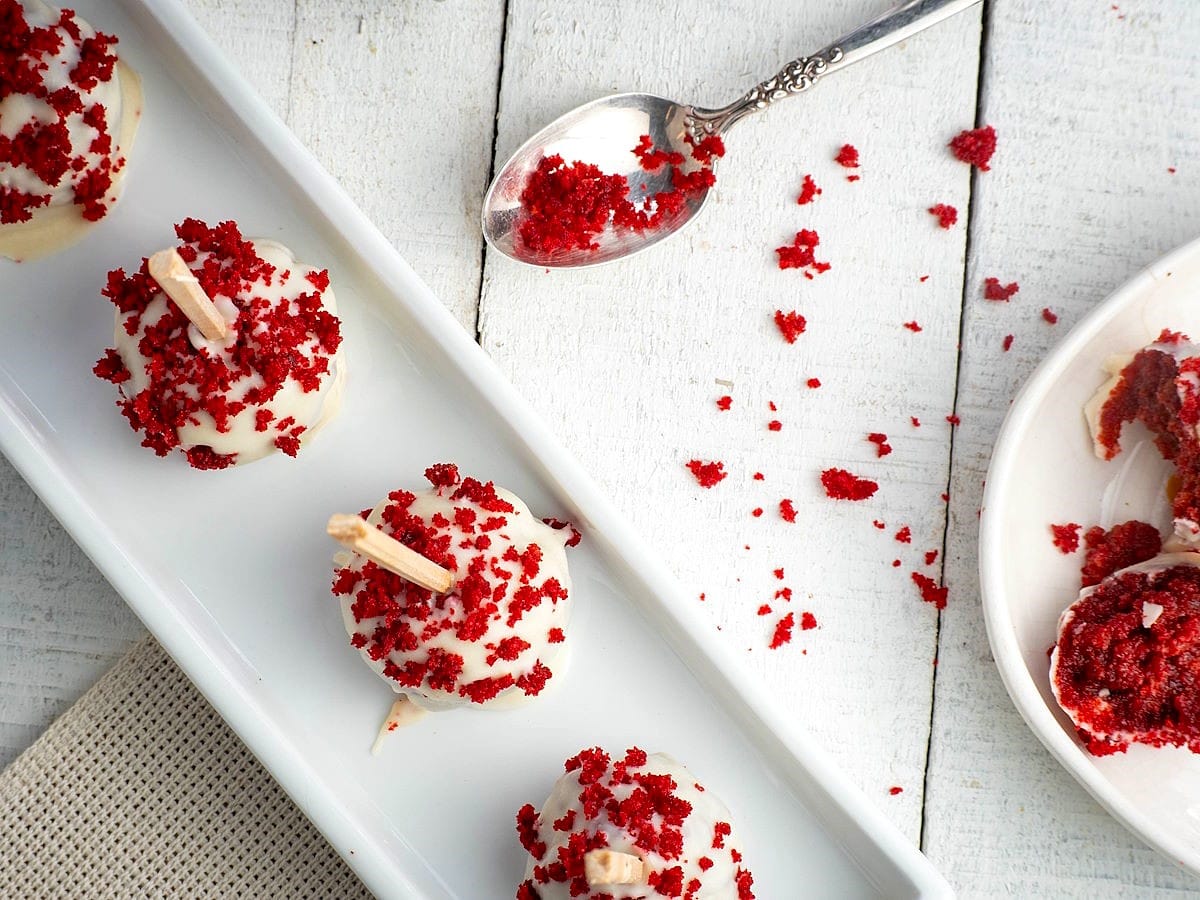
Step 6. Coat. Dip the cake pops into the melted white chocolate. Softly tap the cake pop until the excess chocolate falls off. Don't tap too hard or the cake ball could fall off!
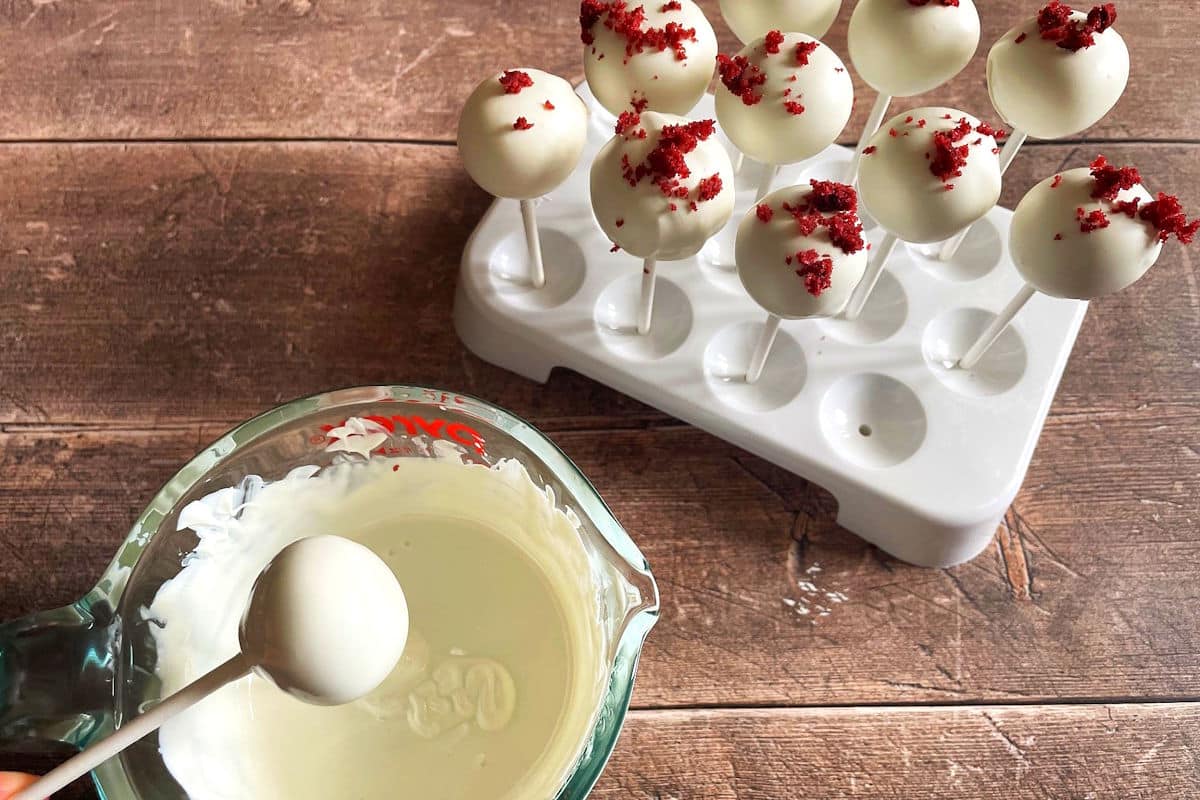
Step 7. Dry. Place in a cake pop stand, sprinkle with the reserved red velvet cake crumbles immediately (the coating starts to harden quickly) and let dry fully. Repeat. You can dry them at room temperature or in the fridge. Candy melts will harden a lot quicker than chocolate.

Step 8. Serve. Serve the red velvet cake pops immediately or store them for later.
✅ Joss' Tips
- Cake mix: If your cake mix is a different weight than the box I use, just use the ingredient amounts listed on the box and bake as directed.
- Cake pop stand option: You can get creative with what to use to stand up the cake pops: Styrofoam block, egg carton, cereal box or a stand that was designed for cake pops. Babycakes cake pop makers usually come with a nice stand.
- Use a cookie scoop: Using a cookie scoop to measure out the cake balls ensures they are consistent in size. You will still need to roll them to get a nice, round shape.
- Microwave: Careful not to overcook the coating in the microwave as it will get thick and lumpy. Cook at 15 to 20 second intervals, mixing thoroughly each time until smooth. Once it's almost smooth, I spend at least 30 seconds stirring because it will continue to melt at that point and become totally lump free with the perfect dipping consistency.
❓ Red Velvet Cake Pops FAQs
Yes. The finished cake pops can be stored in an airtight container at room temperature for up to 2 days. If you use water instead of milk and a store-bought frosting that doesn't require refrigeration, they can last up to a week at room temperature (in a cool, dry place).
They can last in the fridge for up to 1 week. Line the container with paper towel to soak up any unwanted moisture.
Yes! Freeze for up to 3 months. You can wrap them individually and place in a freezer bag.
Absolutely! You can fully prepare them days in advance and store properly or delay coating them until the day of serving. If they were frozen or in the fridge, bring them up to room temperature before serving.
I usually use white chocolate bars or white candy melts. Candy melts tend to be cheaper and are made for this purpose, so they're a great choice! You can use white chocolate chips, but they might not end up as smooth.

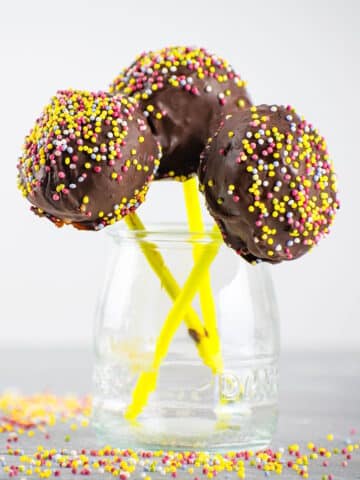
🍰 More Cake Pop Recipes You Will Love


If you made this Red Velvet Cake Pops Recipe or any other recipe on my website, please leave a 🌟 star rating and let me know how it went in the 📝 comments below. And please share the recipe!
📋Recipe

Red Velvet Cake Pops
Ingredients
- 1 box red velvet cake mix - 13.25 ounces *see notes section about cake mix box size
- 1 cup buttermilk - or water
- 3 eggs
- ½ cup canola oil
- 2 to 3 tablespoons cake pop frosting - approximately--I like to use cream cheese frosting
- 2 cups fine quality white chocolate - chopped (or white candy melts)
- 1 teaspoon coconut oil - or shortening
Instructions
- Bake the red velvet cake according to the directions on the box and let cool.
- Trim the outer, crispy parts of the cake off so that only the soft parts of the cake remain.
- Place the cake in a large bowl and crumble it with your hands or using a fork. Separate about 2 tablespoons of cake crumbles for the topping and reserve.
- Start by adding 2 heaping tablespoons of frosting to the bowl of crumbled cake and mix thoroughly. The amount of frosting you'll need is approximate. You need to reach a texture that allows you to form balls with your hands but isn't too heavy. If no large cracks appear, it is ready.
- Use a small cookie scoop or your hands to make round balls of the cake mixture. Place them on a wax paper lined baking sheet.
- Melt the white chocolate (or candy melts) and coconut oil in a double boiler or in the microwave. Stir well.
- Dip the tip of a lollipop stick into the melted chocolate, then insert about halfway into the cake balls. Refrigerate for 30 minutes to allow the cake pops to firm up and the chocolate on the stick to harden.
- Dip the cake pops into the melted white chocolate (remelting if needed). Softly tap the cake pop until the excess chocolate falls off. Don't tap too hard or the cake ball could fall off!
- Place in a Styrofoam block or cake pop stand and sprinkle with the reserved red velvet cake crumbles immediately (the coating starts to harden quickly) and let dry fully. Repeat with all cake pops.
- Serve!
Equipment
Notes
- *Cake Mix Amount: If your cake mix is a different weight than the box I use, just use the ingredient amounts listed on the box and bake as directed.
- Microwave: Careful not to overcook the chocolate in the microwave. Cook at 15 to 20 second intervals, mixing each time until smooth.
- Pan size: I use a smaller pan to get more cake height (which means less parts to trim off). The harder, trimmed parts of the cake can be saved for snacking on!
- Dry Time: You can dry them at room temperature or in the fridge. Candy melts will harden a lot quicker than chocolate, only a few minutes in my experience.
- Storage: These cake pops can be stored in an airtight container at room temperature for up to 2 days, in the fridge for up to 1 week or in the freezer for up to 3 months. If you use water instead of milk and a store-bought frosting that doesn't require refrigeration, they can last up to a week at room temperature.
- Make ahead note: You can fully prepare them days in advance and store properly or delay coating them until the day of serving. If they were frozen or in the fridge, bring them up to room temperature before serving.
- Cookie scoop: Using a cookie scoop to measure out the cake balls ensures they are consistent in size. You will still need to roll them to get a nice, round shape.
- Cake pop stand option: Helpful kitchen tool for this recipe: Styrofoam Block to be used as a stand.
Nutrition
Nutrition information on In the Kitch is provided as a courtesy and is an estimate only. It may not include toppings and/or sauces.


Joss says
These are easy to make and so yummy! They look beautiful as well.