
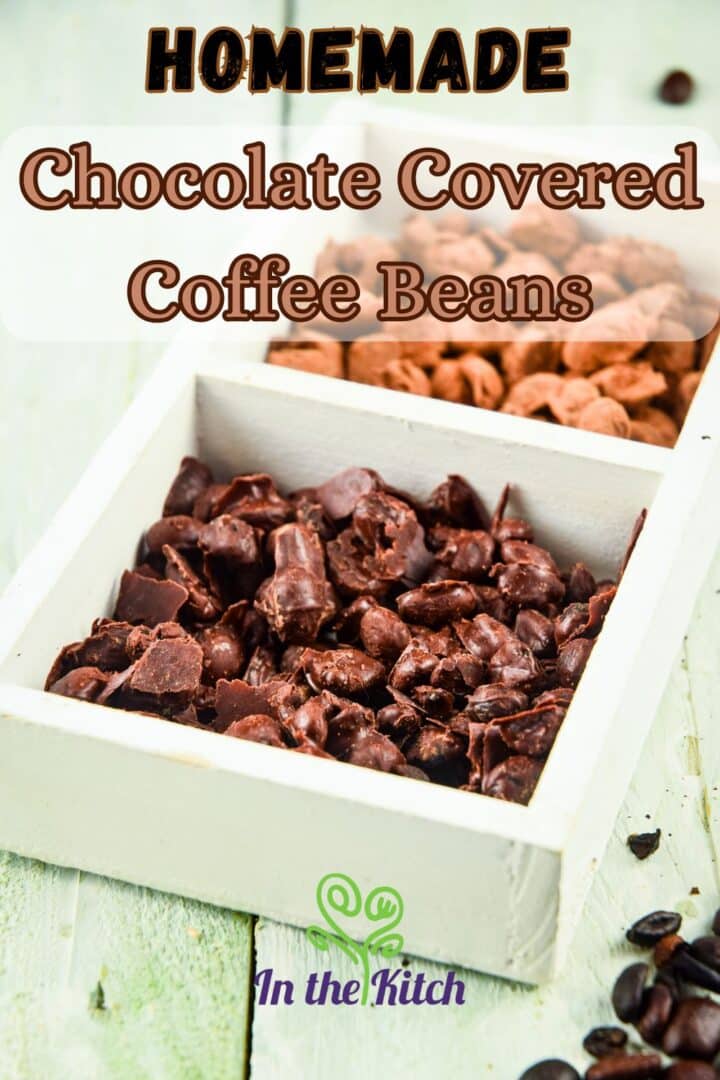
Homemade chocolate covered coffee beans are a splendidly fast and convenient way to have the best of two worlds. They are simple to make, even if you have no culinary skills.
In this tutorial, I will show you step-by-step how to make chocolate covered coffee beans. The result is a delicious tiny morsel with a small burst of caffeine and a bit of crunch. A creamy chocolate coating naturally softens the bitterness of the coffee bean.
Chocolate and coffee create one of the most universally enjoyed flavor combinations in the world. And those are really the only two ingredients you need for this recipe.
If you're a chocolate lover, you might also like my chocolate caramel candy bars and Cuban lunch chocolate bars.
Jump to:
Chocolate Covered Coffee Bean Ingredients
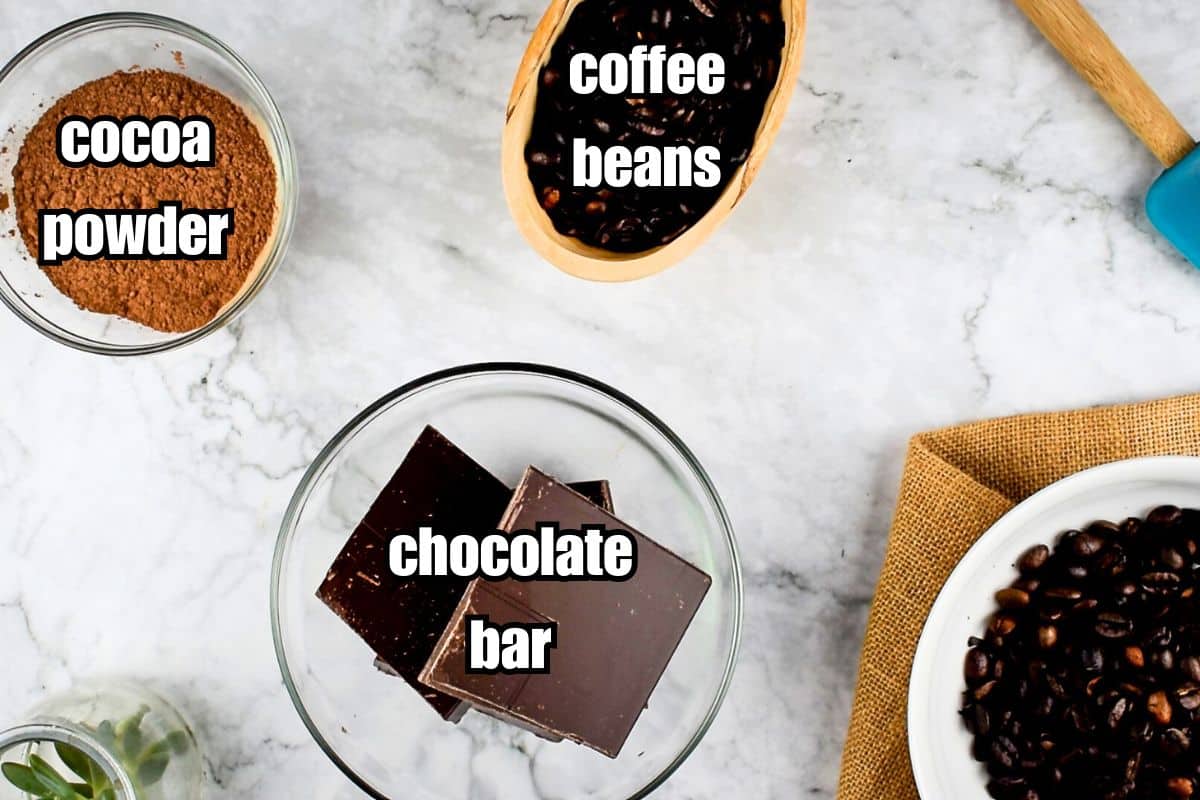
- roasted coffee beans - Arabica coffee beans work best for this recipe because they have a better taste than robusta, are more sweet/less bitter and lower in caffeine.
- dark chocolate bars - Choose a high quality chocolate bar for best results.
- cocoa powder - To dust half of the coffee beans with (optional). You can even experiment with different toppings like icing sugar, ground vanilla beans, or ground pecans or walnuts.
*Check recipe card for ingredient amounts.
👩🏻🍳Chef's Note: If you want to go the extra mile, learn how to roast your own coffee beans at home!
Types of Chocolate to Use
You can use any type of chocolate you desire. Dark chocolate is my preference, but every now and then I like to change it up! Feel free to pick your favorite:
Dark Chocolate
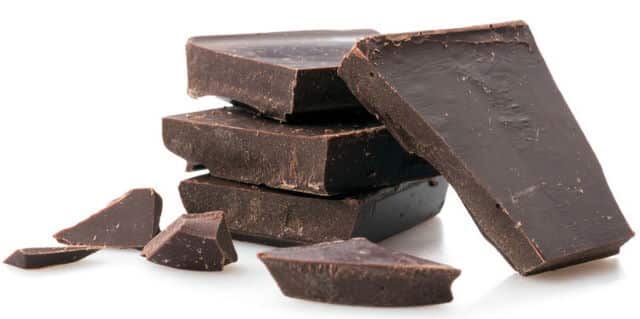
Dark chocolate is a great vegan option and has the fullest chocolate flavor.
Milk Chocolate
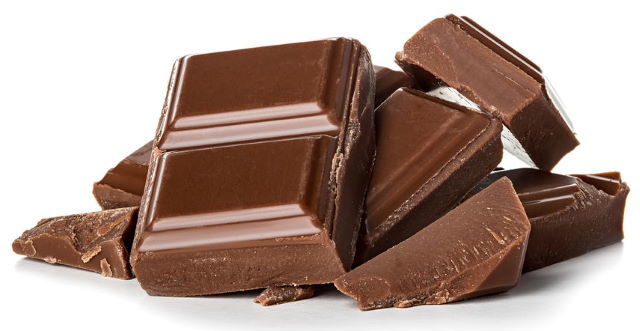
If you have a need for creamy chocolate, by all means go for the milk chocolate to coat your coffee beans with!
White Chocolate
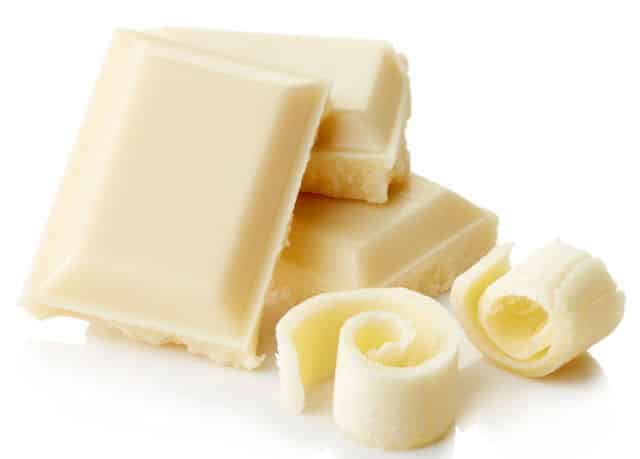
White chocolate is white because it is made of cocoa butter, sugar, and milk, skipping the cocoa solids altogether. It would be a nice contrast to the coffee bean's dark color.
Ruby Chocolate
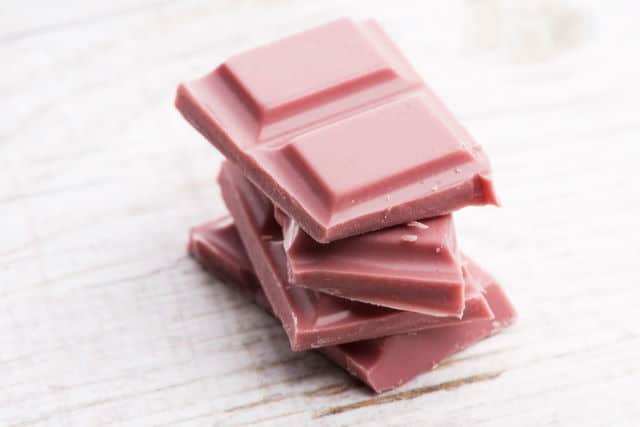
Have you ever heard of ruby chocolate? Its color is in fact natural and comes from ruby cocoa beans (based on the process). How beautiful would chocolate covered coffee beans look in ruby? Think wedding favors, Valentine's day gifts, etc.
You may even decide you prefer to substitute pure chocolate for chocolate bars flavored with mint, hot chili, etc. Some people combine one or two different types to make their own unique flavor.
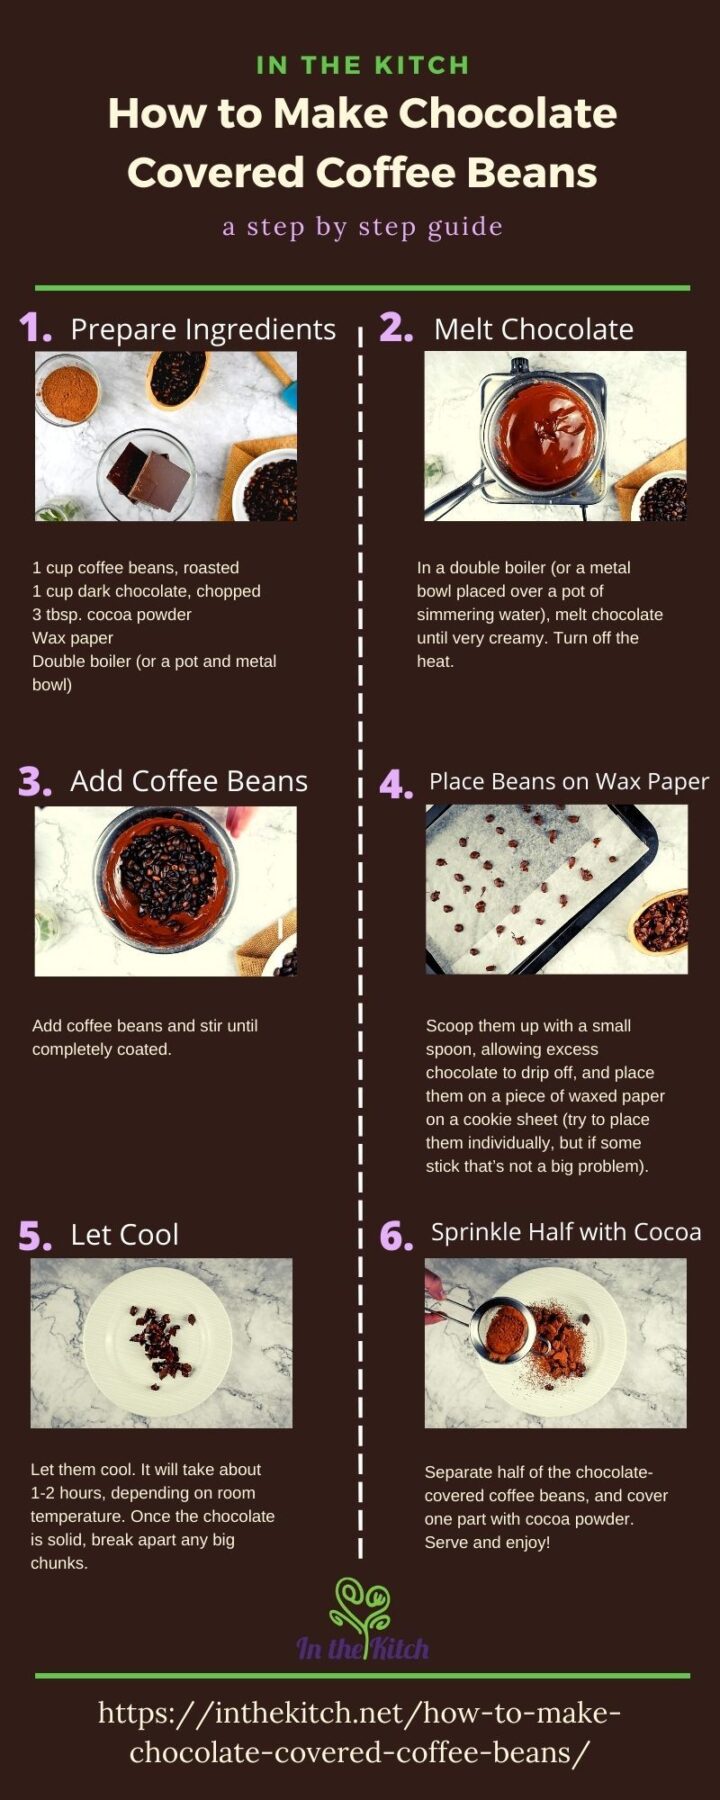
Instructions

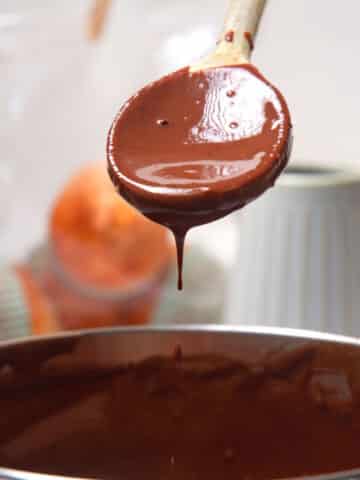
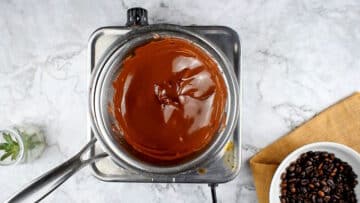
Step 1. Melt the chocolate. In a double boiler (or in a metal bowl placed over a pot of simmering water), melt the chocolate bar chunks until smooth and creamy. Turn off the heat.
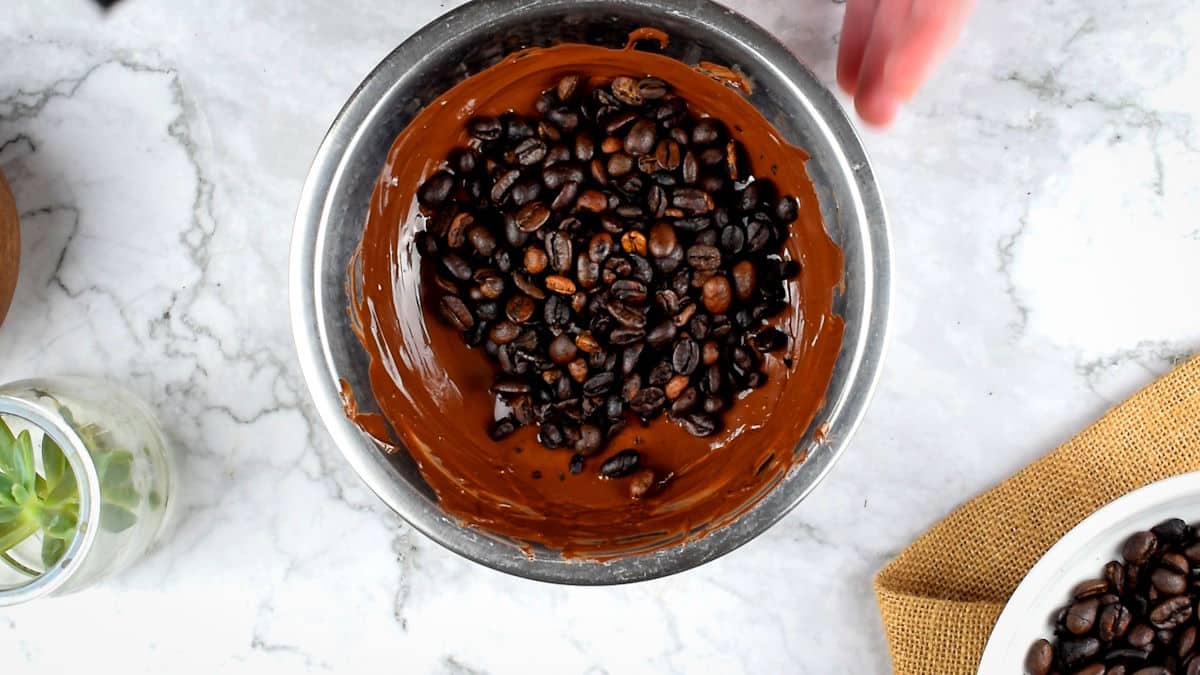
Step 2. Add coffee beans. Add the coffee beans to the melted chocolate and stir until completely coated.
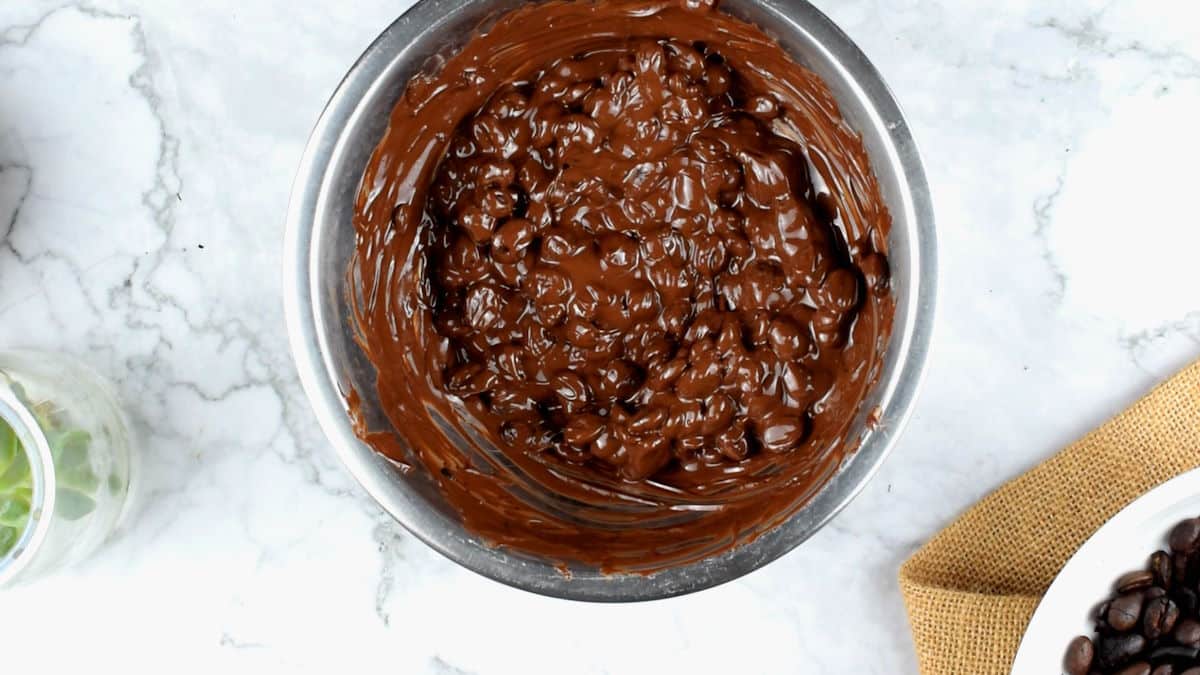
Try to get each bean as covered as you can.
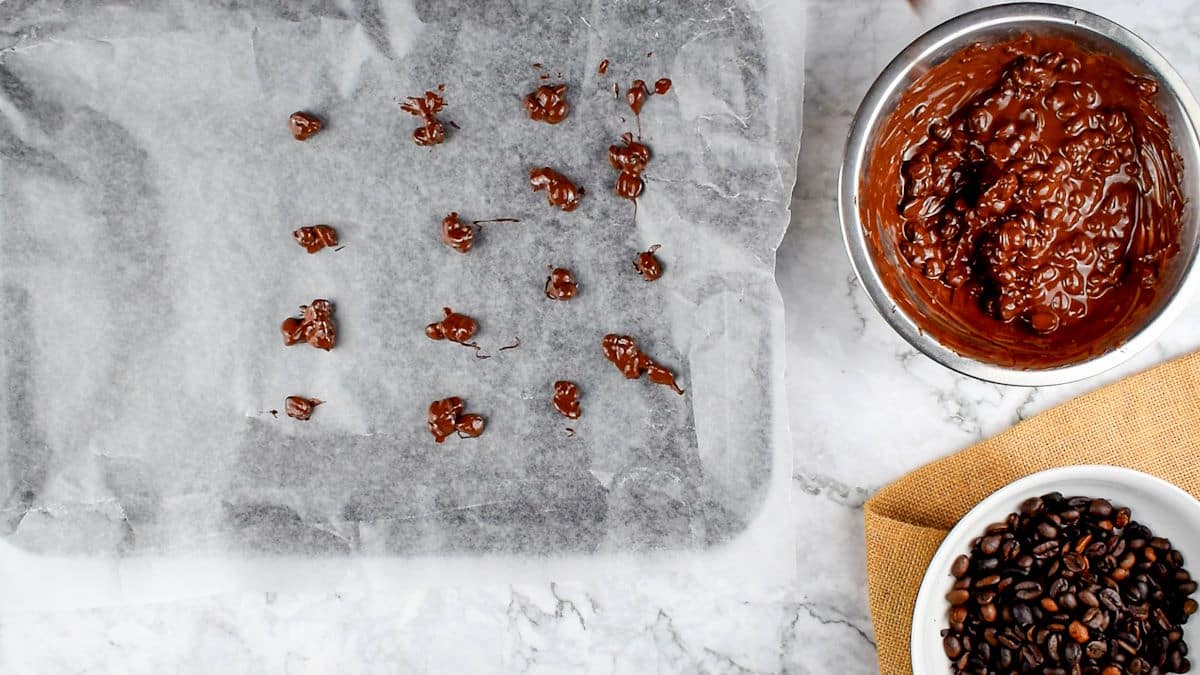
Step 3. Place beans on wax paper. Scoop the coffee beans up with a small spoon, allowing excess chocolate to drip off. Place them on waxed paper.
👩🏻🍳Chef's Note: Try to place them individually, but if some stick together that's not a big problem! I know this seems like it might be tedious, but it doesn't take as long as you would think, especially if you let the kids join in. My kids love helping me out with this recipe!
Pro Tip: Try using 2 spoons for this step: one to pick up the bean and 1 to scrape it off of the other spoon. This will save you some time.
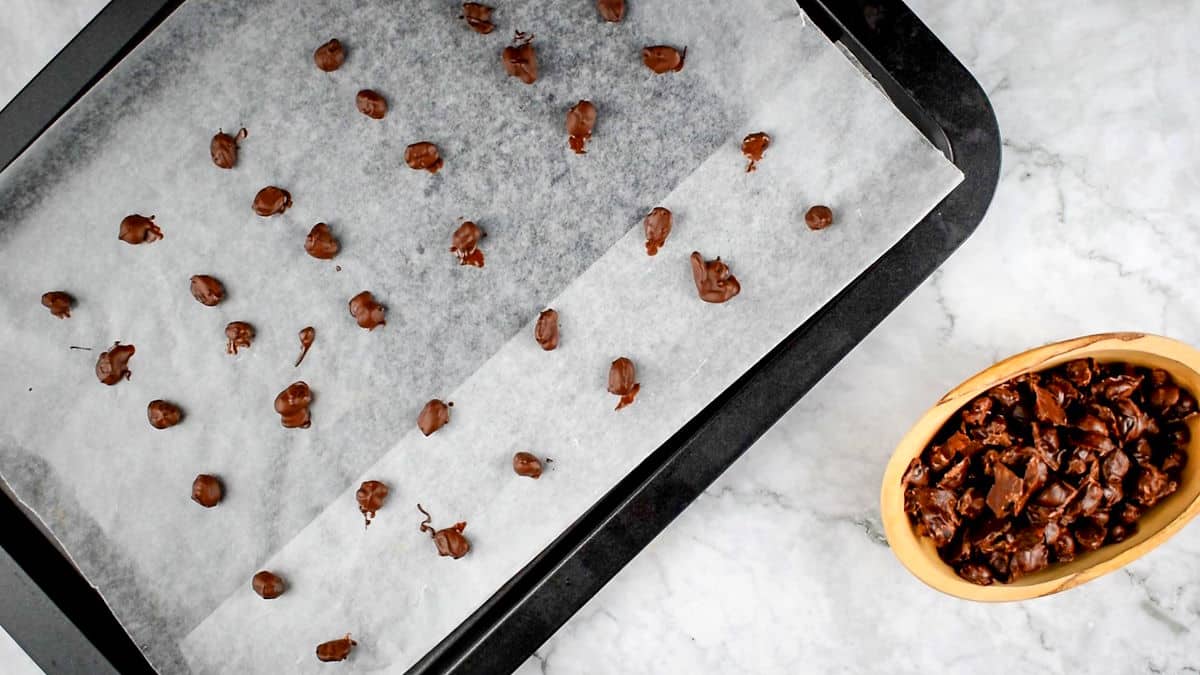
Step 4. Let the coffee beans cool. Let them cool and set. It will take about 1-2 hours, depending on room temperature. Once the chocolate is solid, break apart any big chunks.

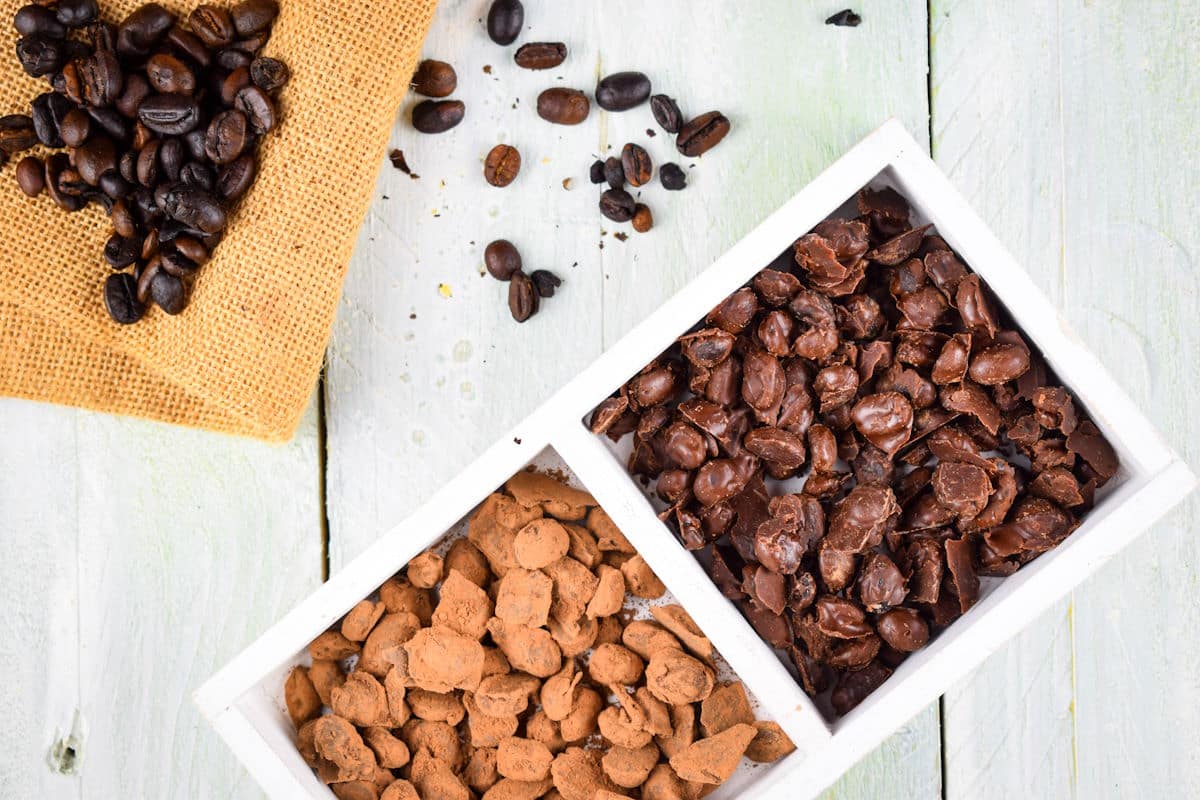
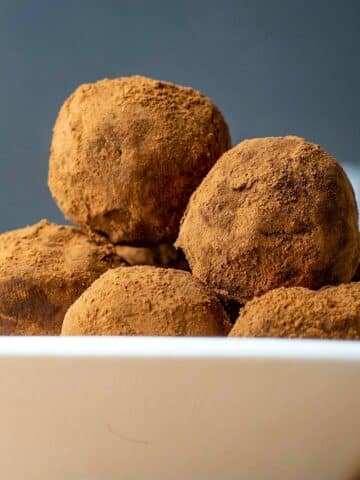
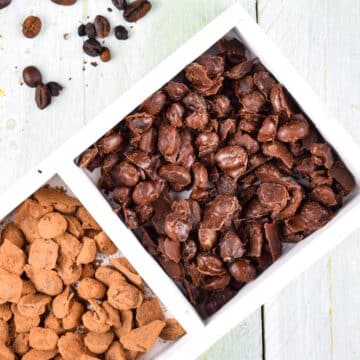
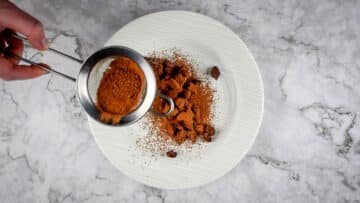
Step 5. Divide in half. Separate the chocolate-covered coffee beans in half. Dust one half with cocoa powder and leave the other half as they are.
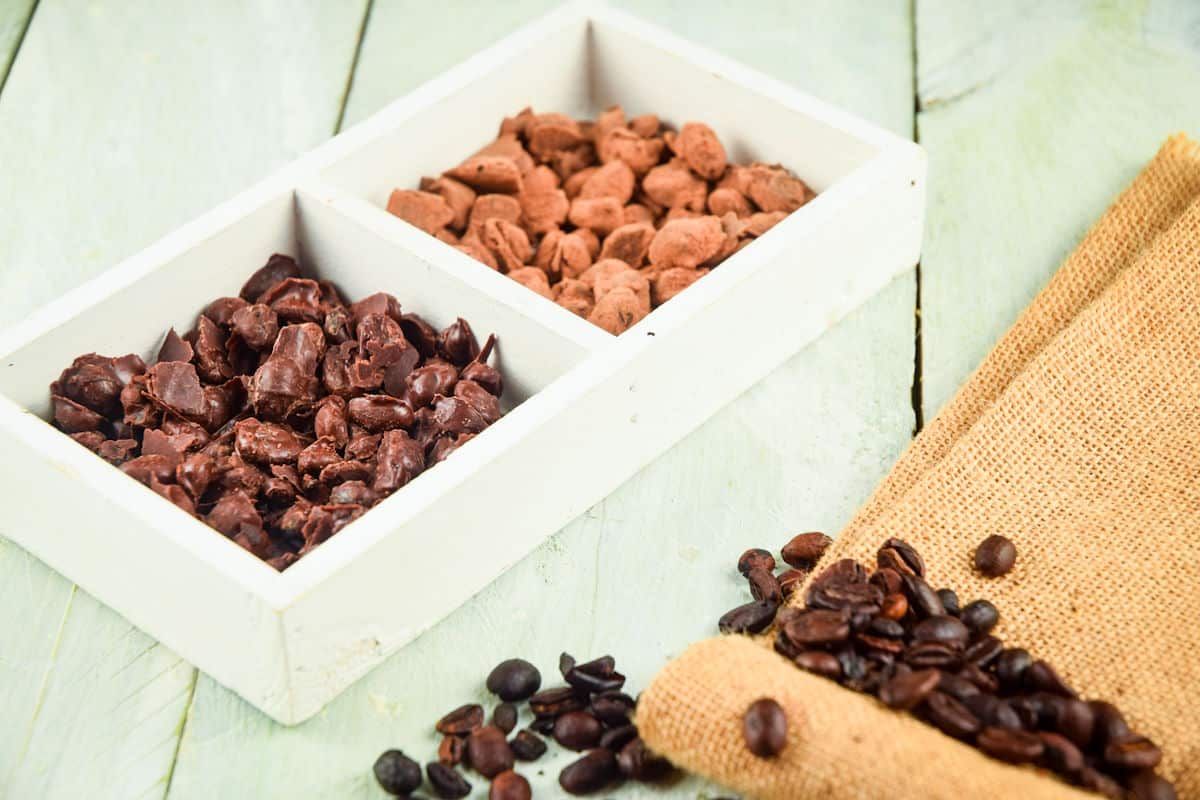
Step 6. Serve. Serve & enjoy!
Serving Suggestions
- These rich, edible, chocolate-coated coffee beans look elegant enough to set in a bowl as a centerpiece for a party.
- One of my favorite ways to eat these is sprinkling them over vanilla ice cream or banana nice cream!
- You can also keep them on hand as a snack or a pick-me-up at home.
- If you could keep them from melting into a gooey mess, you might take them everywhere.
- This is a great recipe to blend just enough bitter and sweet to create an alternative small dessert or a great, food gift (like my chocolate mug cake food gift).
Storage Tips
Since you do not really want to eat too many at one time (due to the caffeine content), it is ideal to keep them in an airtight container that you can slide into the refrigerator or freezer.
- In a cool dark cupboard or pantry: for up to 1 month for best results.
- Refrigerate: for up to 6 months.
- Freeze: for up to 1 year.
- Keep them where kids can't reach them.
Recipe FAQs
On average, one chocolate-covered coffee bean contains between 3 and 5 milligrams of caffeine. The caffeine in chocolate-covered coffee beans comes from both the chocolate and the coffee bean itself. This can cause the amount of caffeine to vary with each batch.
Dark chocolate has a higher caffeine content than milk chocolate, so the type of chocolate you choose can cause a slight difference.
As odd as it sounds, yes, actual roasted coffee beans are covered in chocolate.
They have a desirable bitter-sweet flavor with a mix of textures and a small burst of caffeine, making them a fun and delicious snack.
🍫More Chocolate Recipes You Will Love

If you tried this recipe tutorial for How to Make Chocolate Covered Coffee Beans or any other recipe on my website, please leave a 🌟 star rating and let me know how it went in the 📝 comments below. And please share the recipe!
📋Recipe
How to Make Chocolate Covered Coffee Beans
Ingredients
- 1 cup coffee beans - roasted
- 1 cup dark chocolate - broken into pieces
- 3 tablespoons cocoa powder
Instructions
- In a double boiler (or in a metal bowl placed over a pot of simmering water), melt the chocolate bar chunks until smooth and creamy. Turn off the heat.

- Add the coffee beans to the melted chocolate and stir until completely coated.
- Scoop the coffee beans up with a small spoon, allowing excess chocolate to drip off. Place them on waxed paper (try to place them individually, but if some stick together that's not a big problem).
- Let them cool and set. It will take about 1-2 hours, depending on room temperature. Once the chocolate is solid, break apart any big chunks.
- Separate the chocolate-covered coffee beans in half. Dust one half with cocoa powder and leave the other half as they are.
- Serve & enjoy!


Equipment
Notes
- Type of coffee beans to use: I like to use arabica beans for this recipe as they have a better taste than robusta, are more sweet/less bitter and lower in caffeine.
- Cocoa powder option: Dusting the beans with cocoa powder is optional but it makes for a nice presentation and difference in taste and texture.
- Caffeine content: On average, one chocolate-covered coffee bean contains between 3 and 5 milligrams of caffeine.
- Chocolate type: You can use any chocolate type you desire: milk, dark, white or ruby.
- Pro Tip: Try using 2 spoons for the transferring step: one to pick up the bean and 1 to scrape it off of the other spoon. This will save you some time.
- Storage: It is ideal to keep them in an airtight container that you can slide into the refrigerator or freezer.
- In a cool dark cupboard or pantry: for up to 1 month for best results.
- Refrigerate: for up to 6 months.
- Freeze: for up to 1 year.
- Keep them where kids can't reach them.
Nutrition
Nutrition information on In the Kitch is provided as a courtesy and is an estimate only. It may not include toppings and/or sauces.


Liza says
I am going to do this with Lindt 70% dark chocolate.
How long would they keep stored in a jar in the kitchen cupboard? Would this be good, or can you give me a better idea?
I want to make them as presents but making a batch of them ready to give when the time comes 😀
Joss Dyckson says
Great choice of chocolate, Liza! They can last quite a while if you store them covered in a cool, dark place like the cupboard as you mentioned (possibly up to 6 months). I also freeze and refrigerate mine to extend the shelf life even further.
Jeff V says
This is a Great way to enjoy the caffeine experience in the morning
without having to worry about where your coffee cup is. THANK YOU!
Joss D says
You're welcome! I'm glad you enjoyed it, Jeff. 🙂
Terri says
Thanks for this! And I had no idea I could make my own chocolate covered coffee beans! I want that rhuby chocolate too!!!
Joss D says
Thanks Terri, the ruby chocolate would be so fun!!
Lisa says
Love that you're sharing this recipe! I ate way too many of them when I was in university...and I think I was more addicted to the flavors of chocolate and coffee than to their actual "purpose"!
Joss D says
Lol, I think that is very common Lisa. How can you resist?!
Vanessa says
These will make a wonderful homemade Christmas gift. Thanks for the great idea!
Joss D says
Thanks Vanessa!
Denise@urbnspice says
What fun, Joss! I have never thought about making my own Chocolate Covered Coffee Beans until I read your post. Thanks so much for the step-by-step instructions. These would make excellent edible gifts. Thanks for sharing!
Joss D says
Thanks Denise! They make an excellent gift. Glad you like the step by step!
nancy says
what a cute idea. I wonder if it gets too hard on the teeth when you bite it.
Joss D says
Thanks! Not in my experience. When coffee beans are roasted, they become quite crunchy and break up easily.
Colleen says
I used to buy these, but making them is so simple, and they are a perfect afternoon pick me up. Thanks for sharing!
Joss D says
It really is simple and a fun activity to do with the kids. Thanks Colleen!
Leanne says
Love this for a Christmas gift idea! I've never made chocolate covered coffee beans, and it's been a while since I've had them. A few would be a nice little afternoon pick-me-up right now. Great post Joss. Appreciate the step by step description and photos!
Joss D says
Thanks Leanne! I do give these as gifts, and people seem to love getting them.
Bernice Hill says
Oh my...have you ever brought back memories of my university years with this recipe! I ate so many back in the day, just to stay awake. I would love to try making them and maybe send some to my daughter who is in university!
Joss D says
I love that food can take you back like that! And I'm sure your daughter would appreciate it - so needed in Uni. Thanks for the comment Bernice!
Elaine says
Such a good idea for a homemade Christmas gift! Great instructions!
Joss D says
Yes, it is a great food gift! Thanks Elaine.
Sonya says
I've never tried these before & they were simple + delish!
Joss D says
Thanks Sonya!