
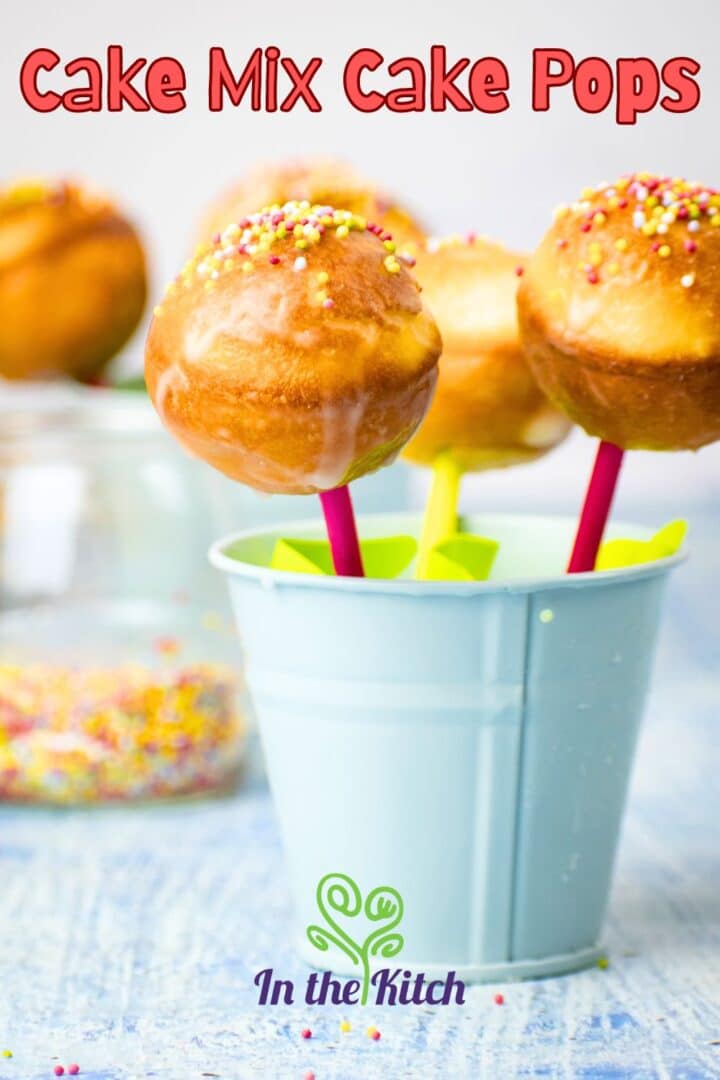
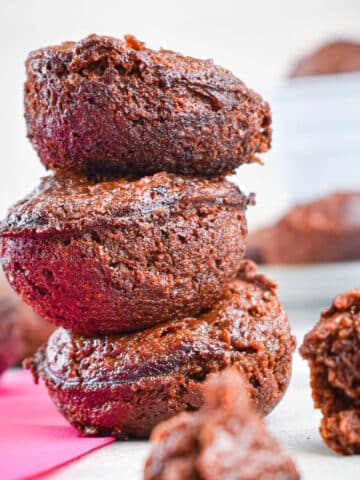
Love to bake but don't exactly want a whole cake? Simplify this dessert and make some cake pops with a box of cake mix instead!
It's really easy to learn how to make cake pops with cake mix. Just pick up a tasty box of mix from the baking aisle, grab a few extra ingredients if you don't already have them on hand and you're all set!
Mix the cake mix batter up and in 5 minutes or less of bake time in a cake pop maker, you too can be enjoying these bites of deliciousness. The homemade icing is very easy to make and adds the finishing touch to this cake pop recipe.
What I love about baking cake pops this way is the lightness of the cake balls without frosting, compared to forming the balls by hand with the heavy frosting. This method makes it far easier to keep the treat from falling apart or off of the treat sticks when dipping into the coating! Yes, you know what I'm talking about.
Try out this recipe next time you're in the mood for a cake but want to eat something unique and snack size. Serve them at a birthday party or simply make a whole batch and share with friends and family.
I also have a tutorial for how to make cake pops with a mold if you're interested!
Jump to:
Cake Mix Cake Pop Ingredients
- a box of cake mix - Pick your favorite flavor of cake mix.
- Ingredients indicated on the cake mix package - This is usually milk or water, oil or melted butter and eggs.
- powdered sugar - For the coating.
- lemon, juiced - If you don't want lemon flavor, use milk or water instead.
- sprinkles - this is optional
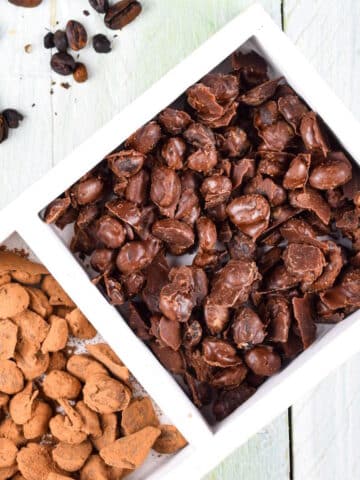
For an alternative coating: For more variety, check out these other cake pop coating and icing options.
*Check recipe card for ingredient amounts.
Equipment
- Cake pop maker - If you don't have a cake pop maker just yet, take a look at my personal top 5 cake pop maker picks.
- Cake pop stand - you can buy a stand that is specifically made for cake pops or make a stand out of an empty egg carton by turning it upside down and poking holes in the center of the egg cavities. You could even use a cereal box by turning it on its side and poking some holes on it.
- Lollipop sticks - These are easy to find in the baking aisle or get some treat sticks online.
Instructions
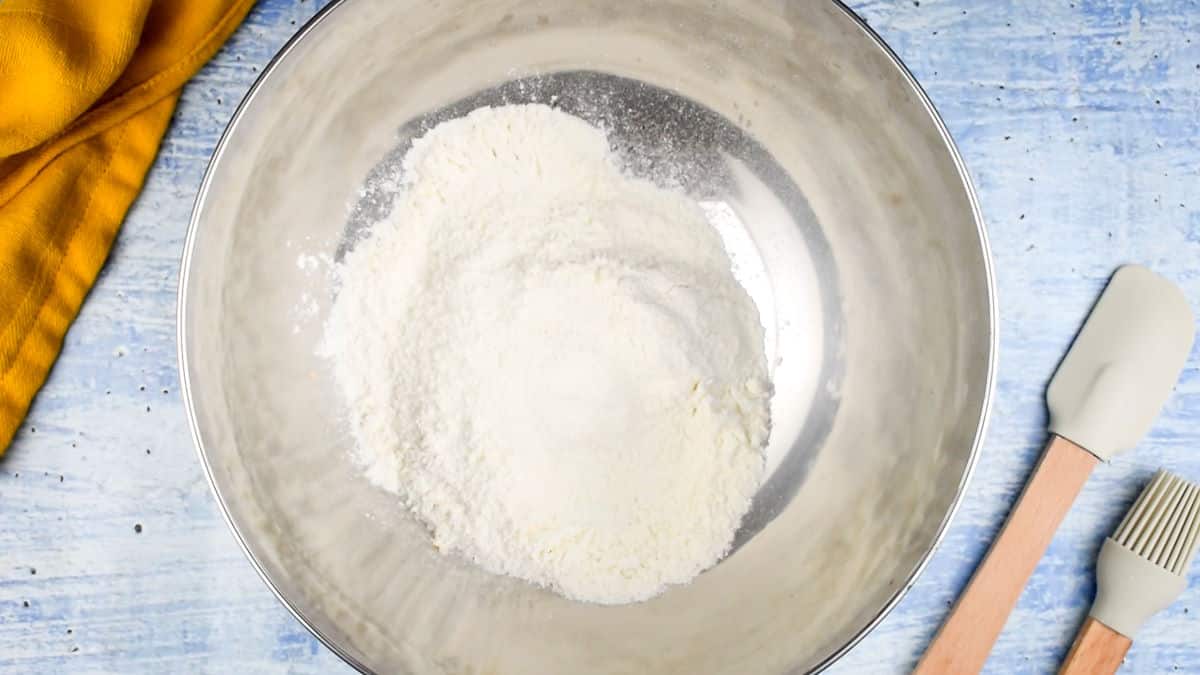
Step #1. Add cake mix to bowl. Lightly oil the inside of the cake pop maker and then plug it in to preheat it. Pour the cake mix into a bowl.

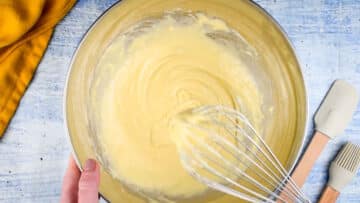
Step #2. Add ingredients to cake mix. Add the ingredients according to the cake mix package (in my case: melted butter, egg and milk). Whisk it all together.
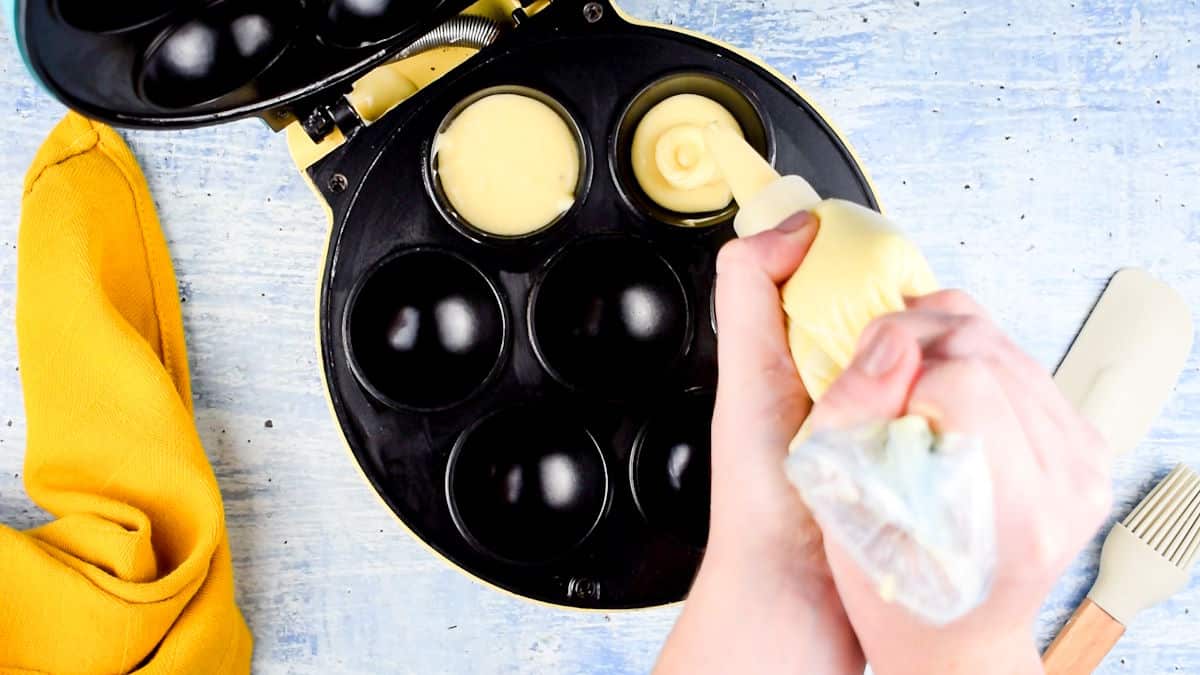
Step #3. Fill cake pop maker with batter. Pour the batter into the cake pop maker cavities. Close the lid.
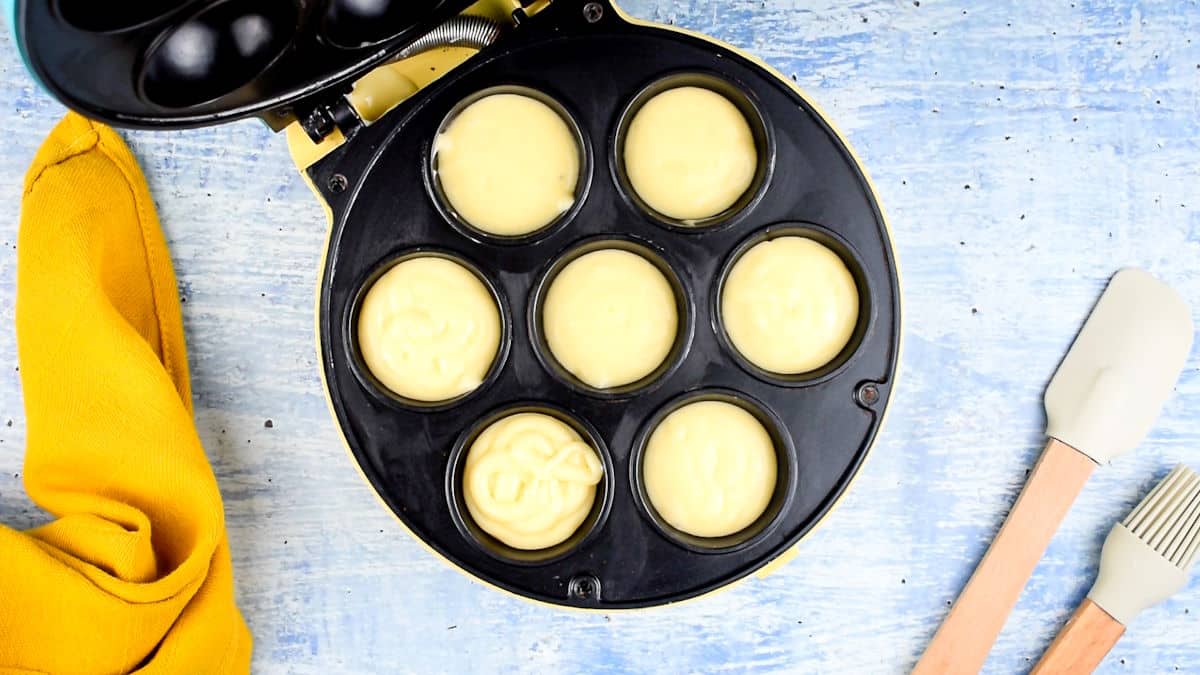
Pro Tip: Fill them about 1 mm from the top of the cavity so that they don't spill over or come out flat. I find that this is the sweet spot.
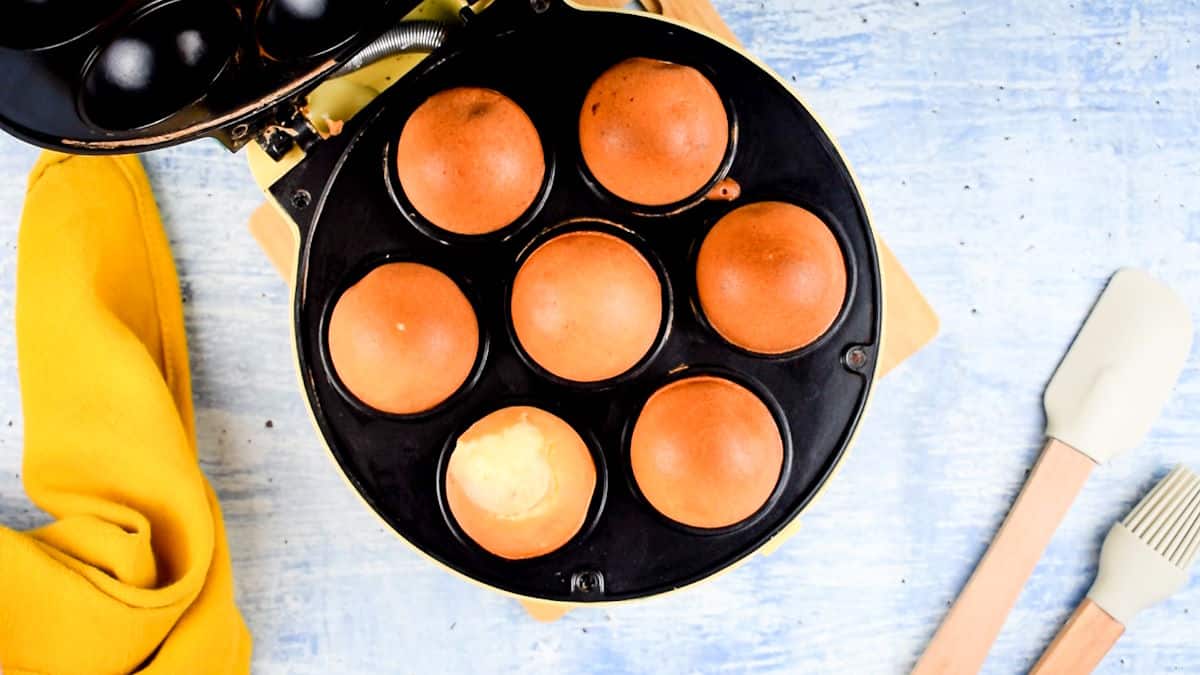
Step #4. Bake. Bake them for 4-5 minutes (if a toothpick comes out dry from the center, they are ready). Repeat for remaining batter. Unplug the device and let it cool before cleaning.
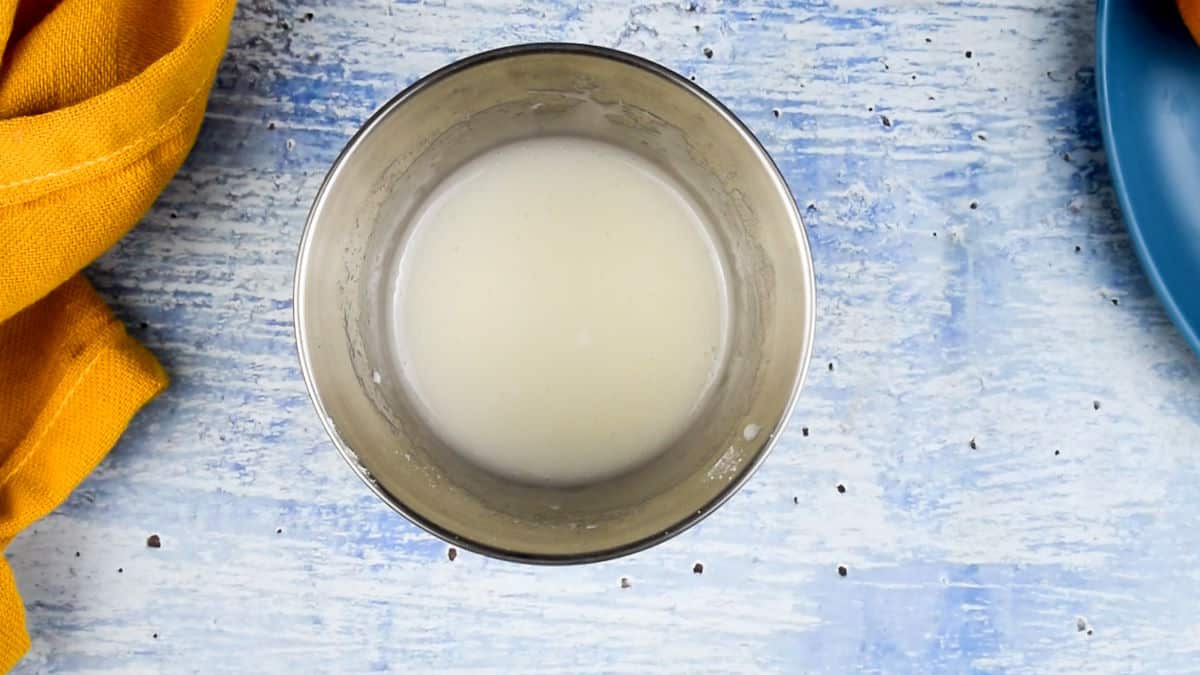
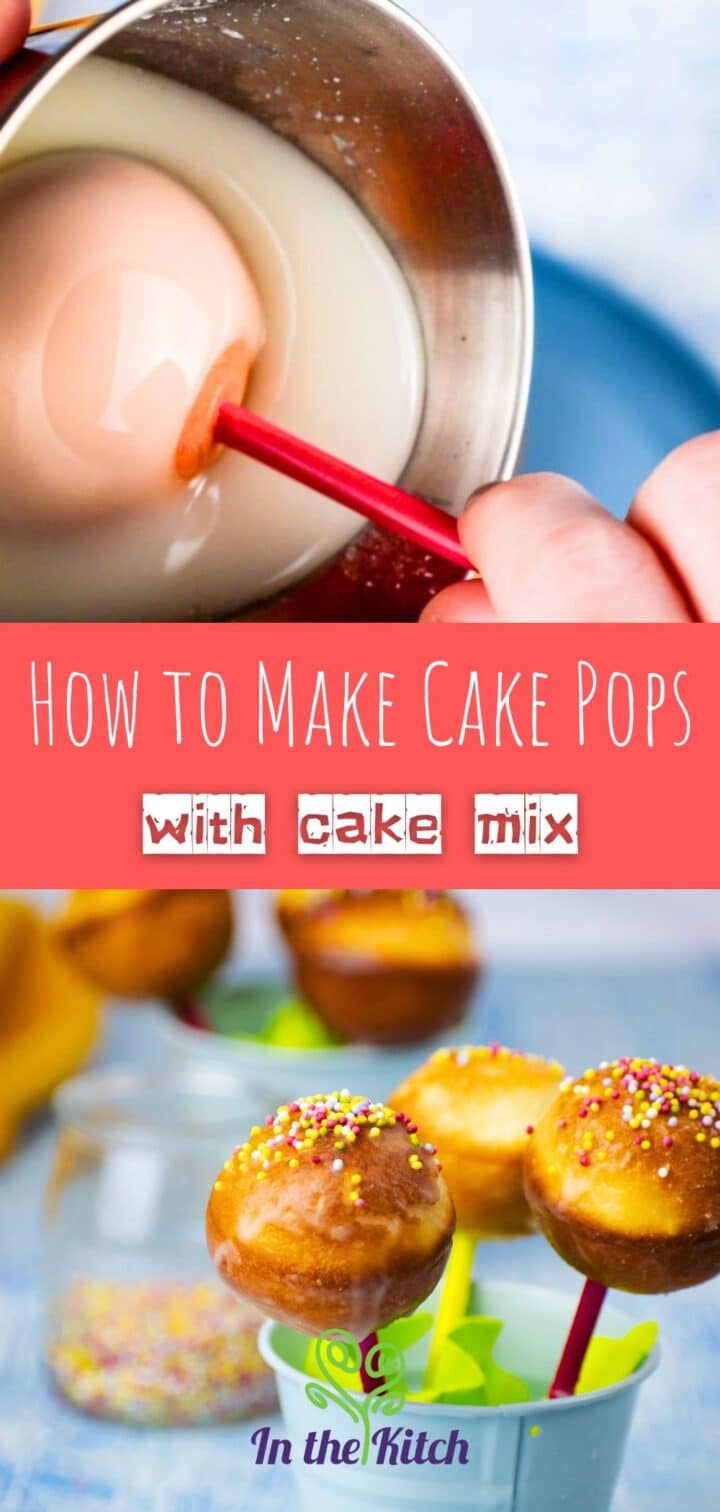
Step #5. Prepare the cake pop coating. Mix the powdered sugar with the lemon juice (or milk) to make the icing. For a thicker coating, add more icing sugar. For a thinner coating, add a little bit of water or more lemon juice.
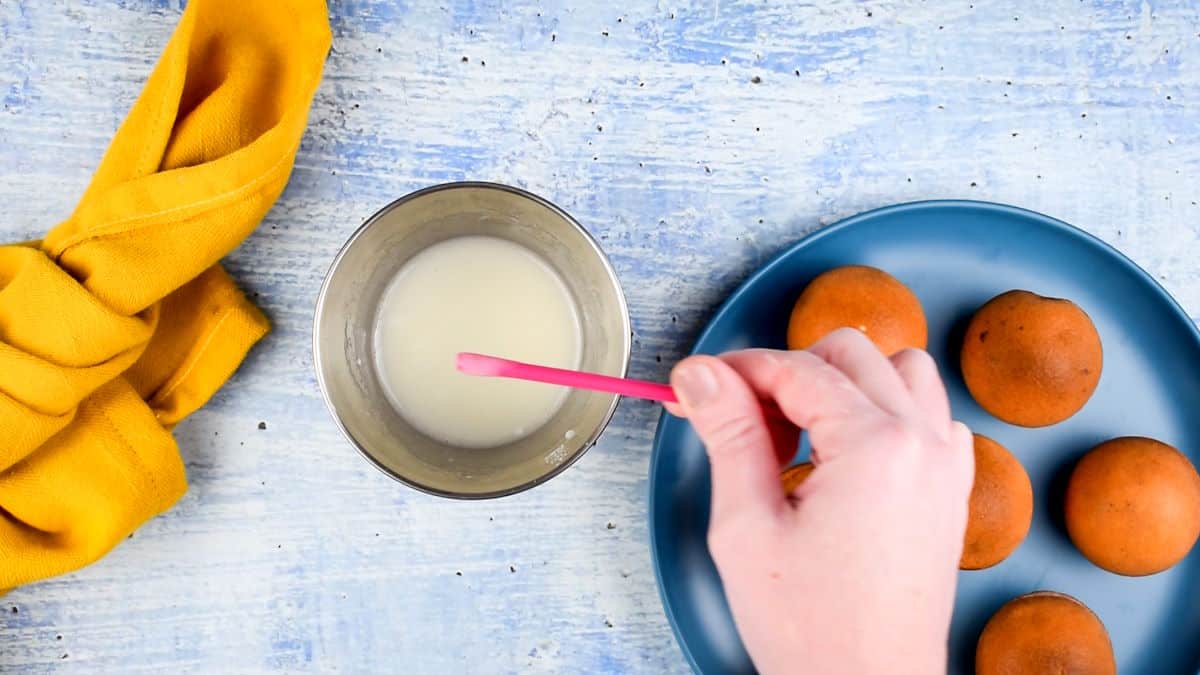
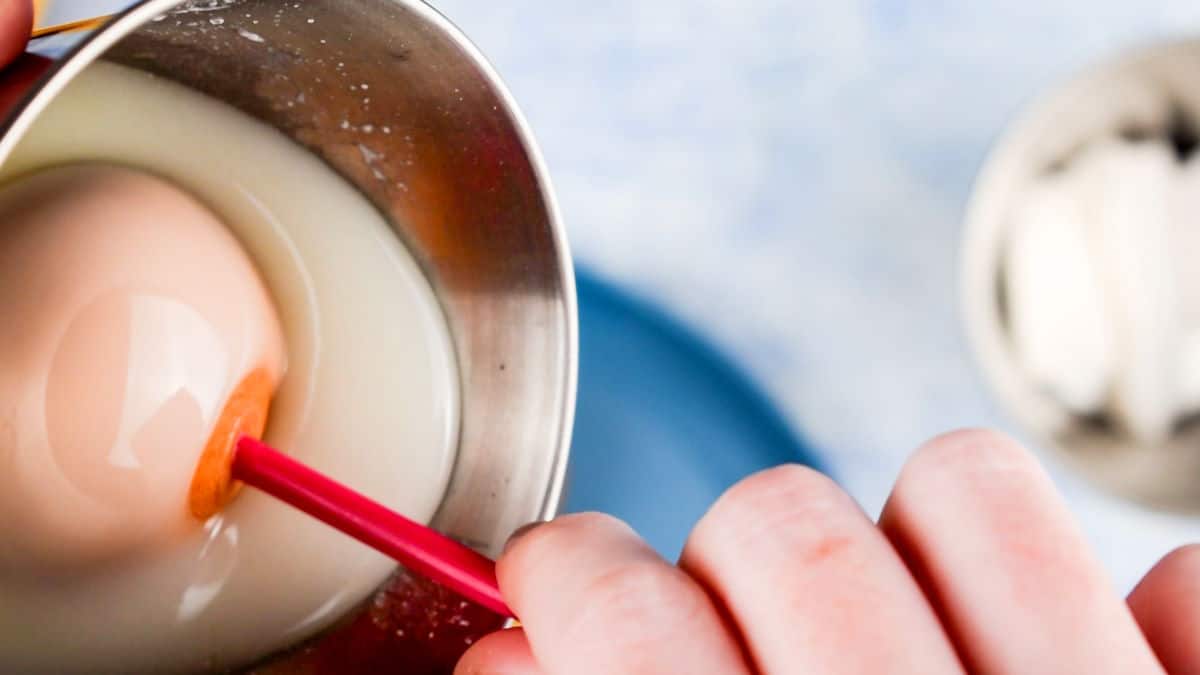
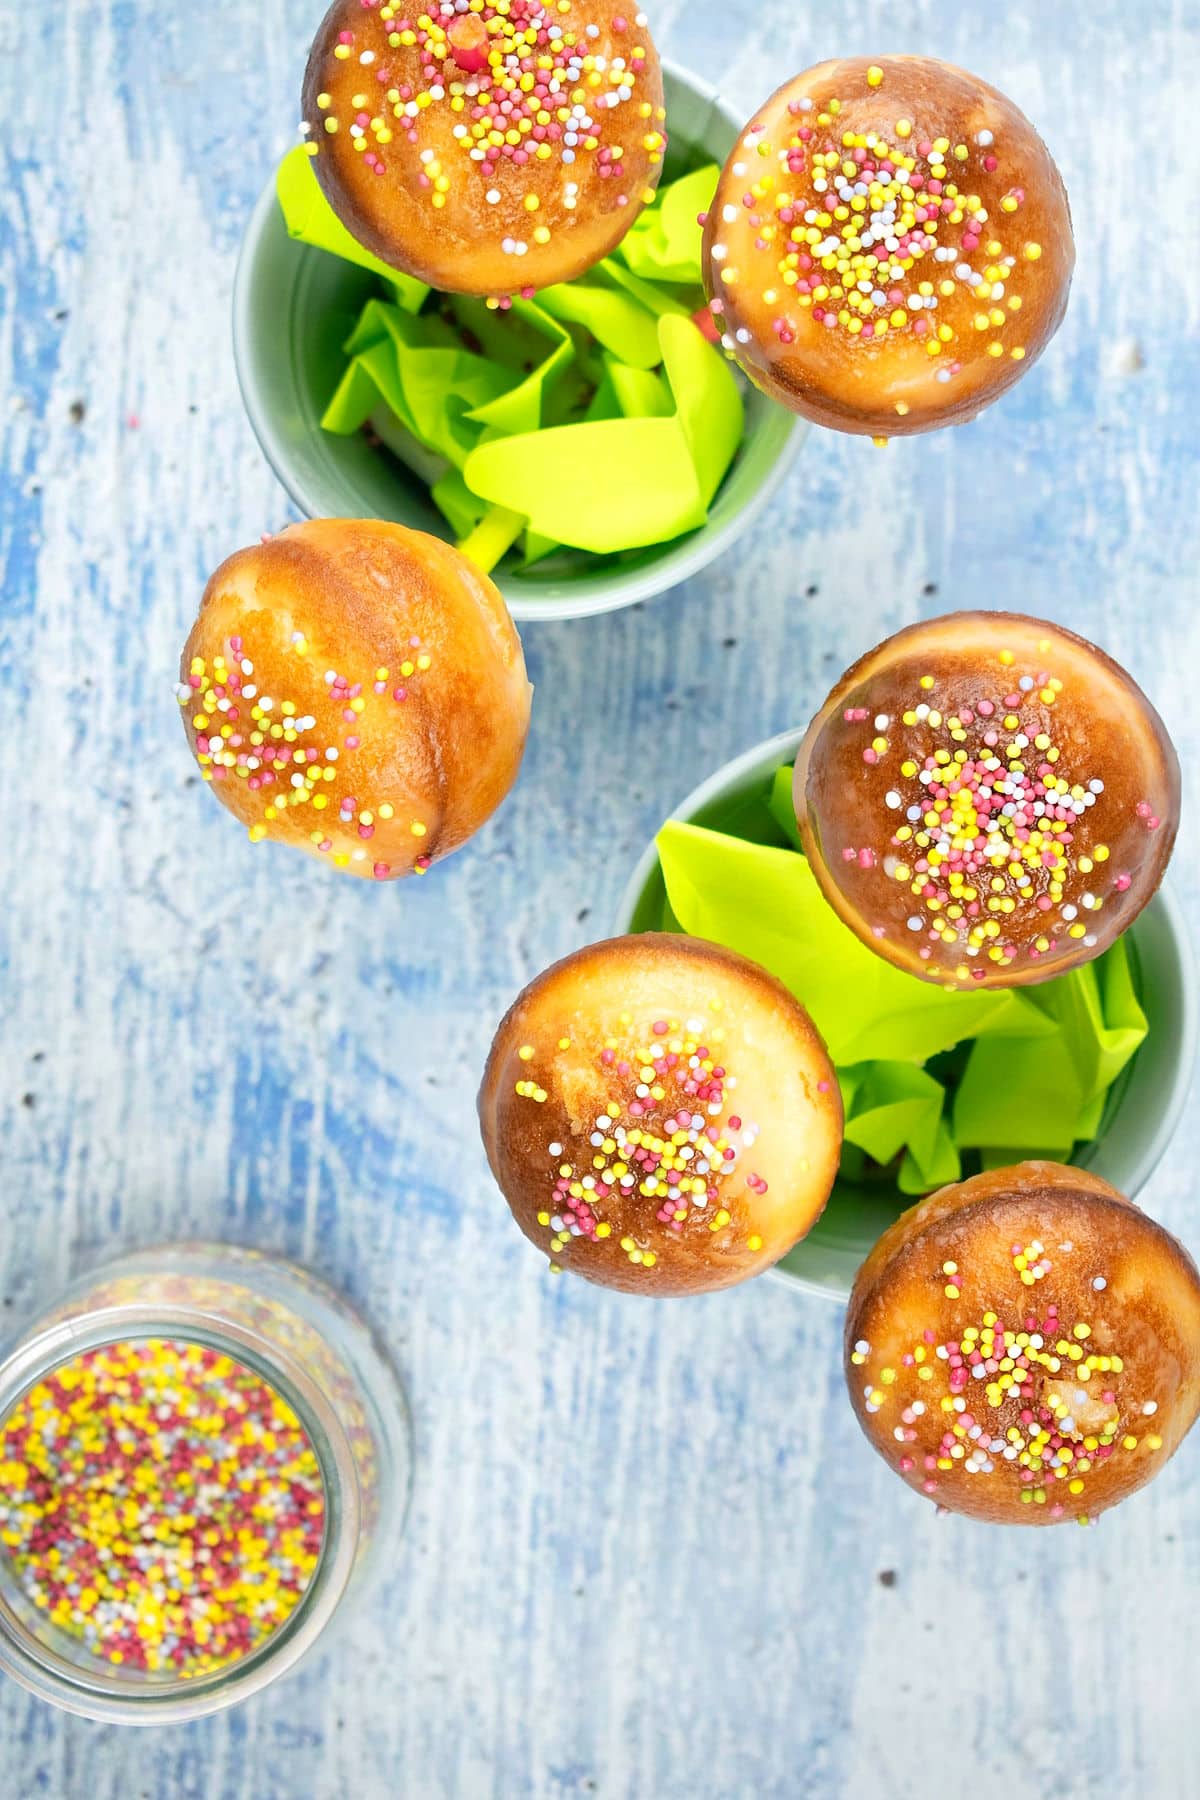
Step #6. Insert treat sticks. Insert the tips of the treat sticks into the icing, and then into the cake pops. Place them on a tray or plate. Refrigerate for 30 minutes.
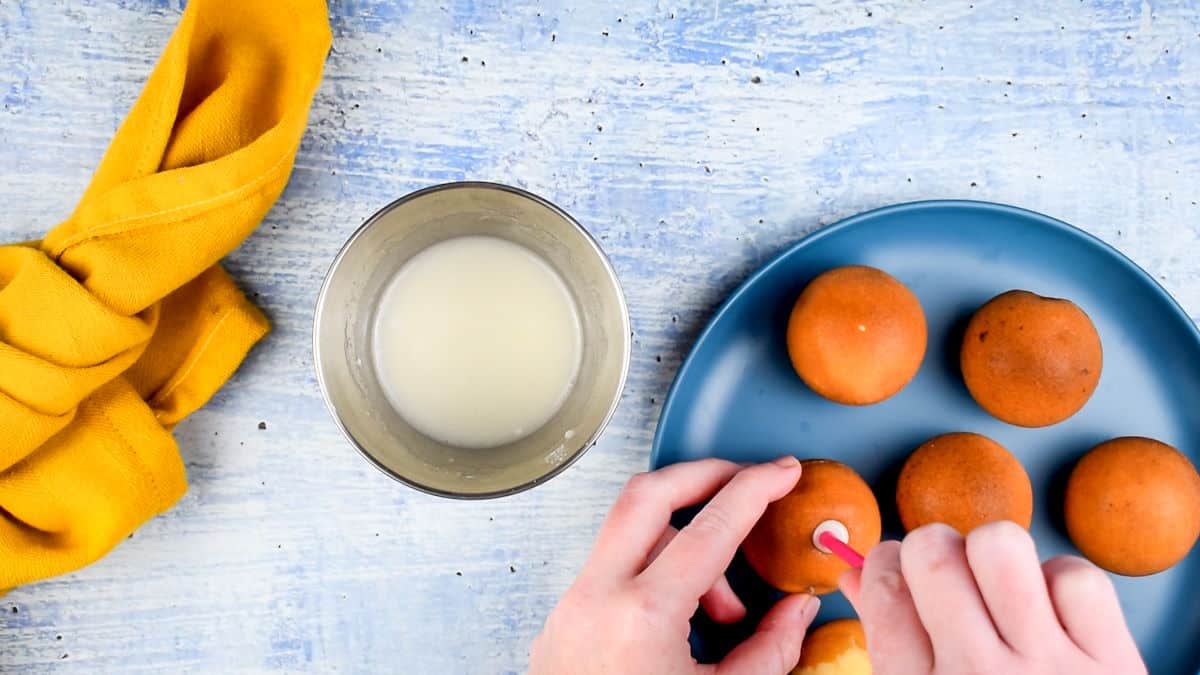
Chef's Note: Try to insert the treat stick about half-way into the cake pop for stability. Any further either way and the cake pop could fall off when you're coating it.
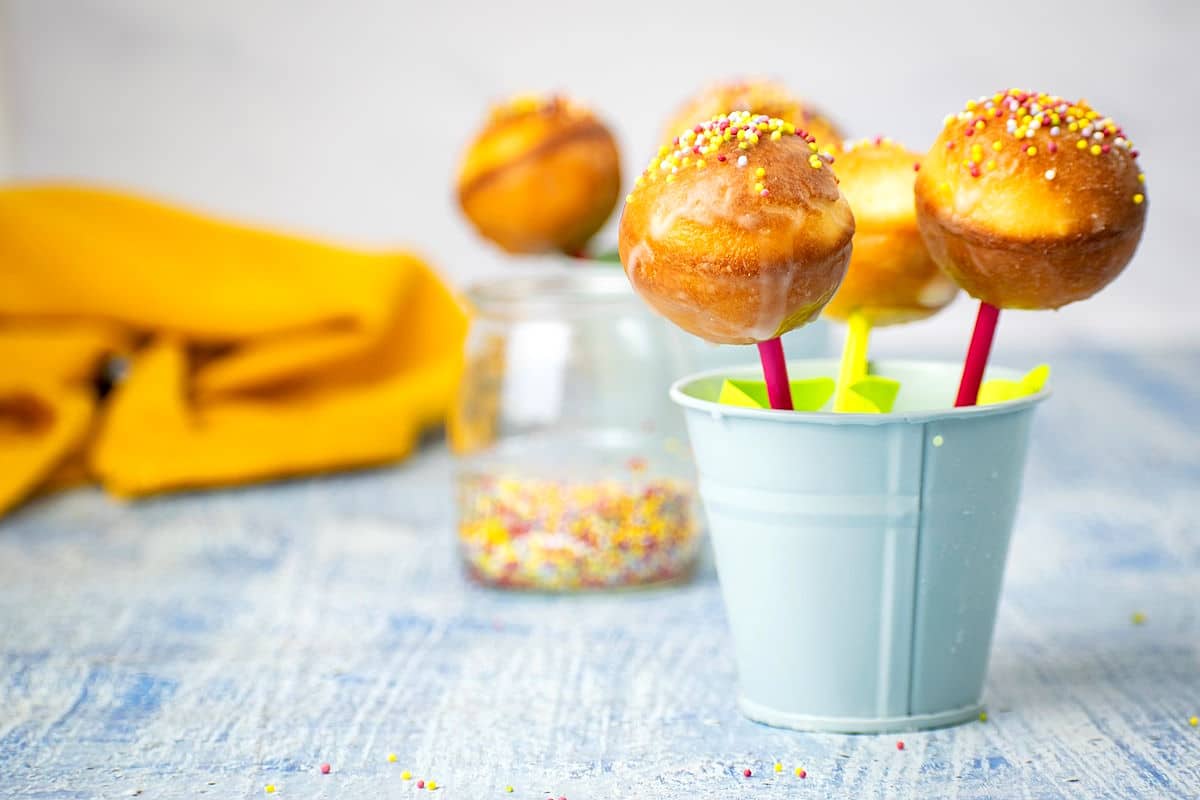
Step #7. Coat the cake pops. Dip the cake pops into the icing and coat with sprinkles. Place in a cake pop stand and let sit until coating has hardened (approximately 1 hour or more). They can be set in the fridge as well, for about 30 minutes.
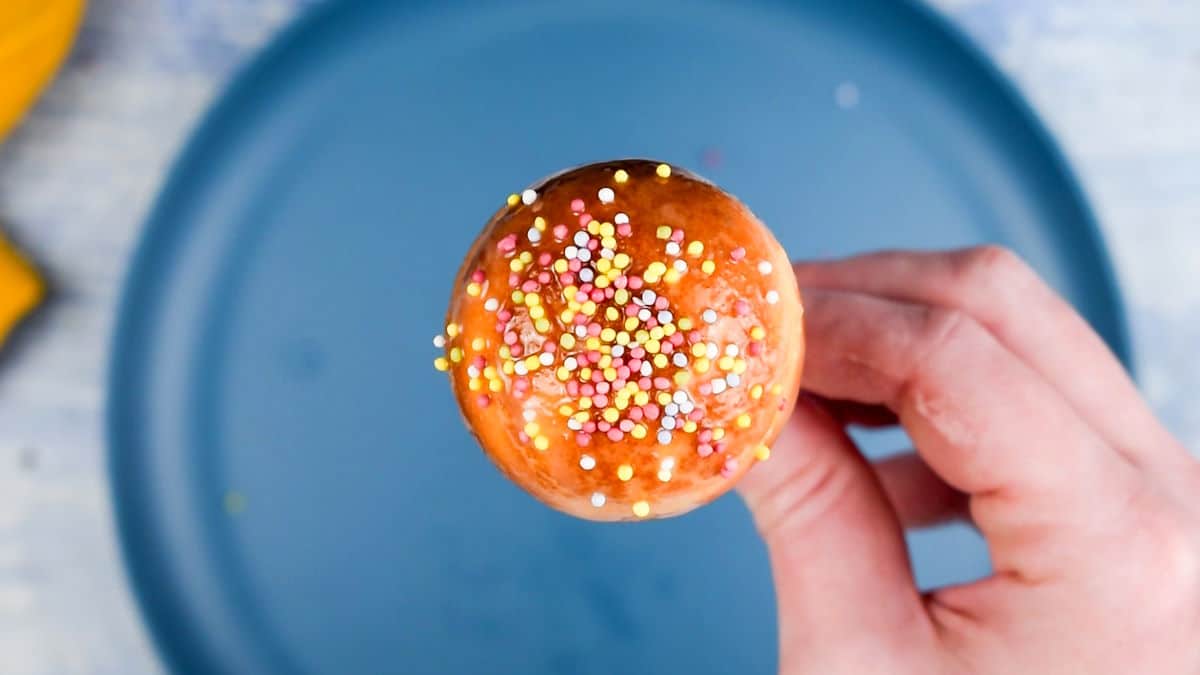
Step #8. Serve & enjoy! The cake pops are now ready to eat! Serve and enjoy!
Storage Tips
- Store the cake mix cake pops up to 1 week at room temperature, up to 1 month covered in the fridge or up to 3 months in the freezer.
- Lining the container with paper towel helps keep moisture in control.
Troubleshooting & Tips
- Sticking: Don't worry if you're having some trouble with the cake balls sticking to the cavities of the cake pop maker. Simply spray it down with baking spray or make sure each cavity is lightly oiled before piping in the batter and your cake balls will pop right out.
- Overfilling: If you accidentally overfill the cake pop cavities, that is okay. After the cake pops bake, let them cool for a few minutes (they will crisp up) and then you can break off the excess cake.
- Serving size: If you don't want to make all of the cake pops at once, you can freeze some of the cake balls for later in a freezer bag. Thaw them on the day of decorating/serving. I know 70 sounds like a lot but you'll be surprised how quick they are to make! Plus, it's great to have extra on hand that you can just pull out of the freezer when needed.
Recipe FAQs
Yes, you can use regular cake mix in a cake pop maker, but here are some tips for best results: Some cake mixes might call for water. It is better to use milk in place of water so that the cake pops are a little denser. Also, you can try adding an extra egg for a more solid structure.
Yes, you can use chocolate to coat your cake pops. I would recommend breaking up pieces of a chocolate bar instead of using chocolate chips for a smoother coating.
It's easy to thin the chocolate coating by melting in a touch of coconut oil, vegetable shortening or cocoa butter. This will make it easier to coat the cake balls.
❤️More Bite Size Treats You Will Love

If you tried this recipe tutorial for 🎂 How to Make Cake Pops with Cake Mix or any other recipe on my website, please leave a 🌟 star rating and let me know how it went in the 📝 comments below. And please share the recipe!
📋Recipe

How to Make Cake Pops with Cake Mix
Ingredients
For the Cake Pops
- 1 box cake mix
- ingredients indicated on the cake mix package - usually butter, egg and milk
For the Coating
- 1 cup powdered sugar
- 1 lemon - juiced--If you don't want lemon flavor, use milk instead.
- sprinkles - to decorate
Instructions
- Lightly oil the inside of the cake pop maker and then plug it in to preheat it. Pour the cake mix into a bowl.

- Add the ingredients according to the cake mix package (in our case: melted butter, egg and milk). Whisk it all together.
- Pour the batter into the cake pop maker cavities (fill them to just below the top so that they don't spill over or come out flat). Close the lid.
- Bake them for 4-5 minutes (if a toothpick comes out dry from the center, they are ready). Repeat for remaining batter. Unplug the device and let it cool before cleaning.
- Mix the powdered sugar with the lemon juice (or milk) to make the icing. For a thicker coating, add more icing sugar. For a thinner coating, add a little bit of water or more lemon juice.
- Insert the tips of the treat sticks into the icing, and then into the cake pops (about half-way into the cake pop). Place them on a tray or plate. Refrigerate for 30 minutes.
- Dip the cake pops into the icing and coat with sprinkles. Place in a cake pop stand and let sit until coating has hardened (approximately 1 hour or more). They can be set in the fridge as well, for about 30 minutes.
- Serve & enjoy!


Notes
- The nutrition information will vary depending on the cake mix you choose.
- Cake pop maker tip: If you accidentally overfill the cake pop cavities, that is okay. After the cake pops bake, let them cool for a few minutes (they will crisp up) and then you can break off the excess cake.
- Servings: If you don't want to make all of the cake pops at once, you can freeze some of the cake balls for later in a freezer bag. 70 sounds like a lot but they're very quick to make.
- For an alternative coating: you can melt candy melts or chocolate in the microwave for 20-30 seconds at a time, stirring each time, until fully melted.
- Cake pop stand: you can buy a stand that is specifically made for cake pops or make a stand out of an empty egg carton by turning it upside down and poking holes in the center of the egg cavities.
- Batter: Some cake mixes might call for water. It is better to use milk in place of water so that the cake pops are a little denser. Also, you can try adding an extra egg for a more solid structure.
- Storage: Store the cake mix cake ups up to 1 week at room temperature, up to 1 month covered in the fridge or up to 3 months in the freezer. Lining the container with paper towel helps keep moisture in control.
Nutrition
Nutrition information on In the Kitch is provided as a courtesy and is an estimate only. It may not include toppings and/or sauces.


Yesenia says
How do you keep them round after they bake? Mine always go almost flat on one side
Joss D says
Hi Yesenia, this might have to do with how much batter you are filling the cavities with. It can take some practice to get just the right amount so that a round cake ball forms. If you fill the batter to just below the top of the cavity and then close the lid, when it bakes it will rise into the top cavity. If you fill it any less, you could end up with a flat top. Also, make sure they are fully baked before removing them to cool by testing with a toothpick.
Terri says
I love how easy these are with the simple glaze and cake pop maker. I've always made them by hand, but a cake pop maker is sooo much simpler!
Joss D says
Yes! Cake pops don't have to be difficult. They are way easier with a cake pop maker, cake mix and a simpler coating. Thanks Terri!
Sean says
Very fun recipe! I have to admit, I didn't know that cake pop maker moulds were a thing. Lol. I wonder if you could make a takoyaki mould work too? Lol, rather different recipes I suppose, but the idea is quite similar. In any case, I really like the light coating you use on these too, as I often find cake-pops a little over-iced. Cheers, and thanks for sharing this!
Joss D says
Thank you Sean! A takoyaki maker definitely has a similar shape and I've seen people make takoyaki in a cake pop maker lol.
Sabrina says
Wow, these are so easy and fun. A great idea for my daughter’s birthday!
Joss D says
Thanks Sabrina! They are definitely great for birthdays.
Vijitha says
What a great idea for quick and easy treats! Perfect for when I don't want to bake a whole cake. Thanks for the great recipe and tips!
Joss D says
Thank you Vijitha!
nancy says
my DD loves cake pops! what a great idea!!
Joss D says
Thank you!
Laura says
Cake pops are so cute and fun to eat! I love how simple this recipe is by using cake mix. Will definitely be trying this out. Thanks for the recipe!😊
Joss D says
No problem Laura, thanks for the comment!
Vanessa says
Food on a stick is always fun! My kids love these and they also make a perfectly portioned little treat for me!
Joss D says
Thanks Vanessa! My kids love them too.
Bernice Hill says
Very cool! I think I would like this style of cake pop much better than the had formed ones. These are especially cute for Springtime!
Joss D says
They are much easier! Thanks Bernice!
Chef Jez says
Extremely tasty and a big hit with the guests! The whole batch was gone in a couple hours and I received compliments from the vast majority. A very well done recipe that will be bookmarked. Thanks inthekitch.net!
Joss D says
Thanks for the compliment Jez!
Becca says
Are these mini or full size?how many inches are they when baked?
Joss D says
Hi Becca. It does depend on the cake pop maker you have but mine are about 1 1/2" in diameter, which is pretty standard.
Rebecca says
Trying today
Joss D says
Enjoy, Rebecca!