

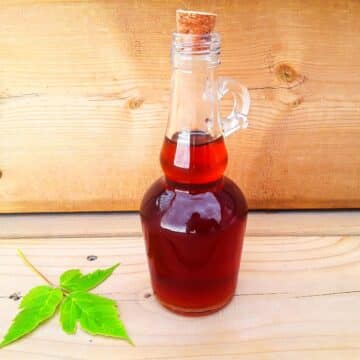
If you're like me, you cannot wait for spring to come because it's time to make homemade maple syrup! I'm talking about the real, pure kind of syrup that has become a breakfast staple in many households. Read on to learn all about how to make maple syrup from your own backyard maple trees, like we do on our farm in the Canadian prairies.
Jump to:
When to Harvest Maple Syrup
There are two very important factors that determine when you can harvest sap from maple trees.
1. Maturity of the Trees: The maple trees should be at least 8" in diameter in order to take sap from them. If the diameter is 20" or more, the tree can handle 2 spiles, one one each side of the trunk.
2. Time of Year (Maple Syrup Season): The time the sap starts running from maple trees is in the spring when it's above 32ºF (0ºC) in the day and below 32ºF (0ºC) at night. This is the only time to harvest maple syrup each year. Stop harvesting the sap when you notice the leaf buds start to swell. The spiles can then be removed.
How Much Syrup Can You Expect?
Maple Sap (Water) Amount: The amount of sap you get from one tree is going to depend on each season and each tree. If it was a dry summer, you will get less sap the following spring.
Maple Syrup Amount: One 5 gallon pail is going to get you about 2 cups of maple syrup once it's cooked down. This is approximate and it's based on my own experience.
Our Best Year: In our best year yet, we collected 320 liters of sap, which resulted in 8 liters of syrup. This is what you can expect in a good year for a hobby farm like ours with about 20 trees.
Equipment and Supplies Needed
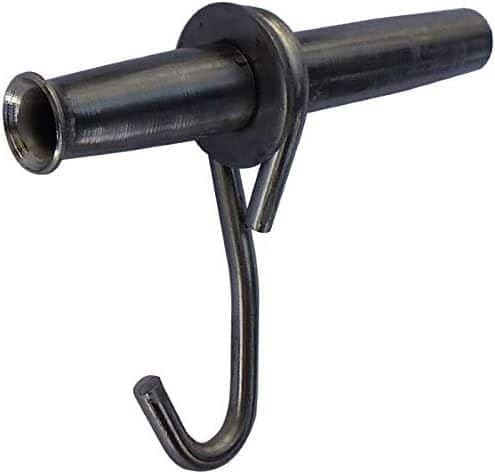
Spiles (taps) with hooks:
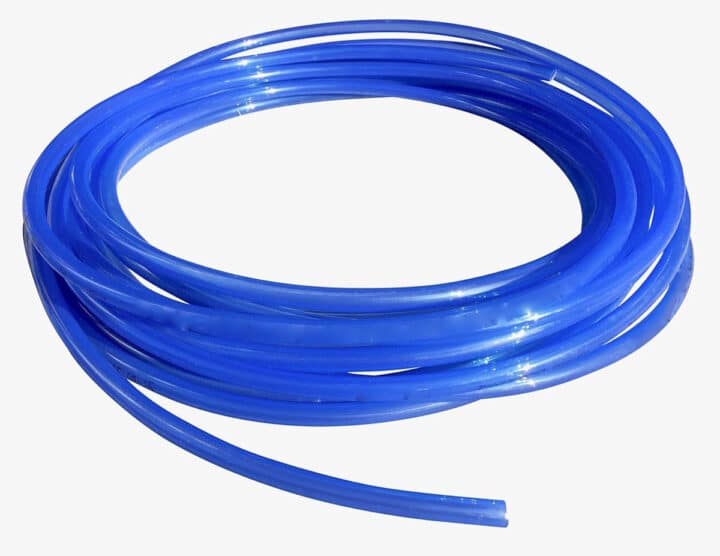
Hose (drop line):
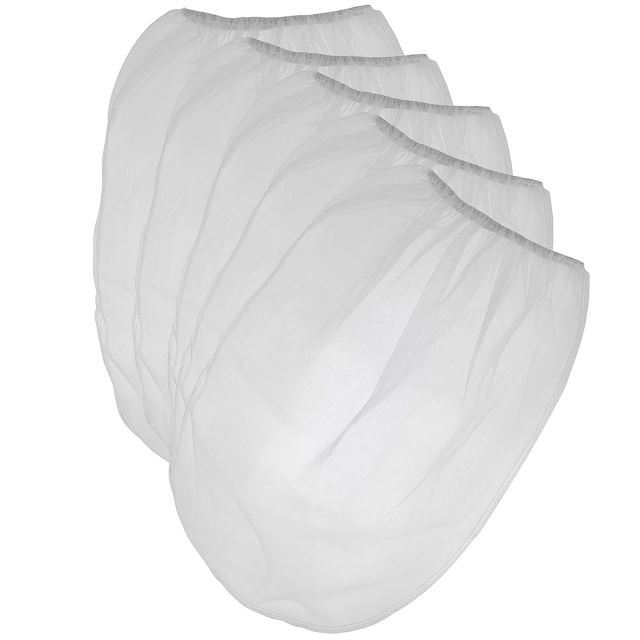
Mesh or Screening
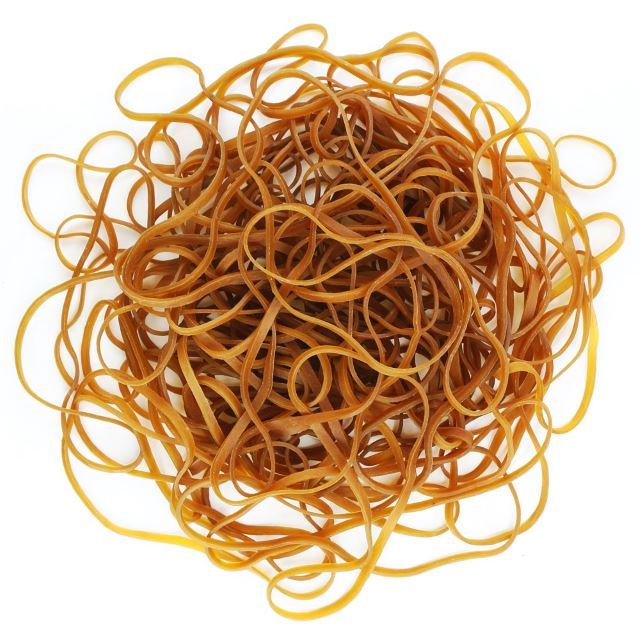
Elastics
Note: There are different types of taps. One type is a spile with a hook attached to hang a pail (pictured). Another type is a spile that you slide a hose on to.
If using the spile with a hook, you need a mesh or screening and elastic to cover the pail to avoid debris and flies getting into the pail.
Drill with 7/16" Drill Bit, Hammer, Stock Pots, Pails & Lids

I use a 2.5 gallon pail to hang on the trees, 5 gallon when using a hose and then 5 gallon pails to collect the sap. You can also use purpose-built buckets for hanging.
Tip: You can usually get these pails from a restaurant or deli for a good deal. The 5 gallon ones are available at hardware stores or online.
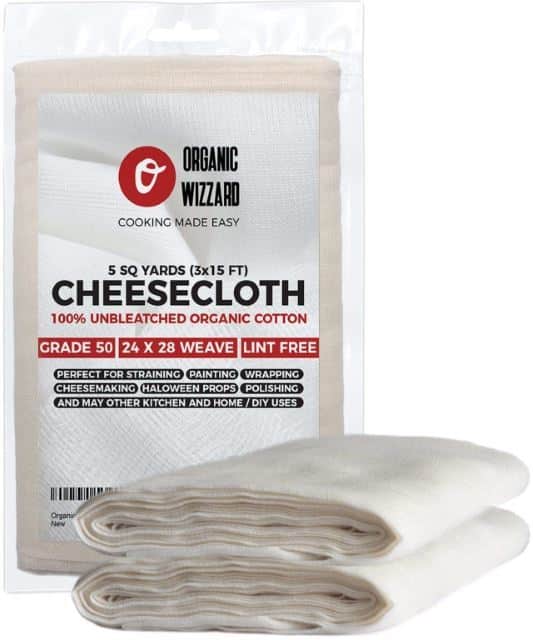
Cheesecloth
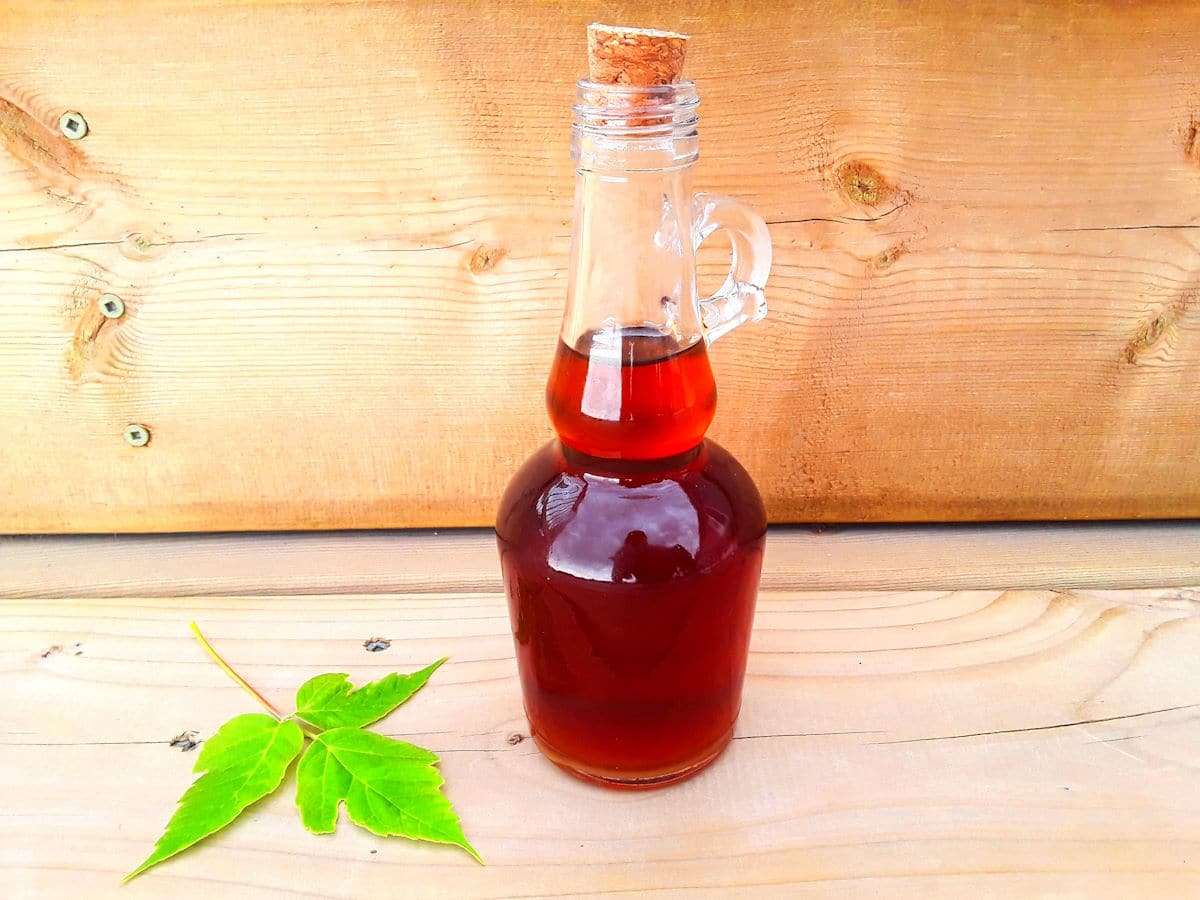
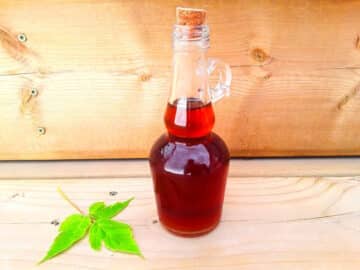
Syrup Jars with Lids
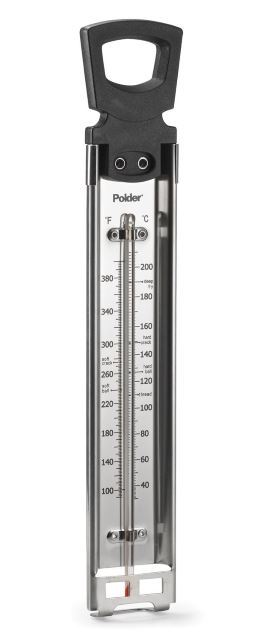
Candy Thermometer
There are kits available as well that supply you with filters, spiles and drop lines.
Instructions for How to Make Maple Syrup
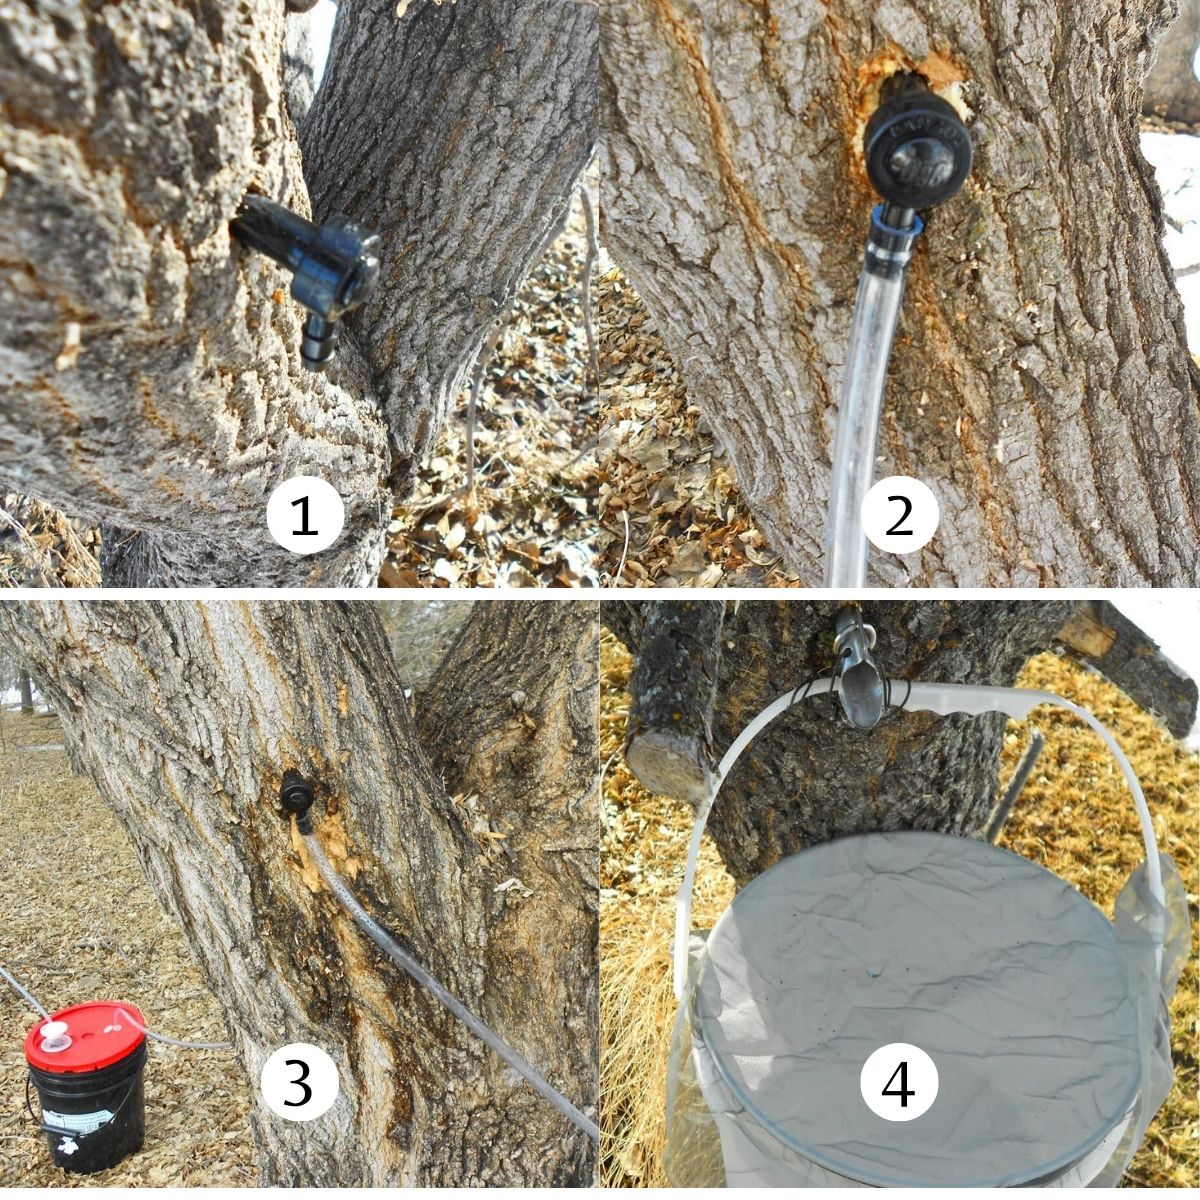
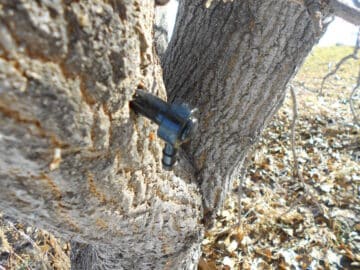
Step #1. Drill a Hole. Drill a hole into a maple tree with a 7/16" bit, approximately 1.25" deep. When drilling, drill the hole slightly upward into the tree. Hammer a spile into the hole snugly (Image 1).
Step #2. Set up the Pails. Whether you are using a hose or hanging a pail, I will show you both options because we do it both ways.
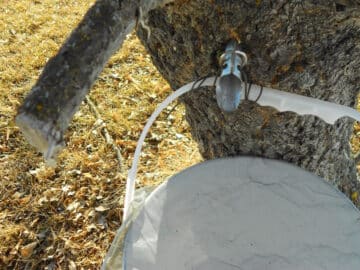
1) Use a Hose: Attach a hose to the spile that leads into pails on the ground (Images 2 and 3). Or...
2) Hang a Pail: Hang your pail directly onto the spile hook and secure it with wire so that it doesn't blow around or take off in the wind (Image 4).
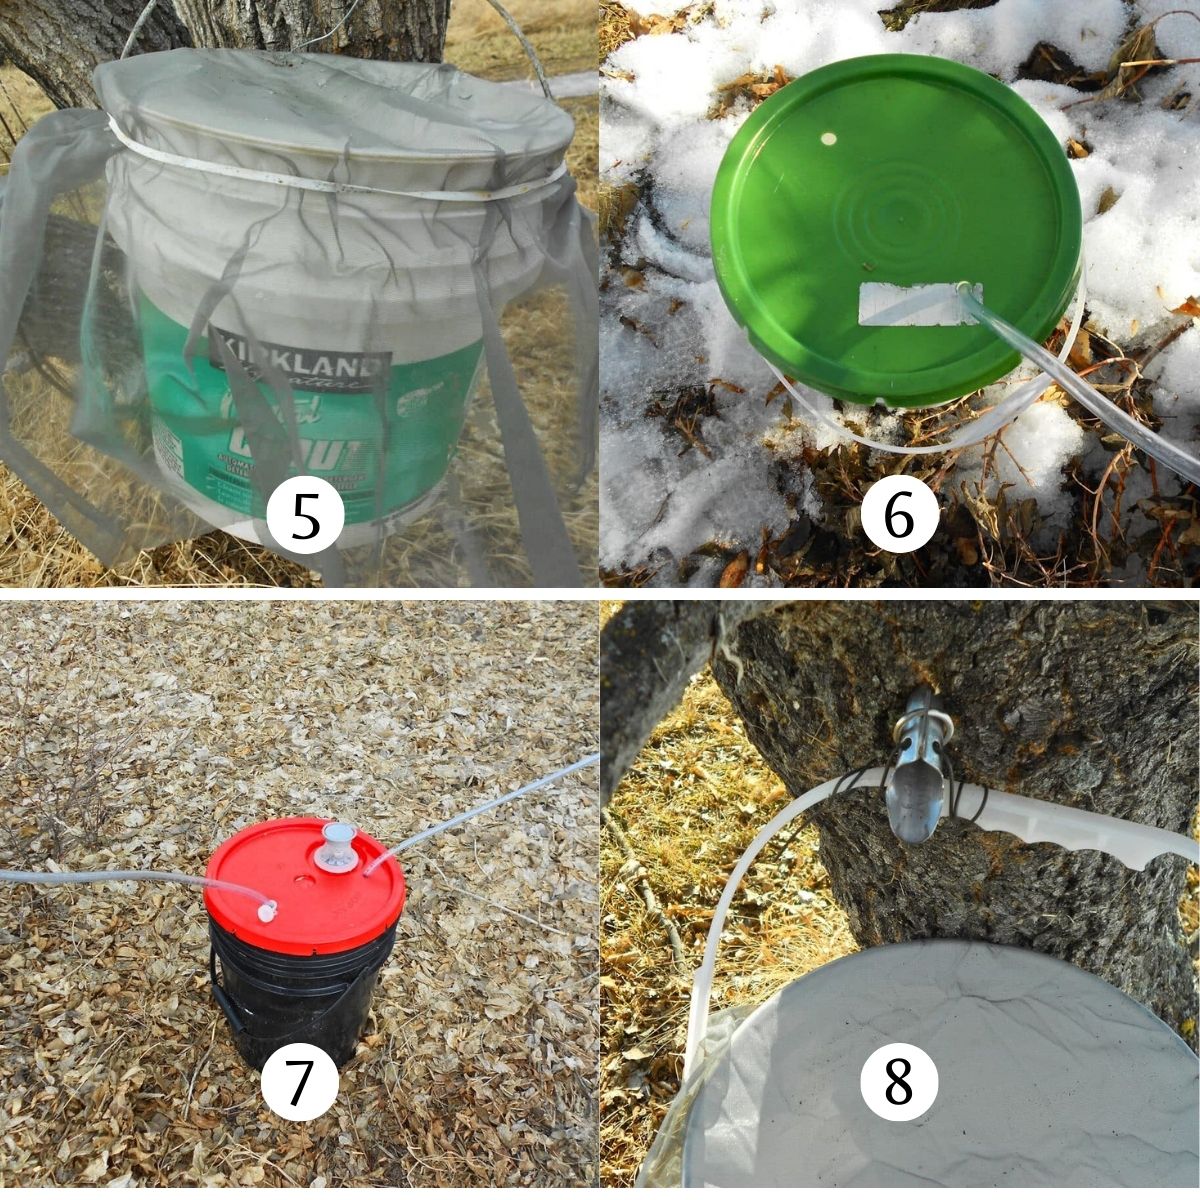
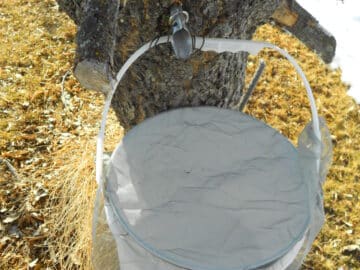
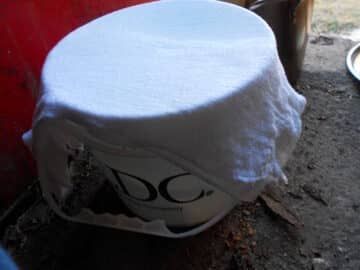
Step #3. Cover the Pails. Put some mesh screening over the top of the hanging pail and secure it with large elastics. This helps keep debris and bugs out (Image 5).
Note: If using the hose method, you can put the lid on the pail. Drill a hole into the pail lid and stick the hose into it (Images 6 and 7). Now you just wait and let the pails collect the sap as it drips out of the spiles.
PRO TIP: If using the pails with a lid, I drilled 2 holes into it so that I can place the hoses from 2 trees into it and still keep the pail covered.
Step #4. Check the Pails. Check the pails every day or every other day until they're full. It depends on how fast the maple water is running (during good years we could get up to a couple of inches in a day) (Image 8).
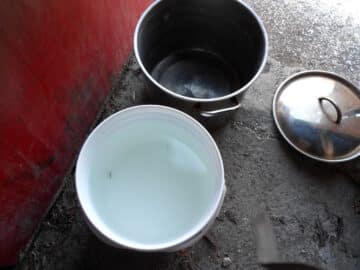
Maple water is simply the sap from the maple tree. It is formed when groundwater mixes with the sugar from the trees. It is approximately 98% water and 2% sugar.
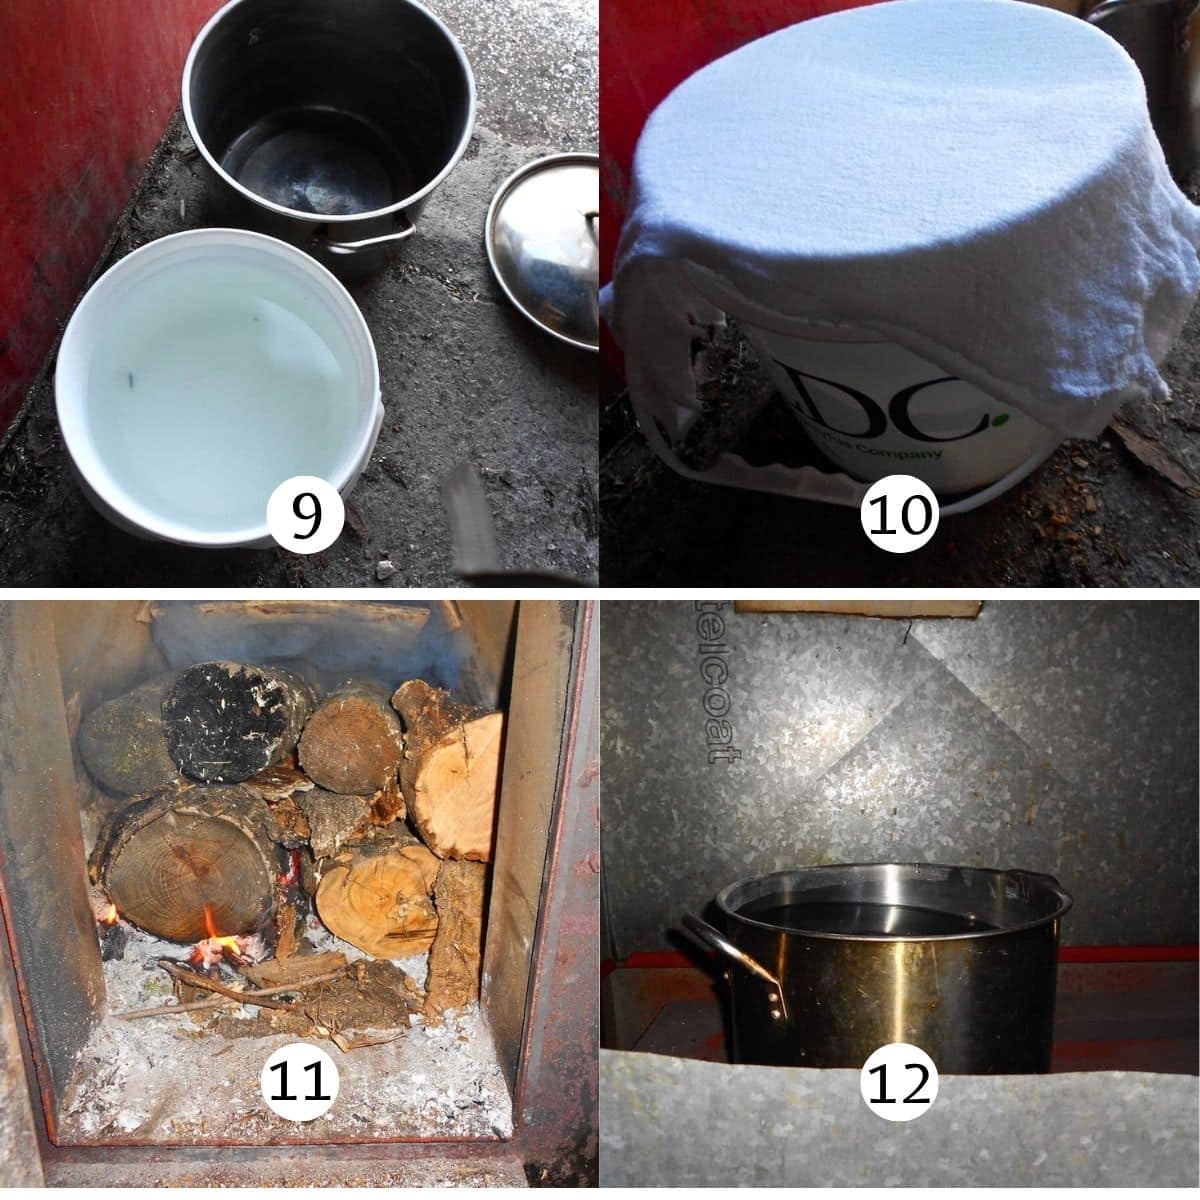
Step #5. Collect the Water. Once you have enough maple water (the sap) in each pail, start collecting the maple water in separate pails. I fill 5 gallon pails. Return the pails to the trees for more maple water (Image 9).
Step #6. Transfer to Pot. Remove the lid or mesh from the pail and place cheesecloth over top. Secure it with an elastic. Carefully pour the maple water through the cheesecloth into a large stock pot (Image 10).
Note: This will remove any debris that has found its way into the pail--I always end up with a little debris so this will make sure it doesn't get into the pot.
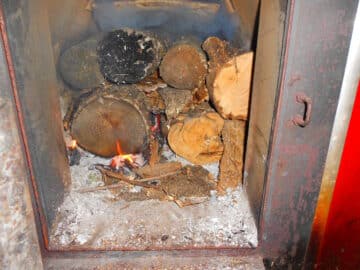
Step #7. Prepare the Heating Source. Now you will start getting ready to cook down the maple water. I use a wood furnace that we took out of our house. Start the fire and place the stock pot on top of the stove/grate (Image 11).
PRO TIP: If you do not have an outdoor wood furnace like us, you can use a fire pit with a screen/grate on top for cooking (in order to place the stockpots on).
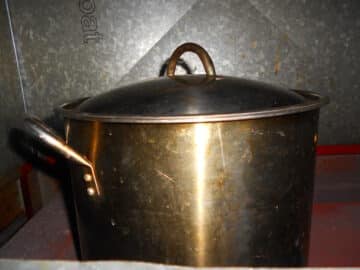
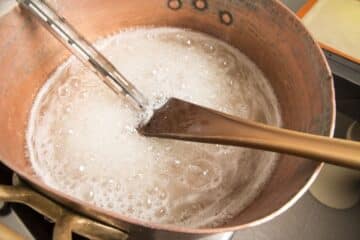
Step #8. Cook. Cover the pot with the lid as this will cut down the cooking time. You will need to keep the fire going for quite a while so make sure you have enough wood on hand. Keep cooking. No mixing is required (Images 12 and 13).

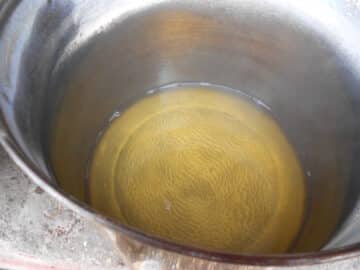
Step #9. Transfer. Once the maple water boils down to approximately 1.5″ to 2" deep in the pot, it is time to remove it from the outside fire (Image 14). Bring it into the house.
Note: This time will vary greatly but it takes me around 6 to 8 hours. Watch carefully because if you go over this, it can quickly burn and become black.
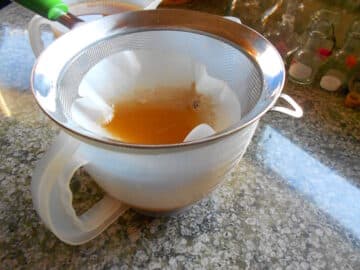
Step #10. Strain. Place some cheesecloth in a mesh strainer and on top of a bowl or measuring cup. Pour the liquid through the strainer and let it settle. There will be sediment on the bottom. Again with a strainer and cheesecloth, slowly pour it into a large pot (Image 15).
Step #11. Sterilize Jars. Have your bottles or jars and lids ready before the maple syrup is completely ready. Sterilize each jar and lid (Image 16).
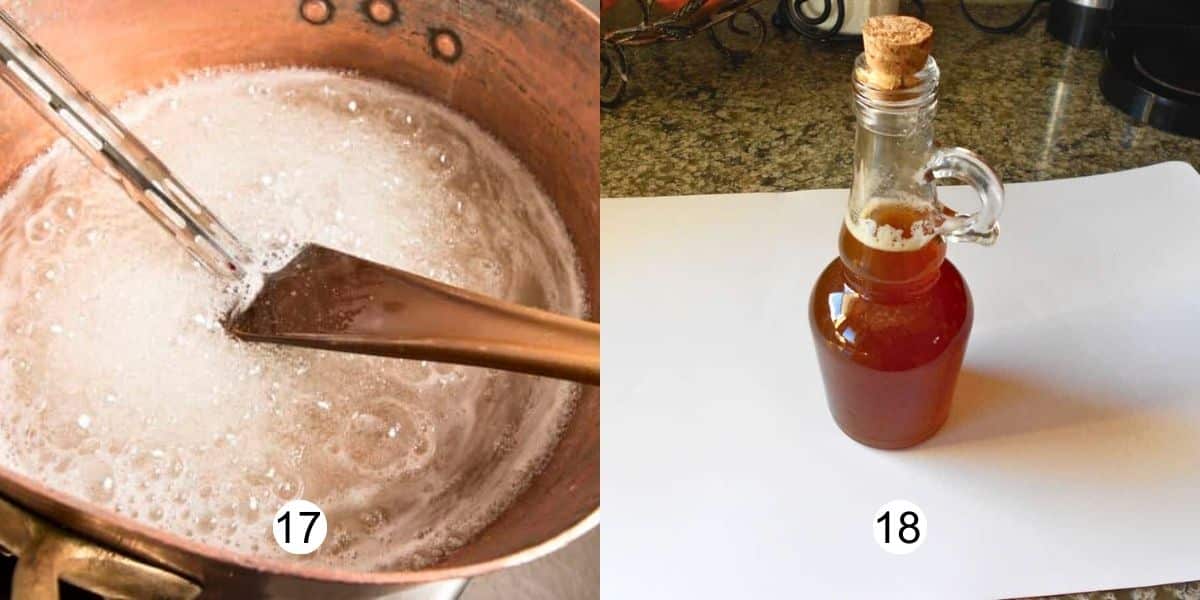
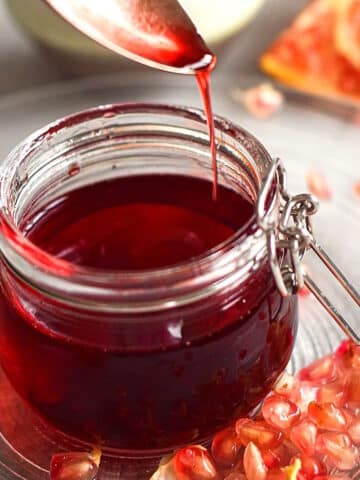
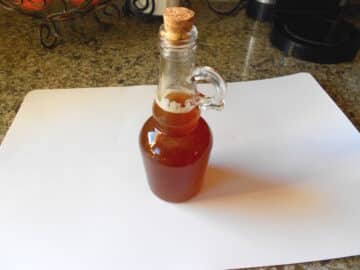
Step #12. Boil. Start boiling the sap again until it reaches the soft ball stage (235°F/112°C). Be careful, this can easily boil over so you need to watch it once it starts bubbling. Turn your stove down enough so that it keeps boiling but not rising over the pot. Once it gets to a soft ball stage, it is ready to put into syrup jars. You will notice the syrup getting thicker as you go (Image 17).
Step #13. Pour into Jars. Carefully pour the syrup into your jars, wipe the edges clean and seal with the lids (Image 18).
Storage
- My jars usually seal after I transfer the hot syrup to the jars and cover them with the lids. It's important that you wipe the rim of the jar clean before covering. Store sealed maple syrup in a cool, dark cupboard or in a cold storage for up to a year.
- Once opened, it can be stored in the refrigerator for up to one year or in the freezer indefinitely.
- Maple syrup can mold, and I know because I've experienced it myself, both with homemade and commercial syrups. If you see any mold, discard it.
Tips for How to Make Maple Syrup
- Hanging Method: If you are hanging a pail on the tree, I recommend using a 2.5 gallon pail so that it doesn't get too heavy as it fills up.
- Hose Method: If you are attaching a hose to a pail on the ground, I recommend 5 gallon pails.
- Boiling: I don't recommend boiling down the sap inside the house as it will take a very long time and the steam can ruin your cupboards.
- Sterilizing the Jars: I usually use a sterilizing powder from a wine-making store, but you can use other options like the dishwasher or submerge them in boiling water for 10 minutes.
- How to Check for Soft Ball Stage Without Thermometer: If you don't have a candy thermometer for this step, put cold water into a glass cup. Drop a few drops of the syrup into the cold water. If you can form a soft ball with the syrup using your fingers, it is ready.
- Drilling: The following year, you shouldn't drill a hole in the same spot. Drill a new hole elsewhere on the tree.
- Festivals: be sure to check out maple syrup festivals in your area!
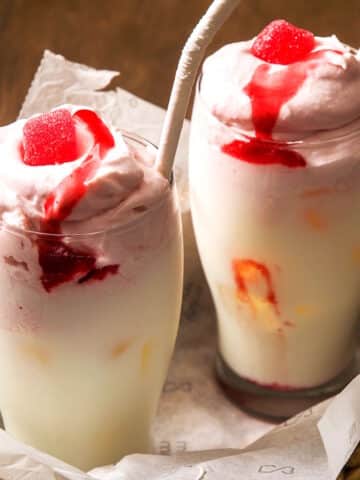
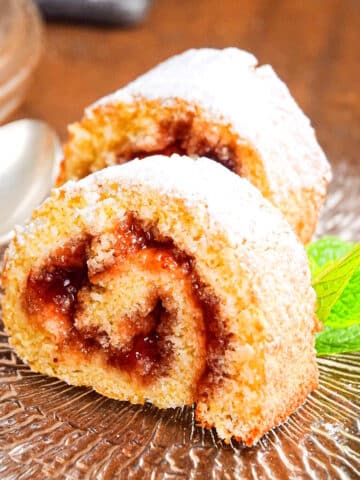
Ways to Use It
Now that you know how to make maple syrup, you have a wonderful, tasty treat. You can use it for pancakes, baking, add it to coffee or however you desire. There are recipes for making Maple Fudge and candy if you would like to try those. Or you can give some of my maple syrup recipes a try:
- Cake Pop Maker Maple Bacon Cake Balls
- Smoky Maple Burger Sauce
- Pancake Pops
- Butter Tarts with Maple Syrup
Have fun!
How to Make Maple Syrup FAQs
Real maple syrup comes from maple trees including the sugar maple, black maple, red maple, Manitoba maple, etc.
Yes, it is gluten free.
Yes, maple syrup is vegan. It is a plant-based sweetener from the sap of the maple tree.
Yes, you can freeze maple syrup.

❤️More Syrup Recipes You Will Love

If you tried this recipe tutorial on How to Make Maple Syrup or any other recipe on my website, please leave a 🌟 star rating and let me know how it went in the 📝 comments below. And please share the recipe!
📋Recipe
How To Make Maple Syrup
Ingredients
- 5 gallons maple water - from the maple tree
Instructions
- Drill a hole into a maple tree with a 7/16″ bit, approximately 1.25″ deep. When drilling, drill the hole slightly upward into the tree. Hammer the spile into the hole snugly.

- Either you can: 1) attach a hose to the spile that leads into pails on the ground through a hole in the lid or 2) hang your pail directly onto the spile hook and secure it with wire so that it doesn't blow around in the wind. Put some mesh screening over the top of the pail and secure it with large elastics. If using the hose method, you can put the lid on the pail. Now you just wait and let the pails collect the sap as it drips out of the spiles.
- Check the pails every day or every other day. It depends on how fast the maple water is running.
- Once you have enough maple water (the sap) in each pail, start collecting the maple water in separate pails. I fill 5 gallon pails. Return the pails to the trees for more maple water.
- Remove the lid or mesh from the pail and place cheesecloth over top. Secure it with an elastic. Carefully pour the maple water through the cheesecloth into a large stock pot. (This will remove any debris that has found its way into the pail--I always end up with a little debris so this will make sure it doesn't get into the pot.)
- Now you will start cooking the maple water. I use a wood furnace that we took out of our house, but you can use a fire pit with a screen/grate on top for cooking. Start the fire and place the stock pot on top of the grate.
- Cover the pot with the lid as this will cut down the cooking time. You will need to keep the fire going for quite a while so make sure you have enough wood on hand. Keep cooking. No mixing is required.
- Once the maple water boils down to approximately 1.5″ to 2" deep in the pot, it is time to remove it from the outside fire. (This time will vary greatly but it takes me around 6 to 8 hours. Watch carefully because if you go over this, it can quickly burn and become black.) Bring it into the house.
- Place some cheesecloth in a mesh strainer and on top of a bowl or measuring cup. Pour the liquid through the strainer and let it settle. There will be sediment on the bottom. Again with a strainer and cheesecloth, slowly pour it into a large pot.
- Have your jars and lids ready before the maple syrup is completely ready. Sterilize each jar and lid.
- Start boiling the sap again until it reaches the soft ball stage (235°F/112°C). Be careful, this can easily boil over so you need to watch it once it starts bubbling. Turn your stove down enough so that it keeps boiling but not rising over the pot. Once it gets to a soft ball stage, it is ready to put into syrup jars. You will notice the syrup getting thicker as you go.

- Carefully pour the syrup into your jars, wipe the edges clean and seal with the lids.
- You now have a wonderful tasty treat. You can use it for pancakes, baking or however you desire.
Equipment
- Candy Thermometer optional
- spiles
- hose (drop line)
- mesh or screening
- large elastics
- stock pots
- pails with lids (2.5 gallon and 5 gallon work well)
- syrup jars with clamp lids or canning jars
Notes
- When to start collecting sap: The time the sap starts running is in the spring when it's above 32ºF (0ºC) in the day and below 32ºF (0ºC) at night.
- When to stop collecting the sap: Stop collecting sap when you notice the leaf buds start to swell.
- Tree Age: When the diameter of the maple tree trunk is at least 8", you can start tapping it. If the diameter is 20" or more, you can attach 2 spiles on opposite sides of the trunk.
- Maple water is simply the sap from the maple tree.
- Equipment: Please go over the entire equipment list carefully before starting.
- Pail Size: If you are hanging a pail on the tree, I recommend using a 2.5 gallon pail so that it doesn't get too heavy as it fills. If you are attaching a hose to a pail on the ground, I recommend 5 gallon pails.
- Cooking Tip: I don't recommend boiling down inside the house as it will take a very long time and the steam can ruin your cupboards.
- Jar Sterilization: I usually use a sterilizing powder from a wine-making store, but you can use other options like the dishwasher or submerge them in boiling water for 10 minutes.
- How to Check for Soft Ball Stage Without Thermometer: If you don't have a candy thermometer for this step, put cold water into a glass cup. Drop a few drops of the syrup into the cold water. If you can form a soft ball with the syrup using your fingers, it is ready.
- Maple Sap Amount: The amount of sap you get from one tree is going to depend on each season and each tree. If it was a dry summer, you will get less sap the following spring.
- Maple Syrup Amount: One 5 gallon pail is going to get you about 2 cups of maple syrup once it's cooked down. This is approximate.
- Storage: My jars usually seal after I transfer the hot syrup to the jars and cover them with the lids. It's important that you wipe the rim of the jar clean before covering. Store sealed maple syrup in a cool, dark cupboard or in a cold storage for up to a year. Once opened, it can be stored in the refrigerator for up to 1 year.
- Drilling: The following year, you shouldn't drill a hole in the same spot. Drill a new hole elsewhere on the tree.
- Mold: If you see any mold, discard it.
- Nutrition Info: The nutrition information is for 1 tablespoon of maple syrup.
Nutrition
Nutrition information on In the Kitch is provided as a courtesy and is an estimate only. It may not include toppings and/or sauces.


Damian Reed says
Really well done. Very informative and easy to understand.
Monica Haas says
Thank you Damian. This is only the second one I did. I appreciate your comment. The other one has not been posted yet but should be in a few months regarding a child's growth chart on a different site.