

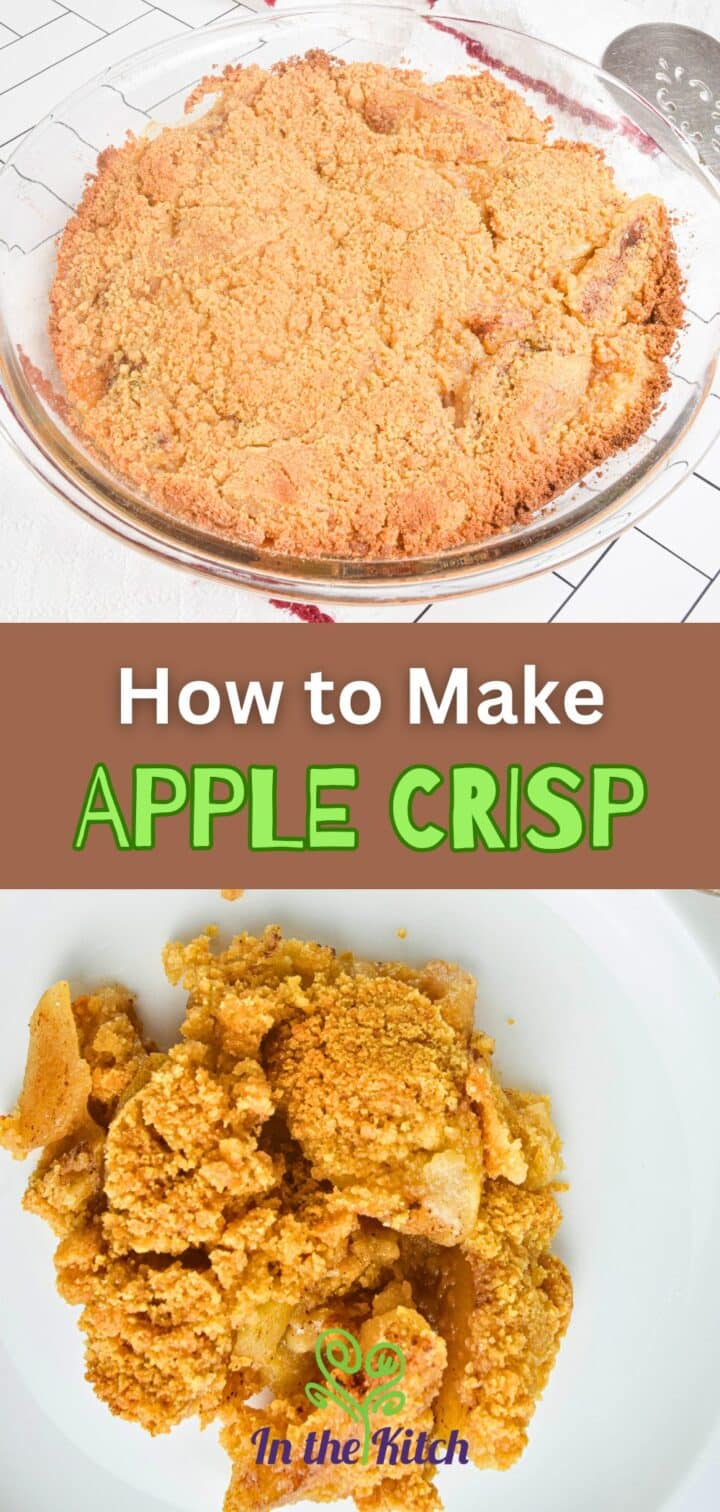
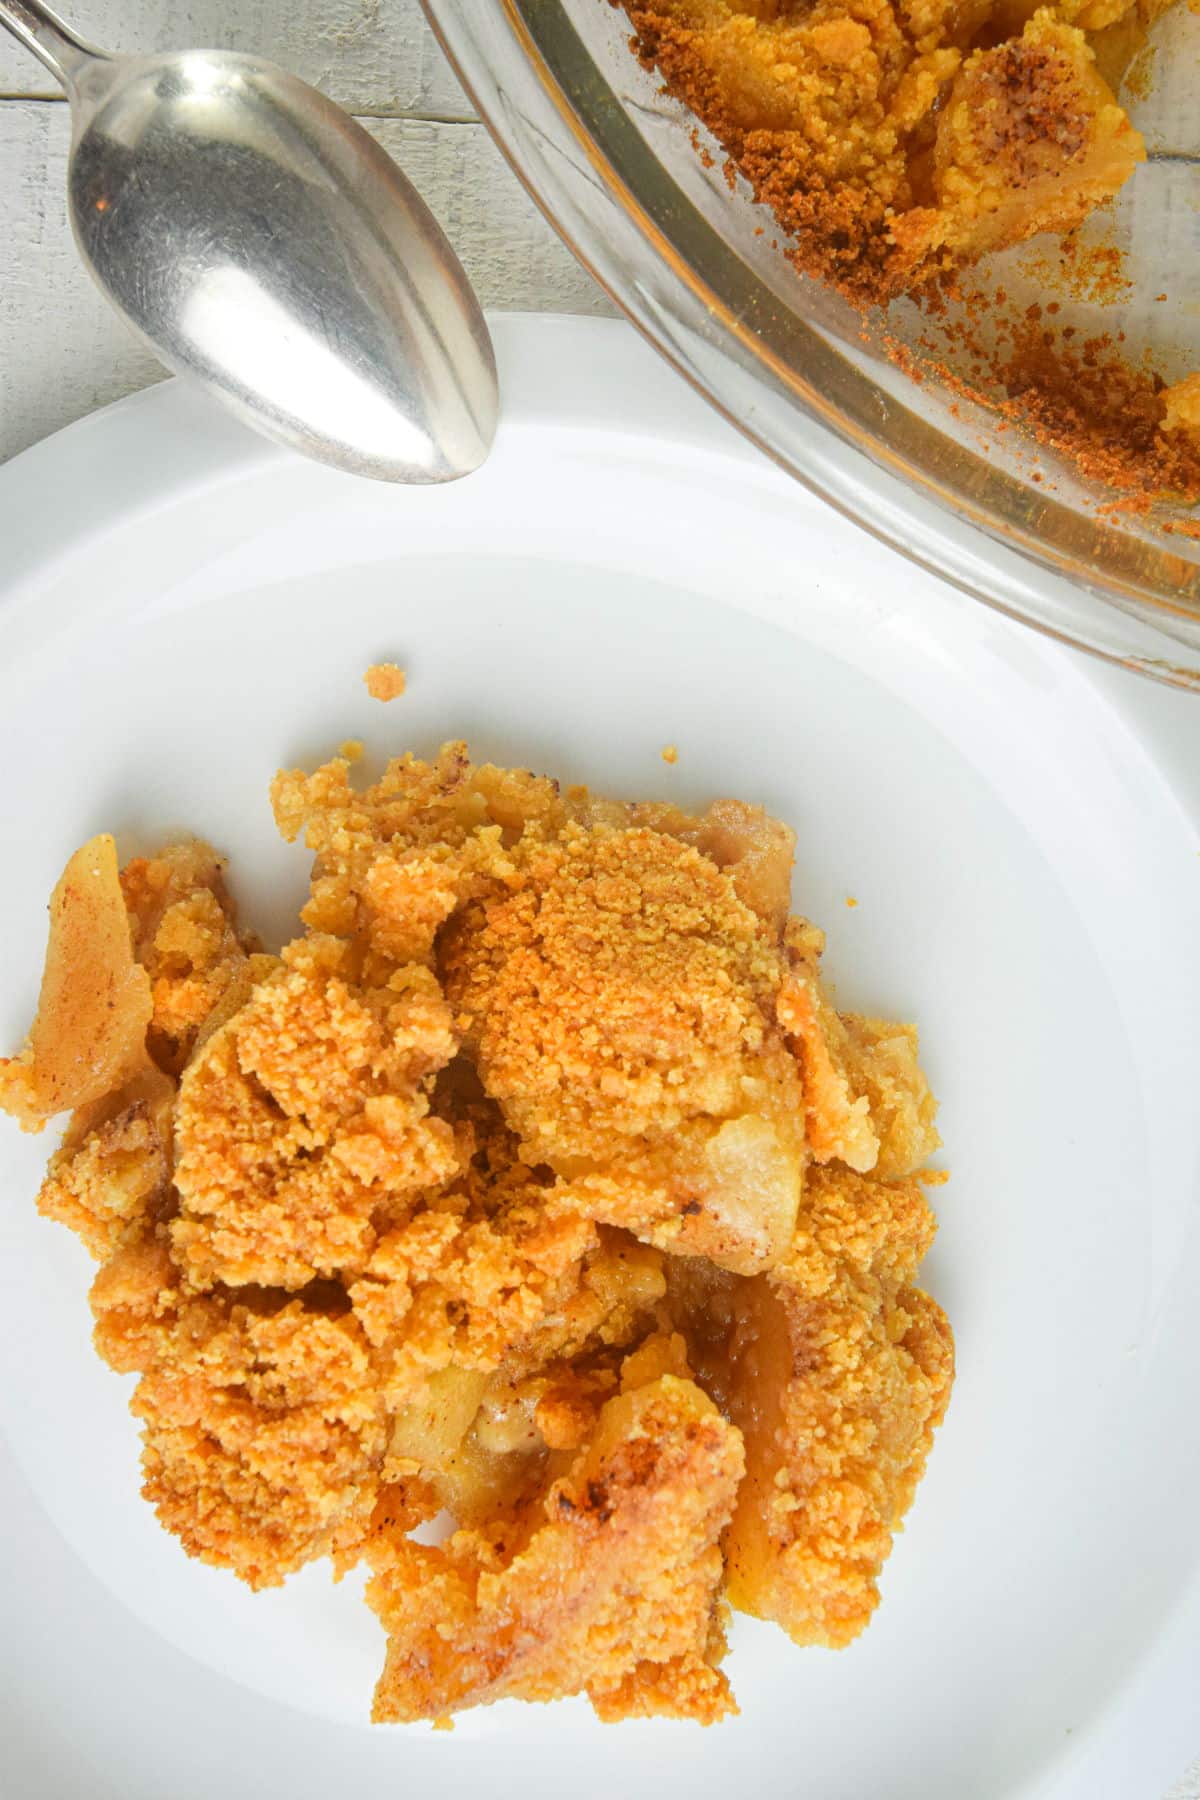
If you're looking to break away from the same old desserts, then learn how to make apple crisp without oats (technically a crumble in some parts of the world). With its sweet, warm filling and irresistible crunchy topping, it's sure to please even the pickiest eaters.
Jump to:
There's all manner of delicious desserts out there just waiting for you to indulge in their flavor. That being said, the old standard can get a bit played out after a while and it can be nice to switch things up.
An apple crisp is the best way to do this in the fall when apples are in season. It's also a fitting choice for a Thanksgiving feast. These mini apple pies are another great option.
🍂 Reasons to Make This Apple Crisp This Fall
- Few Ingredients: If you love desserts with few ingredients and loads of delicious, warm and cozy flavor, you'll love this fall apple dessert.
- Seasonal Flavors: Apple crisp features warm, comforting flavors like cinnamon and fresh apples (similar to my apple cinnamon chips), which perfectly complement the cozy, autumnal feel of Thanksgiving.
- Crowd-Pleaser: The combination of sweet apple filling with a crunchy, buttery topping is universally loved, making it a great choice for gatherings.
- Versatile: It can be served warm or at room temperature, and it's delicious on its own or topped with a scoop of vanilla ice cream or a dollop of whipped cream.
🍎 Apple Crisp Ingredients
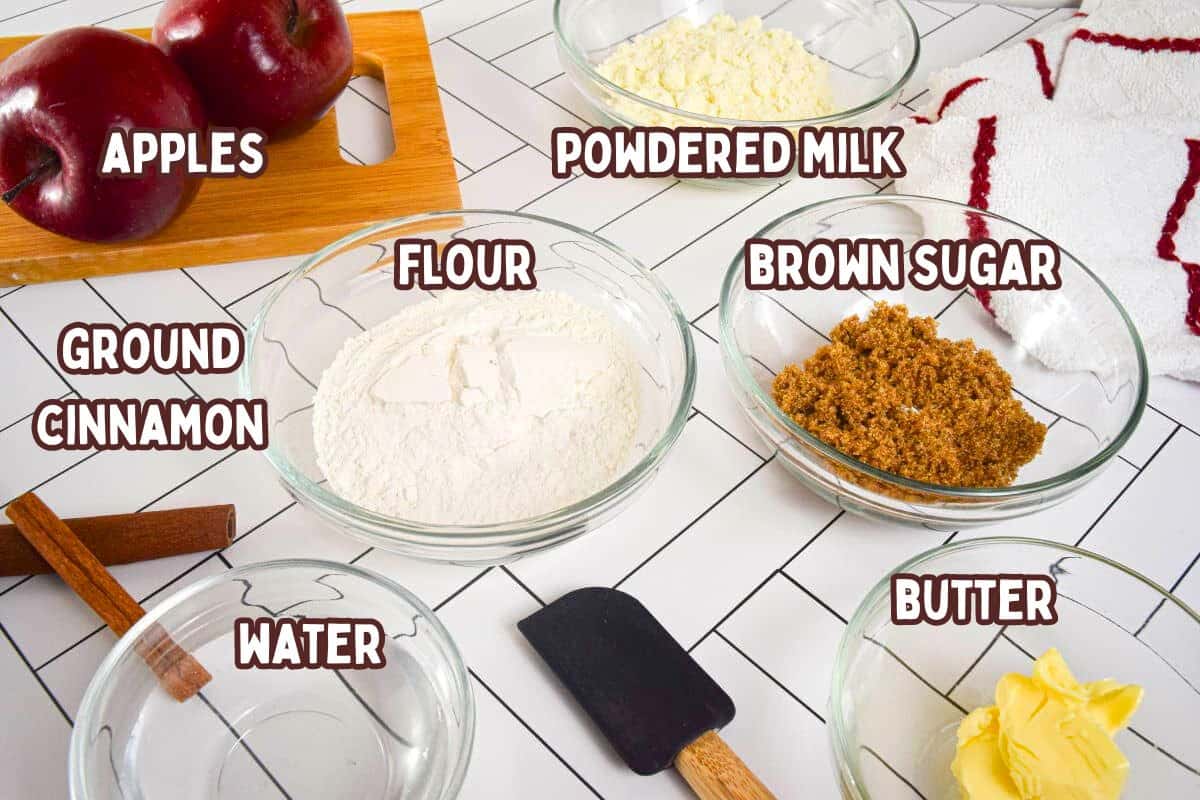
- apples - Some great choices are Granny Smith, Honeycrisp or Golden Delicious.
- cinnamon - Warm spices like cinnamon perfectly complement apples.
- flour - Binds and gives structure to the topping.
- brown sugar - Brown sugar gives a beautiful golden-brown color when the topping bakes and pairs well with the warm flavors.
- powdered milk - In this version, I make a topping of powdered milk without oats. It has a slightly different texture than you'd expect from a classic apple crisp that I find quite enjoyable.
- butter - For the crisp topping.
*Check recipe card for ingredient amounts.
📖 Recipe Tweaks
Apple crumbles/crisps are a super versatile dish with tons of ways to customize them to your liking.
- Spice it up. Add some different spices for a more robust flavor or mix some oats into the top crust for an old fashioned oatmeal kind of experience.
- Sweet tooth. If you like it extra sweet, add 1 or 2 tablespoons of sugar to the apple slices.
- Creamy toppings. Serve it with a nice scoop of vanilla ice cream or a dollop of whipped cream on top.
There's a ton to try that you might enjoy, so don't be afraid to experiment (and tell me how things turn out).
🔪 Instructions for How to Make Apple Crisp
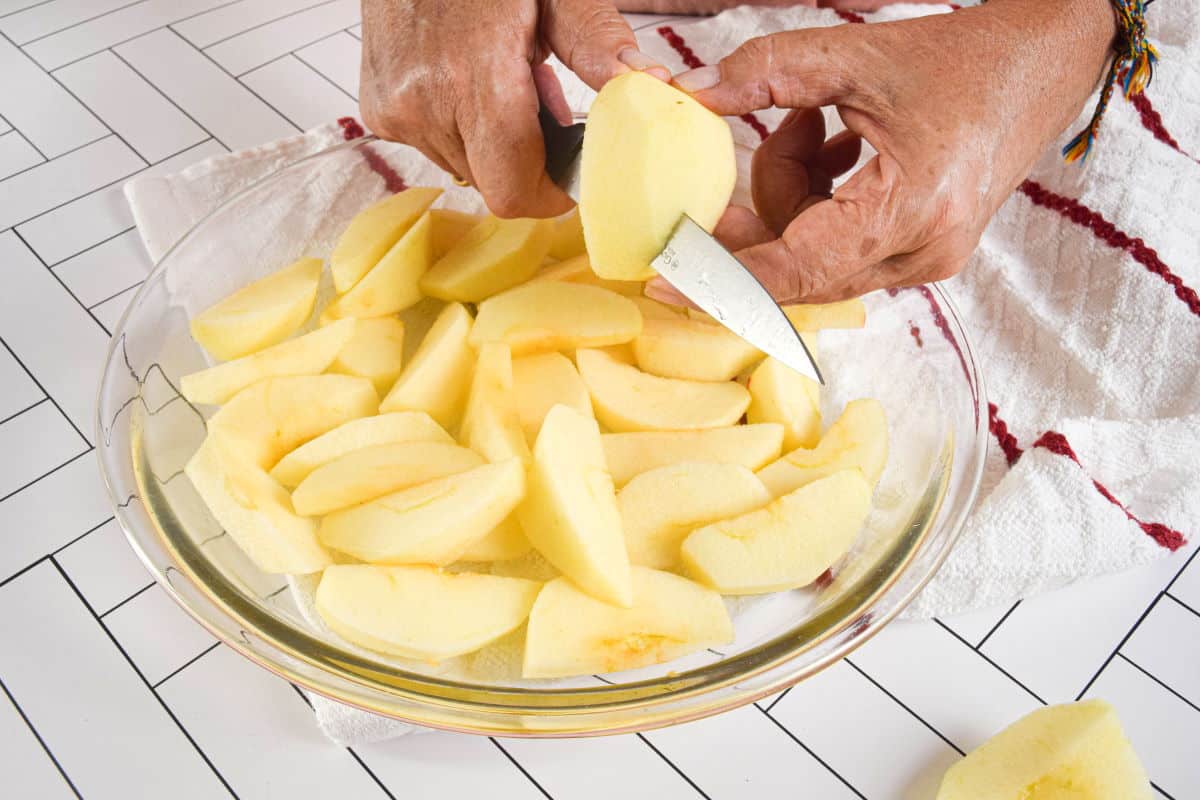
Step #1. Peel & Core the Apples. Preheat oven to 350°F (180°C). Peel, core and slice the apples. Place them in an 8" or 9" baking dish. Sprinkle with the cinnamon and pour water over them evenly.
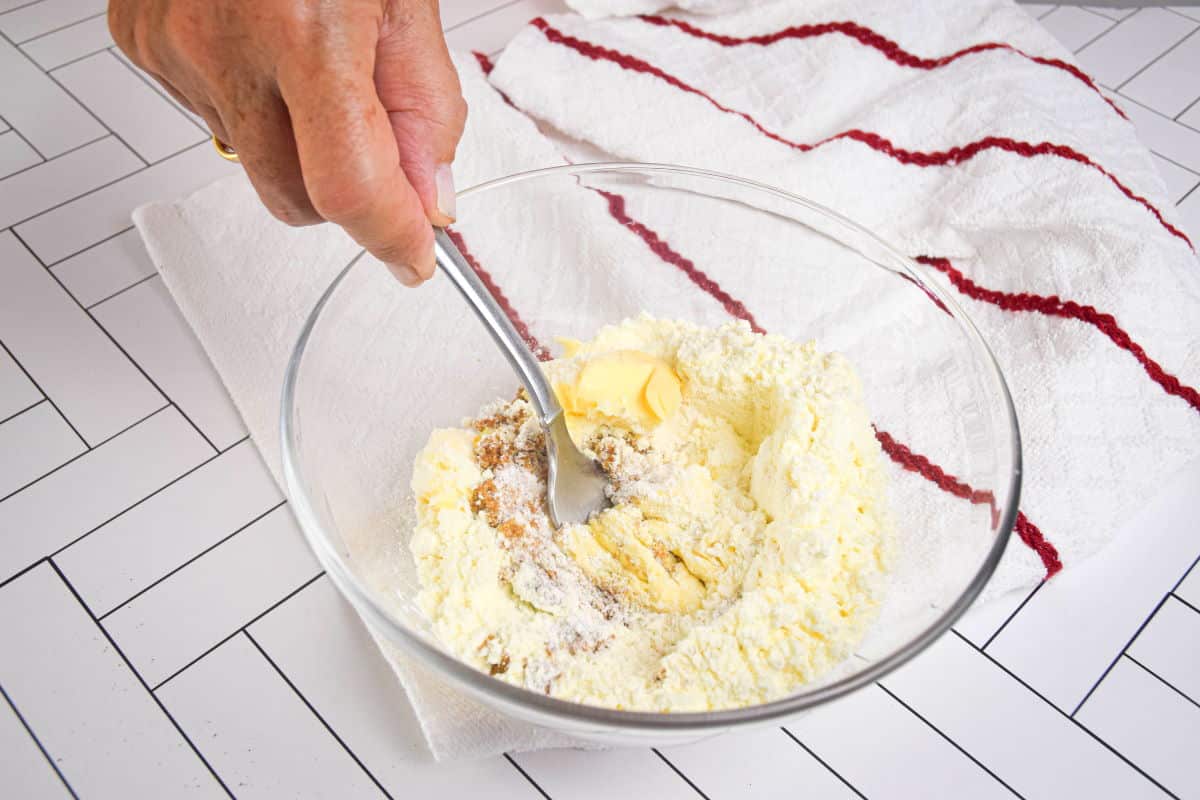
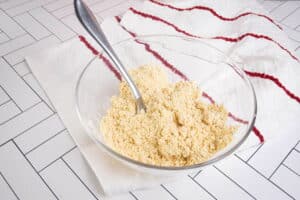
Step #2. Prepare the Topping. Mix the flour, brown sugar, powdered milk and butter in a bowl - press with a fork or your fingers until the crumble forms.
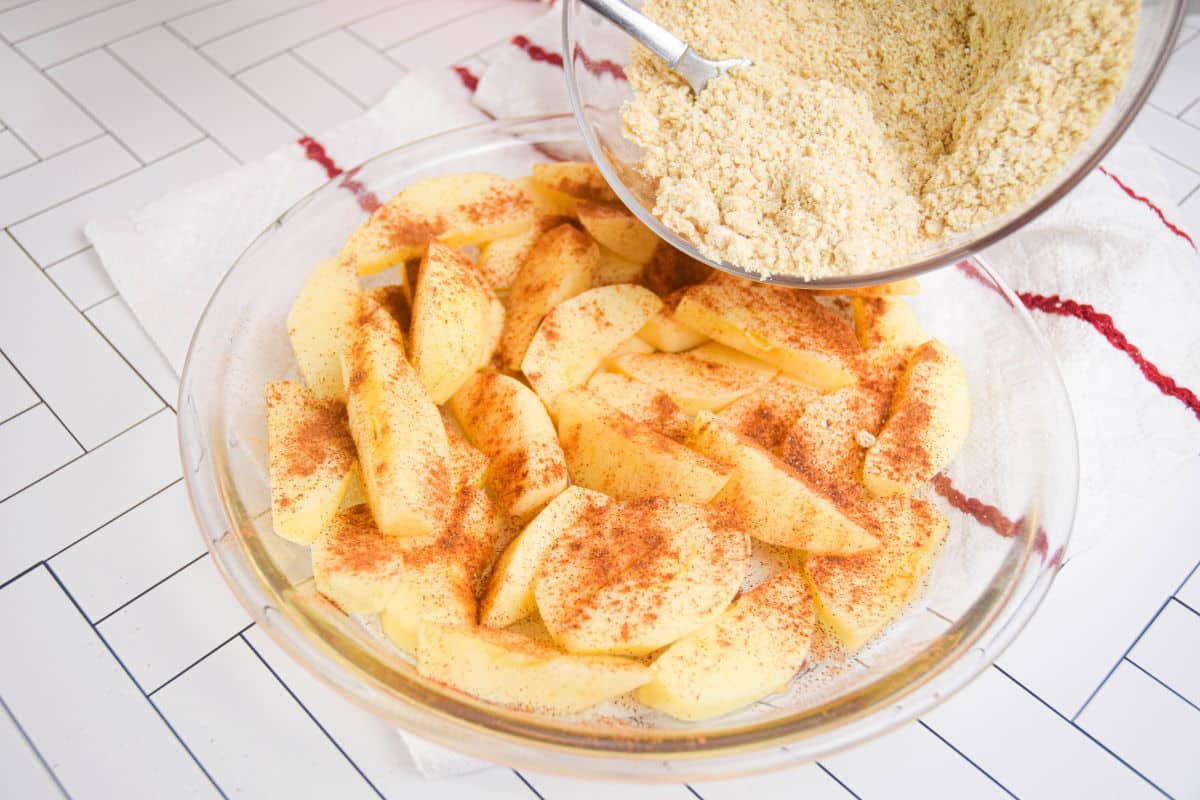
Step #3. Add the Crumble. Cover the apples with the crumble mixture evenly.
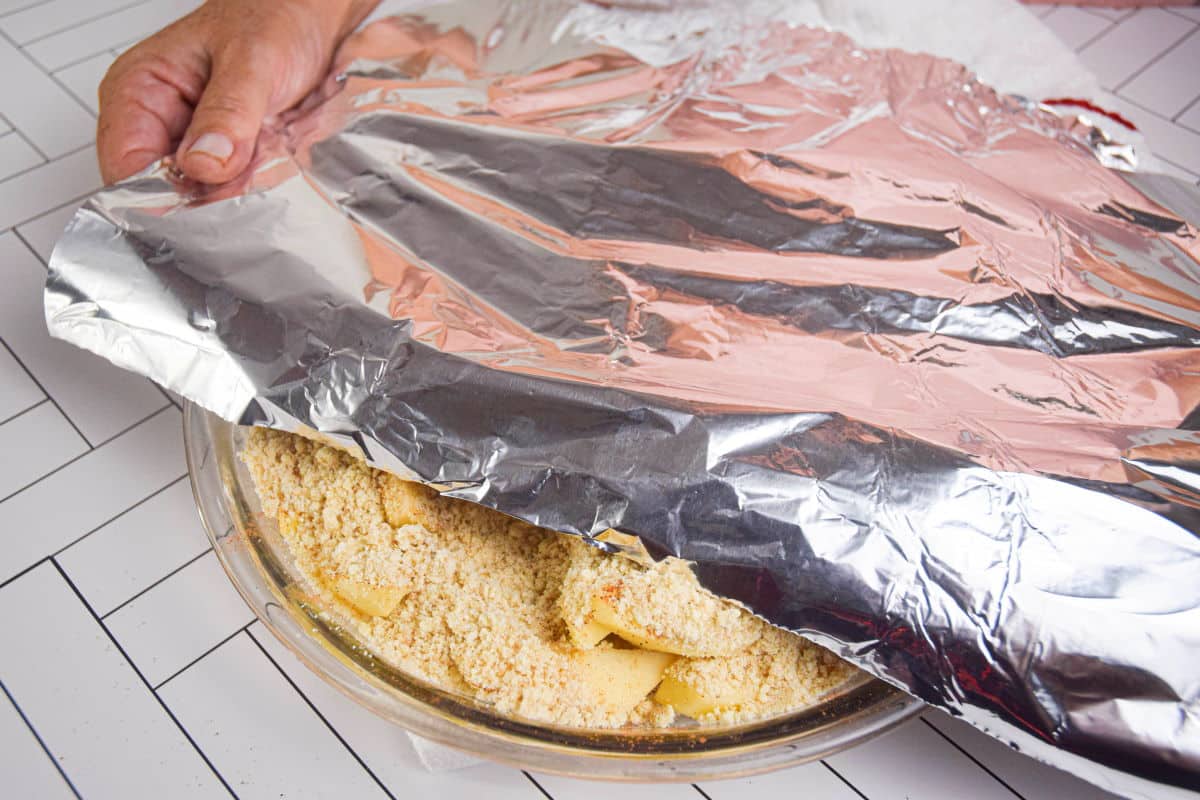
Step #4. Cover with Foil. Cover the baking dish with foil.
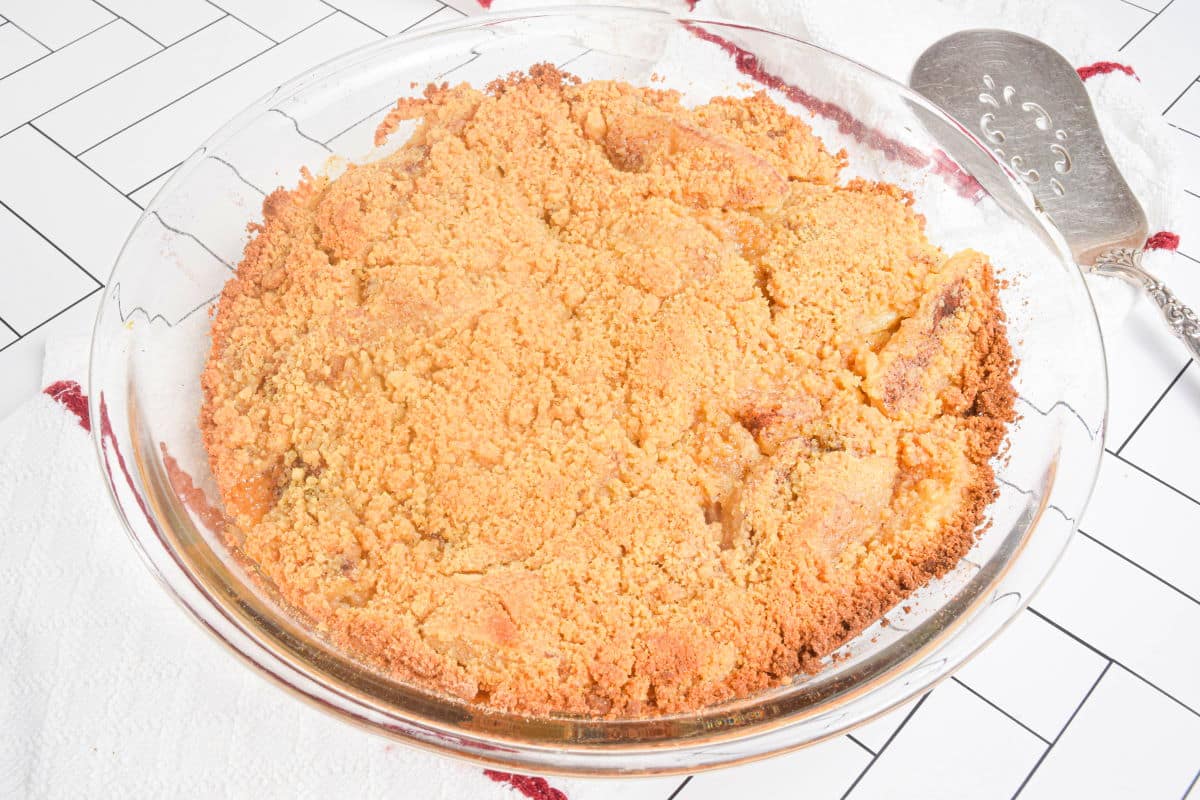
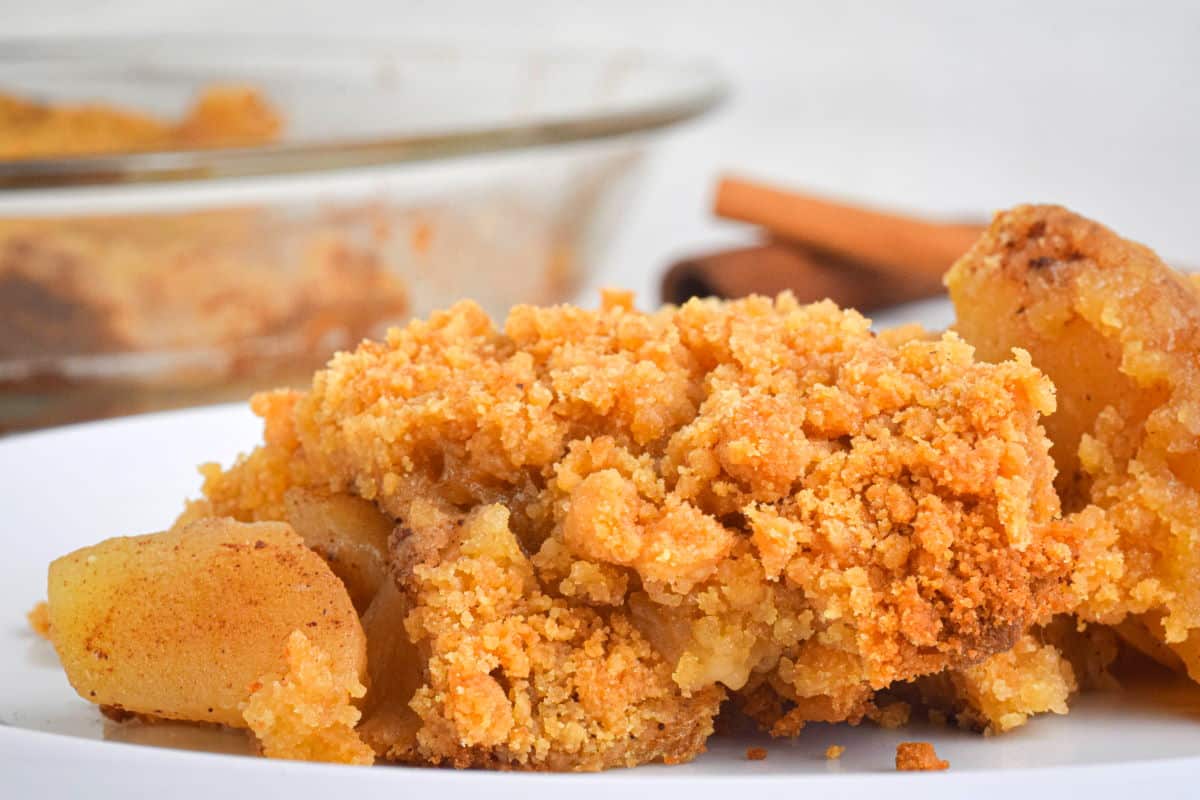
Step #5. Bake. Bake for 30 minutes covered. Remove the foil for another 5 to 10 minutes, until golden on top.

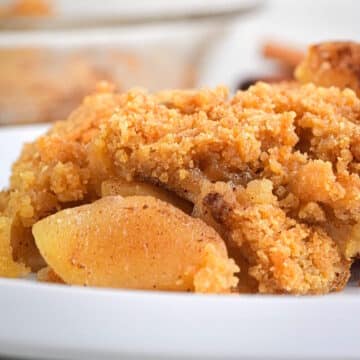
Step #6. Serve. Let cool for a bit. Serve and enjoy!
Now you know exactly how to make apple crisp. Easy, delicious, and even close to healthy, it's a fantastic dessert for weeknights, holidays or basically any other occasion you might have for serving up something amazing and making your guests feel right at home.
✅ Tips for Success
- Consistency: Peel, core, and slice the apples evenly to ensure they cook at the same rate. Thicker slices will hold their shape better, while thinner slices can create a softer filling.
- Don't Overmix the Topping: When combining the butter with the dry ingredients, mix until just combined to achieve a nice, crispy-crumbly texture.
- Keep an Eye on the Crumble When Baking: Bake the crumble until the topping is golden brown and the fruit filling is bubbling around the edges. Keep an eye on it to prevent burning.
- Let it Rest: Let the apple crumble cool for a few minutes after baking. This will help the filling thicken and settle, making it easier to serve.
❓ Recipe FAQs
Store your apple crisp in a covered container in the fridge for up to 5 days.
Reheat in the oven at 350°F until warmed through.
Yes! It can be frozen before or after baking. Cover it well with foil and into a freezer-safe bag for up to 3 to 6 months. If it was already baked, thaw in the fridge overnight before reheating in the oven. If it was unbaked before freezing, it can go straight into the oven from the freezer. Remember to cover it with foil for the first 30 minutes of baking.
In the U.K. and Australia, the term "Apple Crumble" is often used interchangeably with "Apple Crisp." But, in Canada and the U.S., an apple crumble is a distinct dessert. Both apple crisp and crumble feature a baked apple filling with a streusel-like topping. The main difference is that the crumble topping typically does not contain oats or nuts.
🧡 More Delicious Fall Recipe Tutorials to Try


What's your favorite way to serve up a hot slice of 🍎 homemade apple crisp? Do you eat it on its own or with ice cream? If you tried this 📋 recipe tutorial for 🍏 How to Make Apple Crisp or any other recipe on my website, please leave a 🌟 star rating and let me know how it went in the 📝 comments below. And please share the recipe!
📋Recipe
How to Make Apple Crisp
Ingredients
- 6 apples - such as Granny Smith, Honeycrisp or Golden Delicious
- ¼ cup water
- 1 tablespoon ground cinnamon
- ¾ cup flour
- ¾ cup brown sugar
- ¾ cup powdered milk
- ½ cup butter - softened
Instructions
- Preheat oven to 350°F (180°C). Peel, core and slice the apples. Place them in an 8" or 9" baking dish. Sprinkle with the cinnamon and pour water over them evenly.

- Mix the flour, brown sugar, powdered milk and butter in a bowl - press with a fork or your fingers until the crumble forms.
- Cover the apples with the crumble mixture. Cover the baking dish with foil. Bake for 30 minutes in the preheated oven. Remove the foil and bake for another 5 to 10 minutes, until golden on top.
- Let cool for a bit. Serve and enjoy!


Equipment
Notes
- Fridge Storage & Reheating: Store your apple crisp in a covered container in the fridge for up to 5 days. Reheat in the oven at 350°F.
- Freezer Storage & Reheating: It can be frozen before or after baking. Cover it well with foil and in a freezer-safe bag for up to 3 to 6 months. If it was already baked, thaw in the fridge overnight before reheating in the oven. If it was unbaked before freezing, it can go straight into the oven from the freezer. Remember to cover it with foil for the first 30 minutes of baking.
- Toppings: It can be served with a scoop of vanilla ice cream or a dollop of whipped cream on top.
- Consistency: Peel, core, and slice the apples evenly to ensure they cook at the same rate. Thicker slices will hold their shape better, while thinner slices can create a softer filling.
- Don't Overmix the Topping: When combining the butter with the dry ingredients, mix until just combined to achieve a nice, crispy-crumbly texture.
- Keep an Eye on the Crumble When Baking: Bake the crumble until the topping is golden brown and the fruit filling is bubbling around the edges. Keep an eye on it to prevent burning.
- Let it Rest: Let the apple crumble cool for a few minutes after baking. This will help the filling thicken and settle, making it easier to serve.
Nutrition
Nutrition information on In the Kitch is provided as a courtesy and is an estimate only. It may not include toppings and/or sauces.


Tanya says
This was really easy to make and tasted so good!
Joss D says
Thank you!