


Here I will show you, step by step, how to make kimchi at home as well as some helpful tips and information. This homemade Korean condiment is loaded with umami flavor and is surprisingly simple to make.

Pieces of napa cabbage are coated in a flavor--packed paste and then left to ferment for 1 to 5 days. After the fermentation, it is ready to eat as is or add to a variety of recipes.
Try out some of my best kimchi recipes where kimchi is the star ingredient. Some more kimchi uses include: kimchi tuna salad, Korean kimchi chicken and deviled eggs with kimchi.
Jump to:
What is Kimchi?
Kimchi is a Korean side dish made of fermented, seasoned vegetables; mainly napa cabbage and daikon radish. It's basically a more complex, Asian version of sauerkraut.
There are many different types of kimchi such as kkakdugi, mul and chonggak, to name a few. We are sticking to the classic kimchi with napa cabbage in this recipe.
It is a very versatile food, which is why you will see me using it in all sorts of fusion creations.
Ingredients
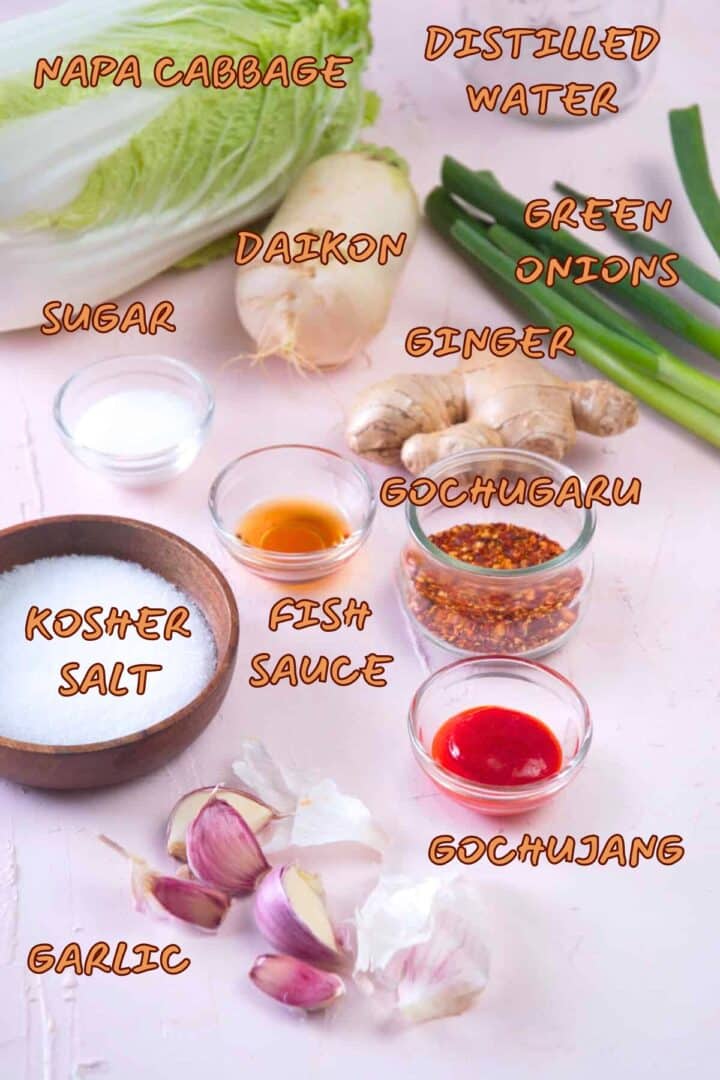
- napa cabbage - It's also known as Chinese cabbage and is the main ingredient in traditional Korean kimchi. It's taller and more narrow than regular green cabbage. The leaves are also more tender and mild in flavor.
- kosher salt - A purer type of salt that typically doesn't contain additives like iodine or anti-caking agents.
- distilled water - Distilled water is used for making kimchi because of its purity and neutral taste. This way there are no contaminants or bacteria that can harm the process of fermenting. It's basically quality control.
- sugar - I use white granulated sugar.
- fish sauce - A condiment made from fermented fish and salt, used for its salty, savory, and umami flavor.
- gochugaru - This is Korean red pepper powder/course ground.
- gochujang paste - If you don't like it spicy, add less gochujang or gochugaru.
- daikon radish - peeled and grated
*Check recipe card for full ingredient amounts.
Instructions
Prep the Cabbage
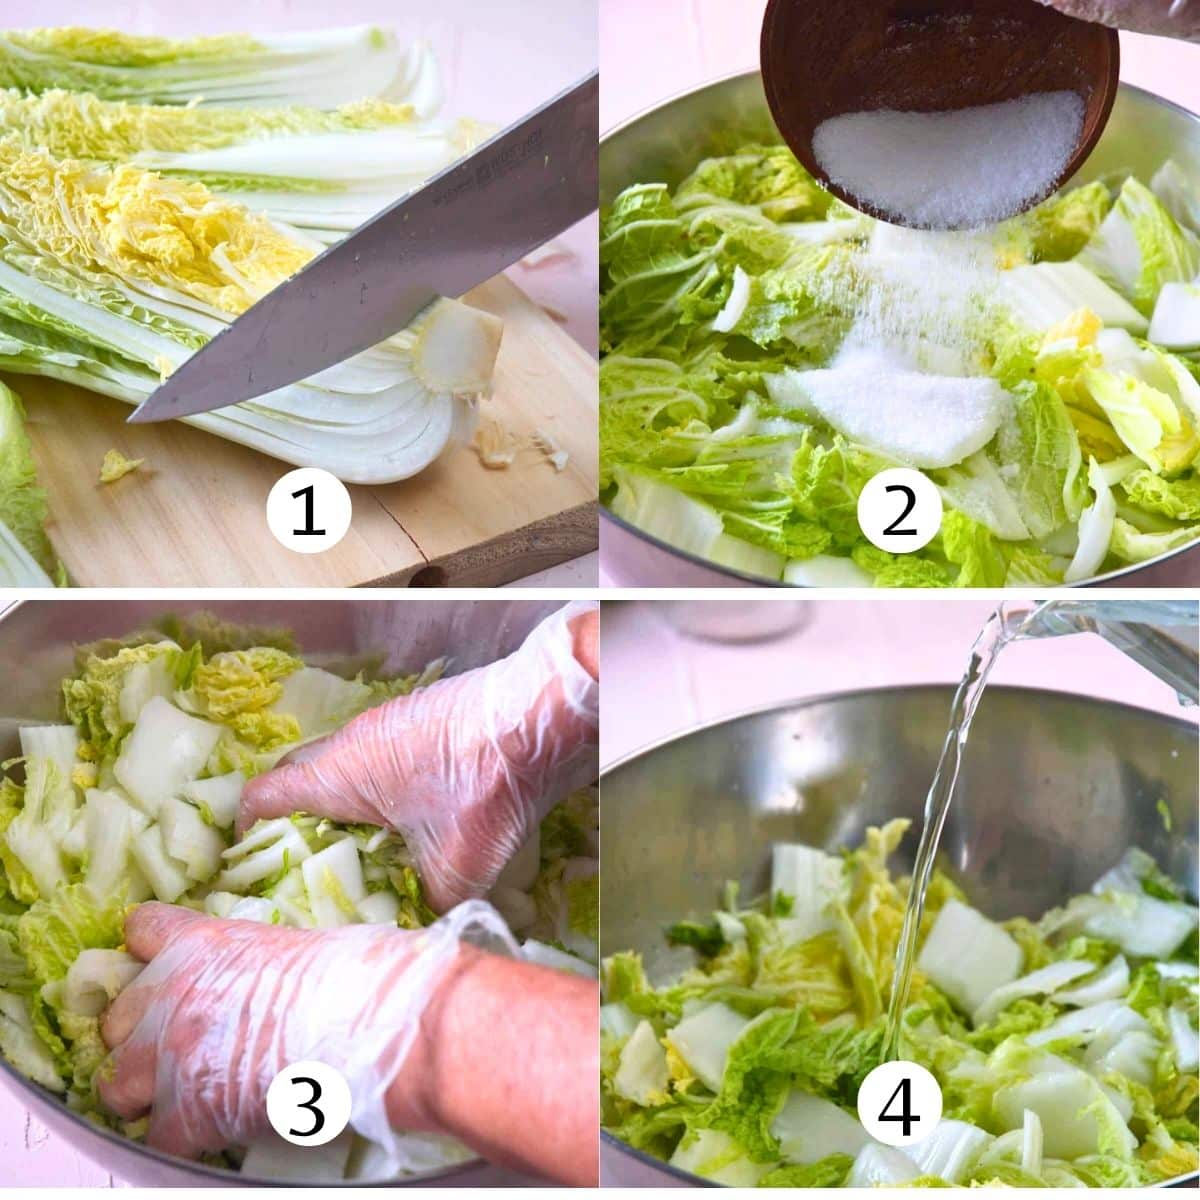
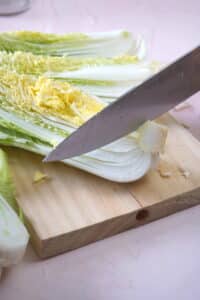
Step 1: Core the Cabbage. Remove any damaged outer leaves from the napa cabbage and then slice it into quarters. Core the cabbage and cut it into 2" pieces (Image 1).
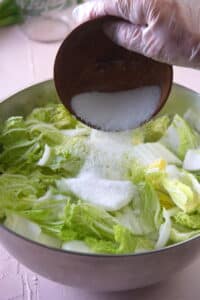
Step 2: Salt the Cabbage. In a large bowl, add the cabbage pieces and salt (Image 2).
Chef's Note: Make sure you use kosher or sea salt so that it is free of additives/iodine, which is believed to negatively affect the fermentation process.
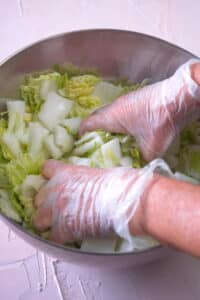
Step 3: Massage the Salt into the Cabbage. Massage the salt into the cabbage with your hands (Image 3).
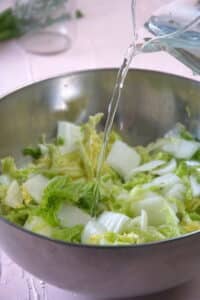
Step 4: Add Distilled Water. Add enough of the distilled water to cover the cabbage. Stir until the salt has been dissolved (Image 4).
Season the Cabbage
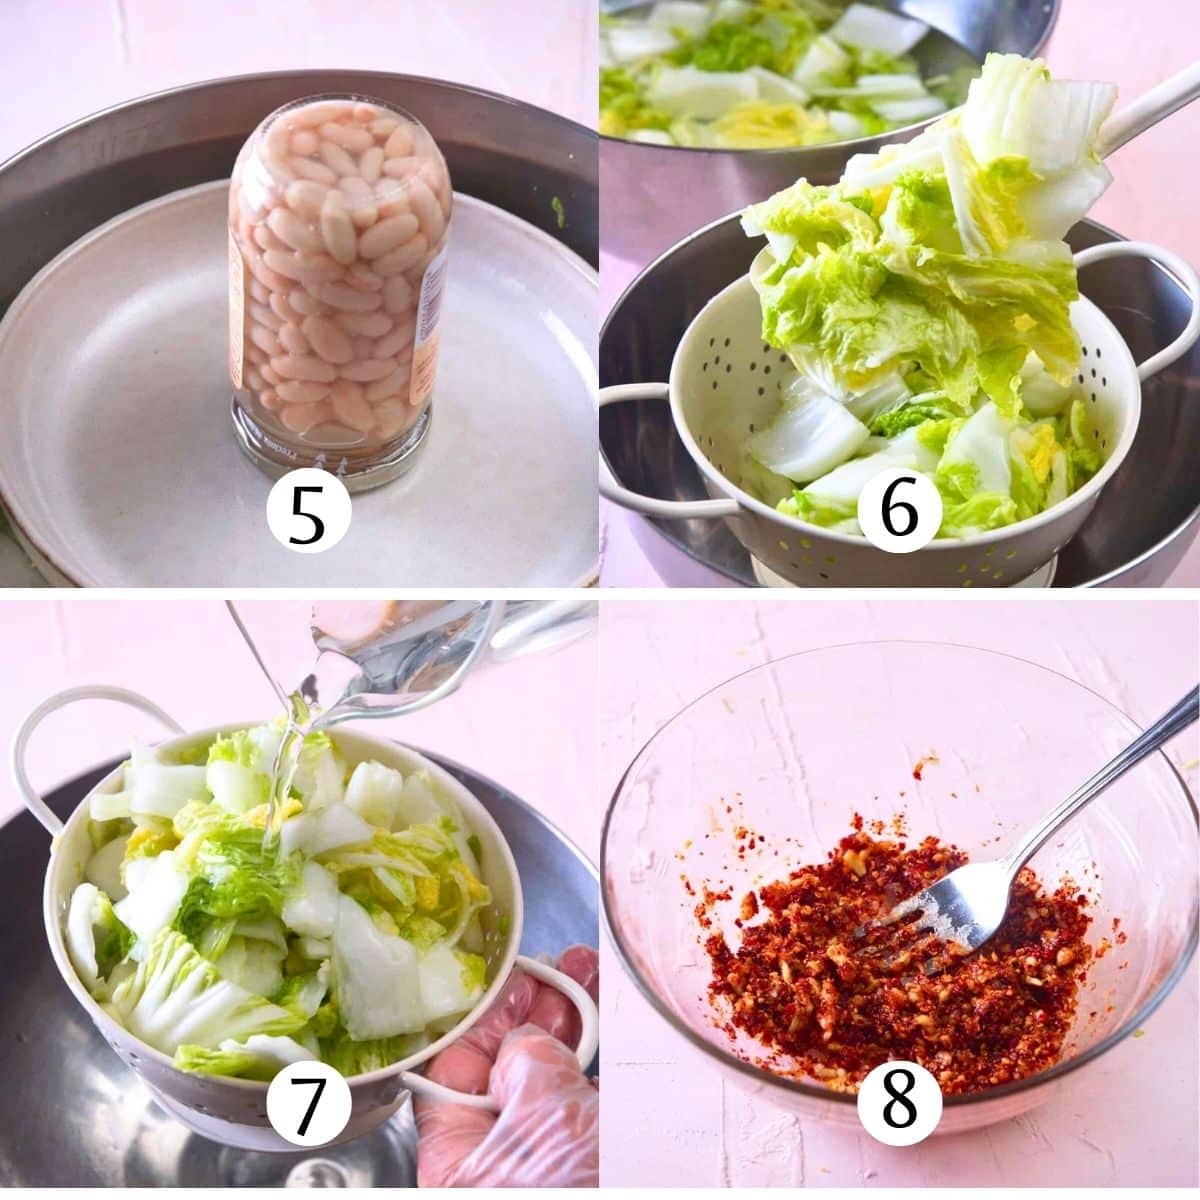
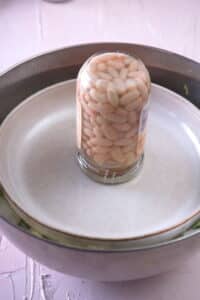
Step 5: Let the Cabbage Sit. Cover the cabbage with an inverted plate and weigh it down with something heavy, like a jar/can. Let it sit for at least 2 hours at room temperature or up to 5 hours. This will draw out the moisture which will help preserve it and absorb the seasonings later (Image 5).
⭐Pro Tip: If you like a crispier kimchi, I suggest letting it sit for the full 5 hours.
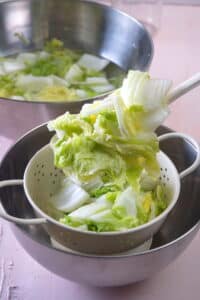
Step 6: Drain the Salt Water. Drain the salt water from the cabbage (Image 6).
Step 7: Rinse. Rinse the cabbage under cold water. Blot with paper towel to dry it and return it to the large bowl (Image 7).
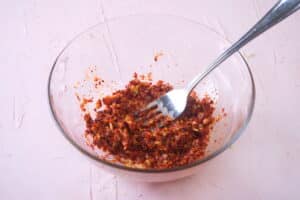
Step 8: Make the Paste. To make the paste, stir the garlic, ginger, sugar, fish sauce, gochugaru and gochujang paste together, until combined well (Image 8).
Ferment

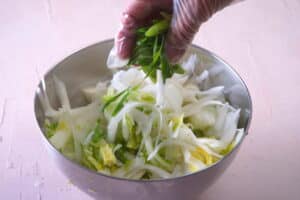
Step 9: Combine the Vegetables. Combine the cabbage with the radish and green onions (Image 9).
Step 10: Add Paste. Add the paste. Using your hands (you can use gloves as some of the ingredients are spicy), gently massage the paste into the cabbage mixture until all of the pieces are completely coated (Image 10).
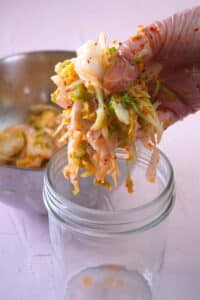
Step 11: Transfer the Kimchi to Jars. Pack the kimchi into sanitized jars, pressing it down as you add it to minimize exposure to air. You want to leave about 2 inches of space at the top of the jar. To help keep the kimchi packed into the liquid, you can use some sort of weight placed on top of it. Wipe the jars down if needed and seal them with the lids (Image 11).
⭐Pro Tip: It's important that the cabbage stays covered in the brine for the lactic acid bacteria to multiply and to prevent mold. Fermentation weights come in handy for this or you can also use a cabbage leaf placed on top/tucked in with a weight on top of it. Make sure the weights are the right size for wide mouth jars.
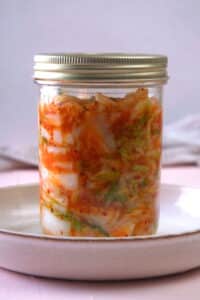
Step 12: Ferment the Kimchi. Place the jars in a baking dish (to help catch any juices that may overflow from the release of carbon dioxide) and set them in an area that is cool and dark. Let the kimchi sit for at least 24 hours or up to 5 days. If you see some bubbling and fizzing, that means it is fermenting (Image 12)!
Check the kimchi once per day to press down on the vegetables with a clean spoon and make sure they stay submerged under the brine. The cabbage will slowly release more brine over time.
After 24 hours, you can start tasting the kimchi to see if it's fermented to your liking (it will be tangy). If not, you can leave it to ferment longer.
Chef's Notes:
- Brine: If you need more brine to keep the kimchi covered, you can mix 1 cup of water with 1 ¼ teaspoon kosher salt or sea salt. Use some of this mixture to top it up, if needed.
- Temperature: The temperature range I ferment my kimchi in is between 65°F/18°C to 70°F/21°C and that seems to work out great. The cooler you keep it, the longer it takes to ferment.
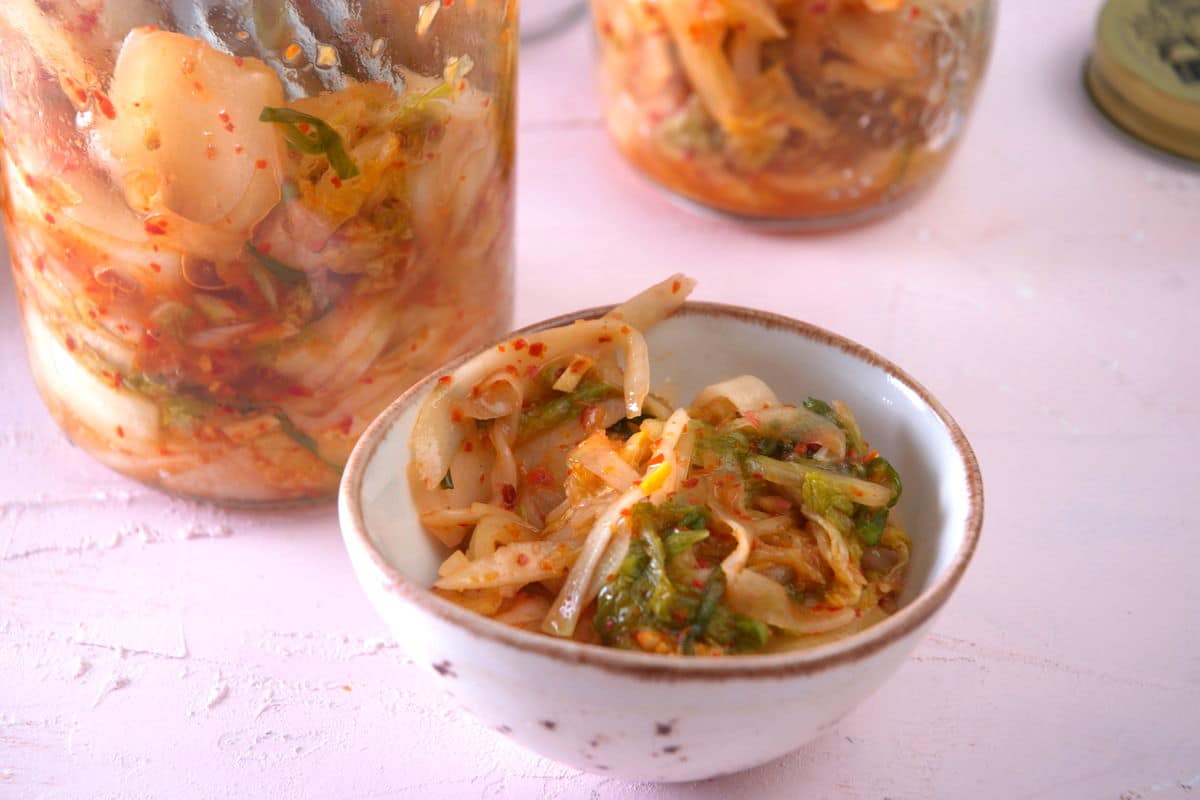
Step 13: Serve! The kimchi is now ready to eat (you can remove the weights and label the jar with the date). For full flavor, slowly ferment it further in the fridge for 1 to 2 weeks. You can eat it as is or add it to many different recipes!
How to Store Kimchi

After the fermentation process, kimchi needs to be stored in the refrigerator, in a covered container, for food safety purposes or it will go bad. This also slows down further fermentation.
It is recommended to open the jar of kimchi slowly over the sink as pressure can build up in the jar from the fermentation process as gases release. You may hear a popping sound; this is normal.
Homemade Kimchi FAQs
It can take as little as 1 to 5 days for fermentation at room temperature. You can eat it at this point but it will also continue to slowly ferment as it sits in the fridge.
Kimchi has a very strong, spicy, umami flavor. Because the cabbage is fermented, it will taste sour and tangy.
Fresh kimchi will expire if left at room temperature within a week. Storing it in the refrigerator will extend that time to 3 to 6 months. Keep in mind that as the kimchi gets older, the taste may change and become more sour and the texture may become softer. Always check for mold growth.
It depends. Kimchi can contain seafood ingredients like dried shrimp, anchovies and fish sauce. If you're making it yourself, just leave out these ingredients. You can easily find vegan brands of kimchi, such as Madge's or Mother in Law's. They use ingredients like sea vegetables to get a similar flavor as the non-vegan type.
One of my favorite vegetarian kimchi brands is Rooster. I find it has the best flavor out of the ones I've tried so far. It's imported from South Korea so you know it is authentic. What I don't like about it, is that it contains msg.
Kimchi is generally a low-carb, keto dish but always be sure to check the nutrition information if using store-bought. If making your own, leave out the sugary ingredients.
Yes, kimchi is gluten free.
You can find kimchi in Asian food markets, local farmers' markets or in the refrigerated section of the grocery store. It is also readily available online. Luckily, you won't need to worry about that if you make it at home!

More Flavorful Kimchi Recipes to Consider


If you tried this 📋 recipe tutorial for How to Make Kimchi at Home or any other recipe on my website, please leave a 🌟 star rating and let me know how it went in the 📝 comments below. And please share the recipe!
📋Recipe

How to Make Kimchi at Home
Ingredients
- 2 pounds napa cabbage - about 1 large head
- ¼ cup kosher salt
- distilled water - enough to cover the cabbage
- 5 cloves garlic - minced
- 1 tablespoon fresh ginger - minced
- 1 teaspoon sugar
- 2 tablespoons fish sauce
- 3 tablespoons gochugaru - Korean red pepper powder/course ground
- 2 tablespoons gochujang paste
- 1 cup daikon radish - peeled and grated
- 3 green onions - sliced
Instructions
- Remove any damaged outer leaves from the napa cabbage and then slice it into quarters. Core the cabbage and cut it into 2" pieces.

- In a large bowl, add the cabbage pieces and salt (See Note 1).
- Massage the salt into the cabbage with your hands.
- Add enough of the distilled water to cover the cabbage. Stir until the salt has been dissolved.
- Cover the cabbage with an inverted plate and weigh it down with something heavy, like a jar/can. Let it sit for 2 hours at room temperature or up to 5 hours. This will draw out the moisture which will help preserve it and absorb the seasonings later.
- Drain the salt water from the cabbage and rinse it under cold water. Blot with paper towel to dry it and return it to the large bowl.
- To make the paste, stir the garlic, ginger, sugar, fish sauce, gochugaru and gochujang paste together until smooth.

- Combine the cabbage with the radish and green onions.
- Add the paste. Using your hands (you can use gloves), gently massage the paste into the cabbage mixture until all of the pieces are completely coated.
- Pack the kimchi into sanitized jars, pressing it down as you add it to minimize exposure to air. You want to leave about 2 inches of space at the top of the jar. To help keep the kimchi packed into the liquid, you can use some sort of weight placed on top of it (See Note 2). Wipe the jars down if needed and seal them with the lids (do not seal them tightly).
- Place the jars in a baking dish (to help catch any juices that may overflow) and set them in an area that is cool and dark. Let the kimchi sit for at least 24 hours or up to 5 days. If you see bubbling that means it is fermenting.Check the kimchi once per day to press down on the vegetables with a clean spoon and make sure they stay submerged under the brine. The cabbage will slowly release more brine over time (See Note 3). After 24 hours, you can start tasting the kimchi to see if it's fermented to your liking (it will be tangy). If not, you can leave it to ferment longer.
- The kimchi can now be stored in the refrigerator and is ready to eat (you can remove the weights and label the jar with the date). For full flavor, slowly ferment it further in the fridge for 1 to 2 weeks. You can eat it as is or add it to many different recipes!


Equipment
Notes
- Make sure you use kosher or sea salt so that it is free of additives/iodine, which is believed to negatively affect the fermentation process.
- It's important that the cabbage stays covered in the brine for the lactic acid bacteria to multiply and to prevent mold. Fermentation weights come in handy for this or you can also use a cabbage leaf placed on top/tucked in with a weight on top of it.
- If you need more brine to keep the kimchi covered, you can mix 1 cup of water with 1 ¼ teaspoon kosher salt or sea salt. Use some of this mixture to top it up, if needed.
- This recipe yields about 5 pint jars of kimchi with 2" of headspace.
- The temperature range I ferment my kimchi in is between 65°F/18°C to 70°F/21°C and that works out great. The cooler you keep it, the longer it takes to ferment.
- To make it less spicy, add less gochugaru and/or gochujang.
- Store the kimchi in the fridge for up to 3 to 6 months.
Nutrition
Nutrition information on In the Kitch is provided as a courtesy and is an estimate only. It may not include toppings and/or sauces.


Leave a Reply