
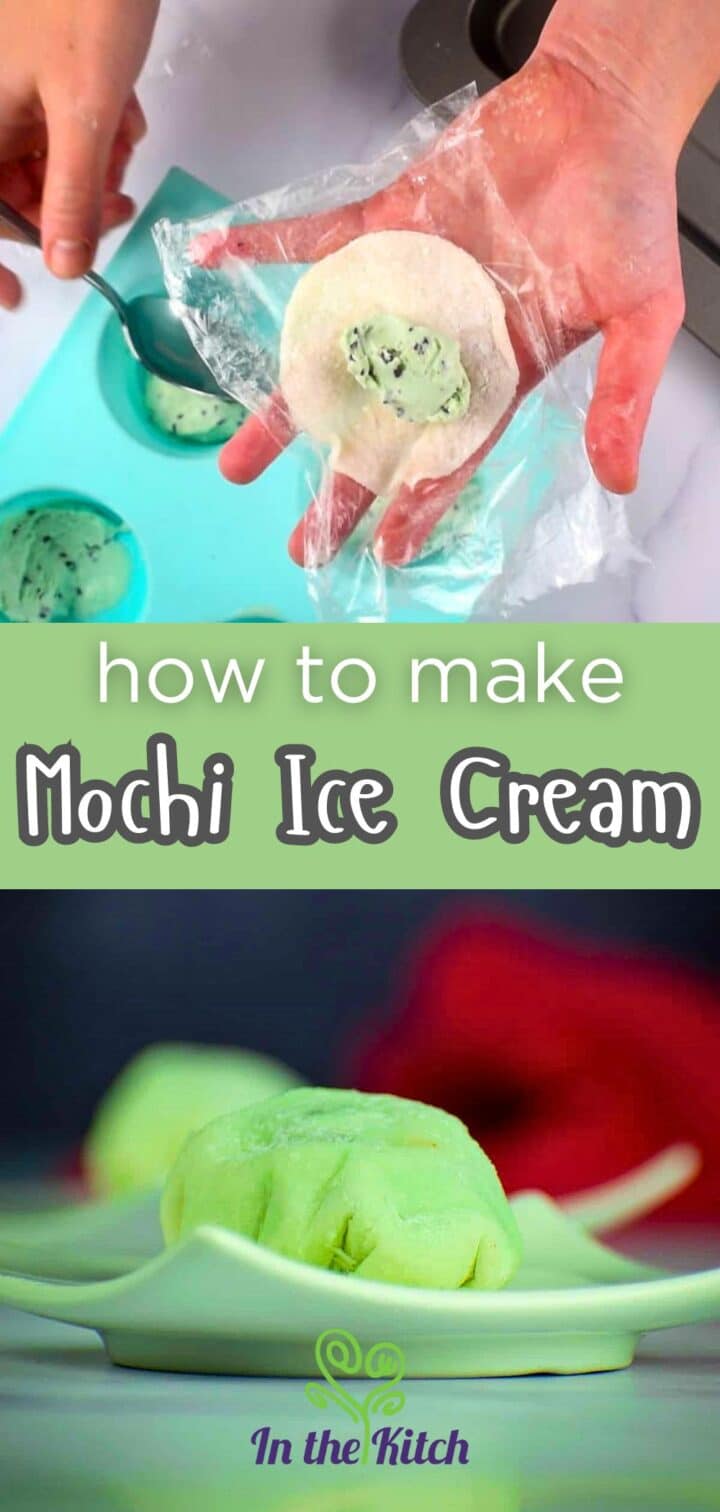
While professionally produced mochi might seem out of reach for anyone not living in Japan, it's actually quite simple to learn how to make mochi ice cream at home with only a few ingredients and supplies.

Some genius had the bright idea to combine mochi with ice cream and give us the amazing dessert that is mochi ice cream: little balls of ice cream wrapped up in a sweet and sticky layer of mochi. It's a fun and delicious 4-ingredient dessert. It's similar to strawberry Daifuku mochi but with ice cream instead of fresh fruit.
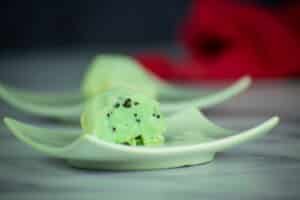
That soft, supple mochi exterior blends perfectly with the creamy and decadent ice cream center resulting in what's sure to become your new favorite dessert.
Simply follow my mochi recipe to teach you everything you'll need to create these fabulous frozen mochi balls using your favorite ice cream from scratch. Kids may not find this recipe so easy to help out with (although my daughter still loves to pitch in), but they will surely enjoy eating it!
This Brazilian papaya cream frozen dessert is also delicious, and it's a wonderful example of another cultural dessert!
Jump to:
What is Mochi Ice Cream?
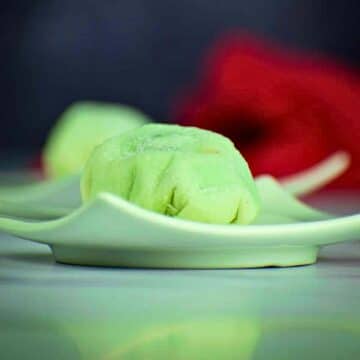
Mochi ice cream is a delightful Japanese confection made with ice cream that is enveloped into a dough in a shape similar to a purse-shaped dumpling!
The mochi dough itself is made with glutinous rice flour or 'sweet rice flour'. It goes through a process of steaming and then being rolled and cut out into circles to be later filled with a ball of your favorite ice cream; it's unique and delicious!
Traditionally, the mochi dough is steamed on the stove, but it can also be cooked in the microwave (which is how I will be showing you in this tutorial) or even with a mochi maker.
Ingredients
Mochi ice cream consists of dough that is made from glutinous rice flour, water and sugar wrapped around ice cream.

- glutinous rice flour - There is a slight difference in glutinous rice flours. Shiratamako is more expensive but is easier to combine with the water and easier to work with when rolling out the dough. Mochiko is cheaper and more available, but harder to work with.
- cornstarch - The dough will be very sticky so you need cornstarch to prevent it from sticking to your hands and the work surface when you're rolling it out.
- ice cream - I used mint chocolate chip because it's a family favorite in my house but choose your favorite! You could even use vegan ice cream with my banana ice cream recipe. I have some more flavor ideas below to get you started.
*Check recipe card for ingredient amounts.
Mochi Ice Cream Flavors
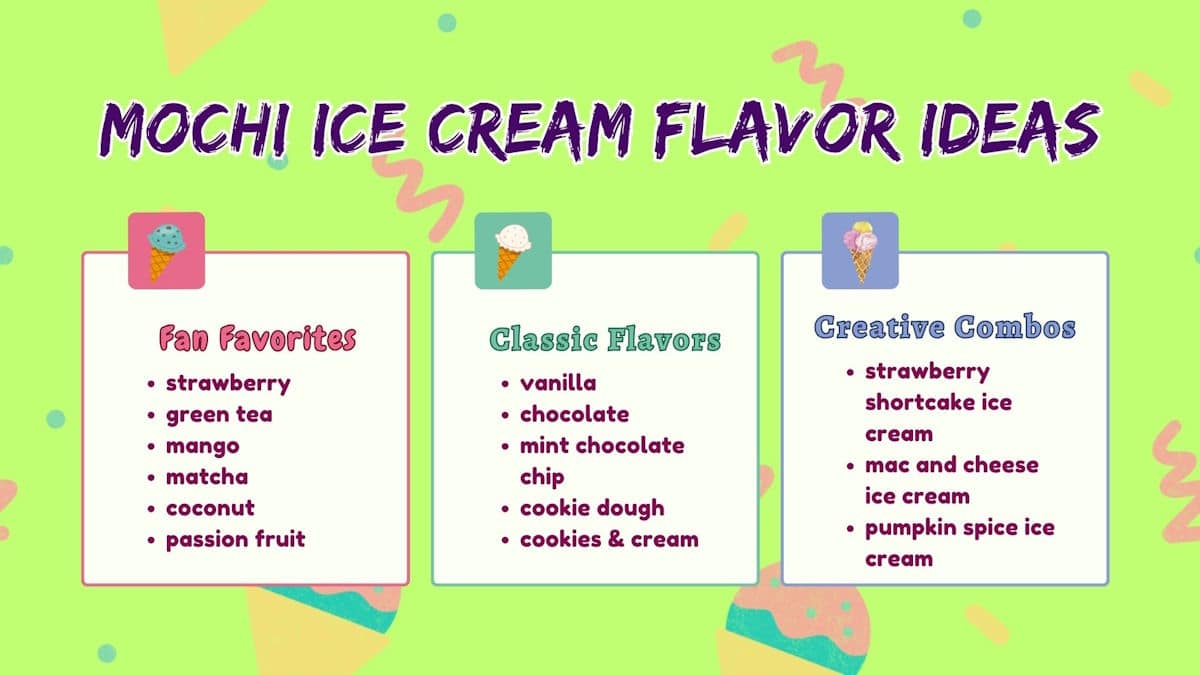
Fan Favorites
These flavors are very common for mochi ice cream balls:
- strawberry
- green tea
- mango
- matcha
- coconut
- passion fruit
Classic Flavors
These flavors are easily found in the grocery store because they are the classics:
- vanilla
- chocolate
- mint chocolate chip
- cookie dough
- cookies and cream
Creative Combos
Get a little more creative with these fun flavors:
How to Make Mochi Ice Cream (Steps)

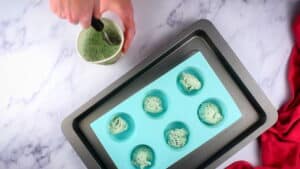
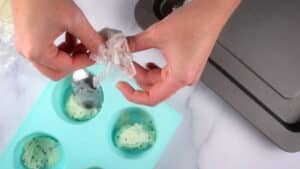
Step 1. Portion the ice cream. Scoop out the ice cream into smaller portions and place them in a muffin tin (you can use an ice cream scoop for this). Transfer to the freezer while you make the dough.

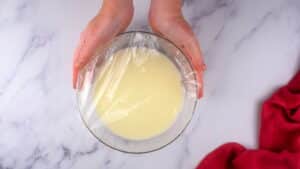
Step 2. Make the dough. Add the rice flour, sugar and water to a bowl and mix until it has dissolved completely.
Chef's Note: Freezing the ice cream in smaller portions will help you work with the ice cream quicker when forming the mochi balls - instead of working with the whole container. There isn't an exact amount of ice cream to use; you can use a spoon or cookie scoop to scoop the amount that will fit into the mochi dough circle.

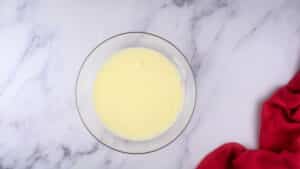
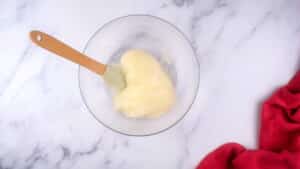
Step 3. Cook the dough. Cover with plastic wrap and heat it on high heat in the microwave for 1 minute. Take it out and stir carefully with a spatula. Cover again and cook for 1 more minute at high heat. Stir again with the spatula and cook for 1 more minute (for a total of 3 minutes).

Chef's Note: Above is an image of what it should look like when the dough is ready.

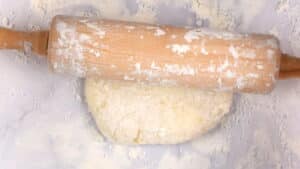
Step 4. Roll out mochi dough. Cover the work surface and your hands with cornstarch (be generous with it). Transfer the cooked mochi to the work surface. Cover the dough completely with more cornstarch and roll it until flat (about 2 mm thick).
Pro Tip: Whenever you feel the dough get too sticky, add more of the cornstarch. Be prepared to work quickly as mochi dough becomes less flexible and harder to work with the longer it sits.

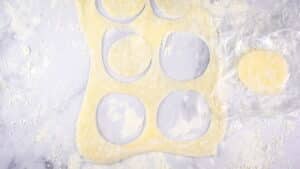
Step 5. Cut into circles. Cut circles out of the dough using a cookie cutter. Pile the circles on top of each other, separating them with plastic wrap so they don't stick (add more cornstarch if needed). You should get approximately 10 circles in total.
Pro Tip: You can combine the cut outs and roll them together again to make new circles.
Chef's Note: I use a cutter that has a diameter of 11 cm (4.5 inches).

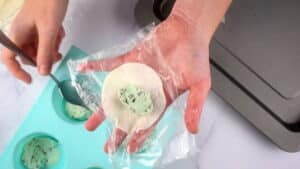
Step 6. Add ice cream to dough. Scoop an ice cream portion out and place it over one of the dough circles.

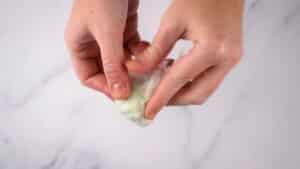
Step 7. Close it up. Close the circle with the help of the plastic wrap and place it on a tray. Repeat for the rest of them.

Step 8. Freeze. Freeze for 30 more minutes.

Step 9. Serve. Remove the plastic wrap and serve!
Joss' Top Tips
- I recommend working in a cool kitchen for best results, so that the ice cream doesn't melt too quickly.
- The great thing about this recipe is just how customizable it is, though. Mochi ice cream flavors are pretty much limitless since you can use any flavor of ice cream you like when you're making them.
- Although the color of the ice cream will show through the dough a little, you could also try adding food coloring to the dough for something a little more vibrant.
- It is possible to buy a mochi maker online. I haven't tested the use of it, therefore I can't fully recommend using it, but you might find it helpful if mochi is something you will be preparing often.
Storage
The mochi balls can be stored in the freezer for up to 3 to 4 months but make sure to cover them well and place in a freezer bag.
How to Make Mochi Ice Cream FAQs
Glutinous rice flour is flour made from 'sweet rice' or 'sticky rice'; the rice that is used in sushi. The word glutinous in its name is pertaining to the stickiness of the rice and is actually gluten free. It is very starchy and therefore works well as a thickening agent for gravies, soups etc.
It is not to be confused with regular rice flour, which is made from the common white rice. However, it can also be used in gluten-free baking.
Yes, it is made of a gluten-free rice flour dough.
You can eat mochi ice cream frozen by hand, after thawing for about one minute to let the dough soften. You can also cut it into pieces or in half, but eat it up quickly before the ice cream melts!
The taste can differ depending on the type of ice cream in the center. The dough itself has a slightly sweet taste with a neutral flavor from the rice flour.
It's a Japanese treat. It was invented by a Japanese-American business woman named Frances Hashimoto.

❤️ More Dessert Recipe Tutorials To Consider

If you tried this 📋 recipe tutorial for 🍡 How to Make Mochi Ice Cream or any other recipe on my website, please leave a 🌟 star rating and let me know how it went in the 📝 comments below. And please share the recipe!
📋Recipe
How to Make Mochi Ice Cream
Ingredients
- ¾ cup glutinous rice flour
- ¼ cup sugar
- ¾ cup water
- cornstarch - for rolling out the dough
- your favorite ice cream - mint chocolate chip, strawberry, green tea, mango, etc.
Instructions
- Scoop out the ice cream into smaller portions and place them in a muffin tin (you can use an ice cream scoop for this). Transfer to the freezer while you make the dough (this will help you work with the ice cream quicker when forming the mochi balls - instead of working with the whole container).

- Add the rice flour, sugar and water to a bowl and mix until it has dissolved completely.¾ cup glutinous rice flour, ¼ cup sugar, ¾ cup water
- Cover with plastic wrap and heat it on high heat in the microwave for 1 minute.
- Take it out and stir carefully with a spatula. Cover again and cook for 1 more minute at high heat. Stir again with the spatula and cook for 1 more minute (for a total of 3 minutes).
- Cover the work surface and your hands with cornstarch (be generous with it). Transfer the cooked mochi to the work surface. Cover the dough completely with more cornstarch and roll it until flat (about 2 mm thick).
- Cut circles out of the dough using a cookie cutter. Pile the circles on top of each other, separating them with plastic wrap so they don't stick (add more cornstarch if needed). You should get approximately 10 circles in total.
- Scoop an ice cream portion out and place it over one of the dough circles.
- Close the circle with the help of the plastic wrap and place it on a tray. Repeat for the rest of them.
- Freeze for 30 more minutes.
- Remove the plastic wrap and serve!

Notes
- Cutter Size: I use a cutter that has a diameter of 11 cm (4.5 inches).
- Temperature Tip: I recommend working in a cool kitchen for best results, so that the ice cream doesn't melt too quickly.
- Food Coloring Option: Although the color of the ice cream will show through the dough a little, you could also try adding food coloring to the dough for something a little more vibrant.
- Scoop Tip: There isn't an exact amount of ice cream to use. You can use a spoon or cookie scoop to scoop the amount that fits into the mochi dough circle.
- Serving Suggestion: You can eat mochi ice cream frozen by hand, after thawing for about one minute to let the dough soften. You can also cut it into pieces or in half, but eat it up quickly before the ice cream melts!
- Storage: The mochi can be stored in the freezer for up to 3 to 4 months but make sure to cover it well and place in a freezer bag.
- Gluten: This treat is gluten free!
Nutrition
Nutrition information on In the Kitch is provided as a courtesy and is an estimate only. It may not include toppings and/or sauces.

Joss says
This is such a fun, unique and tasty treat!
Megan says
Mint mochi ice cream recipe
Lisa says
Thanks for the recipe and for the detailed explanations! I'm definitely going to give this a try!
Joss D says
No problem, good luck and enjoy Lisa!
Colleen says
Although I love mochi as a treat, I've never made it. You make it look so easy, and I like the step by step instructions. Saving to give it a try!
Joss D says
Thanks Colleen! It's a delicious little treat and fun to make. I'm glad you find the step by step easy to follow.