In the Kitch

menu icon
go to homepage
  • Patriotic Recipes
  • Recipe Index
  • Guides
  • Tutorials
  • Subscribe
    • Facebook
    • Pinterest
    • YouTube
  • search icon
    Homepage link
    • Patriotic Recipes
    • Recipe Index
    • Guides
    • Tutorials
    • Subscribe
    • Facebook
    • Pinterest
    • YouTube
  • ×
    In the Kitch » Recipes

    Leek & Potato Soup

    January 9, 2019 by Joss Dyckson Leave a Comment

    Soups are the perfect food for when you want to feel indulgent, but remain healthy at the same time. They are warm, comforting, and delicious. Leek and potato soup is an especially comforting recipe that incorporates the crispness of frizzled leeks with the hearty and reliable potato.

    Leek and potato soup in white square soup bowl on wooden background.
    [feast_advanced_jump_to]

    🥘 A Cozy & Comforting Soup

    With just six ingredients, you cannot go wrong on a cool fall or winter day with this simple yet delectable soup.

    This potato and leek soup recipe adds texture with the simple to make frizzled leeks and a chicken broth adds depth of flavor to this veggie heavy dish.

    It's a great way to warm your home and keep everyone full and coming back for seconds. As with most homemade soup recipes, it is easy to prepare, then keep warm until you are ready to serve.

    I also make these hot soups that I think you'll love: red lentil and dill soup, mango soup and homemade roasted tomato soup.
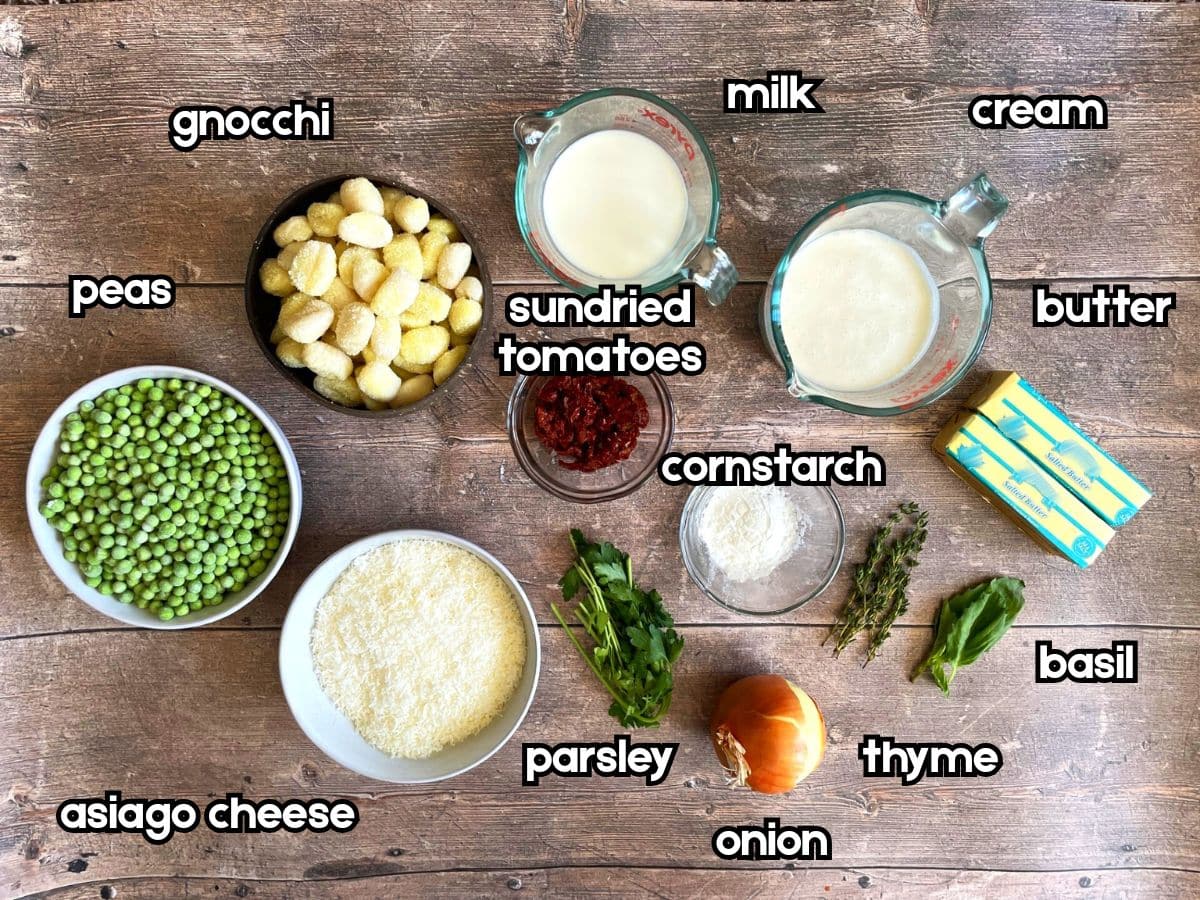
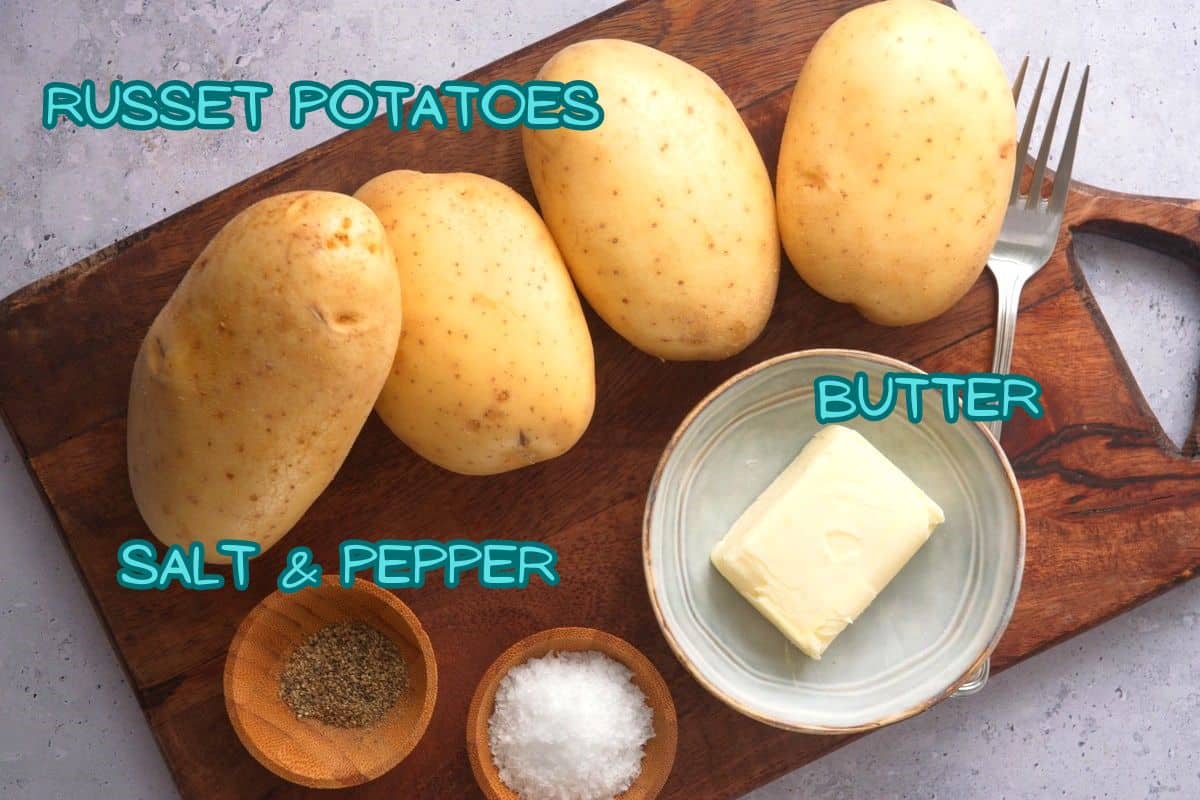
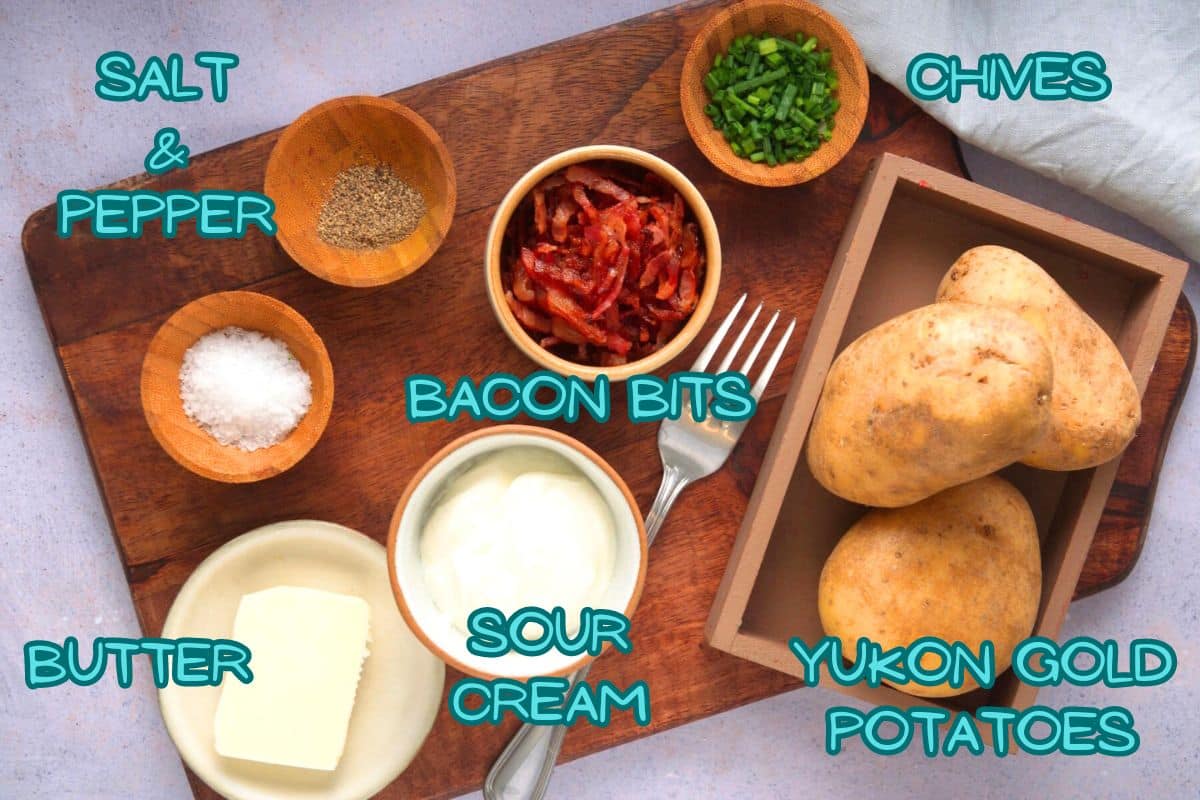
    🥔 Ingredients

    Leek potato soup ingredients labeled.
    • large leeks - As seen in the picture above, leeks have a long, cylindrical shape with a white base and green, leafy tops. They have a mild, sweet, and onion-like flavor, but they are less pungent than onions.
    • yellow onions - The flavor of onions deepens as they cook, adding a rich, comforting base to the potato soup.
    • chicken broth - Looking for a vegetarian or vegan option? There is no cream in this recipe so it can easily be modified with a vegetable based broth to make it vegan-friendly.
    • Yukon Gold potatoes - (Also known as yellow potatoes.) Yukon Gold potatoes have a thin skin and so peeling them is optional. You can try using different types of potatoes to vary the soup from one batch to another. I personally like the yellow (Yukon Gold) potato variety and use it in most of my recipes (such as this potato galette). Russets are an easy choice for this soup as well.

    *Check recipe card for ingredient amounts.

    🔪 How to Make Leek and Potato Soup

    For the Soup

    Sliced leeks in bowl of cold water.

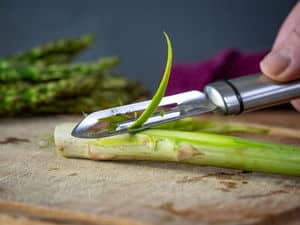
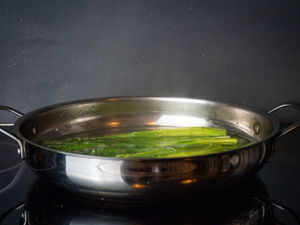
    Step 1. Prep the Leeks. Remove the roots, outer leaves, and tops from the leeks. Thinly slice the white and light green parts of the leek. Rinse in a bowl of cold water and then drain.

    Sliced leeks and onions in pot.

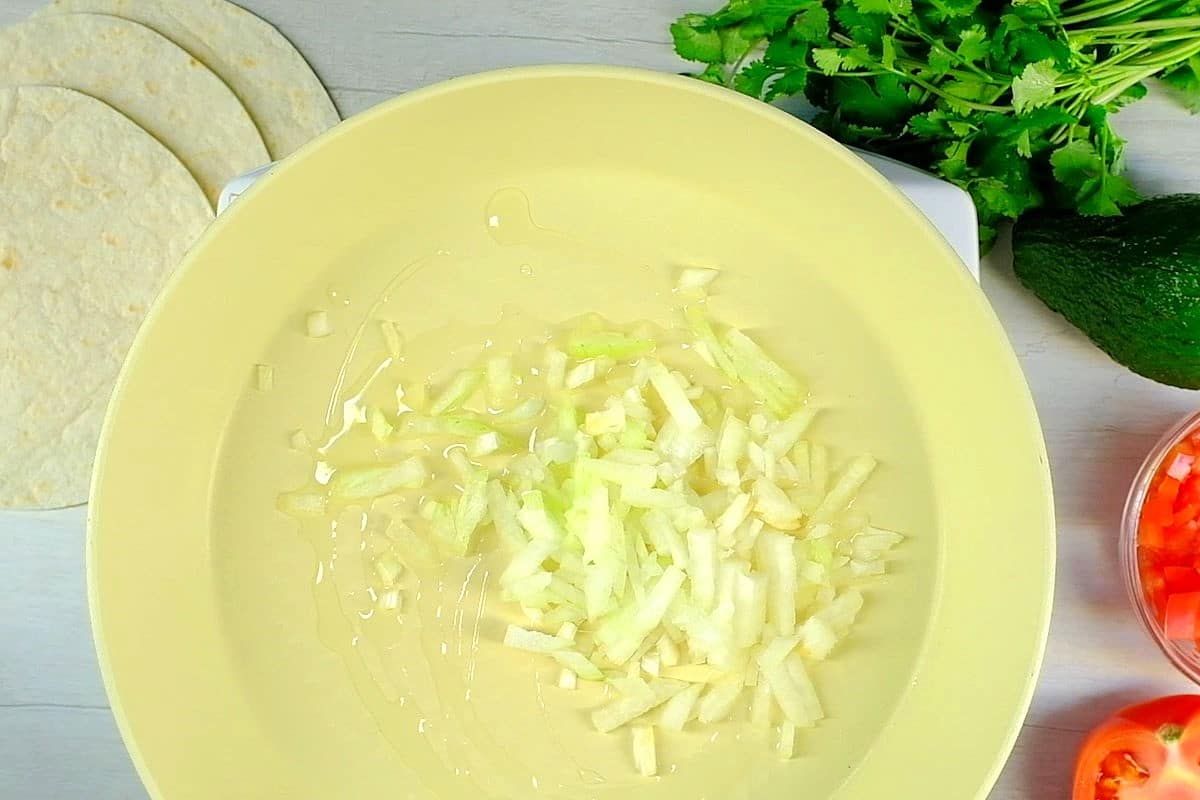
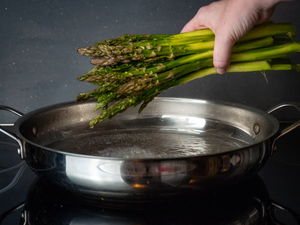
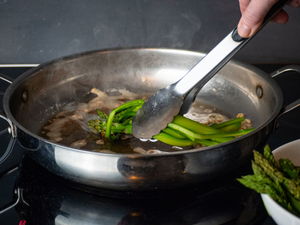
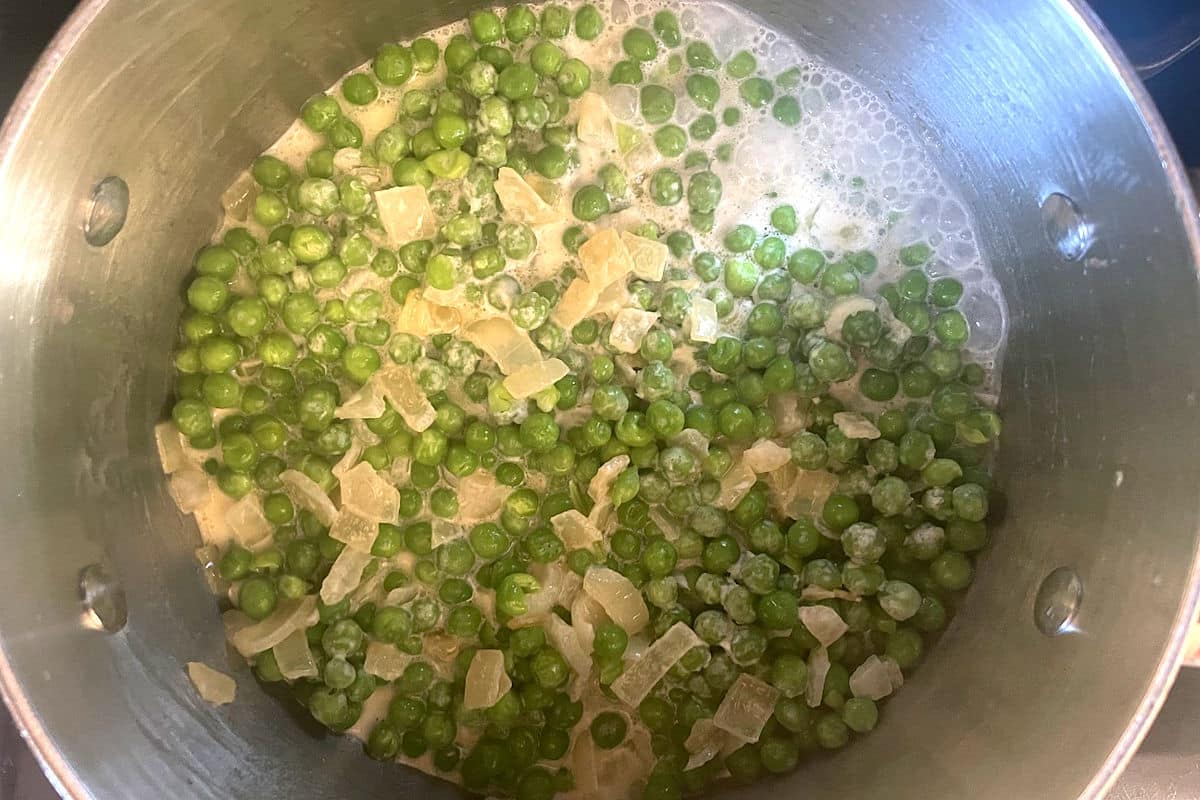
    Step 2. Cook Leeks. Heat oil in a large saucepan over medium heat. Add the leeks, onions and garlic. Mix them around in the oil and then lower the heat to medium-low. Partially cover, and cook for 15 minutes, stirring occasionally.

    Potato leek soup cooking in pot.

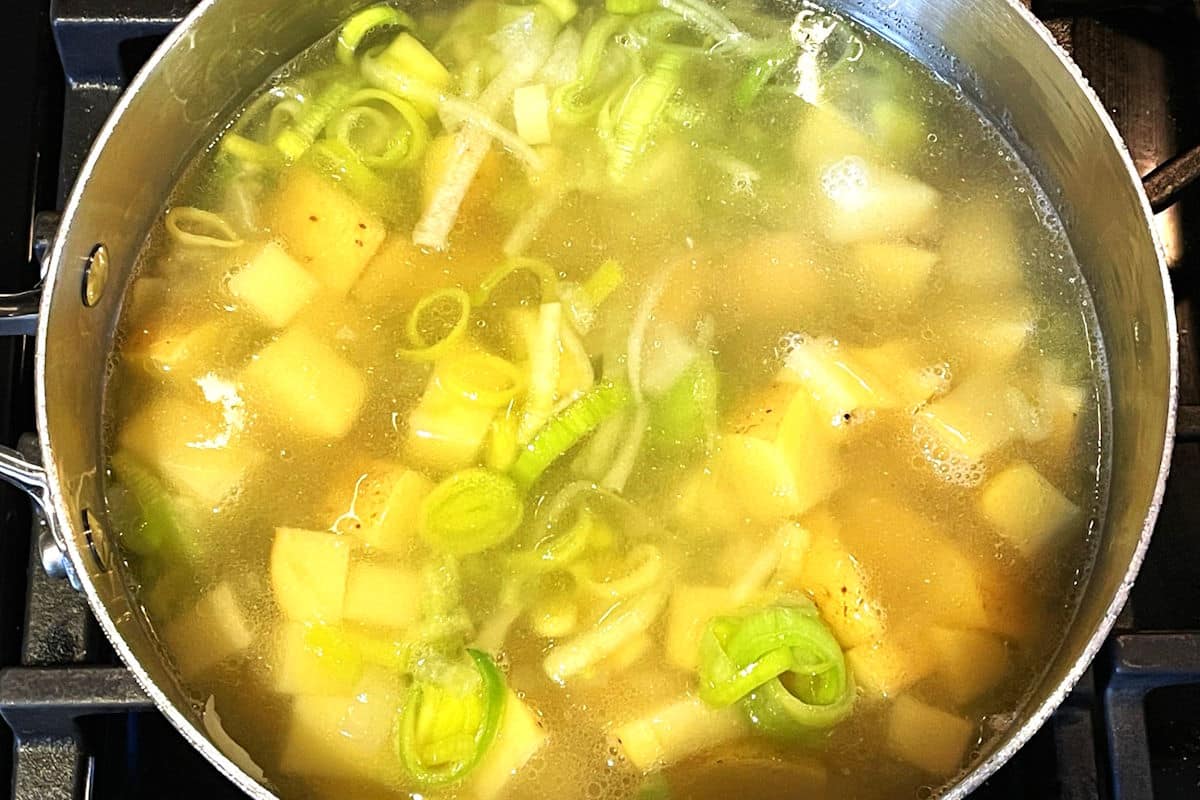
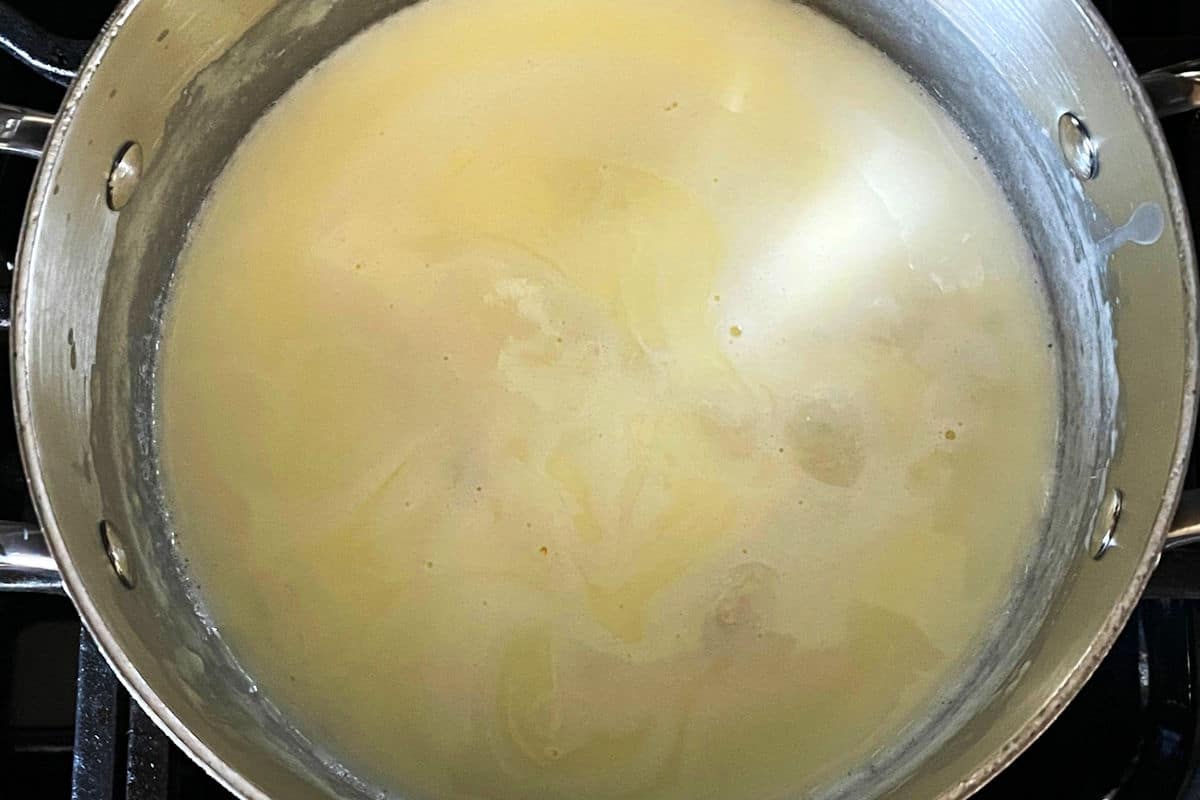
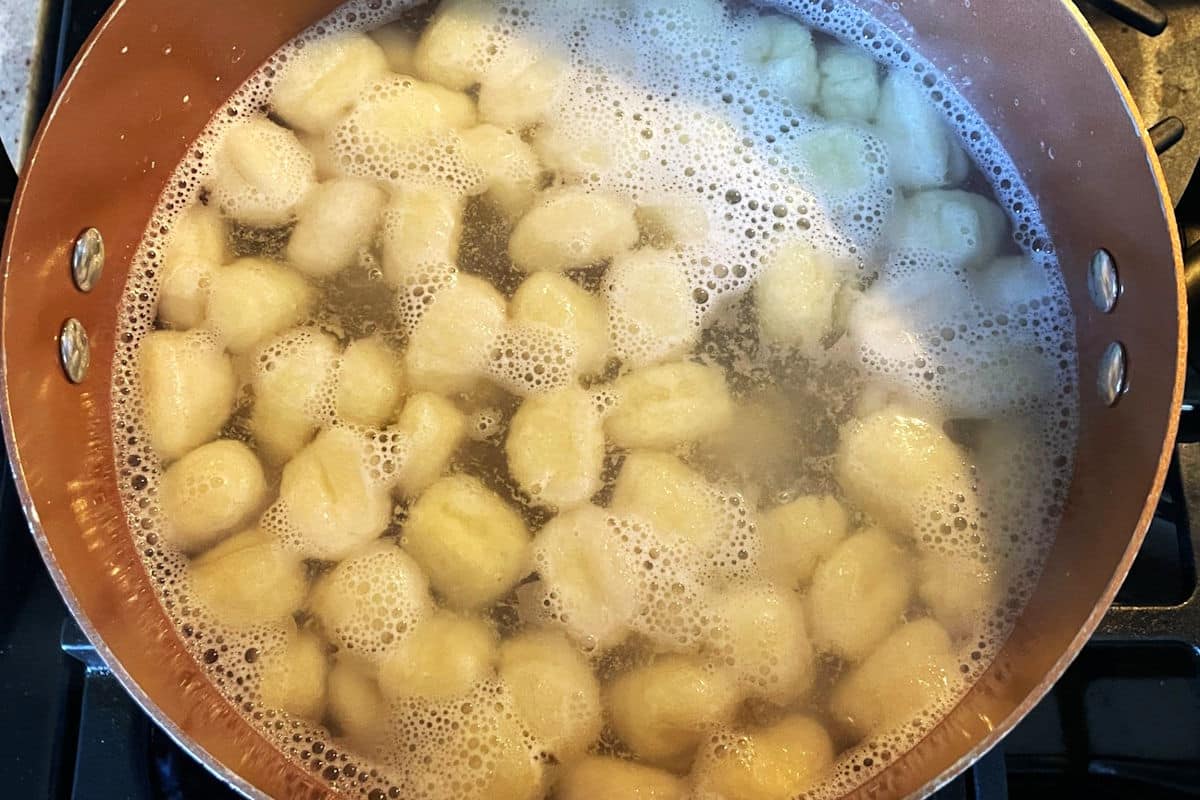
    Step 3. Add Broth. Add the broth and potatoes to the pot and bring to a boil over medium-high heat. Cover, reduce heat, and simmer until the potatoes are soft (about 10 minutes).

    Potato leek soup getting blended with immersion blender in pot.

    Step 4. Blend. Make a purée with an immersion blender until the soup is smooth. Season with salt and pepper, to taste.

    Leek and potato soup in white square soup bowls with spoons on the side.

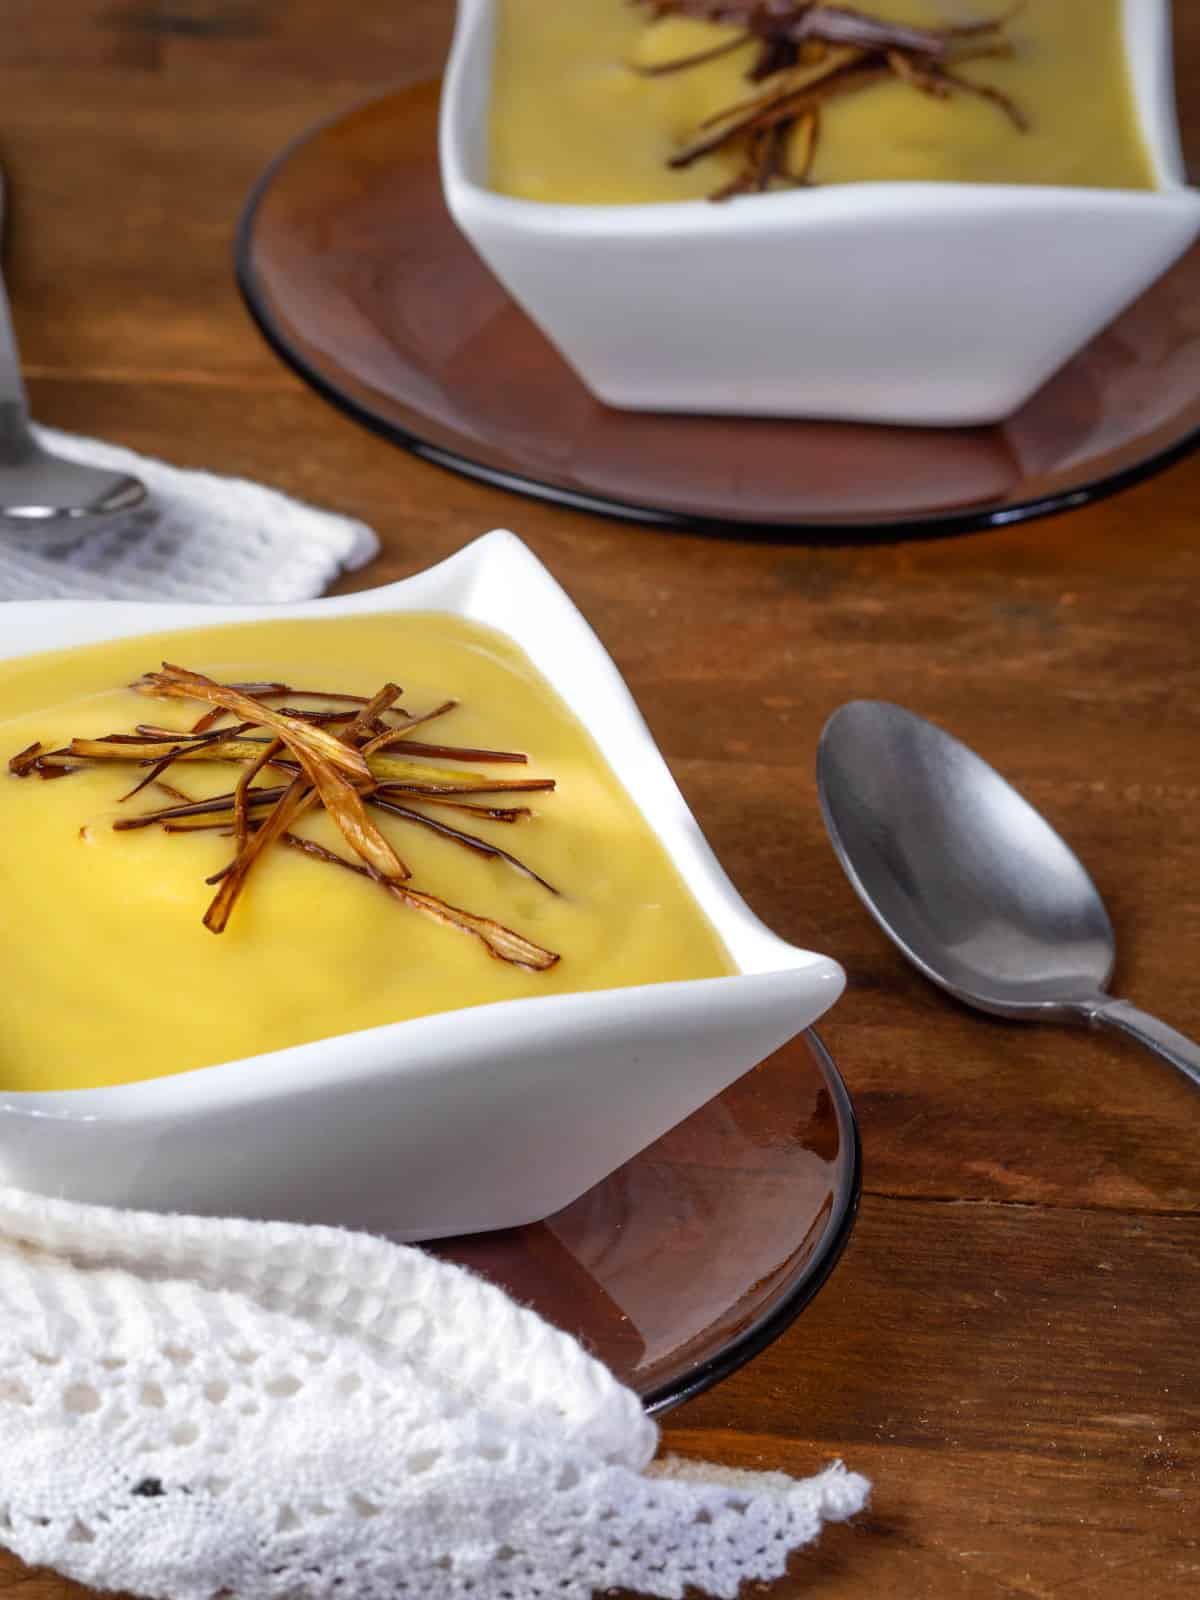
    Step 5. Serve. Serve the leek and potato soup with the frizzled leeks topping.

    For the Frizzled Leeks

    Sliced, cleaned leeks in colander.

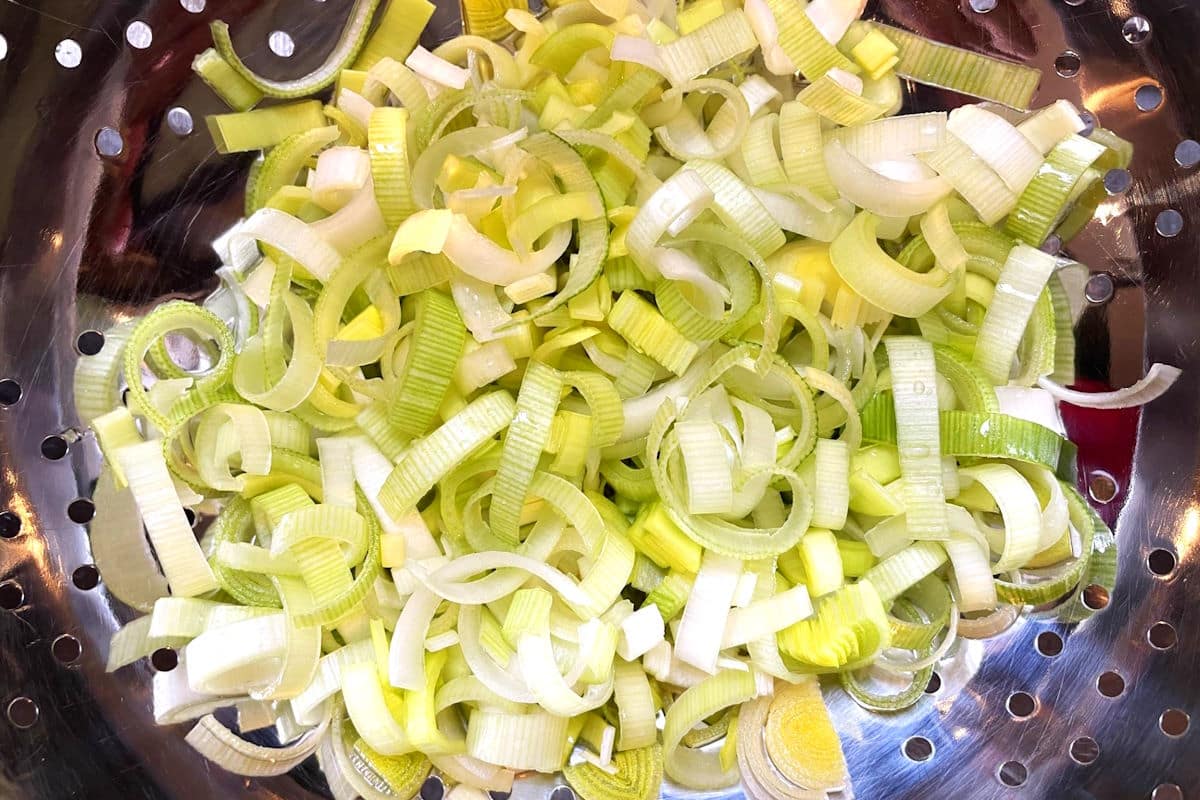
    Step 1. Clean Leeks. Remove the roots, outer leaves, and top from the leek. Cut it in half lengthwise and then into slices. Rinse them in a bowl of water to remove any dirt. Drain and pat dry.

    Sliced leeks in frying pan.

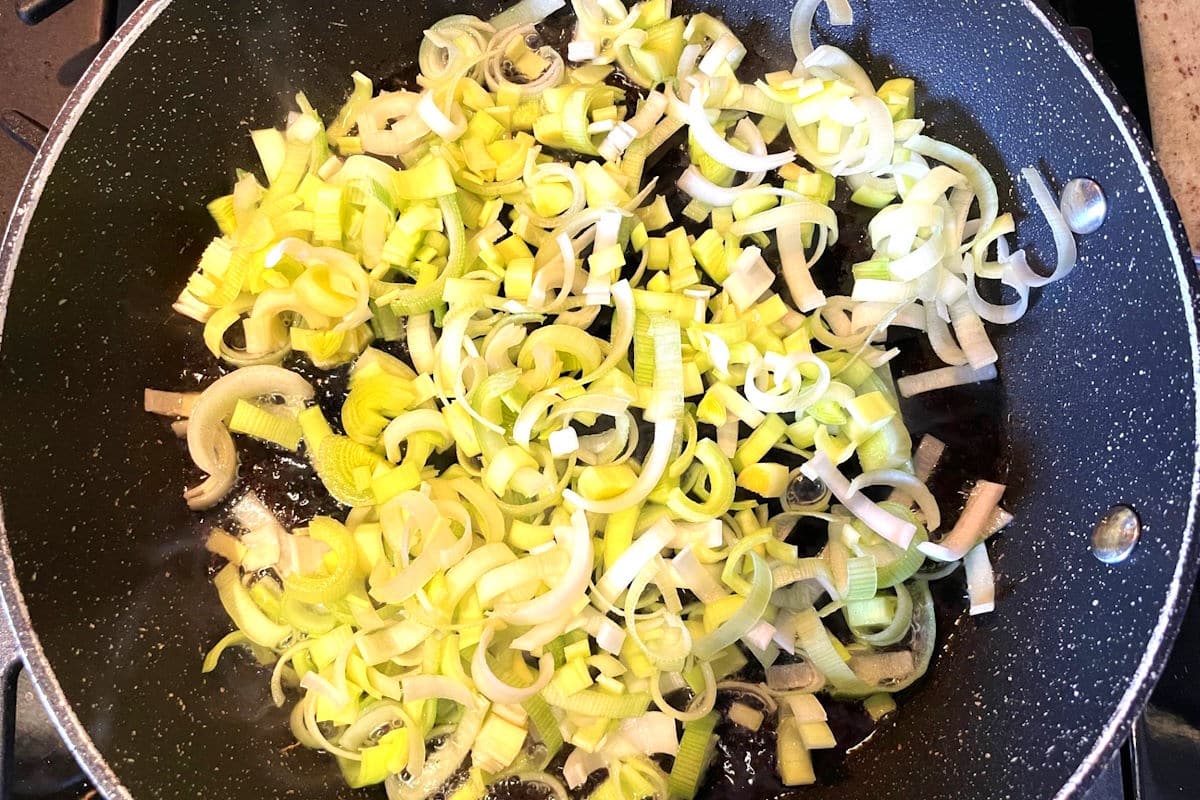
    Step 2. Fry the Leeks. In a small non-stick frying pan, heat the canola oil over medium-high heat. Add the leeks to the oil. Fry the leeks, stirring constantly, until the leeks are golden brown (about 5 to 7 minutes).

    Chef's Note: For the frizzled leeks, instead of slicing them width-wise, you can also choose to slice them into 3" long strips.

    Frizzled leeks on paper towel.

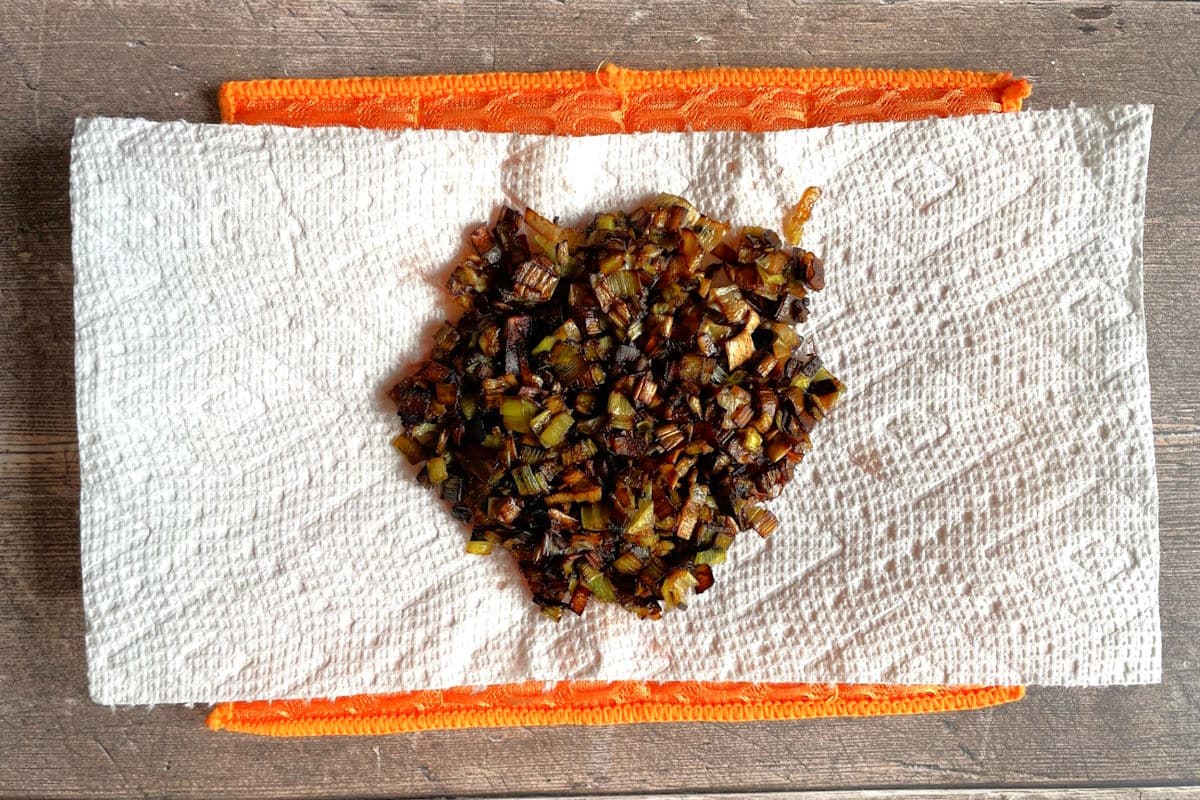
    Step 3. Remove Oil. Remove the frizzled leaks to a bowl with paper towel to remove excess oil. Use them as a topping for the soup.

    ✔️ Joss' Tips

    • This soup also makes for great leftovers and reheats well. If you ended up freezing your soup, thaw it in the fridge overnight before you reheat it on the stove.
    • Make sure you clean the leeks very well so that you aren't left with a gritty soup from the dirt that ends up caught between the layers.
    • The frizzled leeks add a full-bodied flavor to the puréed soup; just consider making a fresh batch of frizzled leeks when preparing on day two or three. They can also make a great topping for salads.

    🍞 Side Suggestions

    Here is a list of some great side dish options for your soup.

    • Bread: Toast points, crusty bread, garlic bread, bread sticks, pretzel rolls etc.
    • Salads: Green salad, Caesar salad, hemp seed salad and spinach salad.
    • Sandwiches: Kimchi grilled cheese sandwiches, blackened chicken sandwich, turkey or ham sandwiches and paninis.
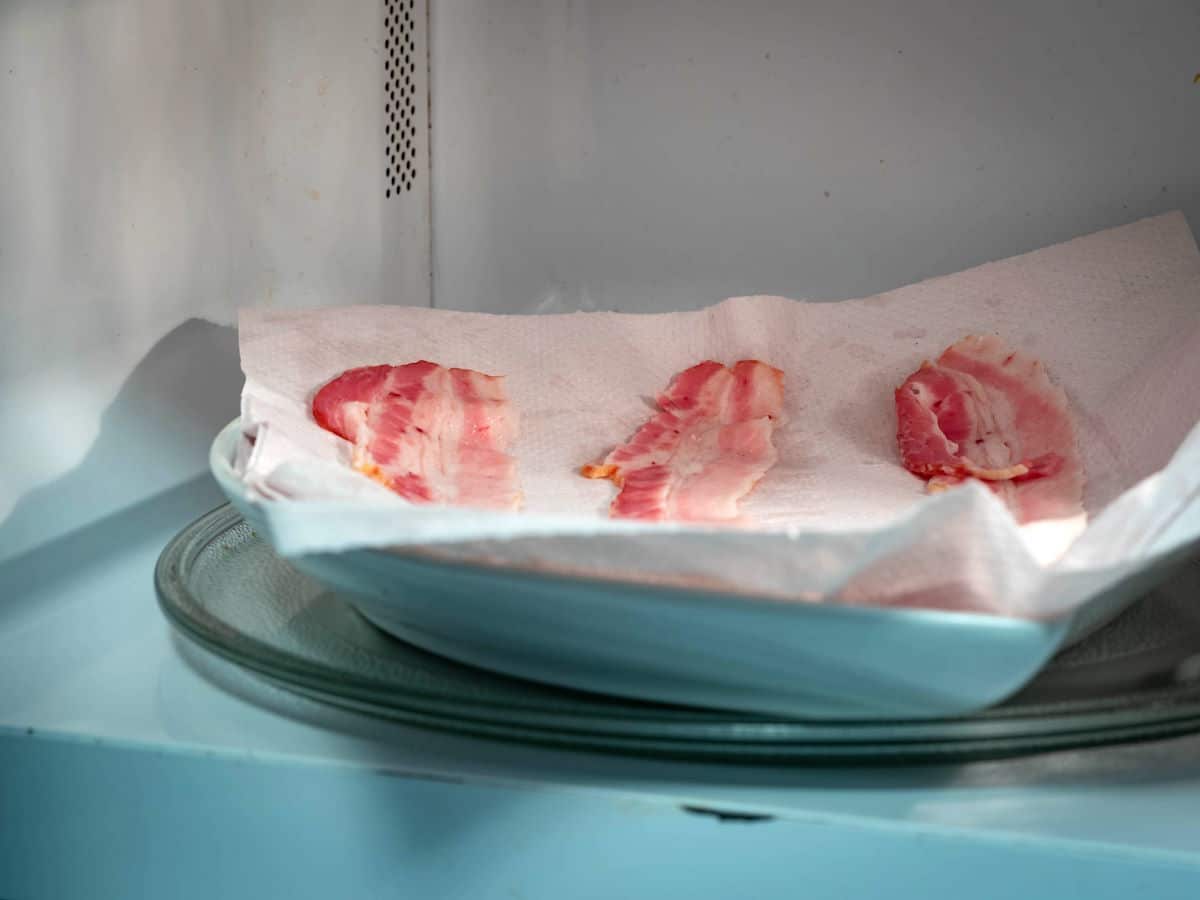
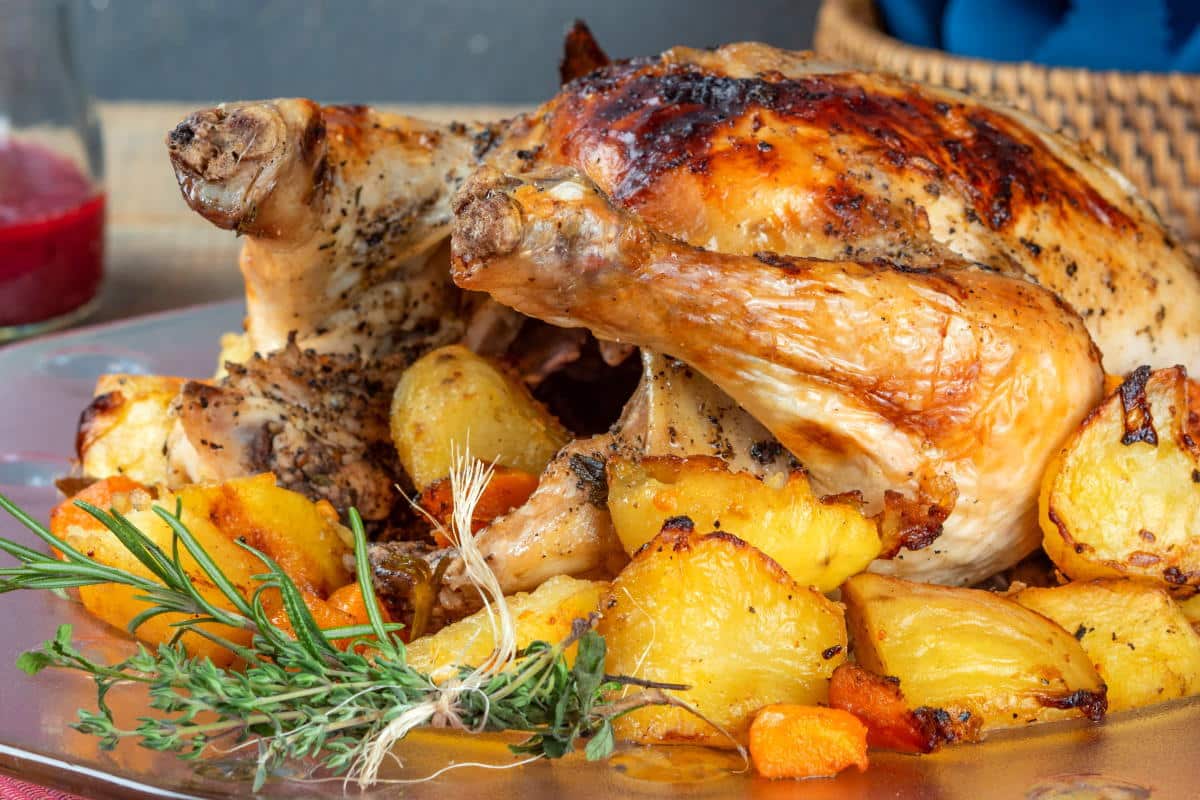
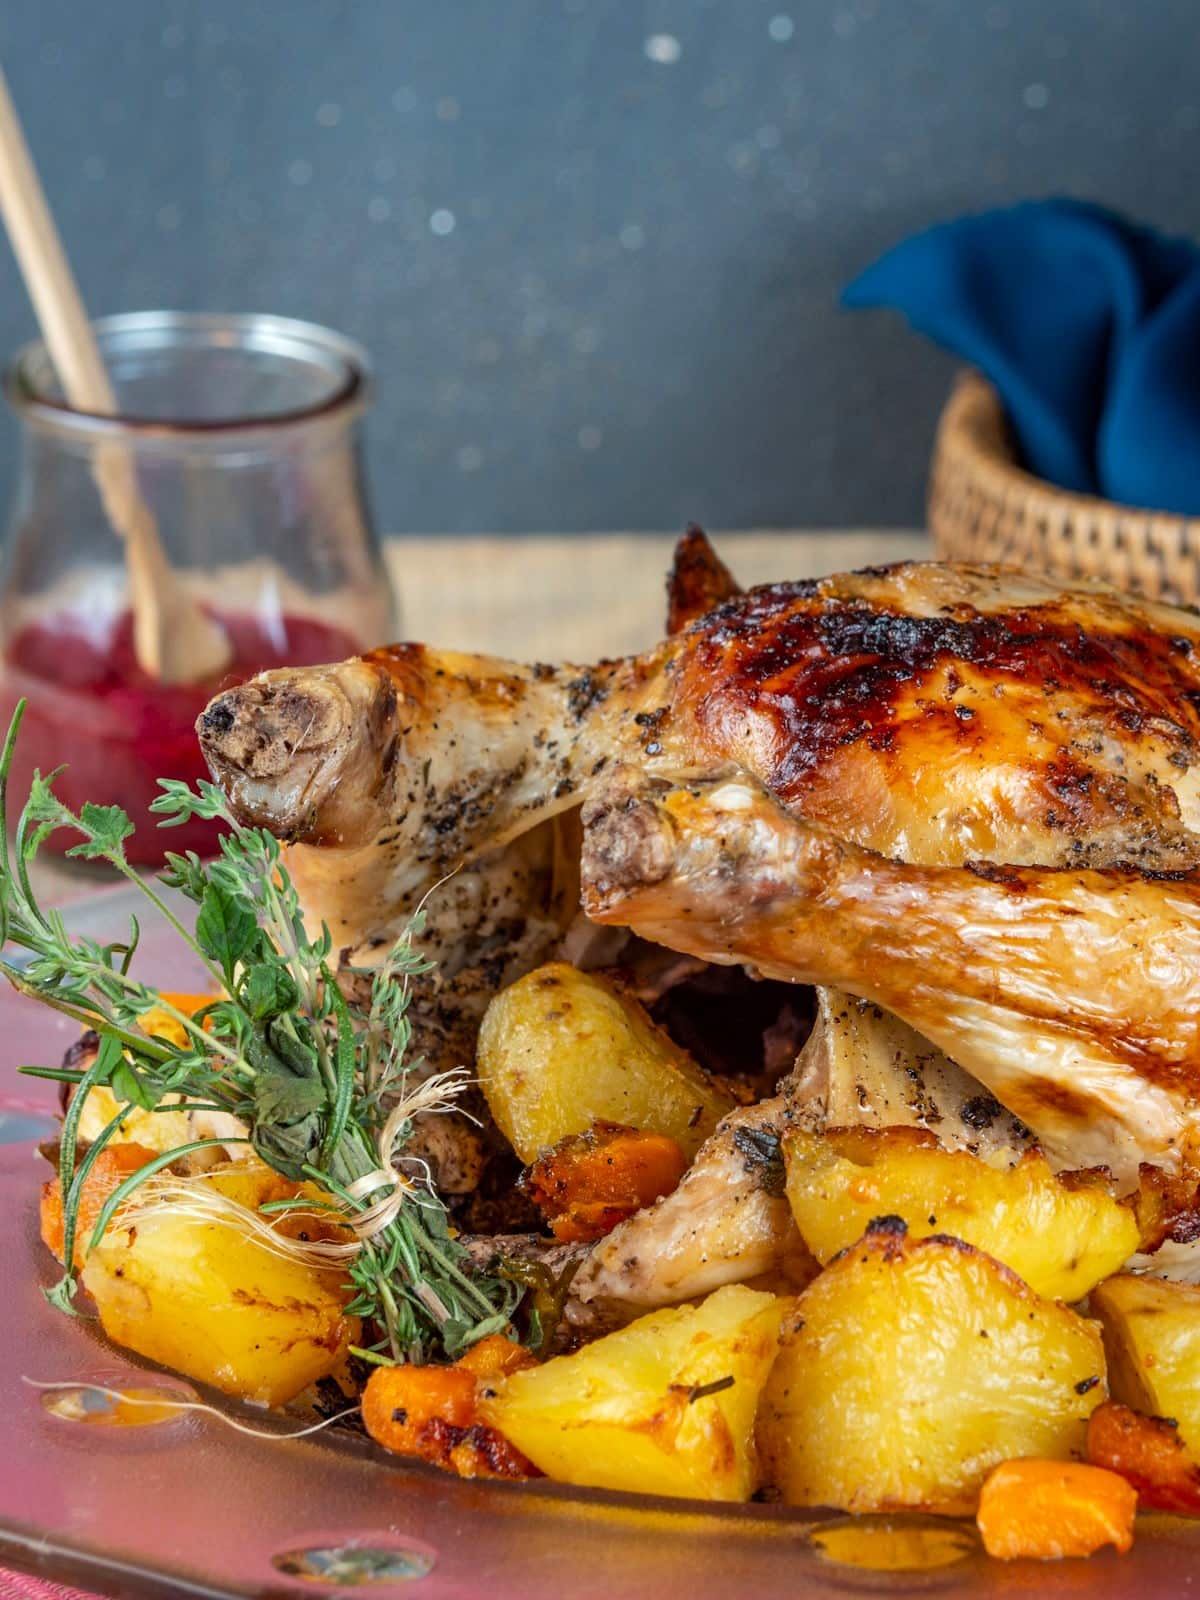
    • Proteins: Roasted chicken or bacon bits.
    • Drinks: White wine such as sauvignon blanc, herbal tea or sparkling water.

    ❓ Recipe FAQs

    How long do leftovers last in the fridge?

    The soup can be stored in the fridge in an airtight container for up to 5 days.

    Can you freezer leftover potato and leek soup?

    Yes! It can be stored in the freezer for up to 6 months, but make sure it cools down first.

    Why does my leek and potato soup taste bitter?

    Leeks can develop bitterness if they are overcooked or exposed to high temperatures. Also, using the green sections of the leek, which are tougher and more intense in flavor, can also cause some bitterness.

    Why is my potato leek soup gummy?

    Potatoes, if over-mashed or over-blended, release their starches and this results in a sticky, gluey texture. Blend until they are just so smooth, then stop to avoid a gloopy mess.

    What if my leek and potato soup is too thick?

    If it's too thick after you've puréed it, simply add some more broth until it's the right consistency for you and let it reheat.

    Leek and potato soup in white square soup bowls on wooden background.

    ❤️ More Soup Recipes You Will Love

    • Peanut butter soup in a speckled bowl.
      Peanut Butter Soup
    • Beef and cabbage soup in blue soup bowl.
      Hearty Beef & Cabbage Soup
    • Creamy pumpkin soup in soup bowls.
      Savory Creamy Pumpkin Soup
    • Tom yum soup with shrimp in bowls.
      Thai Tom Yum Seafood Soup

    If you tried this Leek and Potato Soup Recipe or any other recipe on my website, please leave a 🌟 star rating and let me know how it went in the 📝 comments below. And please share the recipe!

    📋Recipe

    Leek and potato soup in a white bowl.
    Print Pin
    5 from 1 vote

    Leek and Potato Soup (w/ Frizzled Leeks)

    This leek and potato soup is a tasty, comforting recipe that incorporates the crispiness of frizzled leeks with the hearty potato.
    Course Soup
    Cuisine American
    Prep Time 10 minutes minutes
    Cook Time 30 minutes minutes
    Total Time 50 minutes minutes
    Servings 4
    Calories 317kcal
    Author Joss Dyckson

    Ingredients

    For the Leek Potato Soup

    • 2 large leeks
    • 2 tablespoons canola oil
    • 1 cup yellow onions chopped
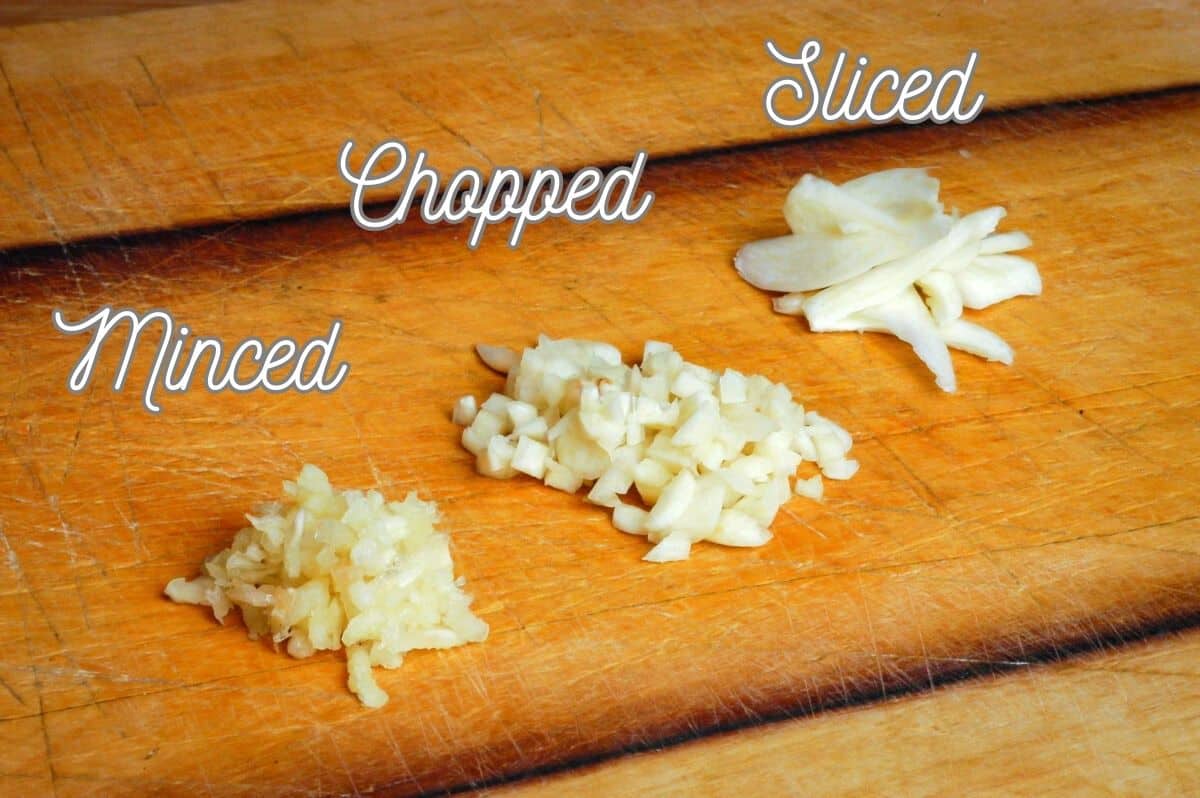
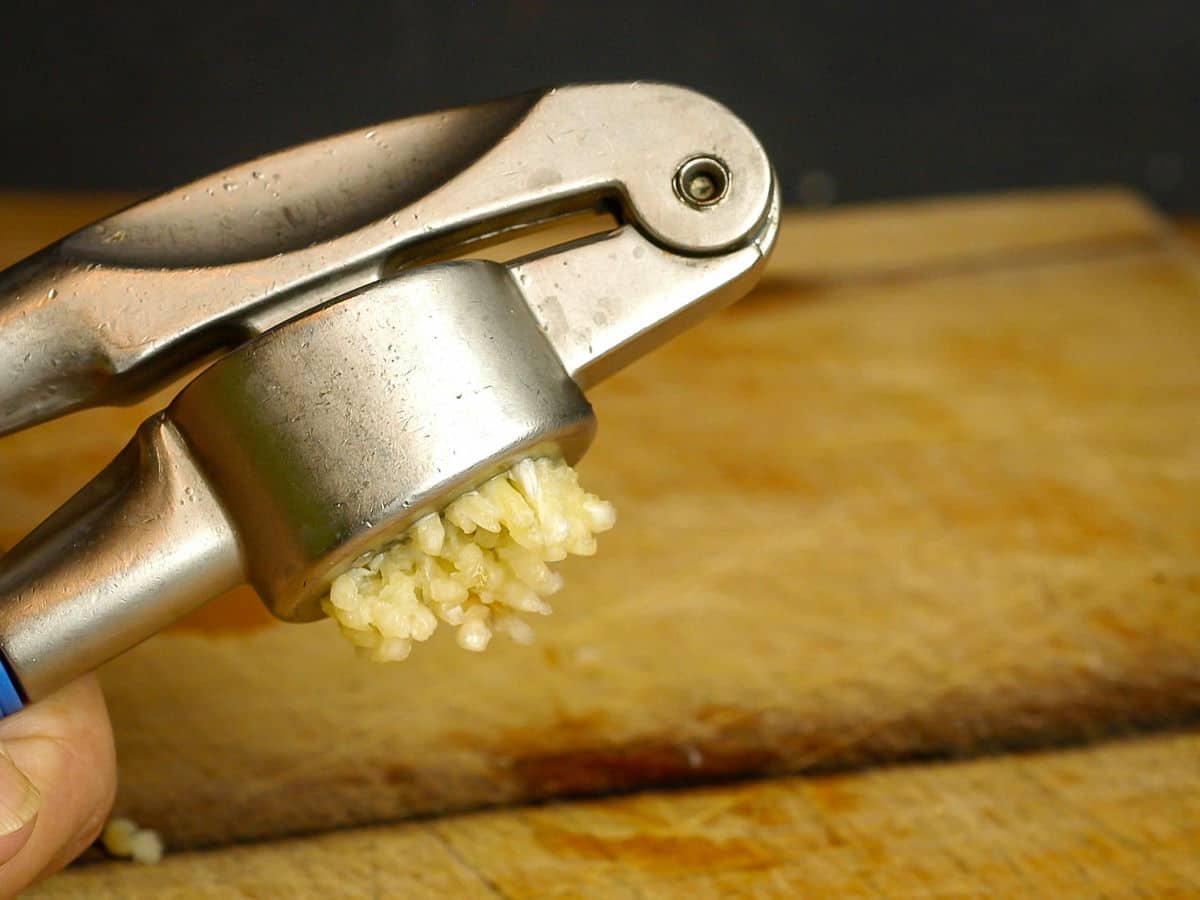
    • 2 garlic cloves minced
    • 4 cups chicken broth
    • 4 cups Yukon gold potatoes cleaned and cubed
    • salt and pepper to taste

    For the Frizzled Leeks

    • 1 leek
    • 2 tablespoons canola oil
    US Customary - Metric

    Instructions

    For the Soup

    • Remove the roots, outer leaves, and tops from the leeks. Thinly slice the white and light green parts of the leek. Rinse in a bowl of cold water and then drain.
    • Heat oil in a large saucepan over medium heat. Add the leeks, onions and garlic. Mix them around in the oil and then lower the heat to medium-low. Partially cover, and cook for 15 minutes, stirring occasionally.
    • Add the broth and potatoes to the pot and bring to a boil over medium-high heat. Cover, reduce heat, and simmer until the potatoes are soft (about 10 minutes).
    • Make a purée with an immersion blender until the soup is smooth. Season with salt and pepper, to taste.
    • Serve with the frizzled leeks.

    For the Frizzled Leeks

    • Remove the roots, outer leaves, and top from the leek. Cut it in half lengthwise and then into slices. Rinse them in a bowl of water to remove any dirt. Drain and pat dry.
    • In a small non-stick frying pan, heat the canola oil over medium-high heat. Add the leeks to the oil. Fry the leeks, stirring constantly, until the leeks are golden brown (about 5 to 7 minutes).
    • Remove the frizzled leaks to a bowl with paper towel to remove excess oil. Use them as a topping for the soup.

    Notes

    • Yukon Gold potatoes have a thin skin and so peeling them is optional.
    • For the frizzled leeks, instead of slicing them width-wise, you can also choose to slice them into 3" long strips.
    • For a thicker soup, you can use a couple more potatoes.
    • The soup makes for great leftovers and reheats on the stove well. The soup can be stored in the fridge in an airtight container for up to 5 days. It can also be stored in the freezer for up to 6 months, but make sure it cools down first.
    • Looking for a vegetarian or vegan option? This recipe can be easily modified with a vegetable based broth.
    • If it's too thick after you've puréed it, simply add some more broth until it's the right consistency for you and let it reheat.
    • Potatoes, if over-mashed or over-blended, release their starches and this results in a sticky, gluey texture. Blend until they are just so smooth, then stop to avoid a gloopy mess.

    Nutrition

    Calories: 317kcal | Carbohydrates: 56g | Protein: 8g | Fat: 8g | Saturated Fat: 1g | Polyunsaturated Fat: 2g | Monounsaturated Fat: 4g | Trans Fat: 0.03g | Cholesterol: 5mg | Sodium: 901mg | Potassium: 1223mg | Fiber: 7g | Sugar: 7g | Vitamin A: 1123IU | Vitamin C: 58mg | Calcium: 89mg | Iron: 4mg

    How to Make Gummies at Home

    January 7, 2019 by Joss Dyckson 2 Comments

    With only a few ingredients and steps, anyone can learn how to make gummies at home. This low-hassle recipe could be a rainy-day activity to do with kids or whenever you're craving a sweet, homemade treat.

    Green homemade gummies on plate.

    Gummies are a favorite sweet treat of kids and adults alike. While it can be convenient just to grab a bag of them off the supermarket shelf, making your own gummies at home can be surprisingly easy.

    I personally love snacking on Haribo gummies for their chewiness and I tried making these gummies similar in texture.

    I also make these candy recipes that I think you'll like: strawberry flavored candy, chocolate covered coffee beans and homemade chocolate caramel bars.

    [feast_advanced_jump_to]

    Gummy Ingredients

    Gummy ingredients prepped on wooden table.
    • Jello powder - Pick your favorite flavor. I use 4 of the 85 gram packages.
    • unflavored gelatin powder - Also spelled gelatine.
    • warm water - To help dissolve the powders.
    • vegetable oil - This is used to lightly grease the mold and help the gummies to release once they are set.

    *Check recipe card for ingredient amounts.

    Chef's Note: Gummies are typically made with a liquid like water or juice, flavor, sugar and gelatin. In this recipe, Jello powder provides most of these components, but water and extra gelatin are added to help them set up.

    Equipment

    While there isn't much equipment involved, you will need a candy mold of your choosing.

    Tweaks

    • Vegan: You can choose a gelatin alternative that is vegetarian and vegan friendly like agar agar or Vegan Jel. You can see and control exactly what goes into your snack.
    • Alcoholic: Why not spike them with a bit of booze for an adult twist? Just remember to clean your dishes before making a second flavor.
    • Mold shape: This recipe is simple, but allows room for lots of creativity. While bears are the most well-known gummy candy shape, you don't have to be limited by it. There are loads of different shaped silicone trays available for you to have fun with.
    • Flavor: You can choose any flavors you want. There are many different jelly flavors, and you can even try a sugar free alternative.

    Instructions

    Gelatin and Jello powder in small bowl with wooden spoon.

    Step #1. Mix the Powders Together. Mix the Jello powder with the unflavored gelatin in a small bowl.

    Green jello powder and warm water in small bowl.

    Step #2. Add Warm Water. Add the warm water to the powders.

    COOKING TIP: If you prefer sour gummies, try adding up to 2 teaspoons of food grade citric acid with the powders.

    Green Jello powder and warm water in small bowl with wooden spoon.

    Step #3. Mix Well. Mix carefully using a spoon, making sure that it has dissolved completely.

    Homemade gummy mixture pouring into blue candy mold.

    Step #4. Pour into Mold. Very lightly oil your favorite shaped silicone molds with vegetable oil. Place the molds on a baking sheet and use a dropper or measuring cup with a spout to pour the mixture into the molds.

    Pro Tip: You want to mix slowly to avoid creating bubbles.

    Chef's Note: There are many molds that come with the droppers. If you have a small mold, I would suggest using the dropper. They make it a lot easier to transfer the liquid.

    Green gummies on cutting board and in mold.

    Step #5. Chill. Transfer the gummy mold on the baking sheet to the refrigerator and chill for 12 hours or overnight (until they have fully set). Remove the sweets from the mold.

    Green homemade gummies on wooden cutting board.

    Step #6. Serve. The gummies are ready to be eaten!

    Top Tip

    If you want your gummies to be more chewy, after they have been refrigerated, lay them out on wax paper or a baking rack and allow them to air-dry for a day or two. They will become firmer and chewier!

    Storage

    • In the cupboard: The gummies can be stored in an air-tight container in a cool, dark place like a cupboard or pantry. They should last up to 3 to 5 days.
    • In the fridge: You can also store them in the refrigerator for up to 2 weeks.

    Recipe FAQs

    What are the main ingredients in gummies?

    You will need a sweetener, flavor, gelatin (the most important ingredient), water and color, if desired. You can buy jelly powders that include all of these ingredients together.

    How do you make homemade gummies that don't melt?

    Tossing the gummies with a touch of cornstarch is one way to help prevent them from melting/sticking. Also, keep them in a cool and dry area like a cupboard or pantry.

    Why do gummies need gelatin?

    Gelatin is what thickens and gels the liquid, giving you that classic chew you get from a good gummy.

    Green homemade gummies stacked on plate.

    More Cooking Tutorials to Consider

    • Melted brie cheese in cast iron pan.
      How to Bake Brie Cheese
    • 4 colors of coffee beans on wooden board with a mug of coffee on the side.
      How to Roast Coffee Beans
    • Cake mix cake pops in small pails with sprinkles on top.
      How to Make Cake Pops with Cake Mix
    • Vanilla bean powder in small dish with spoon.
      How to Make Vanilla Powder

    What kind of gummy flavor is your favorite? If you tried this recipe tutorial for 🍬 How to Make Gummies at Home or any other recipe on my website, please leave a 🌟 star rating and let me know how it went in the 📝 comments below. And please share the recipe!

    📋Recipe

    Green homemade gummies on cutting board.
    Print Pin
    5 from 1 vote

    How to Make Gummies at Home

    Gummies are a favorite sweet treat of kids and adults alike. While it can be convenient just to grab a bag of them off the supermarket shelf, making your own gummies at home can be surprisingly easy.
    Course Snack
    Cuisine American
    Prep Time 15 minutes minutes
    Chill Time 12 hours hours
    Total Time 12 hours hours 15 minutes minutes
    Servings 12
    Calories 14kcal
    Author Joss Dyckson

    Equipment

    • Candy molds
    • Dropper

    Ingredients

    • 1 cup of your favorite Jello powder 4 - 85 gram packages
    • 4 tablespoons unflavored gelatin powder
    • 2 cups warm water
    • vegetable oil to lightly grease the mold
    US Customary - Metric

    Instructions

    • Mix the Jello powder with the unflavored gelatin.
      1 cup of your favorite Jello powder, 4 tablespoons unflavored gelatin powder
      Gelatin and Jello powder in small bowl with wooden spoon.
    • Add the warm water to the powders.
      2 cups warm water
      Green jello powder and warm water in small bowl.
    • Mix slowly using a spoon, making sure that it has dissolved completely. You want to try to avoid creating bubbles.
      Green Jello powder and warm water in small bowl with wooden spoon.
    • Very lightly oil your favorite shaped silicone molds with vegetable oil. Place the molds on a baking sheet and use a dropper or measuring cup with a spout to pour the mixture into the molds.
      Homemade gummy mixture pouring into blue candy mold.
    • Refrigerate for 12 hours or overnight (until they have fully set), and remove the sweets from the mold. At this point, they can be eaten. If you want the gummies to be more chewy, lay them out on wax paper or a baking rack and allow to air-dry for a day or two. They will become chewier.
      Green gummies on cutting board and in mold.
    • Serve!
      Green homemade gummies on wooden cutting board.

    Notes

    • Storage: The gummies can be stored in an air-tight container at room temperature. They should last up to 3 to 5 days. You can also store them in the fridge for up to two weeks.
    • Sour Gummies: If you prefer sour gummies, try adding up to 2 teaspoons of food grade citric acid.
    • Mold Shape: While bears are the most well-known gummy candy shape, you don't have to be limited by it. There are loads of different shaped silicone trays available for you to have fun with.
    • Jello Flavor: You can choose any flavors you want. There are many different jelly flavors, and you can even try a sugar free or vegetarian alternative.

    Nutrition

    Calories: 14kcal | Carbohydrates: 2g | Protein: 2g | Fat: 0.003g | Saturated Fat: 0.002g | Monounsaturated Fat: 0.002g | Sodium: 15mg | Potassium: 0.5mg | Sugar: 2g | Calcium: 3mg | Iron: 0.03mg

    Cheesecake Cake Pops

    January 2, 2019 by Joss Dyckson Leave a Comment

    Cake pops are one of the most delicious and fun baking trends. They take everything we love about cake and add it to the ease of a lollipop. The next step in the cake pop world: cheesecake cake pops. They are easier to make than regular pops, take less time and use only 3 ingredients!

    Cheesecake cake pops in stand with a bite taken out of one.
    [feast_advanced_jump_to]

    🥥 Bite-Sized Cheesecake Bliss: Rich, Creamy, and Coconutty

    These dark chocolate-coconut cheesecake pops blend delicious grown-up flavors with a fun and whimsical bite-size dessert. It's the perfect treat for any age!

    Before you begin, you need only pick-up or make your family's favorite baked cheesecake, then you will be ready to start rolling these yummy pops. You can form them into wedges, balls or any shape you like.

    Clocking in at just over an hour, these cheesecake pops are a perfect last minute treat for a potluck or party. Make up a batch of these to share with your coworkers on a down day, or to brighten your counter-tops at home.

    The tangy, sweet, slightly bitter and tropical notes sing to many pallets and can be enjoyed by treat lovers of all kinds.

    I also have this yummy raspberry cheesecake in a jar dessert you might like. Or, check out some more of the best cake pop recipes like these cake pops made with a mold and easy red velvet cake pops.

    🍫 Ingredients

    Cheesecake cake pop ingredients labeled.
    • cheesecake - Make sure it is the baked kind of cheesecake and chilled well or it will be difficult to form the cake pops. Choose your favorite flavor such as strawberry, blueberry, cherry or even pumpkin.
    • dark chocolate - Are you a fan of all kinds of chocolate? To mix this recipe up, try using another type of chocolate, or combine different types for a fun alternative.
    • shredded coconut - For the topping. Consider adding different toppings to your cake pop based on who you plan to serve to or what flavor you're going for.

    *Check recipe card for ingredient amounts.

    🍰 How to Make Cheesecake Cake Pops

    Chef's Note: Before you begin, make sure the cheesecake is well-chilled.

    Cheesecake cut into triangles and balls.

    Step 1. Make balls or wedges with the cheesecake. Use a small cookie scoop to scoop out rounds of the cheesecake and roll them into balls with your hands. Or, you can simply cut the cheesecake into small wedges. You need to work quickly here while the cheesecake is cold.

    Cheesecake shaped into triangles and balls with treat sticks.

    Step 2. Add treat sticks. Place them on a pan lined with wax paper. Carefully insert the lollipop sticks into the center of the cheesecake balls.

    Cheesecake shaped into triangles and balls with treat sticks, chilled on sheet pan.

    Step 3. Chill. Refrigerate or freeze for 30-60 minutes to allow the cake pops to firm up.

    Dark chocolate melting in pot.

    Step 4. Melt chocolate. Melt the chocolate (or candy melts) in a double boiler. Alternatively, you can microwave the chocolate at 20 second intervals, stirring each time until melted.

    Cheesecake cake pop getting dipped in chocolate.

    Step 5. Coat the cake pops. Insert the cake ball or wedge into the chocolate and rotate until covered. Softly tap and rotate the cake pop until the excess chocolate falls off. Don't tap too hard or the cake ball could fall off!

    Dark chocolate covered cheesecake cake pops on parchment.

    Step 6. Add toppings and let dry. Place in a Styrofoam block, cake pop stand or on wax paper to dry. Sprinkle with coconut flakes while the chocolate is still wet.

    Dark chocolate covered cheesecake cake pops on small white plate.

    Step 7. Serve. Serve the cheesecake cake pops!

    ✔️ Joss' Top Tips

    • Make sure to keep that cheesecake chilled to begin with so that it's firm enough to hold its shape. Avoid working in a warm kitchen for best results.
    • A good cookie scoop size is between 1.25" to 1.75" in diameter.

    ❓ Cheesecake Cake Pops FAQs

    How do you store them?

    Store them in the fridge for up to 5 to 7 days.

    Can you freeze them?

    Yes! You can freeze them for up to 3 months. Make sure to wrap them in plastic wrap and place in a freezer bag. Thaw in the fridge.

    Can I use different coatings, like white chocolate or milk, instead of dark chocolate?

    Absolutely! I like using dark chocolate for this recipe but you can definitely change it up to suit your taste. You can even try different colored candy melts and toppings like candy sprinkles or chopped nuts. Try to match the cheesecake flavor you are using.

    Cheesecake cake pops in different shapes on white plates.

    🤎 More Cake Pop Recipes You Will Love

    • Margarita cake pops on plate.
      Margarita Cake Pops
    • Maple bacon cake pops on plate.
      Maple Bacon Cake Pops
    • Pumpkin cake pops in small basket.
      Pumpkin Spice Cake Pops
    • Cake mix cake pops in small pails with sprinkles on top.
      How to Make Cake Pops with Cake Mix

    If you tried this Cheesecake Cake Pops Recipe or any other recipe on my website, please leave a 🌟 star rating and let me know how it went in the 📝 comments below. And please share the recipe!

    📋Recipe

    Cheesecake cake pops in holder.
    Print Pin
    5 from 1 vote

    Cheesecake Cake Pops

    These dark chocolate-coconut cheesecake cake pops, blend delicious grown-up flavors with a fun and whimsical bite-size dessert. It's the perfect treat for any age.
    Course Dessert
    Cuisine American
    Diet Vegetarian
    Prep Time 30 minutes minutes
    Refrigeration Time 30 minutes minutes
    Total Time 1 hour hour
    Servings 12 cake pops
    Calories 162kcal
    Author Joss Dyckson

    Equipment

    • Lollipop sticks

    Ingredients

    • 1 small firm baked cheesecake your favorite flavor like cherry, strawberry, blueberry etc.
    • 2 cups fine quality dark chocolate or candy melts
    • shredded coconut flakes for the cake pop topping
    US Customary - Metric

    Instructions

    • Make sure the cheesecake is cold to begin with. Use a small cookie scoop to scoop out rounds of the cheesecake and roll them into balls with your hands. Or, you can simply cut the cheesecake into small wedges. You need to work quickly here while the cheesecake is cold.
    • Place them on a pan lined with wax paper. Carefully insert the lollipop sticks into the center of the cheesecake balls. Refrigerate or freeze for 30-60 minutes to allow the cake pops to firm up.
    • Melt the chocolate (or candy melts) in a double boiler. Alternatively, you can microwave the chocolate at 20 second intervals, stirring each time until melted.
    • Insert the cake ball or wedge into the chocolate and rotate until covered. Softly tap and rotate the cake pop until the excess chocolate falls off. Don't tap too hard or the cake ball could fall off!
    • Place in a Styrofoam block, cake pop stand or on wax paper to dry. Sprinkle with coconut flakes while the chocolate is still wet.
    • Serve!

    Video

    Notes

    • Some helpful kitchen tools for this recipe:
      • Cookie Scoop
      • Styrofoam Block
      • Double Boiler
    • Make sure to keep that cheesecake chilled to begin with so that it's firm enough to hold its shape. Avoid working in a warm kitchen for best results.
    • Store them in the fridge for up to 5 to 7 days.
    • You can also freeze them for up to 3 months. Make sure to wrap them in plastic wrap and place in a freezer bag. Thaw in the fridge.
    • A good cookie scoop size is between 1.25" to 1.75" in diameter.

    Nutrition

    Calories: 162kcal | Carbohydrates: 16g | Protein: 2g | Fat: 9g | Saturated Fat: 8g | Sodium: 32mg | Potassium: 189mg | Fiber: 1g | Sugar: 10g | Vitamin C: 0.2mg | Calcium: 91mg | Iron: 0.4mg

    How to Make Ketchup (Step by Step)

    December 31, 2018 by Joss Dyckson 5 Comments

    In this tutorial, I will teach you how to make ketchup at home, starting from either fresh tomatoes or from tomato paste--your choice!

    Homemade ketchup in a bowl with fries on the side.

    Nothing beats the tangy delicious flavor of a ripe tomato paired with the perfect blend of sweet and spice. The best part? This recipe for the condiment is quick and easy, so no waiting around to top your juiciest hamburger or freshest batch of perfectly-salted French fries.

    There is no need to fill your body with unnecessary preservatives or potentially harmful ingredients knowing ketchup is this easy to make at home.

    Try it on these ground bison burgers or serve it with a batch of Cajun fries (check out how to make Cajun fries here). Those are two of my favorite ways to use the condiment.

    Choose tomato paste for a quicker version without the need to strain the mixture, or...make the ketchup with your own fresh tomatoes for a more from-scratch version.

    I also make this homemade banana ketchup that you might like to try.

    Featured Comment

    From Angie: ⭐⭐⭐⭐⭐ "This is awesome, sweet and tangy, we prefer not to strain it, just blended is perfect!"

    [feast_advanced_jump_to]

    How to Make Ketchup With Fresh Tomatoes

    Ingredients

    Fresh tomatoes on cutting board.
    • fresh Roma tomatoes - The darker the color, the better. To me, the best tomatoes for making ketchup are ripe Roma tomatoes. They are meaty, have a low moisture content, a low amount of seeds and a rich flavor when cooked down.
    • red wine vinegar - To add that classic ketchup tang.
    • brown sugar - To enhance the flavor and texture. It also adds a deeper color, making the ketchup look more appealing.
    • Worcestershire sauce - A thin brown sauce that adds complex flavor.
    • salt and pepper - To taste.

    *Check recipe card for ingredient amounts.

    Chef's Note: Like it hot? Add a little spice with some cayenne or hot sauce. Don't be afraid to play around with the ingredients.

    Instructions

    Fresh tomatoes and spices in a saucepan.

    Step #1. If you're going to start with fresh tomatoes, place them in a saucepan with vinegar, sugar, Worcestershire sauce, salt and pepper.

    Tomatoes simmering in saucepan.

    Step #2. Simmer until it thickens and most of the liquid has evaporated (at least 25 minutes).

    Ketchup mixture in blender.

    Step #3. Purée the fresh tomato mixture in a blender, until smooth.

    Homemade ketchup straining through mesh strainer.

    Step #4. Strain the ketchup using a fine mesh sieve. If it is too thin for your liking, return it to the pot and simmer it down further, until desired thickness.

    Chef's Note: At this point, adjust the seasoning with the salt and pepper if needed. Let it cool and it's ready to use!

    How to Make Ketchup With Tomato Paste

    Ingredients

    Tomato paste in bowl.
    • tomato paste - Tomato paste is just cooked down tomatoes and you will find it canned in the pasta section of the grocery store. It has deep, concentrated flavor.
    • red wine vinegar - Has a fruitier flavor than white vinegar but you can substitute with white if desired.
    • brown sugar - You can substitute with white sugar if preferred.
    • Worcestershire sauce - For extra umami flavor.
    • salt and pepper - To taste.

    *Check recipe card for ingredient amounts.

    Instructions

    Tomato ketchup mixture in pot.

    If you're starting from tomato paste, add the tomato paste to a saucepan with the vinegar, sugar, Worcestershire sauce, salt and pepper. Simmer for 15 minutes. Let it cool.

    Storage

    • Put it in a squeeze bottle and away you go! It is recommended to keep your ketchup in the refrigerator for up to 2 to 3 weeks to preserve its freshness.
    • If you make an extra large batch, you can even store it in the freezer up to six months. So, you can make as much as you need and know you'll always have the condiment ready for your next cookout or barbecue.

    Ways to Use it

    You can use your homemade ketchup the same ways you would commercial ketchup including:

    • top your French fries, burgers, hot dogs and meatloaf (try this ground bison meatloaf)
    • make these electric skillet sloppy Joes
    • make British style baked beans
    • make a BBQ sauce starting with a ketchup base

    Let me know if you have any other suggestions!

    Recipe FAQs

    Who Invented Ketchup?

    While ketchup was originally made without tomatoes (instead using oysters, mushrooms, peaches, etc.) and appeared in British cookbooks in the 18th century, the tomato ketchup version only started to appear in 19th century cookbooks and included anchovies. If you want to go way back, the precursor to ketchup was actually a Chinese fermented fish sauce in 300 B.C. They called it "ge-thcup" or "koe-cheup".

    While we can't pinpoint who the inventor of the original ketchup was, James Mease is credited with inventing the first tomato ketchup recipe in the early 1800s. He was a scientist from Philadelphia. Heinz came out with their own recipe in 1876 and are one of the most well known ketchup brands today.

    How do you thicken homemade ketchup?

    To thicken homemade ketchup, gently simmer it in a saucepan until desired consistency.

    Homemade ketchup in a bowl on kitchen towel.

    More Recipe Tutorials to Try

    • Green homemade gummies on cutting board.
      How to Make Gummies at Home
    • Braised beef with pureed vegetables on white dish.
      How to Braise Beef
    • Ceviche on yellow plate.
      How to Make Ceviche (Step by Step)
    • Mole sauce in a bowl with cilantro and black sesame seeds.
      How to Make Mole Sauce

    If you tried this 📋 recipe tutorial for 🥫🍅 How to Make Ketchup or any other recipe on my website, please leave a 🌟 star rating and let me know how it went in the 📝 comments below. And please share the recipe!

    📋Recipe

    Homemade ketchup in a bowl.
    Print Pin
    5 from 3 votes

    How to Make Ketchup

    In this tutorial, I will teach you how to make your own ketchup, starting from fresh tomatoes or from tomato paste. It's quick and easy, so no waiting around to top your juiciest hamburger or freshest batch of perfectly-salted French fries.
    Course Condiment
    Cuisine American, British
    Diet Vegan, Vegetarian
    Prep Time 5 minutes minutes
    Cook Time 25 minutes minutes
    Total Time 30 minutes minutes
    Servings 12 tablespoons
    Calories 27kcal
    Author Joss Dyckson

    Equipment

    • Squeeze bottle (optional)
    • Blender
    • Fine mesh sieve

    Ingredients

    • 2 cups ripe Roma tomatoes roughly chopped (or 2 cups tomato paste)
    • ½ cup red wine vinegar
    • ¼ cup brown sugar or to taste
    • 1 teaspoon Worcestershire sauce
    • salt and pepper to taste
    US Customary - Metric

    Instructions

    For Ketchup With Fresh Tomatoes

    • If you're going to start with fresh tomatoes, place them in a saucepan with the vinegar, sugar, Worcestershire sauce, salt and pepper.
      Fresh tomatoes and spices in a saucepan.
    • Heat over high heat until boiling and then lower to a simmer (medium or medium-low). Simmer until it thickens and most of the liquid has evaporated (at least 25 minutes).
      Tomatoes simmering in saucepan.
    • Purée the fresh tomato mixture in a blender, until smooth. (Make sure to have the vent cap open to let steam out or wait until it's cooled.)
      Ketchup mixture in blender.
    • Strain the ketchup using a fine mesh sieve. If it is too thin for your liking, return it to the pot and simmer it down further, until desired thickness. At this point, adjust the seasoning, if needed. Let it cool.
      Homemade ketchup straining through mesh strainer.

    For Ketchup With Tomato Paste

    • If you're starting from tomato paste, add the tomato paste to a saucepan with the vinegar, sugar, Worcestershire sauce, salt and pepper. Gently simmer for 15 minutes. If it's spattering a lot, place a lid partially open on top.
      ½ cup red wine vinegar, ¼ cup brown sugar, 1 teaspoon Worcestershire sauce
      Tomato mixture in pot.
    • Adjust the seasoning and sweetness, if needed. Chill & serve.
      Homemade ketchup in a bowl with fries on the side.

    Video

    Notes

    • The nutrition information is calculated for the fresh tomato ketchup.
    • For the tomatoes, the darker the color, the better. To me, the best tomatoes for making ketchup are ripe Roma tomatoes. They are meaty, have a low moisture content, a low amount of seeds and a rich flavor when cooked down.
    • Like it hot? Add a little spice with some cayenne or hot sauce. Don't be afraid to play around with the ingredients.
    • Transfer to a squeeze bottle and store in the fridge to preserve its freshness for up to 2 to 3 weeks.
    • If you make an extra large batch, you can even store it in the freezer up to six months.

    Nutrition

    Calories: 27kcal | Carbohydrates: 6g | Protein: 0.4g | Fat: 0.1g | Saturated Fat: 0.01g | Polyunsaturated Fat: 0.03g | Monounsaturated Fat: 0.01g | Sodium: 11mg | Potassium: 107mg | Fiber: 0.5g | Sugar: 6g | Vitamin A: 329IU | Vitamin C: 6mg | Calcium: 9mg | Iron: 0.2mg

    Red Velvet Cake Pops

    December 26, 2018 by Joss Dyckson 1 Comment

    This red velvet cake pops recipe takes the classic Southern dessert and transforms it into a mouth-watering party treat perfect for adults and kids alike. They are covered in white chocolate and topped with some red velvet crumbles to make a stunning and delicious treat for any occasion.

    Red velvet cake pops in white dish on white wooden background.

    ❤️ About These Red Velvet Bites

    • Taste: Made with buttermilk and a bit of cocoa powder, this cake's flavor hovers somewhere between vanilla and chocolate, but fully in the tasty category.
    • Texture: When it comes to cake pop recipes, red velvet is noted and loved for its moist texture and eye-catching color. The crunchy, chocolate coating on top against the moist ball of cake creates a taste and texture like no other.
    • Perfect for: Any holiday such as Valentine's Day, Thanksgiving, birthday celebrations, weddings and more. They also make great Christmas cake pops for their red and white color scheme.
    • Serving size: The beauty of this recipe, besides the dreamy flavor, is the fact that you can adjust it as you need to accommodate your guest count. A big family reunion, double the recipe. A small gathering of friends, cut it in half. If you have leftover cake mix, consider making a mug cake food gift.
    • Easy prep: It's easier when you make cake pops with cake mix. This makes it a good recipe to share with your children. If your kids are clamoring to help in the kitchen, let them help make the cake pop balls while you deal with heating the white chocolate up. Of course, after everything is done, all the cooks get to try a red velvet cake pop for dessert.
    [feast_advanced_jump_to]

    🧾 Ingredients

    Red velvet cake pops ingredients prepped and labeled.
    • red velvet cake mix - You can either buy a box of red velvet cake mix or make your favorite red velvet cake recipe. I wouldn't recommend buying a premade red velvet cake as it's already loaded with frosting and you'll have to remove a lot of it, although it can be done if need be.
    • cake pop frosting - Cream cheese is a classic for red velvet. Try experimenting with other cake pop frosting options or even simply buttercream. Some cake mix boxes even come with the frosting so you might not need to purchase or make any.
    • fine quality white chocolate - Or white candy melts. Additionally, you can choose to decorate with drizzles of red candy melts or holiday sprinkles.
    • coconut oil - This is used to thin out the chocolate for dipping. You can use shortening instead if needed.

    *Check recipe card for ingredient amounts.

    🥣 How to Make Red Velvet Cake Pops

    Easy to make and even easier to eat, these pops will be something your guests will love and remember.

    Red velvet cake in pan.

    Step 1. Bake the cake. Bake the red velvet cake according to the directions on the box and let cool.

    Red velvet cake trimmed on baking rack.

    Step 2. Trim. Trim the outer, crispy parts of the cake off so that only the soft parts of the cake remain.

    Chef's Note: I use a smaller pan to get more cake height (which means less parts to trim off). The harder, trimmed parts of the cake can be saved for snacking on!

    Red velvet cake pop mixture in bowl.

    Step 3. Form the balls. Place the cake in a large bowl and crumble it, reserving a couple of tablespoons of the cake for later. Mix in some frosting and form the balls. Place them on a wax paper lined baking sheet.

    White candy melt coating melted in glass measuring cup.

    Step 4. Melt. Melt the white chocolate (or candy melts) with the coconut oil and stir well.

    Chef's Note: The amount of frosting you'll need is approximate. You need to reach a texture that allows you to form balls with your hands but isn't too heavy--It's going to feel a bit like playdough. If no large cracks appear, it is ready.

    Red velvet cake balls on sheet pan with treat sticks.

    Step 5. Dip the lollipop sticks. Dip the tip of a lollipop stick into the melted chocolate, then insert about halfway into the cake ball. Repeat and refrigerate until firm, about 30 minutes.

    Cake pop dipped in white coating.

    Step 6. Coat. Dip the cake pops into the melted white chocolate. Softly tap the cake pop until the excess chocolate falls off. Don't tap too hard or the cake ball could fall off!

    Red velvet cake pops getting dipped and decorated in stand.

    Step 7. Dry. Place in a cake pop stand, sprinkle with the reserved red velvet cake crumbles immediately (the coating starts to harden quickly) and let dry fully. Repeat. You can dry them at room temperature or in the fridge. Candy melts will harden a lot quicker than chocolate.

    Red velvet cake pops in white dish.

    Step 8. Serve. Serve the red velvet cake pops immediately or store them for later.

    ✅ Joss' Tips

    • Cake mix: If your cake mix is a different weight than the box I use, just use the ingredient amounts listed on the box and bake as directed.
    • Cake pop stand option: You can get creative with what to use to stand up the cake pops: Styrofoam block, egg carton, cereal box or a stand that was designed for cake pops. Babycakes cake pop makers usually come with a nice stand.
    • Use a cookie scoop: Using a cookie scoop to measure out the cake balls ensures they are consistent in size. You will still need to roll them to get a nice, round shape.
    • Microwave: Careful not to overcook the coating in the microwave as it will get thick and lumpy. Cook at 15 to 20 second intervals, mixing thoroughly each time until smooth. Once it's almost smooth, I spend at least 30 seconds stirring because it will continue to melt at that point and become totally lump free with the perfect dipping consistency.

    ❓ Red Velvet Cake Pops FAQs

    Can they be stored at room temperature?

    Yes. The finished cake pops can be stored in an airtight container at room temperature for up to 2 days. If you use water instead of milk and a store-bought frosting that doesn't require refrigeration, they can last up to a week at room temperature (in a cool, dry place).

    How long do they last in the fridge?

    They can last in the fridge for up to 1 week. Line the container with paper towel to soak up any unwanted moisture.

    Can you freeze them?

    Yes! Freeze for up to 3 months. You can wrap them individually and place in a freezer bag.

    Can I make them ahead of time?

    Absolutely! You can fully prepare them days in advance and store properly or delay coating them until the day of serving. If they were frozen or in the fridge, bring them up to room temperature before serving.

    What kind of chocolate works best?

    I usually use white chocolate bars or white candy melts. Candy melts tend to be cheaper and are made for this purpose, so they're a great choice! You can use white chocolate chips, but they might not end up as smooth.

    Red velvet cake pops with red velvet crumble topping.

    🍰 More Cake Pop Recipes You Will Love

    • Decorated cake pops in jar.
      How to Make Cake Pops with a Mold
    • Cranberry white chocolate cake pops sprinkled with cinnamon in decorative jar.
      Cranberry White Chocolate Cake Pops
    • Pancake cake pops on a white plate with polka dots, a jar of maple syrup in the background.
      Pancake Cake Pops
    • Cheesecake cake pops in holder.
      Cheesecake Cake Pops

    If you made this Red Velvet Cake Pops Recipe or any other recipe on my website, please leave a 🌟 star rating and let me know how it went in the 📝 comments below. And please share the recipe!

    📋Recipe

    Red velvet cake pops in white dish on white wooden background.
    Print Pin
    5 from 4 votes

    Red Velvet Cake Pops

    This recipe for red velvet cake pops takes the classic Southern dessert and transforms it into a mouth-watering party treat, covered in white chocolate and red velvet crumbles. Easy to transport and even easier to eat, these pops are perfect for holidays, birthdays or any special occasion.
    Course Dessert
    Cuisine American
    Diet Vegetarian
    Prep Time 30 minutes minutes
    Cook Time 20 minutes minutes
    Refrigeration Time 30 minutes minutes
    Total Time 1 hour hour 20 minutes minutes
    Servings 24 cake pops
    Calories 221kcal
    Author Joss Dyckson

    Equipment

    • Lollipop sticks
    • Cake pop stand

    Ingredients

    • 1 box red velvet cake mix 13.25 ounces *see notes section about cake mix box size
    • 1 cup buttermilk or water
    • 3 eggs
    • ½ cup canola oil
    • 2 to 3 tablespoons cake pop frosting approximately--I like to use cream cheese frosting
    • 2 cups fine quality white chocolate chopped (or white candy melts)
    • 1 teaspoon coconut oil or shortening
    US Customary - Metric

    Instructions

    • Bake the red velvet cake according to the directions on the box and let cool.
    • Trim the outer, crispy parts of the cake off so that only the soft parts of the cake remain.
    • Place the cake in a large bowl and crumble it with your hands or using a fork. Separate about 2 tablespoons of cake crumbles for the topping and reserve.
    • Start by adding 2 heaping tablespoons of frosting to the bowl of crumbled cake and mix thoroughly. The amount of frosting you'll need is approximate. You need to reach a texture that allows you to form balls with your hands but isn't too heavy. If no large cracks appear, it is ready.
    • Use a small cookie scoop or your hands to make round balls of the cake mixture. Place them on a wax paper lined baking sheet.
    • Melt the white chocolate (or candy melts) and coconut oil in a double boiler or in the microwave. Stir well.
    • Dip the tip of a lollipop stick into the melted chocolate, then insert about halfway into the cake balls. Refrigerate for 30 minutes to allow the cake pops to firm up and the chocolate on the stick to harden.
    • Dip the cake pops into the melted white chocolate (remelting if needed). Softly tap the cake pop until the excess chocolate falls off. Don't tap too hard or the cake ball could fall off!
    • Place in a Styrofoam block or cake pop stand and sprinkle with the reserved red velvet cake crumbles immediately (the coating starts to harden quickly) and let dry fully. Repeat with all cake pops.
    • Serve!

    Notes

    • *Cake Mix Amount: If your cake mix is a different weight than the box I use, just use the ingredient amounts listed on the box and bake as directed.
    • Microwave: Careful not to overcook the chocolate in the microwave. Cook at 15 to 20 second intervals, mixing each time until smooth.
    • Pan size: I use a smaller pan to get more cake height (which means less parts to trim off). The harder, trimmed parts of the cake can be saved for snacking on!
    • Dry Time: You can dry them at room temperature or in the fridge. Candy melts will harden a lot quicker than chocolate, only a few minutes in my experience.
    • Storage: These cake pops can be stored in an airtight container at room temperature for up to 2 days, in the fridge for up to 1 week or in the freezer for up to 3 months. If you use water instead of milk and a store-bought frosting that doesn't require refrigeration, they can last up to a week at room temperature.
    • Make ahead note: You can fully prepare them days in advance and store properly or delay coating them until the day of serving. If they were frozen or in the fridge, bring them up to room temperature before serving.
    • Cookie scoop: Using a cookie scoop to measure out the cake balls ensures they are consistent in size. You will still need to roll them to get a nice, round shape.
    • Cake pop stand option: Helpful kitchen tool for this recipe: Styrofoam Block to be used as a stand.

    Nutrition

    Calories: 221kcal | Carbohydrates: 24g | Protein: 3g | Fat: 14g | Saturated Fat: 4g | Polyunsaturated Fat: 3g | Monounsaturated Fat: 6g | Trans Fat: 0.02g | Cholesterol: 25mg | Sodium: 183mg | Potassium: 124mg | Fiber: 0.5g | Sugar: 17g | Vitamin A: 51IU | Vitamin C: 0.1mg | Calcium: 71mg | Iron: 1mg

    How to Candy Limes

    December 24, 2018 by Joss Dyckson 17 Comments

    Have you ever wondered how to make those deliciously candied limes that professional bakers present with their key lime pies? Candied limes are typically used as a sweet and savory garnishment for key lime pies and can also be used to garnish other desserts or drinks. Some people enjoy them as a stand-alone delicious snack.

    You will be surprised to find out how easy it is to make them. With my step by step instructions on how to candy limes, I will guide you through the simple process of making your next delicious dessert garnish or snack. Be sure to make plenty to go around!

    Sliced candied limes on wooden counter.

    Chef's Note: Make the candied limes a couple days before required as they need to sit for 1 to 2 days before they are ready.

    [feast_advanced_jump_to]

    Step #1. Prepare Ingredients

    Limes in a glass container and sugar in a small bowl, wooden background.

    You will need the following to candy limes:

    • 6 limes
    • ¾ cup water
    • 2 tbsp. lime juice
    • 1 cup sugar

    Step #2. Slice the Limes

    Lime slices on wooden cutting board.

    Cut the limes into thin rounds.

    OPTIONAL: At this point, you may wish to blanch the lime slices in boiling water for 2 minutes in the pot and then drain and chill them in ice water. Do this a few times, using fresh water each time. This will help to remove some bitterness. Then proceed to step #3. This is optional and depends on your preference.

    Step #3. Add Ingredients to Deep Pot

    Sugar and water in a saucepan on wooden background.

    Mix water, lime juice and sugar in a deep pot.

    Step #4. Dissolve Sugar & Add Limes

    Lime slices in a pot, wooden background.

    Heat over medium heat. When the sugar is dissolved, add the lime slices and bring to a simmer.

    Step #5. Simmer

    Candied limes in a pot with a wooden spoon, wooden background.

    Gently simmer for 15 minutes, until they look translucent (thicker slices may take longer).

    Step #6. Remove Limes

    Candied limes sitting on a silicone mat.

    Place the lime slices on a non-stick baking sheet (like these silicone mats here) or foil.

    Step #7. Pour Syrup Over Lime Slices

    Candied limes sitting on a silicone mat.

    Pour a little bit of extra syrup into the center of each slice.

    Step #8. Let the Limes Sit to Dry

    Candied limes as a garnish on cups.

    Let the limes sit to dry for 1-2 days. They are now ready to use.

    Candied limes as a garnish on a cup.

    As you can see, it doesn't take a professional baker or chef to transform plain lime slices into a sweet and delicious candy treat. Not sure where to put the limes? They can be served as a garnishment on a drink like these passion fruit ginger mojitos for example or on cakes, cupcakes, cookies, and pies, or even in a bowl.

    Candied limes are such a quick and easy treat to make. This makes them desirable for dinner parties and birthdays. They can be served to one person or to a whole group. No matter how you use them, these treats are irresistible.

    Store the candied limes in an airtight container and in a cool, dry place for up to 1 month. Leftover syrup can be refrigerated and used to sweeten beverages.

    How do you plan to serve your candied limes?

    How to Candy Limes - Step by Step Guide

    More Kitchen Tutorials to Try

    • Homemade ketchup in a bowl.
      How to Make Ketchup (Step by Step)
    • Cocktail syrups infusing in bottles.
      How to Prepare Cocktail Syrups
    • 4 colors of coffee beans on wooden board with a mug of coffee on the side.
      How to Roast Coffee Beans
    • Green homemade gummies on cutting board.
      How to Make Gummies at Home

    If you tried this Candied Limes Recipe or any other recipe on my website, please leave a 🌟 star rating and let me know how it went in the 📝 comments below. And please share the recipe!

    📋Recipe

    Sliced candied limes on wooden counter.
    Print Pin
    5 from 10 votes

    How to Candy Limes

    With my step by step instructions for how to candy limes, you will see how simple the process of making your next delicious dessert garnish or snack really is.
    Course Dessert, Snack
    Cuisine American
    Diet Vegan, Vegetarian
    Prep Time 10 minutes minutes
    Cook Time 15 minutes minutes
    Total Time 25 minutes minutes
    Servings 36 lime slices, approximately
    Calories 25kcal
    Author Joss Dyckson

    Equipment

    • Deep pot
    • Silicone mat or foil

    Ingredients

    • 6 limes
    • ¾ cup water
    • 2 tablespoons lime juice
    • 1 cup sugar
    US Customary - Metric

    Instructions

    • Cut the limes into thin rounds.
      Lime slices on wooden cutting board.
    • Mix water, lime juice and sugar in a deep pot.
      Sugar and water in a saucepan on wooden background.
    • Heat over medium heat. When the sugar is dissolved, add the lime slices and bring to a simmer.
      Lime slices in a pot, wooden background.
    • Gently simmer for 15 minutes, until they look translucent (thicker slices may take longer).
      Candied limes in a pot with a wooden spoon, wooden background.
    • Place the lime slices on a non-stick baking sheet (like these silicone mats here) or foil.
      Candied limes sitting on a silicone mat.
    • Pour a little bit of extra syrup into the center of each slice.
      Candied limes sitting on a silicone mat.
    • Let the limes sit to dry for 1-2 days. They are now ready to use.
      Candied limes as a garnish on cups.

    Video

    Notes

    • As an optional step (after slicing the limes), you may wish to blanch the lime slices in boiling water for 2 minutes and then drain and chill them in ice water a few times (using fresh water each time). Then proceed to simmering. This will help to remove some bitterness if that is your preference.
    • Store the candied limes in an airtight container and in a cool, dry place for up to 1 month.
    • The leftover syrup can be cooled and stored in the refrigerator. It can be used to sweeten drinks.
    • Make the candied limes a couple days before required as they need to sit for 1 to 2 days before they are ready.
    • They can be served as a garnishment on drinks or on cakes, cupcakes, cookies, and pies.

    Nutrition

    Calories: 25kcal | Carbohydrates: 6g | Potassium: 11mg | Sugar: 5g | Vitamin A: 5IU | Vitamin C: 3.5mg | Calcium: 4mg | Iron: 0.1mg

    Cinnamon Apple Chips

    December 19, 2018 by Joss Dyckson Leave a Comment

    With the fall season still upon us, everyone is on the lookout for easy and delicious harvest related recipes. This oven-baked Cinnamon Apple Chips recipe is just that. With only three simple ingredients, you can feel good about sharing this delicious treat with both the young and old among your friends and family.

    Cinnamon apple chips in a wooden bowl.
    [feast_advanced_jump_to]

    Crunch Into Fall With Homemade Apple Chips

    This recipe brings together the classic autumnal flavor combination of fresh apples and warm cinnamon, reminiscent of a warm apple crisp.

    You can bake up these treats last minute for a fall harvest bash or afternoon snack. They even work great as a summer, beach snack.

    These cozy simple snacks are sure to be a hit with everyone. Who wouldn't like the sweet and tart combination of fall apples and yummy cinnamon sugar? Plus, nothing smells better than cinnamon treats baking in the fall. If that sounds irresistible, you would probably love my mini apple pie school snack recipe too.

    With their simplicity these fruity chips are the perfect baking project for young hands to help with. They're easy, quick and fun to make.

    Kids can help select the apples, mix the cinnamon and sugar, coat and place the apple slices, and, of course, taste test! Bag these up for lunches or set them out on the counter for a simple and healthy grab and go bite.

    Ingredients

    Cinnamon apple chips ingredients labeled.

    This recipe uses 3 simple ingredients:

    • apples - You can use your favorite type of apple or an assortment (green, honeycrisp and pink lady all work well). Use fresh, crisp apples for the best texture.
    • sugar - I usually use white sugar but you can also use brown sugar, cane sugar or coconut palm sugar.
    • ground cinnamon - Optional but it adds to the warm, fall flavor profile.

    *Check recipe card for ingredient amounts.

    How to Make Cinnamon Apple Chips

    Cinnamon sugar in bowl with small wooden spoon.

    Step 1. Preheat. Preheat oven to 105ºC/225ºF. Mix the sugar and cinnamon in a small bowl.

    Sliced apples in bowl.

    Step 2. Slice. Core and slice the apples thinly, leaving the skin on.

    Chef's Note: You can remove the core if you prefer ring-shaped chips or leave it in for a more natural look.

    Sliced apples with cinnamon sugar on baking sheet.

    Step 3. Arrange Slices. Arrange the apple slices on a baking sheet. Sprinkle the cinnamon sugar over the apple slices. Use as much or as little as you like.

    Sliced, dried apple chips on cooling rack.

    Step 4. Bake and Cool. Bake in the preheated oven until the apple slices are dried, slightly brittle and the edges curl up, about 1 hour or more. Transfer the apple chips to a wire rack to cool and crisp up.

    Chef's Note: I usually need more than one baking sheet to fit all of the apple slices.

    Cinnamon apple chips in a parchment-lined wooden bowl with cinnamon sticks on the side.

    Step 5. Serve. Serve the cinnamon apple chips!

    Joss' Tips

    • I like to slice the apples just before baking, before they start to turn brown.
    • A mandolin works great for slicing the apples thinly to ensure even baking and I highly recommend it! Be sure to use a hand guard when slicing.
    • If you're keeping the core in the apples, be sure to remove any seeds that don't fall out when slicing.
    • The baking time can vary, depending on the thickness of the apple slices. The thinner the slices, the less time it takes to dehydrate and crisp them up.
    • If they feel chewy, they likely need more time in the oven to fully dehydrate. When done right, they should have a nice crunch without being too hard.
    • Line your baking sheet with parchment paper to prevent sticking and help with more even crisping. It's optional but helpful, especially with an older, stained pan.

    Recipe FAQs

    Are apple chips better than potato chips?

    Baking them in the oven makes them healthier than fried potato chips. As for flavor, it depends on whether you're craving sweet or salty.

    How do you store them?

    Apple chips can be stored in an airtight container in a cool, dark place like a cupboard or pantry for up to 1 week or 2.

    Can you freeze apple chips?

    Yes! They can be frozen for up to a year, allowing you to enjoy the flavors of your fall harvest all year long.

    Do you eat them on their own?

    This is the best way to eat them but you can also enjoy your homemade cinnamon apple chips as a topping for oatmeal or yogurt, or a crunchy addition to salads!

    Apple chips sprinkled with cinnamon in a wooden bowl.

    ❤️More Delicious Snacks You Will Love

    • Crispy kale chips in dish on wooden background.
      How to Make Crispy Kale Chips
    • Red velvet cake pops in white dish on white wooden background.
      Red Velvet Cake Pops
    • Easy Homemade Pickled Sausage
    • Corn nuggets on plate with dip.
      How to Make Corn Nuggets

    If you tried this Cinnamon Apple Chips Recipe or any other recipe on my website, please leave a 🌟 star rating and let me know how it went in the 📝 comments below. And please share the recipe!

    📋Recipe

    Cinnamon apple chips in a bowl.
    Print Pin
    5 from 2 votes

    Cinnamon Apple Chips

    This cinnamon apple chips recipe brings together the classic autumnal combination of fresh apples and warm cinnamon. You can bake up these treats last minute for a fall harvest bash or afternoon snack. They even work great as a summer, beach snack.
    Course Snack
    Cuisine American
    Diet Vegan, Vegetarian
    Prep Time 5 minutes minutes
    Cook Time 1 hour hour
    Total Time 1 hour hour 5 minutes minutes
    Servings 4
    Calories 126kcal
    Author Joss Dyckson

    Ingredients

    • 4 apples
    • 2 tablespoons sugar
    • 1 teaspoon ground cinnamon
    US Customary - Metric

    Instructions

    • Preheat oven to 105ºC/225ºF. Mix the sugar and cinnamon in a small bowl.
    • Core and slice the apples thinly, leaving the skin on. Or, you can leave the core in (either way works).
    • Arrange the apples slices on a baking sheet. Sprinkle the cinnamon sugar over the apple slices. Use as much or as little as you like.
    • Bake in the preheated oven until the apple slices are dried and the edges curl up, about 1 hour or more. They will feel light and slightly brittle to the touch.
    • Transfer the apple chips to a wire rack to cool and crisp up. Serve!

    Notes

    • You can use your favorite type of apple or an assortment (green, honeycrisp and pink lady all work well). Use fresh, crisp apples for the best texture.
    • I like to slice the apples just before baking so that they don't start to turn brown.
    • A mandolin works great for slicing the apples thinly and I highly recommend it. Be sure to use a hand guard when slicing.
    • You can remove the core if you prefer ring-shaped chips or leave it in for a more natural look.
    • If you're keeping the core in the apples, be sure to remove any seeds that don't fall out when slicing.
    • Line your baking sheet with parchment paper to prevent sticking and help with more even crisping. It's optional but helpful, especially with an older, stained pan. I usually need more than one baking sheet to fit all of the apple slices.
    • The baking time can vary, depending on the thickness of the apple slices. If they feel chewy, they likely need more time in the oven to fully dehydrate. When done right, they should have a nice crunch without being too hard.
    • Apple chips can be stored in an airtight container in a cool, dark place like a cupboard or pantry for up to 1 week. They can also be frozen for up to 1 year.

    Nutrition

    Calories: 126kcal | Carbohydrates: 33g | Sodium: 2mg | Potassium: 194mg | Fiber: 5g | Sugar: 26g | Vitamin A: 100IU | Vitamin C: 8.3mg | Calcium: 23mg | Iron: 0.3mg

    Finding the Best Cake Pop Maker For Your Needs

    December 17, 2018 by Joss Dyckson Leave a Comment

    If anything could possibly be better than cake, it's cake pops. The petite size allows for the perfect union of cake and filling (or frosting, if you prefer), as well as boundless opportunities for invention. The only potential roadblock? Locating the best cake pop maker amongst all of the available options.

    Valentines cake balls in a cake pop maker.

    Fortunately, I'm here to shoulder some of that burden with my list of cake pop maker reviews. In this guide, you'll learn what you should look for when shopping for one of these handy tools, and what sets certain brands apart from the rest.

    When you're through, selecting the right product will be easy-though perhaps not quite as enjoyable as your eventual results. You'll be making margarita cake pops, pumpkin spice cake pops and mini brownie bites before you know it!

    [feast_advanced_jump_to]

    Compare Cake Pop Makers

    PRODUCT SPECIFICATIONS
    babycakes multitreat baker

    Babycakes MT-6
    Multitreat Baker
    CHECK PRICE ➜
    Type: Electric
    # of Cake Pop Cavities: 12
    Non-Stick?: Yes
    Indicator Lights?: Yes
    Recipes Included?: Yes
    Latching Lid?: Yes
    Watts: 760
    Warranty: 1 year
    Purple Brentwood cake pop maker
    Brentwood
    Cake Pop Maker
    CHECK PRICE ➜
    Type: Electric
    # of Cake Pop Cavities: 12
    Non-Stick?: Yes
    Indicator Lights?: Yes
    Recipes Included?: Yes
    Latching Lid?: Yes, Safety Lock
    Watts: 750
    Voltage: 120 v
    Warranty: 1 year limited
    babycakes mini cake pop maker

    Babycakes
    Mini Maker
    CHECK PRICE ➜
    Type: Electric
    # of Cake Pop Cavities: 9
    Non-Stick?: Yes
    Indicator Lights?: Yes
    Recipes Included?: Yes
    Latching Lid?: Yes
    Watts: 500
    Warranty: 1 year
    Cucinapro Electric Cooker for Donut Holes and Cake Pops

    CucinaPro
    Electric Cooker
    CHECK PRICE ➜
    Type: Electric
    # of Cake Pop Cavities: 7
    Non-Stick?: Yes
    Indicator Lights?: Yes
    Recipes Included?: Ebelskiver recipe only
    Latching Lid?: No lid
    Watts: 120
    Warranty: 1 year
    silicone cake pop mold with treat sticks and ties.

    Akingshop
    Silicone Cake Pop Mold Kit
    CHECK PRICE ➜
    Type: Manual/silicone for oven
    # of Cake Pop Cavities: 20
    Non-Stick?: Yes
    Indicator Lights?: NA
    Recipes Included?: Not specified
    Latching Lid?: NA
    Watts: NA
    Warranty: Full warranty

    Buyer's Guide

    What is a Cake Pop Maker?

    babycakes cake pops in a glass cup

    What is a cake pop maker, and how do cake pops differ from cupcakes?

    A cake pop maker is an electric device that bakes round cake balls from a batter in a matter of minutes, eliminating the need to form them by hand with frosting.

    Cake pops are smaller than cupcakes, typically bite-sized, and shaped into round balls. The defining feature is their presentation on a stick, much like a lollipop. They're also dipped in a hard chocolate or candy melt coating for flavor and structure. We can thank Bakerella for this tasty invention!

    Advantages and Benefits of a Cake Pop Maker

    Before the invention of this specialized equipment, cake pops were made by baking a cake, then mashing it into crumbs and adding frosting before forming the mixture into balls. As you can imagine, this was such a messy project that it was only a matter of time before a solution presented itself in the form of an appliance that would skip over all the hassle of pre-baking the cake.

    For those of you who are still on the fence about whether or not to buy one of these useful gadgets, here are just a few of the arguments in their favor. 

    They're easy to use. Hand-making cake pops is a very different process from using a cake pop baker. The major difference is that handmade cake pops involve baking a cake to later break apart and mix with icing to form the balls.

    If you've ever made these cake balls by hand, you would know how difficult it can be to form them and keep them on the stick without watching them roll away onto the floor or into the melting pot.

    Using a cake pop baker allows us to omit this step and bake the cake straight into near-perfect round balls that remain in tact with the stick far easier.

    Cake Pop Fails on wax paper.

    Even if you're not a professional baker, it doesn't get much simpler than adding measured amounts of batter to a molded surface. You can use packaged cake mixes to make things even easier.

    Anyone who's mastered the use of a waffle iron or muffin tin is sure to get the hang of it in no time. And if you're wondering how long to bake cake pops in a cake pop maker (as opposed to molding them out of cake that's already been baked), most models have a small recipe booklet included that will let you know the required time. It will typically be 4 to 5 minutes; very quick!

    They take the guesswork out of your baking projects. With one of these, you'll never have to wonder what to bring to the next bake sale or holiday gathering. Many are capable of turning out an impressive number of treats at once (see What to Look For: How the Styles Differ, below).

    You can even prepare multiple recipes at once, something that's potentially more problematic when baking full-sized cakes.

    4 cake pops in a row.

    Kids will love it. Though adult supervision and help is still necessary, little ones are sure to get a kick out of whipping up batch after batch of these tasty morsels with Mom or Dad-and the whole family can enjoy the results.

    What to Look For: How the Styles Differ

    While the basic principle behind cake pop devices is consistent across all brands, there are a couple of different styles available. Following is a brief overview:

    Electric

    Purple Brentwood cake pop maker

    These stand-alone units function in a manner that's similar to a waffle iron: You pour the prescribed amount of batter into a series of molded cups, then close the lid and wait a few minutes for the treats to be fully baked.

    As with the cp maker, when the device is powered on and when it is heated and ready to go, there should be an indicator that lights up. These are generally preferable to their more esoteric counterparts, as they're far more user-friendly and offer consistently good results when used properly.

    Oven-ready

    bapro cake pop baking mold

    Since a cake pop is essentially just a smaller version of cake, it can theoretically be prepared in any molded cup, as long as the cup is of an appropriate size.

    There are oven-safe molds available that are similar to muffin tins, only with smaller rounded cups instead of the traditional muffin shape. It can be trickier to achieve the desired results with these units, as they offer no built-in timer and take some getting used to, but they do have the distinction of being much more affordable than the electric ones. 

    To give yourself an idea of the results you can expect from an oven-ready mold, check out this tutorial:

    How to Make Cake Pops with a Mold

    Cake pop mold with batter in it on sheet pan, wooden background.

    Now that you've learned the difference between the two styles, it's time to educate yourself on the features that no respectable unit should lack. Here's a list to get you started.

    • Nonstick molds-without these, cleanup can be a real nightmare. Luckily, most models on the market currently are labeled as non-stick.
    • Capacity-think about how many pops you'll want to make at one time. Keep in mind that with a large amount of cake pop cavities, such as one with a capacity of 24, it may take too long to fill, resulting in some over-flow of the batter as they already begin to bake. The fact that it takes mere minutes to bake, a small capacity maker may suffice as you can make several batches in a short period of time.
    • Stand for assembling the pops-this feature is more prevalent with electric models, but it can be a real time-saver. I find it quite important to have one on hand as it is not easy to work with cake pops without some sort of stand to hold them upright. Other stand types include wooden, Styrofoam, plastic, cardboard, etc.
    • Versatility-Does the unit have other uses that appeal to you? Some can make donuts, mini cupcakes and cake pops. These models come with exchangeable cooking plates for the other baking options.
    • Recipes-Is it important to you that cake pop recipes are included? Many devices come with a recipe booklet that are tailored for that particular model and this may result in a more successful bake session.

    Best Uses for a Cake Pop Maker

    Finding the best cake pop flavors is a matter of personal taste, as the template lends itself to endless variations. While cake pops provide an enticing enough reason for the investment, these units can be used for more than just dessert. Here are just a few of the culinary adventures that could be just around the corner:

    • Pancake Dippers, served warm with a side of maple syrup
    • Cake Pop Maker Donut Holes
    • Pizza Balls-just add premade dough, tomato sauce, and mozzarella to the molds instead of batter
    • Mediterranean Meatballs
    • Mini Pork Buns
    • Spinach & Mozza Egg Bites
    • Cake Pop Maker Falafels
    • Black Forest Cake Balls
    • as well as many more cake pop recipes and ideas
    Pizza ball cut in half with tomato sauce on top, toothpicks on the side.

    In truth, when it comes to this versatile appliance, the possibilities are limited only by your imagination.

    Other Considerations

    Let's say you're tempted by the positive aspects that I've outlined, but are hesitant to allow another appliance to take up more of your valuable kitchen space-particularly if you don't do all that much cooking and baking anyway. That's understandable, but bear in mind that the virtues of the cake pop baker extend far beyond the realm of dessert (see Best Uses, above).

    Further, they're exceptionally low-profile (as in, easy to store), especially the oven-ready ones, which can be stored easily in the cabinet with the cookie sheets or rolled up and stashed away.

    They don't require a great deal of additional equipment, either. The aforementioned stands are useful but not strictly necessary, and the units usually come with their own supply of sticks, which can be replenished as needed. If you have a supply of pastry bags, all the better; if not, then a sturdy Ziploc bag should suffice.

    Wilton melting pot

    One tool I find very useful to keep the candy melts warm for dipping is a melting pot (pictured above), however this too is not necessary. Be sure to read the package carefully before making a purchase, to be sure that it has all the parts you'll need.

    Product Reviews

    1. Babycakes Multi-Treat Baker

    babycakes multitreat baker

    This model comes equipped with three different molds, so it can be used to make doughnuts and regular cupcakes as well as cake pops. This is undoubtedly an appealing feature; however, the capacity is limited, as it can turn out only seven of each at a time.

    Keep in mind that it only takes minutes to bake a batch, so low capacity may not be an issue for you. A locking handle and non-slip feet offer stability, and a set of lights will signal you when the unit is hot enough to be used.

    I appreciate the versatility of this model, and find that it's very easy to clean-just remove the molded plate, wash, and air-dry. Be forewarned, however, that it doesn't come with any cake pop sticks-if you don't already own a set, you'll have to make an additional investment. 

    The babycakes manual comes with recipes for the pops including flavors such as cherry, white chocolate, German chocolate, and minted brownie, as well as for cupcakes, donuts and frosting.

    PROS

    • Three mold options offers versatility
    • Easy to use
    • Easy to clean
    • Affordable
    • Recipe booklet included

    CONS

    • Limited capacity
    • Extras like cake pop sticks are sold separately

    Who would love this? This cake ball maker is best suited for bakers who appreciate having multiple options to get more use out of the device, and plan on making cake pops only occasionally.

    BUY HERE

    2. Brentwood Cake Pop Maker

    Purple Brentwood cake pop maker with lid open, cake balls on the side.

    The Brentwood is a good middle-of-the-road option-it's affordable, and its 12-pop capacity adds to its appeal. It takes about 4 minutes to bake a batch of cake pops, which is very comparable to the other models.

    The design is attractive and stylish, and won't take up too much cupboard space. It is also BPA free.

    The unit does have a "power" and "pre-heat" indicator light which comes in handy. The 'cool-touch handles' on this baker are a necessity as these little devices do get extremely hot!

    As an added safety bonus, the unit will automatically shut off if it senses over-heating. It also includes a few recipes including pancake bites and cinnamon-sugar donut holes!

    Product Manual

    PROS

    • Automatic shut-off if it over heats
    • Good capacity
    • Non-stick plates and convenient cord wrap
    • Reasonably priced
    • High wattage

    CONS

    • Some users complain of a plastic smell when heating

    Who would love this? This cake pop baker is best suited for anyone on a budget who wants to make cake pops on a semi-regular to regular basis.

    BUY HERE

    3. Babycakes Mini Cake Pop Maker

    babycakes mini cake pop maker

    There's a reason why I've included a second Babycakes cake pop maker review: They offer a wide variety of products, and I would be remiss not to fill you in on what they do best. Like the Multi-Treat Baker, this unit features a locking lid, convenient cord wrap and signal lights, as well as non-skid rubber feet.

    The capacity is lower-the machine can turn out nine pops at a go. When filling the cavities, it's best to use a pastry bag or a Ziploc for piping in the batter.

    As the yield is small, hence the name 'mini', you may find yourself making several batches. However, since the bake time is only a few minutes for each batch, this may not be seen as an issue for you. A benefit to this is that you won't need to rush to fill the cavities with batter as quickly as the higher capacity units before shutting the lid.

    The versatility of the Multi-Treat Baker makes that model a better choice, as well as the fact that it turns out more treats at one time. What this unit has over the Multi-Baker is it will not take up as much space, which makes it more suitable for apartment or tiny home dwellers making a quick snack.

    PROS

    • Easy to clean
    • Locking lid
    • Very inexpensive
    • Takes up less space

    CONS

    • Only makes nine cake pops at a time
    • Some complaints that this unit takes a long time to preheat

    Who would love this? This cake pop maker is best suited for shoppers on a tight budget who have minimal space in their kitchen and are okay with a smaller batch size. I personally bought this model for my niece.

    BUY HERE

    4. CucinaPro Electric Cooker for Donut Holes and Cake Pops

    Cucinapro Electric Cooker for Donut Holes and Cake Pops

    First things first: An ebelskiver is a Danish treat consisting of pancake batter (or some approximation thereof), baked into a spherical shape. The word can be literally translated as apple slices, but apples aren't necessarily included in modern-day variations of the dish.

    The CucinaPro unit is capable of making these goodies and more; cake batter is an easy substitution for the pancake mix, and a second non-stick mold can be swapped in to make doughnuts.

    Its capacity is limited to seven ebelskivers or cake pops in a single batch, but they're generously sized, so this could be an even trade-off. The signal light will alert you when the unit is ready for cooking to commence. The pops need to be baked 3 to 5 minutes per side.

    This model differs from the ones listed above in that there's no lid to close once the batter is poured in-the pops must be turned manually during baking. This could be a turnoff to busy cooks; however, the end result is satisfying enough to make the extra time worth it.

    There's no tool included to help you turn them-you'll have to purchase that separately. The company recommends using 2 wooden skewers to flip the treats.

    PROS

    • Doughnut option offers versatility
    • Heats evenly
    • Easy to clean
    • Lightweight and manageable
    • Easy to store

    CONS

    • The treats must be turned over manually during baking
    • No accessories included

    Who would love this? This cake pop baker is best suited for fans of eclectic baked goods, who are willing to put in a little extra work to get the job done.

    BUY HERE

    5. Akingshop 20 Cavity Silicone Cake Pop Mold

    silicone cake pop mold with treat sticks and ties.

    This double-sided silicone mold is an oven-ready option, with the highest capacity of any model on this list: It can turn out 20 uniform-sized cake pops at a time.

    This benefit is offset by the fact that they'll take longer to bake in the oven than they would on the countertop (about 15 to 25 minutes), but you're still likely to get a larger yield in a shorter period of time. The bright pink silicone is dishwasher safe, and can be used in the microwave, oven and freezer.

    This model requires a bit more work than the others on my list, but it is still handier than making the pops completely by hand! It can be recommended if budgeting and space issues are major concerns.

    You may not be able to peek into the mold as the pops are baking, but what you can do is insert a toothpick into the steam holes at the top to see if it comes out clean. The temperature-safe range for this mold is from +446°F to -40°F.

    This mold is very versatile; you can even use it for jello or hard candy treats! I use it once in a while when I feel like giving my electric one a break.

    PROS

    • Generous capacity
    • Easy to store
    • Microwave, oven, freezer and dishwasher safe
    • Very affordable
    • Comes with treat sticks, ties and bags.

    CONS

    • Oven-ready units don't allow you to peek during baking, but you can insert a toothpick into the steam vent holes.
    • Process takes longer than when using an electric unit
    • The mold can take some practice to figure out which height to fill the cavities to.

    Who would love this? This cake pop maker is best suited for traditionalists who enjoy doing mostly everything by hand, but still appreciate the extra help a mold has to offer.

    BUY HERE

    In Conclusion

    Taking everything into consideration, the best rated cake pop maker on this list would have to be: The Brentwood.

    While the unit has its shortcomings, it also contains the greatest number of desirable features, as outlined earlier in the Buyer's Guide. The yield is generous, it features nonstick plating, and the price point is very reasonable.

    While it doesn't offer a doughnut-making option or other alternative insert, there are other ways of increasing the appliance's versatility, particularly if you intend to use it for dishes that aren't dessert-related.

    A very close second would be the Babycakes Multi-Treat Baker. Babycakes has rightfully made a name for itself in the realm of cake pops, and the option to switch up the cooking plates for some donuts or cupcakes is very enticing.

    I hope you've found our discussion both enjoyable and informative, and that your purchase brings you many gustatory delights in the years to come. Bon appetit!

    More Buying Guides to Consider

    • Home coffee roaster with lid.
      The Best Home Coffee Roaster: Top 5 Picks Reviewed
    • Stainless steel electric skillet isolated on white background.
      The Best Stainless Steel Electric Skillet (Top Picks)
    • Ceramic electric skillet on counter.
      Top 5 Choices for the Best Ceramic Electric Skillet
    • Large electric skillet.
      The Best Electric Skillet: Buyer's Guide And Top 5 Choices

    If you enjoyed this buying guide for The Best Cake Pop Maker Reviews or any other post on my website, please let me know what you thought in the 📝 comments below. And please share the post!

    Christmas Spice Cake Pops

    December 12, 2018 by Joss Dyckson 2 Comments

    If you're looking for the perfect dessert to bring along to a holiday function or to serve over the holidays, you can't go wrong with this recipe. These Christmas spice cake pops are seasoned with just the right amount of cinnamon, vanilla, and nutmeg-all the flavors we associate with this special time of year.

    Christmas spice cake pops with beige ribbons and white candles on white wooden background.
    [feast_advanced_jump_to]

    🎁 A Sweet Bite-Size Treat For The Holiday Season

    These cake pops will undoubtedly be a big hit at the seasonal office party or family gathering. Because of their small size, they're easy to transport-and also less messy than traditional cupcakes. My red velvet and white chocolate cake pops are also perfect for Christmas parties.

    While they do require a bit of advance planning (note that the cake needs to bake for about an hour, then cool completely before you can form the pops), you can use the baking time to make your own buttercream frosting from scratch with this cake pop frosting recipe.

    You can also check out these yummy and festive, Christmas holiday recipes or more cake pop ideas.

    🌰 Ingredients

    • flour - White all-purpose flour works great.
    • sugars - We will be using white, brown and powdered sugar.
    • Christmas spices - Nutmeg and cinnamon powder.
    • baking powder and baking soda - Leavening agents to rise the cake.
    • canola oil - Or another vegetable oil that you have on hand. Canola is my oil of choice.
    • eggs - I use large eggs.
    • buttercream frosting - Store bought or homemade will work.
    • pralines - Candied pecans.

    *See recipe card for full ingredients and amounts.

    Chef's Note: Instead of the glaze to coat the cake pops, you can also use candy melts or melted chocolate.

    📖 Recipe Tweaks

    • You might want to substitute almond extract or a different flavor for the vanilla.
    • You can top the Christmas cake pops in almond slivers instead of pralines.
    • The nuts can easily be omitted altogether and other nut-free toppings can be added.
    • Omit the nutmeg if you're not a fan and swap in whatever Christmas spices you prefer, such as allspice, cloves or ginger.

    🥣 How to Make Christmas Spice Cake Pops

    For the Cake:

    1. Preheat oven to 180°C/350°F. Butter and flour a cake pan.
    2. In a bowl, combine all of the dry ingredients.
    3. In another bowl, combine all of the wet ingredients.
    4. Pour the wet ingredients into the dry ingredients and mix until smooth. The batter will be thick.
    5. Pour the batter into the cake pan and bake in the preheated oven for 45 to 60 minutes (or until a toothpick comes out clean from the center of the cake).

    Steps for Building the Cake Pops:

    1. After the cake is baked and cooled completely, crumble it with your hands in a large bowl until its texture is sandy.
    2. Add the buttercream frosting, a couple of heaping tablespoons at a time, and mix thoroughly. The amount of frosting you'll need depends on the texture of the mix. You need to reach a texture that allows you to form balls with your hands. (Too little or too much could result in failure. You do not want to see cracks when forming the balls, while too much frosting will make the cake balls heavy.)
    3. Use a small cookie scoop to make round balls of the cake mix, or you can use your hands. Place them on wax paper.
    4. For the sugar coating, mix the powdered sugar, vanilla extract and water, 1 tablespoon at a time, until spreadable. The icing will thicken slightly as it sets.
    5. Dip the tip of a treat stick into the sugar coating, then insert into the cake ball (approximately half-way). Repeat with the remaining cake balls.
    6. Refrigerate for 30-60 minutes to allow the cake pops to firm up and the icing on the stick to harden.
    7. Once firm, carefully dip the cake ball into the icing by holding the treat stick and rotating/gently tapping until covered.
    8. Place in a styrofoam block or some sort of cake pop stand. Sprinkle with the chopped pralines and let dry.
    9. Serve!

    Chef's Note: The cake pop stand can be a purpose-built stand that you can buy online or in store. Other ideas include: a Styrofoam block, an egg carton, an upside-down shoebox, etc.

    Christmas spice cake pops with praline topping.

    ✅ Make Ahead Tip

    The cake itself can be made a day or two in advance. This way it can be cooled and ready for the frosting step.

    Depending on how you store the finished cake pops, you can enjoy them for up to 1 week to 3 months.

    💬 No time to make cake pops by hand? Have a look at my Best Cake Pop Maker Reviews.

    ❓ Christmas Spice Cake Pops FAQs

    How long can you store the cake pops at room temperature?

    Christmas cake pops can be stored in an airtight container at room temperature for up to one week.

    How long can they be stored in the fridge?

    They can be stored in the fridge for up to 1 month, covered well.

    Can you freeze them?

    Yes! Store them in the freezer for up to 3 months. Wrap them with plastic wrap and place into a freezer bag.

    Christmas spice cake pops with beige ribbons tied around the treat stick.

    🎄 More Festive Christmas Holiday Recipes

    • Top view of mulled wine with orange slices and cinnamon sticks.
      Electric Skillet Mulled Wine
    • Chocolate chip cookie mix in a jar with bow.
      Food Gift Recipe: Chocolate Chip Cookie Mix in a Jar
    • Christmas punch in champagne glasses with wooden snowflake decorations.
      Christmas Morning Punch
    • Cranberry biscotti scattered on baking rack.
      Cranberry Biscotti

    If you tried this Christmas Spice Cake Pops Recipe or any other recipe on my website, please leave a 🌟 star rating and let me know how it went in the 📝 comments below. And please share the recipe!

    📋Recipe

    Christmas spice cake pops with beige ribbons tied around the treat stick.
    Print Pin
    5 from 3 votes

    Christmas Spice Cake Pops

    If you're looking for the perfect dessert to serve over the holidays, you can't go wrong with these Christmas spice cake pops. They're seasoned with just the right amount of cinnamon, vanilla, and nutmeg-all the flavors we associate with this special time of year.
    Course Dessert
    Cuisine American
    Diet Vegetarian
    Prep Time 40 minutes minutes
    Cook Time 45 minutes minutes
    Refrigeration Time 30 minutes minutes
    Total Time 1 hour hour 55 minutes minutes
    Servings 30 cake pops
    Calories 169kcal
    Author Joss Dyckson

    Equipment

    • popsicle sticks

    Ingredients

    For the Cake

    • 3 cups flour
    • ½ cup brown sugar
    • ½ cup white sugar
    • 1 tablespoon nutmeg
    • 1 tablespoon baking powder
    • 1 tablespoon baking soda
    • 2 tablespoons cinnamon powder
    • 1 cup canola oil
    • 5 large eggs or 6 medium
    • 1 ½ tablespoon vanilla extract

    For the Cake Pops

    • 1 cup buttercream frosting
    • 2 ½ cups powdered sugar
    • 1 ¼ teaspoon vanilla extract
    • 5 tablespoons water
    • ½ cup pralines chopped
    US Customary - Metric

    Instructions

    For the Cake

    • Preheat oven to 180°C/350°F. Butter and flour a cake pan.
    • In a bowl, combine all of the dry ingredients. In another bowl, combine all of the wet ingredients.
    • Pour the wet ingredients into the dry ingredients and mix until smooth. The batter will be thick.
    • Pour the batter into the cake pan and bake in the preheated oven for 45 to 60 minutes (or until a toothpick comes out clean from the center of the cake).

    Steps for Building the Cake Pops

    • After the cake is baked and cooled completely, crumble it with your hands in a large bowl until its texture is sandy.
    • Add the buttercream frosting, a couple of heaping tablespoons at a time, and mix thoroughly. The amount of frosting you'll need depends on the texture of the mix. You need to reach a texture that allows you to form balls with your hands. (Too little or too much could result in failure. You do not want to see cracks when forming the balls, while too much frosting will make the cake balls heavy.)
    • Use a small cookie scoop to make round balls of the cake mix, or you can use your hands. Place them on wax paper.
    • For the sugar coating, mix the powdered sugar, vanilla extract and water, 1 tablespoon at a time, until spreadable. The icing will thicken slightly as it sets.
    • Dip the tip of a treat stick into the sugar coating, then insert into the cake ball (approximately half-way). Repeat with the remaining cake balls.
    • Refrigerate for 30-60 minutes to allow the cake pops to firm up and the icing on the stick to harden.
    • Once firm, carefully dip the cake ball into the icing by holding the treat stick and rotating/gently tapping until covered.
    • Place in a styrofoam block or some sort of cake pop stand. Sprinkle with the chopped pralines and let dry.
    • Serve!

    Notes

    • Make Ahead Tip: The cake itself can be made a day or two in advance. This way it can be cooled and ready for the frosting step.
    • Storage: Cake pops can be stored in an airtight container at room temperature for up to one week, in the fridge for up to 1 month or in the freezer for up to 3 months.
    • Cake Pop Stand: The cake pop stand can be a purpose-built stand or simply a Styrofoam block, an egg carton, an upside-down shoebox, etc.
    • Alternative Coating Options: Instead of a glaze to coat the cake pops, you can also use candy melts or melted chocolate.
    • Nuts: The nuts can easily be omitted altogether and other nut-free toppings can be added.
    • Spices Tweak: Omit the nutmeg if you're not a fan and swap in whatever Christmas spices you prefer, such as allspice, cloves or ginger.

    Nutrition

    Calories: 169kcal | Carbohydrates: 33g | Protein: 2g | Fat: 3g | Saturated Fat: 1g | Cholesterol: 31mg | Sodium: 162mg | Potassium: 88mg | Sugar: 21g | Vitamin A: 50IU | Calcium: 42mg | Iron: 0.9mg

    Gourmet Dark Chocolate Truffles

    December 10, 2018 by Joss Dyckson Leave a Comment

    We all know that chocolate is delicious, but what is better than simply chocolate? gourmet dark chocolate truffles! And not just any kind of truffles. I mean the real, homemade, mouth-watering kind. The best part is: they are so easy to make!

    Chocolate truffles in a white dish.

    This yummy treat will easily make the top of your dessert list with the decadent chocolate on chocolate flavor.

    [feast_advanced_jump_to]

    🍫What are Chocolate Truffles?

    Chocolate truffles are a candy consisting of little balls of chocolate ganache coated in cocoa powder, nuts and/or other toppings.

    🥘Ingredients

    Dark chocolate truffle ingredients prepped and labeled.

    There is no cream required for these truffles but you will need the following ingredients to get started:

    • graham wafers/crackers - This is the special ingredient I use to give the truffles a bit of crispy texture on the inside. (I also use them to make this delicious graham wafer lemon bars dessert.)
    • dark chocolate bar - high quality* such as Lindt
    • butter - You can use salted or unsalted. I normally only keep salted butter on hand so that is what I use for this recipe.
    • sea salt - Sea salt will enhance the flavor with more of a pure taste than table salt will.
    • regular unsweetened cocoa powder - The truffles will be dusted with the cocoa powder to make them less sticky, add double chocolate flavor, plus it looks amazing.

    *Check recipe card for ingredient amounts.

    *Pro Tip: Using low quality chocolate or chocolate chips can affect the texture of the truffle negatively.

    📖Tweaks

    Try tweaking the recipe to match your own particular sweet tooth! You could try using white chocolate, milk chocolate or semi-sweet chocolate.

    Mixing different kinds of chocolate bars and even caramel chocolate candy bars together will provide a unique twist.

    Instead of coating the truffles in cocoa, try rolling them in powdered sugar, shredded coconut, chopped peanuts or walnuts, grated chocolate chips, or granola. Try each kind and see which one you enjoy the most!

    You can add a touch of vanilla powder to the cocoa for extra flavor. I have a tutorial for how to make vanilla powder and vanilla sugar if you want to give it a try.

    🔪How to Make Them

    Graham crackers in blender.

    Step #1. Blend graham wafers. Process the graham wafers in a blender until you get a fine powder.

    Chocolate melting in metal bowl.

    Step #2. Melt the chocolate. Place the chocolate in a metal bowl and over a pot with simmering water (to melt using a double-boiler style).

    Chocolate truffle ingredients in metal bowl.

    Step #3. Add ingredients to chocolate. Add the butter and mix it into the chocolate as it melts. Add the powdered wafers and sea salt. Mix all of the ingredients well.

    Chocolate truffle mixture in metal bowl with wooden spoon.

    Step #4. Chill. Continue mixing until you get a silky and smooth texture. Refrigerate for 1 hour, or just until it thickens enough to manipulate.

    Pro Tip: Depending on the chocolate you use, you may need to add a bit more butter if it's too dry, or a bit more of the ground wafers if it's too runny to form into balls.

    Chocolate truffle mixture on spoon.

    Step #5. Form into balls. Using a spoon and your hands, form the mixture into small balls. If your hands are getting sticky, just dust them with a little cocoa powder.

    Chocolate truffle rolled in cocoa powder.

    Step #6. Roll in cocoa powder. Add the cocoa powder to a plate. Roll the balls in the cocoa powder to cover them completely.

    Cocoa powder sprinkled over chocolate truffles with small mesh strainer.

    Step #7. Dust with cocoa. Dust a little more cocoa powder over the truffles.

    Chocolate truffles in a white dish.

    Step #8. Serve. Serve and enjoy!

    🍴Serving Suggestions

    • They are great to serve at parties (including birthday parties), at home, at work, or just to snack on while watching your favorite movie or TV show.
    • They are the perfect treat to display on your holiday dessert table including for Christmas, Easter and Valentine's Day.

    🌡️Storage

    • Store the truffles in an airtight container in a cool, dry place away from light or in the refrigerator for up to two weeks. Serve them at room temperature.
    • You can freeze them for up to 3 months in a freezer bag. Thaw them in the refrigerator.

    ❓Chocolate Truffles FAQs

    Why are they called truffles?

    They are called truffles because of their resemblance to the fungus with the same name.

    What do they taste like?

    They are mainly composed of chocolate, so that is the main flavor that comes through and they are only slightly sweet. The flavor is enhanced with a touch of salt.

    How long do chocolate truffles last?

    For best quality, consume them within two weeks.

    Chocolate truffles stacked on a white dish.

    🍬More Candy Recipes You Will Love

    • Sliced candied limes on wooden counter.
      How to Candy Limes
    • Strawberry heart-shaped candies in jar.
      Strawberry Candy
    • Christmas sprinkles in jar with red ribbon.
      Homemade Christmas Sprinkles
    • Marzipan ball dusted in icing sugar.
      Marzipan Balls

    If you tried this Gourmet Dark Chocolate Truffles Recipe or any other recipe on my website, please leave a 🌟 star rating and let me know how it went in the 📝 comments below. And please share the recipe!

    📋Recipe

    Chocolate truffles in a white dish.
    Print Pin
    5 from 1 vote

    Gourmet Dark Chocolate Truffles

    This recipe shows you exactly how to make real, homemade, mouth-watering, easy gourmet dark chocolate truffles.
    Course Dessert
    Cuisine French
    Diet Vegetarian
    Prep Time 20 minutes minutes
    Refrigeration Time 1 hour hour
    Total Time 1 hour hour 20 minutes minutes
    Servings 12 truffles
    Calories 155kcal
    Author Joss Dyckson

    Equipment

    • Blender
    • Double boiler

    Ingredients

    • ½ cup graham wafers about 1.6 ounces
    • 6 ounces high quality dark chocolate bar chopped
    • 5 tablespoons butter
    • 1 teaspoon sea salt
    • ½ cup cocoa powder
    US Customary - Metric

    Instructions

    • Process the graham wafers in a blender until you get a fine powder.
      Graham crackers ground in blender.
    • Place the chocolate in a metal bowl and over a pot with simmering water (to melt using a double-boiler style).
      Chocolate melting in metal bowl.
    • Add the butter. Mix it into the chocolate as it melts. Add the powdered wafers and salt. Mix all of the ingredients well.
      Chocolate truffle ingredients in metal bowl.
    • Continue mixing until you get a silky and smooth texture. Refrigerate for 1 hour, or just until it thickens enough to manipulate.
      Chocolate truffle mixture in metal bowl with wooden spoon.
    • Using a spoon and your hands, form the mixture into small balls. If your hands are getting sticky, just dust them with a little cocoa powder.
      Chocolate truffle mixture on spoon.
    • Add the cocoa powder to a plate. Roll the balls in the cocoa powder to cover them completely.
      Chocolate truffle rolled in cocoa powder.
    • Dust a little more cocoa powder over the truffles.
      Cocoa powder sprinkled over chocolate truffles with small mesh strainer.
    • Serve & Enjoy!
      Chocolate truffles in a white dish.

    Notes

    • Depending on the chocolate you use, you may need to add a bit more butter if it's too dry, or a bit more of the ground wafers if it's too runny to form into balls.
    • Store the truffles in an airtight container in a cool, dry place away from light or in the refrigerator for up to two weeks.
    • You can freeze them for up to 3 months in a freezer bag. Thaw them in the refrigerator.
    • Serve them at room temperature.

    Nutrition

    Calories: 155kcal | Carbohydrates: 11g | Protein: 2g | Fat: 12g | Saturated Fat: 7g | Cholesterol: 13mg | Sodium: 231mg | Potassium: 165mg | Fiber: 2g | Sugar: 4g | Vitamin A: 160IU | Calcium: 20mg | Iron: 2.4mg

    Salmon Mousse

    December 5, 2018 by Joss Dyckson 1 Comment

    This savory salmon mousse with dill is a bit of a showstopper with its five-star-quality presentation. This appetizer will wow your holiday guests with its creamy texture and hint of citrus zing. Best of all, it's super easy to make.

    Salmon and dill mousse with caviar in white dish.
    [feast_advanced_jump_to]

    An Easy & Elegant Holiday Appetizer

    Forget the cheese tray. This holiday season, present your guests with a salmon mousse appetizer, adorned with black caviar, served atop crisp crackers.

    It's a great make ahead appetizer because it needs to be serve chilled, allowing you to make it 1 or 2 days in advance.

    Other appetizers may be quick and easy, but it will be the unique holiday appetizers like my cranberry goat cheese shots and this salmon and caviar mousse that everyone will remember and enjoy for many seasons to come.

    Here are some more festive and yummy holiday recipes you might like including Christmas punch and Christmas cookie sprinkles.

    SUMMARIZE & SAVE THIS CONTENT ON

    ChatGPT
    Google AI
    Perplexity
    Grok

    Ingredients

    • unflavored gelatin powder - to give it structure and help hold its shape (just like it does in Jello and homemade Jello gummies)
    • white wine - white wine is an excellent match for salmon, not only as a drink but also as an ingredient for cooking
    • canned salmon - you don't have to cook the salmon because we are using canned salmon which saves on time and energy
    • fresh dill - see my tutorial for how to chop up dill
    • black fish eggs/roe (lumpfish) - optional--referred to as 'the caviar of the north' and is a cheaper option than the more expensive caviar

    *Check recipe card for ingredient amounts.

    ⭐ If you like appetizers using fresh dill, you might also like my dill dip recipe.

    Recipe Tweaks

    • Make it spicy by adding a few drops of hot sauce or some red pepper flakes. To please everyone, make a spicy version and a regular version.
    • For dipping, you can use different types of crackers, breadsticks or even vegetables like celery sticks.
    • Instead of fresh dill, you can try finely diced chives.
    • Instead of a mini loaf pan, try another type of mold or multiple, smaller molds.
    • You can also use try using hot smoked salmon instead of canned for a different flavor.
    Salmon and dill mousse on a white dish with small santa knife.

    How to Make Salmon Mousse

    1. Pour 3 tablespoons of cold water in a small bowl, and sprinkle with gelatin. Let it sit for 5 minutes.
    2. Pour it into a small pot over medium heat. Heat it for a couple of minutes, until the gelatin dissolves. Set aside.
    3. In a food processor or blender, add the white wine, canned salmon, cream cheese, lemon juice & zest, salt and pepper. Purée until smooth.
    4. Add the gelatin and the fresh dill and pulse until well mixed.
    5. Line a mini loaf pan mold with plastic wrap. Pour in the mousse and cover the top with the plastic wrap. Refrigerate until firm (about 2 hours).
    6. Open the top of the plastic wrap, turn the mousse over onto the serving plate, and remove the plastic wrap.
    7. Garnish the mousse with some more fresh dill and black fish eggs. Serve with crackers.

    Joss' Tips

    • Choose high quality ingredients. I recommend using wild caught, high quality salmon. Using high quality ingredients will give you a great-tasting appetizer that will impress your guests.
    • Don't over-blend. By carefully blending ingredients and managing texture, your mousse will turn out light, smooth, and full of flavor!
    • Give it time to chill. Let the mousse chill in the fridge for at least 2 hours. This allows the flavors to mingle and the mousse to firm up, making it easier to spread.

    Salmon Mousse FAQs

    What is salmon mousse?

    Salmon mousse is a savory, spreadable mixture of cooked salmon and cream cheese, formed in a mold with gelatin. It has that smooth and airy texture of whipped cream cheese.

    What do you serve it with?

    Salmon mousse is often served chilled, spread on crackers, toast, or cucumber slices. I love to serve it with an assortment of crackers.

    How low can you store leftovers in the fridge?

    Store in a covered container in the refrigerator for up to 3 days.

    Can you store it in the freezer?

    You can freeze salmon mousse for up to 2 months for best quality. Thaw in the refrigerator.

    Salmon and dill mousse topped with caviar.

    More Holiday Recipes to Wow Your Guests

    • Beef tenderloin covered in mushroom sauce
      Beef Tenderloin (With Bourbon Sauce)
    • Christmas spice cake pops with beige ribbons tied around the treat stick.
      Christmas Spice Cake Pops
    • Cranberry biscotti scattered on baking rack.
      Cranberry Biscotti
    • Fruit salad in dessert glass.
      Christmas Fruit Salad

    If you tried this Salmon Mousse Recipe or any other recipe on my website, please leave a 🌟 star rating and let me know how it went in the 📝 comments below. And please share the recipe!

    📋Recipe

    Salmon and dill mousse with caviar in white dish.
    Print Pin
    5 from 4 votes

    Salmon Mousse

    This savory dill salmon mousse is a bit of a showstopper with its five-star-quality presentation. This dish will wow your holiday guests with its creamy texture and hint of citrus zing. Best of all, it's super easy to make using a mold.
    Course Appetizer
    Cuisine American, French
    Prep Time 15 minutes minutes
    Cook Time 2 minutes minutes
    Refrigeration Time 2 hours hours
    Total Time 2 hours hours 17 minutes minutes
    Servings 8
    Calories 89kcal
    Author Joss Dyckson

    Equipment

    • Food processor
    • Mini loaf pan

    Ingredients

    • 1 teaspoon unflavored gelatin
    • 2 tablespoons white wine
    • 1 cup canned salmon drained
    • ½ cup cream cheese softened
    • 1 lemon zested and juiced
    • 3 tablespoons fresh dill chopped
    • black fish eggs lumpfish - optional
    • salt and pepper to taste
    US Customary - Metric

    Instructions

    • Pour 3 tablespoons of cold water in a small bowl, and sprinkle with gelatin. Let it sit for 5 minutes.
      1 teaspoon unflavored gelatin
    • Pour it into a small pot over medium heat. Heat it for a couple of minutes, until the gelatin dissolves. Set aside.
    • In a food processor or blender, add the white wine, canned salmon, cream cheese, lemon juice & zest, salt and pepper. Purée until smooth.
      2 tablespoons white wine, 1 cup canned salmon, ½ cup cream cheese, 1 lemon
    • Add the gelatin and the fresh dill and pulse until well mixed.
      3 tablespoons fresh dill
    • Line a mini loaf pan (something close to 5.5 inches x 2.7 inches x 1.5 inches deep) with plastic wrap. Pour in the mousse and cover the top with the plastic wrap. Refrigerate until firm (about 2 hours).
    • Open the top of the plastic wrap, turn the mousse over onto the serving plate, and remove the plastic wrap.
    • Garnish the mousse with some more fresh dill and black fish eggs. Serve with crackers.

    Notes

    • Salmon mousse is often served chilled, spread on crackers, toast, or cucumber slices. I love to serve it with an assortment of crackers.
    • Store in a covered container in the refrigerator for up to 3 days.
    • You can freeze salmon mousse for up to 2 months for best quality. Thaw in the refrigerator.
    • I recommend using wild caught, high quality salmon or hot-smoked salmon if you like that flavor.

    Nutrition

    Calories: 89kcal | Carbohydrates: 2g | Protein: 6g | Fat: 6g | Saturated Fat: 2g | Cholesterol: 33mg | Sodium: 131mg | Potassium: 149mg | Vitamin A: 630IU | Vitamin C: 11.9mg | Calcium: 89mg | Iron: 0.7mg

    White Chocolate Ganache

    December 3, 2018 by Joss Dyckson Leave a Comment

    Can't figure out what is missing from your dessert? What do you need to take it from good to positively delectable? Simple. You need to add this sweet, white chocolate ganache filling.

    Strawberry dipped into white chocolate ganache.

    White ganache, basically a chocolate gravy, can be used for cakes, drip cakes, cupcakes, truffles, or any delicious treat you make that you need to add a little gooey goodness to. Or, better yet, let it stand alone.

    While you may want to eat it right out of the bowl, I recommend pairing it with strawberries, cubed cantaloupe or another bite-size fruit for dipping. The best part? It can be made in under half an hour, so it's an easy addition to your dinner party or family gathering when you have guests to impress.

    [feast_advanced_jump_to]

    What is White Chocolate Ganache?

    It is simply a mixture of white chocolate and cream that can be used for dipping or as a sauce, glaze, icing or filling for pastries, cakes and more.

    Ganache Ratio

    • It is usually made with a ratio of 1:1, meaning equal parts chocolate and cream.
    • For a pourable glaze, you will want to use a ratio of 1:2 (1 part chocolate and 2 parts cream) to make the ganache thinner.
    • For a firmer ganache, use a ratio of 2:1 (2 parts chocolate and 1 part cream).

    Ingredients

    White chocolate ganache ingredients prepped and labeled.
    • white chocolate bar - Pick up a high quality chocolate bar for best results.
    • heavy cream - The fat in heavy cream gives ganache a smooth, rich, and velvety texture. This is essential for creating that luxurious, glossy finish that ganache is known for!
    • vanilla extract - Vanilla is added to enhance the flavor and balance the sweetness.
    • strawberries - To serve (totally optional).

    *Check recipe card for ingredient amounts.

    How to Make White Chocolate Ganache

    White chocolate and vanilla in metal bowl.

    Step #1. Place Ingredients in Metal Bowl. Place the white chocolate, heavy cream and vanilla extract in a metal bowl.

    While chocolate ganache on a spoon and in a metal bowl.

    Step #2. Melt. Place the bowl over a pot with simmering water (to melt using a double-boiler style) and mix until smooth and creamy.

    White chocolate ganache drizzling from a spoon into a clear glass bowl.

    Step #3. Remove From Heat. Remove from heat. Continue mixing until you get a silky texture.

    Strawberry dipped into white chocolate ganache.

    Step #4. Use the Ganache. It is now ready to be used as desired.

    Ways to Use it

    • Serve as a dip with strawberries or other fresh fruits.
    • Ganache can also be used as a cake, cupcake or macaron filling.
    • Pour it over cakes, cookies, brownies, cupcakes, chocolate ice cream, mochi ice cream, waffles etc.

    Joss' Tips

    • If you're using the ganache for dipping, you can keep it warm in a fondue pot or mini food warmer/slow cooker.
    • If you followed the recipe, your results should be smooth and tasty! However, wish it was a little whiter to complement your dessert or just look prettier with your plate of fruit? You can add a little food grade titanium dioxide to lighten it up. Be sure to utilize an appropriate ratio, so as not to change the consistency. Also, make sure you do not to go over the limit of 1% as per FDA guidelines.
    • Another way to keep it whiter? Use clear vanilla extract.

    Recipe FAQs

    How long can you store ganache in the fridge?

    You can store leftover ganache in the fridge for up to two to three weeks.

    Can you freeze it?

    You can also freeze it for one month. Make sure you thaw it in the fridge.

    Is whipped ganache the same as regular ganache?

    A whipped ganache and regular ganache use the same components but the whipped version incorporates a higher amount of liquid. Stabilizers like gelatin are used to help create and maintain an airy and fluffy texture.

    How to fix oily ganache?

    It likely split. Use an immersion blender on high speed and blend until it comes together.

    Does ganache harden on cake?

    It won't completely harden like like a rock, but when it cools and sets it will have a stiffer, fudge-like consistency.

    White chocolate ganache on spoon with text overlay that says 'how to make white chocolate ganache'

    More Mouth-Watering Chocolate Recipes

    • Chocolate mug cake mix in a red mug with Christmas gift label.
      Food Gift Recipe: Fudgy Chocolate Mug Cake
    • Hot chocolate spoons on serving tray.
      Hot Chocolate Spoons
    • Chocolate covered coffee beans in white dish.
      How to Make Chocolate Covered Coffee Beans
    • Chocolate truffles in a white dish.
      Gourmet Dark Chocolate Truffles

    If you tried this White Chocolate Ganache Recipe (For Drip Cakes & More) or any other recipe on my website, please leave a 🌟 star rating and let me know how it went in the 📝 comments below. And please share the recipe!

    📋Recipe

    White chocolate ganache drizzling from spoon into bowl.
    Print Pin
    5 from 1 vote

    White Chocolate Ganache

    This sweet, white chocolate ganache filling can be used for drip cakes, cake filling, cupcakes, truffles, or any delicious treat you make that you need to add a little gooey goodness to.
    Course Dessert
    Cuisine American, French
    Diet Vegetarian
    Prep Time 5 minutes minutes
    Cook Time 5 minutes minutes
    Total Time 10 minutes minutes
    Servings 6
    Calories 228kcal
    Author Joss Dyckson

    Equipment

    • Metal bowl and pot (double-boiler)

    Ingredients

    • 1 white chocolate bar chopped--6 ounces/175 grams
    • ½ cup heavy cream
    • 1 teaspoon vanilla extract
    • strawberries to serve--optional for dipping
    US Customary - Metric

    Instructions

    • Place the white chocolate, heavy cream and vanilla extract in a metal bowl.
      White chocolate and vanilla in metal bowl.
    • Place the bowl over a pot with simmering water (to melt using a double-boiler style) and mix until smooth and creamy. Make sure to keep it at a gentle simmer so that you don't overcook the chocolate.
      While chocolate ganache on a spoon and in a metal bowl.
    • Remove from heat. Continue mixing until you get a silky texture.
      White chocolate ganache drizzling from a spoon into a clear glass bowl.
    • Serve as a dip with strawberries or other fresh fruits. Ganache can also be used as a cake or macaron filling. Pour it over cakes, cookies, brownies, cupcakes, ice cream, waffles etc.
      Strawberry dipped into white chocolate ganache.

    Notes

    • Dipping Tip: If you're using the ganache for dipping, you can keep it warm in a fondue pot or mini food warmer.
    • Fridge Storage: You can store leftover ganache in the fridge for up to two to three weeks.
    • Freezer Storage: You can also freeze it for one month. Make sure you thaw it in the fridge.
    • Ganache Ratio:
      • White chocolate ganache is usually made with a ratio of 1:1, meaning equal parts chocolate and cream.
      • For a pourable glaze, you will want to use a ratio of 1:2 (1 part chocolate and 2 parts cream) to make the ganache thinner.
      • For a firmer ganache, use a ratio of 2:1 (2 parts chocolate and 1 part cream).
    • For a Whiter Ganache: You can add a little food grade titanium dioxide to lighten it up. Be sure to utilize an appropriate ratio, so as not to change the consistency. Also, make sure you do not to go over the limit of 1% as per FDA guidelines. Also, use clear vanilla extract.

    Nutrition

    Calories: 228kcal | Carbohydrates: 17g | Protein: 2g | Fat: 16g | Saturated Fat: 10g | Cholesterol: 33mg | Sodium: 33mg | Potassium: 98mg | Sugar: 17g | Vitamin A: 300IU | Vitamin C: 0.2mg | Calcium: 71mg | Iron: 0.1mg

    Swedish Glögg

    November 28, 2018 by Joss Dyckson 8 Comments

    This cinnamon-orange Swedish Glögg is best served hot and shared with some great company on a cold Christmas night. If you are looking for a new addition to your Christmas menu, try this recipe.

    Cinnamon orange glögg in wine glass.

    🎄 A Cozy Cup of Swedish Christmas Cheer

    There is nothing cozier than the warm tingle of spices wafting through the house around Christmas time. For me, the aroma of spicy ginger, cinnamon and sweet cardamom, while the Swedish Glögg is heating, reminds me of my European roots and the Christmas night markets flowing with steaming mulled wine.

    While hot cocoa is the drink of choice for the holidays, this Swedish Glögg is a great adult alternative. The notes of orange zest will brighten up even the darkest winter night (another orange flavored drink you might like is this homemade orange Julius).

    Not only is this holiday recipe easy to make, but it is an instant crowd-pleaser. It makes a large batch of about six servings, but Swedish Glögg can easily be saved and reheated throughout the duration of your holiday celebrations.

    Sometimes I enjoy serving the Glögg with these Christmas spice cake pops or gingerbread cake balls on the side. This topfenstrudel is also traditional in my family.

    Featured Comment

    From Marieke: ⭐⭐⭐⭐⭐ "I'm so excited to have found this recipe! My dad grew up in the Netherlands and his favourite mulled wine always had almonds -- can't wait to make this for him!"

    [feast_advanced_jump_to]

    🍷 What is Glögg?

    Glögg is a traditional Swedish variation of mulled wine. The name itself comes from the Swedish word glödga which is a verb meaning: to mull or to burn. It is served hot and usually at Christmas time.

    🗣 How do you Pronounce it?

    As for how to pronounce Glögg, here is an entertaining and informative video for you:

    🍊 Ingredients

    Swedish glögg ingredients labeled on wooden background.
    • red wine - My favorite wine to use is cabernet sauvignon. You can also use Merlot or Zinfandel.
    • oranges - We will be using the oranges for their zest to flavor the drink as well as the slices for a garnish.
    • blanched almonds - Blanched almonds have their skins removed. I can usually find them in the baking aisle.
    • cardamom pods - This is a common baking spice in Nordic countries like Sweden.
    • fresh ginger root - Not pictured. Fresh ginger adds a nice hit of flavor to the glögg.
    • star anise - Star anise is a beautiful star-shaped spice with licorice flavor.

    *Check recipe card for ingredient amounts.

    📖 Recipe Variations

    • Alcohol swap: Swedish Glögg is highly versatile in the type of alcohol and spices used. While this particular recipe calls for wine, the Swedes are not afraid to replace it with aquavit, brandy or vodka or a combination.
    • No-alcohol: You can make a non-alcoholic version with juice such as grape, apple or blackcurrant.

    🥣 How to Make Swedish Glögg

    Swedish Glögg in pot on burner.

    Step 1. Combine ingredients. Combine the wine, sugar, orange zest, raisins, almonds, cardamom pods, ginger root, cinnamon stick and cloves in a large pot. Bring to a simmer over medium heat.

    Swedish Glögg simmering in pot.

    Step 2. Simmer. Lower the heat and let it gently simmer for 10 minutes. Remove the Glögg from heat and let it stand for a couple of minutes.

    👩‍🍳 Chef's Note: While the glögg is heating, I also prep a warm crockpot cheese dip to round out the holiday spread.

    Swedish Glögg straining into wine glass through wire mesh strainer.

    Step 3. Strain. Strain the liquid to remove the spices, nuts and raisins.

    Cinnamon orange glögg in wine glasses with Christmas decorations.

    Step 4. Serve. Ladle the Swedish glögg into heat-proof glasses or mugs. Garnish with orange slices and star anise. Serve!

    👉 Joss' Tip

    To strain the Swedish glögg you can use a mesh strainer, slotted spoon or just pick the whole spices and almonds out with tongs. You may instead choose to reserve the raisins and almonds and return them to the drink. They can be eaten directly out of the mug with a spoon!

    🎄 Looking for more holiday options? Try my Salmon and Dill Mousse.

    ❓ Swedish Glögg FAQs

    Is Swedish glögg the same as mulled wine?

    Glögg is a Swedish version of mulled wine but adds different ingredients like raisins and almonds and sometimes different alcohols.

    What is best to serve glögg in?

    You can serve the drink in any heat-proof glass or mug. Ceramic, porcelain and glass should all work great. I recommend clear glass mugs so that you can see the contents through the glass or some festive Christmas mugs.

    How do you store leftover glögg?

    Store leftovers, once they've cooled, in an airtight container in the fridge for up to 3 days.

    How do you reheat it?

    Reheat the Swedish glögg gently on the stove over low or medium-low heat. You can also reheat it in a slow cooker on low.

    Cinnamon orange glögg in wine glasses.

    ❤️ More Cinnamon-Flavored Recipes You Will Love

    • Brandy Alexander cocktail in a martini glass with blue stem.
      Brandy Alexander Cocktail
    • Three sugar rims in small glass jars on marble background.
      Sugar Rim (3 Flavors)
    • London fog tea latte in a clear glass mug with tea biscuits on the side.
      How to Make a London Fog
    • Cinnamon apple chips in a bowl.
      Cinnamon Apple Chips

    If you tried this Swedish Glögg Recipe or any other recipe on my website, please leave a 🌟 star rating and let me know how it went in the 📝 comments below. And please share the recipe!

    📋Recipe

    Cinnamon orange glögg in wine glass.
    Print Pin
    5 from 6 votes

    Swedish Glögg

    This Swedish Glögg is a variation of mulled wine best served hot and shared with some great company on a cold Christmas night. If you are looking for a new addition to your holiday traditions, try this recipe.
    Course Drinks
    Cuisine Swedish
    Diet Vegan, Vegetarian
    Prep Time 5 minutes minutes
    Cook Time 10 minutes minutes
    Total Time 15 minutes minutes
    Servings 6
    Calories 175kcal
    Author Joss Dyckson

    Ingredients

    • 1 bottle red wine
    • ½ cup sugar
    • 2 tablespoons orange zest
    • 2 tablespoons raisins
    • 2 tablespoons blanched almonds (skins removed) chopped
    • 1 tablespoon cardamom pods
    • 2 tablespoons ginger root peeled and chopped
    • 1 cinnamon stick
    • 8 whole cloves
    • orange slices as a garnish
    • star anise as a garnish
    US Customary - Metric

    Instructions

    • Combine the wine, sugar, orange zest, raisins, almonds, cardamom pods, ginger root, cinnamon stick and cloves in a large pot. Bring to a simmer over medium heat. Lower the heat and let it gently simmer for 10 minutes.
      1 bottle red wine, ½ cup sugar, 2 tablespoons orange zest, 2 tablespoons raisins, 2 tablespoons blanched almonds (skins removed), 1 tablespoon cardamom pods, 2 tablespoons ginger root, 1 cinnamon stick, 8 whole cloves
    • Remove from heat and let it stand for a couple of minutes. Strain the liquid to remove the spices, nuts and raisins.
    • Ladle into heat-proof glasses or mugs. Garnish with orange slices and star anise. Serve! (You may also reserve the raisins and almonds and return them to the glögg. They can be eaten directly out of the glögg with a spoon.)

    Video

    Notes

    • Straining tip: To strain the glögg you can use a mesh strainer, slotted spoon or just pick them out with tongs.
    • Fridge storage: Store leftovers, once they've cooled, in an airtight container in the fridge for up to 3 days.
    • Reheating: Reheat the glögg gently on the stove over low or medium-low heat. You can also reheat it in a slow cooker on low.

    Nutrition

    Calories: 175kcal | Carbohydrates: 21g | Sodium: 5mg | Potassium: 169mg | Sugar: 17g | Vitamin A: 20IU | Vitamin C: 6.7mg | Calcium: 18mg | Iron: 0.6mg

    Homemade Chocolate Caramel Bars

    November 26, 2018 by Joss Dyckson Leave a Comment

    These homemade chocolate caramel bars are nutty, ooey, gooey and delicious! Who doesn't love the combination of chocolate and caramel? This from-scratch recipe breaks it all down into simple steps.

    Chocolate caramel bars stacked on blue background.
    [feast_advanced_jump_to]

    Why You Will Love Caramel Filled Chocolate Bars

    • These chocolate caramel bars are great for the holidays, along with the chocolate truffles and other Christmas candy, or any time you feel like surprising your friends and family with a sweet treat.
    • With a few basic ingredients, this chocolate bar recipe will show you how to make delicious candy right in your own kitchen. (I've also made these copycat Cuban Lunch bars that are just as chocolatey and delicious that you might like.)
    • Worried about making caramel from scratch? My recipe explains precisely how to cook the sugar and when to add the butter and cream to achieve a deliciously smooth caramel.
    • You don't even need a candy thermometer to follow this recipe.
    • The bars take a couple hours to set, but once they are done, you will have nutty, rich caramel bars your whole family will love. Just make sure the kids don't feed any to the family dog!

    🍬 If you're interested in candy making, I also have a tutorial for how to make gummies at home that you might like!

    Ingredients & Tools

    Chocolate caramel bar ingredients labeled on wooden background.
    • high quality chocolate bar - I use either milk or dark chocolate. The large Lindt bars are my favorite for homemade chocolaty treats.
    • hazelnuts - The hazelnuts add just the crunchy touch this recipe needs.
    • freshly squeezed lemon juice - To help prevent crystallization.
    • butter - I prefer to use salted because it helps enhance the flavor.
    • Heavy cream - Heavy cream contains at least 36% milk fat. You can also use light cream (30% to 35%).
    • sugar - You need to use white granulated sugar for the caramel.
    • small loaf pan - I use an 8" x 4" loaf pan for a single batch (you can also use 2 to 3 mini loaf pans). If you're doubling or tripling the recipe, you might want to consider a larger square pan. Instead of using foil to line a pan, you can also use a disposable foil pan.
    • kitchen mallet - To crush the hazelnuts. You can also use a rolling pin.

    *Check recipe card for ingredient amounts.

    How to Make Chocolate Caramel Bars

    Hazelnuts and mallet on cutting board.

    Step #1. Crush the hazelnuts. On a cutting board, pound the hazelnuts into small pieces with a kitchen mallet. It helps to place a clean kitchen towel on top so that the nuts don't scatter.

    Chocolate bar pieces in double boiler.

    Step #2. Melt the chocolate. Place the chocolate in a metal bowl and over a pot with simmering water (to melt using a double-boiler style).

    ⭐ Another chocolate recipe you might like is my tutorial for how to make chocolate covered coffee beans.

    Melted chocolate in double boiler.

    Step #3. Reserve. When the chocolate is melted, reserve but keep warm (you can turn off the heat and keep it in the same pot until it's time to transfer it to the loaf pan).

    Sugar in saucepan with wooden spoons.

    Step #4. Begin to make the caramel. Place the sugar in a deep pot.

    Pro Tip #1

    When making caramel, do not use a metal spoon. Opt for a clean, wooden or silicone spoon to prevent crystallization. Any debris in the pot or on the utensil could also cause the caramel to crystallize so make sure they are very clean.

    Chocolate caramel bars steps collage making the caramel.

    Step #5. Add liquid. Add the water and lemon juice and heat slowly over medium heat until boiling. Give it an initial stir, and then stop stirring! Do not mix anymore as this can promote crystallization (Image 5).

    Chef's Note: You can, however, gently swirl the pot to brown the sugar evenly. Once the water evaporates, the sugar will begin to caramelize.

    Step #6. Remove from heat. Once it begins to brown (you have to be very vigilant as this can happen very suddenly), remove from heat and carefully add the butter and heavy cream. Now you can stir until soft. It will bubble and foam at first (Image 6).

    Step #7. Add first chocolate layer. Pour half of the melted chocolate into the foil-lined loaf pan (Image 7).

    Step #8. Add caramel layer. Add the caramel to the pan on top of the chocolate (Image 8).

    Pro Tip #2

    Do not feel discouraged if it didn't turn out for you on your first attempt (it took me a while to get it right for my first time). If it does happen to crystallize, you can try to fix the caramel by adding ¼ cup of water back to the pot and start the process of heating to a boil again.

    Hand holding hazelnuts over loaf pan.

    Step #9. Add hazelnuts. Sprinkle with half of the crushed hazelnuts. Add the rest of the chocolate. You can use the spatula to carefully spread it out into the edges and corners.

    Melted chocolate pouring into loaf pan.

    Step #10. Cool and serve. Sprinkle the rest of the hazelnuts on top. Let it cool at room temperature (for at least 2 hours or until the chocolate is hard). When the chocolate caramel bars have cooled, cut into pieces and serve.

    Pro Tip #3

    The foil can be used to pull the chocolate caramel bars out of the loaf pan.

    Storage

    These chocolate caramel bars are best stored in one single layer. I don't recommend stacking them because the caramel can dribble and cause the bars to stick together.

    • Room temperature storage: You can store the chocolate caramel candy bars in an airtight container at room temperature for up to 2 days. I prefer fridge storage to keep the caramel more firm.
    • Fridge storage: Refrigerate covered for up to 2 weeks.
    • Freezer storage: Freeze in freezer bags for up to 3 months.

    Chocolate Caramel Bars FAQs

    Does caramel taste good with chocolate?

    Chocolate and caramel make an awesome duo. It's no wonder there are so many types of chocolate bars that combine the two.

    Is caramel just melted sugar?

    Creating wet caramel involves blending sugar and a liquid, cooking them together. On the other hand, dry caramel is crafted by heating sugar in a dry pan until it transforms into a liquid and takes on a golden brown hue. Then you will add cream and butter.

    Why can't you stir caramel?

    This can trigger a domino effect, leading to the caramel seizing up and ultimately spoiling the whole batch.

    Chocolate caramel bars.

    ❤️ More Dessert Recipes You Will Love

    • White chocolate ganache drizzling from spoon into bowl.
      White Chocolate Ganache
    • Graham wafer lemon bars stacked on purple napkin.
      Graham Wafer Lemon Bars
    • Chocolate covered donut holes on serving tray.
      Double Chocolate Donut Holes (Video)
    • Decorated cake pops in jar.
      How to Make Cake Pops with a Mold

    If you tried this Homemade Chocolate Caramel Bars Recipe or any other recipe on my website, please leave a 🌟 star rating and let me know how it went in the 📝 comments below. And please share the recipe!

    📋Recipe

    Chocolate caramel bars with hazelnuts.
    Print Pin
    5 from 1 vote

    Homemade Chocolate Caramel Bars

    With a few simple ingredients like hazelnuts, chocolate, heavy cream, and butter, this homemade chocolate caramel bars recipe will show you how to make delicious candy right in your own kitchen. They're nutty, ooey, gooey and delicious!
    Course Dessert
    Cuisine American
    Diet Vegetarian
    Prep Time 10 minutes minutes
    Cook Time 8 minutes minutes
    Cooling Time 2 hours hours
    Total Time 2 hours hours 23 minutes minutes
    Servings 8 small bars
    Calories 461kcal
    Author Joss Dyckson

    Equipment

    • Small loaf pan
    • Kitchen mallet
    • Metal bowl and pot (double-boiler)

    Ingredients

    • ½ cup hazelnuts
    • 12 ounces chocolate bar broken into pieces
    • 1 cup sugar
    • ½ cup water
    • 2 teaspoons lemon juice to prevent crystallization
    • 4 tablespoons butter
    • 2 tablespoons heavy cream
    US Customary - Metric

    Instructions

    • On a cutting board, pound the hazelnuts into small pieces with a kitchen mallet. Line a small loaf pan with foil and set aside.
    • Place the chocolate in a metal bowl and over a pot with simmering water (to melt using a double-boiler style). Make sure to keep it at a low simmer so that you don't burn the chocolate.
    • When the chocolate is melted, reserve but keep warm. (You can turn off the heat and keep it in the same pot until it's time to transfer it to a small loaf pan. It can be remelted if needed.)
    • Place the sugar in a deep pot.
    • Add the water and lemon juice and heat slowly over medium heat until boiling. Give it an initial stir with a wooden spoon, and then stop stirring! Do not mix anymore as this can promote crystallization. You can, however, gently swirl the pot to brown the sugar evenly. Once the water evaporates, the sugar will begin to caramelize.
    • Once it begins to brown (you have to be very vigilant as this can happen very suddenly), remove from heat and carefully add the butter and heavy cream. Now you can stir until soft. It will bubble and foam at first.
    • Pour half of the melted chocolate into the foil-lined loaf pan. Add the caramel to the pan on top of the chocolate.
    • Sprinkle with half of the crushed hazelnuts.
    • Add the rest of the chocolate. You can use the spatula to carefully spread it out into the edges and corners. Sprinkle the rest of the hazelnuts on top. Let it cool at room temperature (for at least 2 hours or until the chocolate is hard). You can also transfer it to the fridge to set faster.
    • When it has cooled, cut into pieces and serve.

    Notes

    • Loaf pan: I use an 8" x 4" loaf pan for a single batch (you can also use 2 to 3 mini loaf pans). If you're doubling or tripling the recipe, you might want to consider a larger square pan. Instead of using foil to line a pan, you can also use a lightly greased disposable foil loaf pan.
    • Storage: They are best stored in one single layer. I don't recommend stacking them because the caramel can dribble and cause the bars to stick together.
      • Room temperature storage: You can store the bars in an airtight container at room temperature for up to 2 days. I prefer fridge storage to keep the caramel more firm.
      • Fridge storage: Refrigerate covered for up to 2 weeks. 
      • Freezer storage: Freeze in freezer bags for up to 3 months.
    • Foil trick: The foil can be used to pull the chocolate bars out of the loaf pan.
    • Pounding the nuts: It helps to place a clean kitchen towel on top so that the nuts don't scatter.
    • Pro tip for making caramel: When making caramel, do not use a metal spoon. Use a clean, wooden or silicone spoon to prevent crystallization. Any debris in the pot or on the utensil could also cause the caramel to crystallize so make sure they are very clean.

    Nutrition

    Calories: 461kcal | Carbohydrates: 46g | Protein: 5g | Fat: 30g | Saturated Fat: 15g | Polyunsaturated Fat: 1g | Monounsaturated Fat: 11g | Trans Fat: 0.2g | Cholesterol: 21mg | Sodium: 56mg | Potassium: 362mg | Fiber: 5g | Sugar: 36g | Vitamin A: 248IU | Vitamin C: 1mg | Calcium: 45mg | Iron: 5mg

    Christmas Coffee Cake

    November 21, 2018 by Joss Dyckson Leave a Comment

    Nothing goes better with your morning coffee than a moist, crumbly slice of Christmas coffee cake with a cinnamon oat crumble.

    Coffee cake loaf with Christmas decorations on white wooden background.
    [feast_advanced_jump_to]

    💚 A Holiday Baking Favorite

    With the holidays approaching, family gatherings and friendly parties will have coffee a-plenty, and you can be the star of the party by bringing this simple, coffee-flavored, moist Christmas cake that will have even non coffee drinkers delighted.

    For more holiday baking ideas, check out my Italian cranberry biscotti recipe, Christmas cake pops and the best Christmas cookies.

    🍰 Ingredients

    This recipe makes 1 loaf of coffee cake or about 10 slices.

    • butter - Softened.
    • sugars - You will need both white and brown sugar for this recipe.
    • vanilla extract - Can use pure or imitation if you're on a budget.
    • egg - I use large eggs.
    • flour - All purpose flour works great.
    • baking powder - To rise the cake.
    • salt - A touch of salt enhances the flavor of the coffee cake.
    • milk - I use whole milk but you can use reduced-fat milk if you prefer.
    • cinnamon powder - For the filling and cinnamon crumble.
    • oats - Can use Old Fashioned (rolled) or quick oats.

    *Check recipe card for ingredient amounts.

    🥣 How to Make Christmas Coffee Cake

    For the Cake Batter:

    1. Preheat oven to 350ºF (180ºC). Grease a large loaf pan with butter or spray with cooking spray.
    2. Cream together the butter and sugar in a stand mixer or in a large bowl with an electric hand mixer. Add the vanilla extract and egg. Continue mixing until smooth.
    3. In a separate bowl, mix together the flour, baking powder and salt. Add one half of it to the mixer, and when mostly combined, start pouring in the milk. Once the milk is mostly combined, add the remaining flour.

    For the Filling:

    1. In a small bowl, mix the softened butter, flour, sugar and cinnamon until you get a grainy consistency. Set aside.

    For the Crumble:

    1. Mix the softened butter, oats, flour, brown sugar and cinnamon with your fingers or a fork until the crumbs form.

    To Assemble:

    1. Pour half of the cake batter into the loaf pan and spread it out. Sprinkle in the filling and cover with the other half of the cake batter. Sprinkle the crumble over the top and press lightly so it adheres to the top.
    2. Bake in the preheated oven for 45-50 minutes, until a toothpick inserted into the center comes out clean.
    3. Let cool for 10 minutes before transferring to a baking rack to finish cooling. Slice and serve with a cup of coffee!
    Coffee cake loaf with Christmas decorations.

    🌡️ Storage

    If you happen to have any leftovers (or if you're clever and make a double batch), you can brighten each morning in your household with this tempting, tasty treat.

    • You can store the coffee cake, covered, at room temperature for up to 3 to 4 days.
    • You can also freeze it for up to 3 months, but make sure to cool it first and cover well. Thaw in the refrigerator.

    ✅ Top Tip

    Make sure you press the crumble into the coffee cake before baking so that it sticks. Otherwise, you might end up with a crumbly mess!

    ❓ Christmas Coffee Cake FAQs

    What makes coffee cake different from cake?

    Coffee cakes are usually topped with a crumble instead of a frosting, which makes them great for dunking into coffee.

    Why is a coffee cake called a coffee cake?

    A coffee cake doesn't necessarily have coffee as an ingredient, but is meant to be served with coffee - hence the name coffee cake.

    What country invented coffee cake?

    The coffee cake is believed to have originated in Dresden, Germany.

    Sliced coffee cake loaf with Christmas decorations.

    ❤️ Related Recipes to Try

    • Strawberry crumble in tart dish with vanilla ice cream and spoon.
      Easy Strawberry Crumble
    • Plum crumble with vanilla ice cream.
      Easy Plum Pie Crumble
    • Cinnamon orange glögg in wine glass.
      Swedish Glögg
    • Gingerbread latte and gingerbread coffee syrup.
      Gingerbread Coffee Syrup (+ Latte)

    If you tried this 🎄☕ Christmas Coffee Cake Recipe or any other recipe on my website, please leave a 🌟 star rating and let me know how it went in the 📝 comments below. And please share the recipe!

    📋Recipe

    Coffee cake loaf with Christmas decorations.
    Print Pin
    5 from 4 votes

    Christmas Coffee Cake

    Nothing goes better with your morning coffee than a slice of this moist, crumbly Christmas coffee cake with a cinnamon oat crumble!
    Course Dessert
    Cuisine American
    Diet Vegetarian
    Prep Time 15 minutes minutes
    Cook Time 45 minutes minutes
    Total Time 1 hour hour
    Servings 10 slices
    Calories 423kcal
    Author Joss Dyckson

    Ingredients

    Cake

    • ½ cup butter softened
    • ¾ cup white sugar
    • 1 teaspoon vanilla extract
    • 1 egg
    • 2 cups ap flour
    • 2 teaspoons baking powder
    • 1 pinch salt
    • ¾ cup milk

    Filling

    • 3 tablespoons butter softened
    • ½ cup flour
    • ½ cup brown sugar
    • 1 tablespoon cinnamon powder

    Crumble

    • 3 tablespoons butter softened
    • ¼ cup oats
    • ¼ cup flour
    • ¼ cup brown sugar
    • ½ tablespoon cinnamon powder
    US Customary - Metric

    Instructions

    For the Cake Batter

    • Preheat oven to 350ºF (180ºC). Grease a large loaf pan with butter or spray with cooking spray.
    • Cream together the butter and sugar in a stand mixer or in a large bowl with an electric hand mixer. Add the vanilla extract and egg. Continue mixing until smooth.
      ½ cup butter, ¾ cup white sugar, 1 teaspoon vanilla extract, 1 egg
    • In a separate bowl, mix together the flour, baking powder and salt. Add one half of it to the mixer, and when mostly combined, start pouring in the milk. Once the milk is mostly combined, add the remaining flour.
      2 cups ap flour, 2 teaspoons baking powder, 1 pinch salt, ¾ cup milk

    For the Filling

    • In a small bowl, mix the softened butter, flour, sugar and cinnamon until you get a grainy consistency. Set aside.
      3 tablespoons butter, ½ cup flour, ½ cup brown sugar, 1 tablespoon cinnamon powder

    For the Crumble

    • Mix the softened butter, oats, flour, brown sugar and cinnamon with your fingers or a fork until the crumbs form.
      3 tablespoons butter, ¼ cup oats, ¼ cup flour, ¼ cup brown sugar, ½ tablespoon cinnamon powder

    To Assemble

    • Pour half of the cake batter into the loaf pan and spread it out. Sprinkle in the filling and cover with the other half of the cake batter. Sprinkle the crumble over the top and press lightly so it adheres to the top.
    • Bake in the preheated oven for 45-50 minutes, until a toothpick inserted into the center comes out clean.
    • Let cool for 10 minutes before transferring to a baking rack to finish cooling. Slice and serve with a cup of coffee.

    Notes

    • You can store the coffee cake, covered, at room temperature for up to 3 to 4 days.
    • You can also freeze it for up to 3 months, but make sure to cool it first and cover well. Thaw in the refrigerator.

    Nutrition

    Calories: 423kcal | Carbohydrates: 62g | Protein: 5g | Fat: 17g | Saturated Fat: 10g | Cholesterol: 61mg | Sodium: 164mg | Potassium: 198mg | Fiber: 2g | Sugar: 32g | Vitamin A: 555IU | Calcium: 111mg | Iron: 2.1mg

    How to Use an Electric Skillet

    November 19, 2018 by Joss Dyckson 12 Comments

    I have been using an electric skillet frequently for the last several years, because it cooks more evenly than my stove top frying pan, and cleaning it is a breeze. As such, I am here to teach you how to use an electric skillet.

    Black electric skillet.

    An electric skillet is also known as an electric frying pan. Believe it or not, there is almost nothing that you cannot cook with one of these things! There are multiple electric skillet uses such as frying, slow-cooking, boiling, baking, etc.

    Whether you're an occasional user of electric skillets or a hardcore user like myself, this little tutorial should help you to increase your skills and thus become a true electric skillet master!

    [feast_advanced_jump_to]

    What You Will Need To Follow This Tutorial

    bella ceramic electric skillet

    A standard-size electric skillet: Some manufacturers make models that are exceptionally large or small, but these are special tools for special purposes. This tutorial will focus on the standard-size device, which will be roughly 1 foot by 1 foot. Don't worry if yours is off by an inch or two, as this will make very little difference.

    Bella Electric Skillet with Lid

    A lid that fits your skillet: This is not necessary for all dishes but is absolutely required for some. Most electric skillets on the market come with a lid.

    black extension cord

    A thick extension cord (optional): Like any appliance that contains a heating element, these devices can be a fire hazard if used improperly. Unless you situate them right next to an electrical outlet, you will probably need an extension cord. The cord needs to be good and thick to handle the power load without heating up.

    heat resistant slab

    A heat-resistant slab (optional): This can be used underneath the skillet as extra protection for the surfaces of your kitchen from possible heat damage. A wide ceramic tile is a good choice, as is a block of stone such as a granite cutting board. Ideally, your heat slab should be at least one square foot.

    Kitchen Tongs

    A strong set of tongs(optional): These are handy because it is harder to use a standard potholder when removing an item from your e-skillet. A large pair of tongs will make it much easier.

    Meat Thermometer Gdealer

    A small meat thermometer: This is essential for proper food safety. Remember, beef and pork must be cooked to an internal temperature of 145°F, ground beef to 160°F, while poultry requires a temperature of 165°F. Unless you just like food poisoning, you will definitely need this tool.


    Temperature Dials

    The standard temperature controls on electric skillets range from simmer or warm to 450°F on a dial, depending on the model. Because of this, you will have more control over the temperature than you would using a frying pan on a stovetop. To learn all about electric skillet temperatures, read this article.

    bella 12 x 12 removable plug

    Non-Stick Properties

    Electric Skillet

    Most electric skillet models available today have a non-stick coating, whether it be teflon or ceramic. As such, it is important to stay clear of metal utensils, unless you are using a stainless steel electric skillet model. Instead, opt for wooden, plastic or silicone cooking utensils.

    Sauté With Your Electric Frying Pan

    Pretty much anything you can do with a frying pan, you can do with an electric one and then some. Sautéing is a very common cooking method that utilizes a skillet.

    It will require a little cooking oil and turning the heat up on the dial until it reaches the desired temperature. While the skillet is heating, an indicator light will remain on. Once the skillet reaches the correct temperature, that light will go off.

    Here are some examples of of what you can sauté in your electric skillet:

    Crunchy chow mein noodles with chopsticks.

    Crunchy Chow Mein

    Electric Skillet Beef Stew in a white bowl, cherry tomatoes and two forks on the side, white background.

    Classic Beef Stew

    Electric Skillet Butter Chicken in a bowl with parsley, light wooden background.

    Butter Chicken

    Frying

    Electric frying pans are great for frying foods! It is important to note that although you can fry in your electric skillet, you normally cannot deep dry in it.

    There are some models that are deeper than others, but in most manuals I've seen, they warn you against deep frying and note how much oil you can add to the skillet.

    Here are some recipes you can fry up:

    Electric skillet fried chicken in porcelain dish with garlic mayo on the side.

    Electric Skillet Fried Chicken

    Electric skillet fried fish on a plate with basil pesto in the background and basil leaves on the dish.

    Fried Fish with Basil

    Fried coconut shrimp on a black serving tray, curry dip on the side.

    Fried Coconut Shrimp

    Cube steak can be used as a quick fry in the electric skillet as well.

    Slow Cooking With Your Electric Skillet

    Slow cooking/braising is probably the easiest way to use your electric skillet, as it involves a lot of down time. For this, it is recommended that you have a relatively deep skillet, as some of the more shallow ones are not well-suited for this recipe.

    PRO TIP: If your roast is a thick slab that prevents you from covering the skillet with a lid, you may need to slice it in half first.

    Sliced pot roast on a serving dish with carrots and potatoes.

    Electric Skillet Pot Roast Full Recipe

    All you have to do to slow cook is preheat the skillet and place the meat in the empty skillet and sear the outside.

    PRO TIP: Using tongs can help you to easily maneuver the roast around in the skillet.

    Next, add in your vegetables, broth and spices and simmer with the lid on. Now for the simmering. All you need to do is set your skillet to 200°F or 'SIMMER' and let it cook nice and slow. You may want to check the meat with a thermometer every now and then, and you may also want to check the vegetables for softness.

    Other recipes you can slow cook in your skillet:

    Meatloaf covered in a mushroom sauce on a serving dish.

    Meatloaf

    Sliced pork tenderloin in a white rectangular dish.

    Pork Tenderloin

    Electric Skillet Pork Chops on a wooden serving platter with a bowl of broccoli on the side.

    Pork Chops in Beer Gravy

    Using Your Electric Frying Pan As An Oven

    Most of you don't really need to do this, because you should have a standard oven in your house. However, you may still want to consider this method as a way to save electricity and avoid heating up the kitchen, as a full-size oven is a major power hog.

    I personally love baking in my electric skillet, as it's very easy and I seem to be less likely to over-bake bread and cakes, like this skillet yogurt cake, etc.

    If you think about it, the only real difference between a range top and an oven is confinement. By confining the heat, the entire surface of the food is cooked evenly and efficiently. Therefore, we just have to confine the heat. There is no special trick to this, as you just use the lid.

    Piece of lasagna on a plate.

    You can bake a lasagna in your electric skillet!

    However, we still have one little difference between our electric frying pan with a lid and our oven. The other difference is the rack. An oven cooks its payload by elevating it above the heat source.

    This keeps the bottom from burning as easily. To duplicate this effect in an electric skillet, you just need a small metal rack that will fit the floor of your frying pan. Only an inch or two of elevation is needed.

    Small baking racks isolated on white background.

    Pro Tip: If you don't have anything like this, you can line the bottom of the skillet with metal skewers or crumpled foil balls (careful not to scratch) for a similar effect. Doing this will give you an electric frying pan that can be used as an oven, though you will need to cook at slightly lower temperatures to get similar results.

    Try these baking recipes in your skillet:

    Mini Electric Skillet Lime Pie on a white plate, limes and spoons on the side, on grey background.

    Electric Skillet Pie

    Electric Skillet Oatmeal Cookies in a clear jar.

    Skillet Oatmeal Cookies

    Electric Skillet Corn Bread in a wooden woven basket, a succulent on the table.

    Skillet Cornbread

    Or even a quick & tasty electric skillet pizza!

    Cool & Clean

    scrubbing an electric skillet

    Once you have finished cooking a delicious electric skillet meal, it is important to unplug the unit and let it cool before carrying on to the next step: cleaning. Here is a detailed tutorial on how to clean your electric skillet.

    Conclusion

    Was this tutorial helpful? I hope so, because I have tried very hard to impart my electric frying pan wisdom to you in a way that is informative and easy to follow. As you can see, it is fully possible to cook nearly anything in your electric skillet.

    The electric skillet cooking possibilities do not end here. There are many electric frying pan recipes available to help familiarize yourself with how to use this handy tool.

    More Tasty Electric Skillet Recipes to Try

    • Electric skillet grilled cheese sandwiches on a cutting board over a pink doiley.
      Electric Skillet Grilled Cheese Sandwiches
    • Uncut brownies in a pan in the electric skillet.
      Electric Skillet Brownies
    • 2 steaks in an electric skillet with butter and a rosemary sprig on top.
      Electric Skillet Steak
    • Electric skillet spaghetti alfredo on plate.
      Electric Skillet Spaghetti

    If you enjoyed this tutorial for How to Use an Electric Skillet/Frying Pan, let me know what you thought in the 📝 comments below. And please share the post!

    Beef Tenderloin (With Bourbon Sauce)

    November 14, 2018 by Joss Dyckson Leave a Comment

    Nothing says Christmas like a special meal for the family. This holiday beef tenderloin recipe with a bourbon mushroom sauce is a great choice for the holiday season. You get a wide range of tastes that are sure to please a palette of any background.

    Beef tenderloin covered in mushroom sauce in serving dish.

    If you are looking for the perfect holiday meal and need a change-up from the classic roast turkey or bison roast, give this recipe a try. It's hearty and flavorful, similar to other beef dishes like my electric skillet beef stew but with elevated flavors and presentation.

    It pairs perfectly with this Christmas dinner salad and roasted vegetable side dish for Christmas.

    This Christmas beef dish is sure to leave everyone filled with the holiday spirit and a full stomach! In a matter of only 45 minutes, you and your guests can enjoy the ultimate Christmas meal.

    [feast_advanced_jump_to]

    🥘 Ingredients

    • beef tenderloin - This is a cut of beef that comes from the loin of the cow. Because of its tenderness, it is often used for special occasions and fine dining.
    • olive oil - For searing. Use pure olive oil, not extra virgin.
    • button mushrooms - You could also do a mix of button and cremini if desired.
    • bourbon - Bourbon is a type of American whiskey that is primarily made from corn. It pairs well with beef because of its rich, sweet and bold flavors.
    • beef stock - I use prepared beef stock or broth.
    • cornstarch - To thicken the sauce.

    *Check recipe card for full ingredients and amounts.

    🔪 How to Cook This Christmas Beef Tenderloin

    1. Place the tenderloin in a bowl and cover with the garlic, two tablespoons of olive oil, salt and pepper.
    2. Bring a large pan to high heat and place the beef in it. Let it sear on every side (about 3 minutes on each side). Lower the heat and continue cooking until desired doneness using a meat thermometer. Remove from pan and let rest while making the sauce.
    3. Using the same pan over medium heat, add one tablespoon of olive oil and then add the mushrooms. Sprinkle with salt and let them cook for 5 minutes.
    4. Add the bourbon and let it cook for 5 more minutes. Add the beef stock.
    5. Mix the cornstarch with a bit of cool water until it dissolves. Add this to the mushroom sauce and cook for a couple more minutes, until it thickens. Taste the sauce and add salt and pepper if needed.
    6. Serve the tenderloin covered with the bourbon mushroom sauce.
    Beef tenderloin covered in mushroom sauce on plate.

    ♨️ Cooking Temperatures

    • Medium Rare (130°-140°F)
    • Medium (140°-150°F)
    • Medium Well (150°-160°F)

    🌡️ Leftover Storage

    Store leftovers in an airtight container in the fridge for up to 3 to 4 days.

    ✔️ Tips For Success

    • Trimmed or Untrimmed: Tenderloin can be purchased trimmed or untrimmed. If you're not comfortable trimming it yourself, consider buying it pre-trimmed.
    • Season Generously: Season the tenderloin generously with kosher salt and freshly ground black pepper. For best results, do this a few hours before cooking and let the meat sit in the refrigerator. This will help the seasoning absorb into the meat.
    • Bring to Room Temperature: Before cooking, let the tenderloin come to room temperature. This ensures even cooking throughout the roast.
    • Slice Properly: Slice the tenderloin against the grain into even portions. This will help retain its tenderness!

    What to Serve With Beef Tenderloin

    • Sides: Try asparagus risotto, a vegetable galette or caprese pasta salad.
    • Drinks: If you're looking for holiday drinks, try this cranberry Moscow mule or Christmas party punch. As for wine, some of the best wines that go with tenderloin are Bordeaux, cabernet sauvignon, merlot and malbec.
    • Dessert: Finish this delicious holiday meal off with a range of festive desserts such as Christmas cake pops, Christmas breakfast cake, non-alcoholic fruit cake and butter tarts.
    Mushroom sauce drizzling onto beef tenderloin.

    ❄️ More Holiday Recipes to Consider

    • Cranberry white chocolate cake pops sprinkled with cinnamon in decorative jar.
      Cranberry White Chocolate Cake Pops
    • Cinnamon orange glögg in wine glass.
      Swedish Glögg
    • Brandy Alexander cocktail in a martini glass with blue stem.
      Brandy Alexander Cocktail
    • Goat cheese shots with mini breadsticks and Christmas lights on the side.
      Cranberry Goat Cheese Mini Dips (Christmas Appetizer)

    Do you think I added enough Bourbon? If you tried this Christmas Beef Tenderloin with Bourbon Mushroom Sauce Recipe or any other recipe on my website, please leave a 🌟 star rating and let me know how it went in the 📝 comments below. And please share the recipe!

    📋Recipe

    Beef tenderloin covered in mushroom sauce
    Print Pin
    5 from 2 votes

    Beef Tenderloin (with Bourbon Sauce)

    If you are looking for the perfect Christmas meal and have not quite figured out what to make, give this holiday beef tenderloin with a bourbon mushroom sauce recipe a try.
    Course Main Course
    Cuisine American
    Prep Time 10 minutes minutes
    Cook Time 30 minutes minutes
    Total Time 40 minutes minutes
    Servings 6
    Calories 460kcal
    Author Joss Dyckson

    Equipment

    • Thermometer

    Ingredients

    • 1 beef tenderloin around 3 pounds
    • 3 garlic cloves minced
    • 3 tablespoons olive oil divided
    • 3 cups button mushrooms cleaned and sliced
    • ½ cup bourbon
    • ½ cup beef stock
    • 1 teaspoon cornstarch
    • salt and pepper
    US Customary - Metric

    Instructions

    • Place the beef tenderloin in a bowl and cover with the garlic, two tablespoons of olive oil, salt and pepper.
    • Bring a large pan to high heat and place the beef tenderloin in it. Let it sear on every side (about 3 minutes on each side). Lower the heat and continue cooking until desired doneness using a meat thermometer. Remove from pan and let rest while making the sauce.
    • Using the same pan over medium heat, add one tablespoon of olive oil and then add the mushrooms. Sprinkle with salt and let them cook for 5 minutes.
    • Add the bourbon and let it cook for 5 more minutes. Add the beef stock.
    • Mix the cornstarch with a bit of cool water until it dissolves. Add this to the mushroom sauce and cook for a couple more minutes, until it thickens. Taste the sauce and add salt and pepper if needed.
    • Serve the beef tenderloin covered with the bourbon mushroom sauce.

    Notes

    • Cooking Temperatures:
      • Medium Rare (130°-140°F)
      • Medium (140°-150°F)
      • Medium Well (150°-160°F)
    • Storage: Store leftovers in an airtight container in the fridge for up to 3 to 4 days.
    • Trimmed or Untrimmed: Beef tenderloin can be purchased trimmed or untrimmed. If you're not comfortable trimming it yourself, consider buying it pre-trimmed.
    • Bring to Room Temperature: Before cooking, let the beef tenderloin come to room temperature. This ensures even cooking throughout the roast.
    • Slice Properly: Slice the tenderloin against the grain into even portions. This will help retain its tenderness!

    Nutrition

    Calories: 460kcal | Carbohydrates: 3g | Protein: 52g | Fat: 21g | Saturated Fat: 6g | Polyunsaturated Fat: 1g | Monounsaturated Fat: 11g | Cholesterol: 145mg | Sodium: 167mg | Potassium: 999mg | Fiber: 1g | Sugar: 1g | Vitamin A: 0.1IU | Vitamin C: 1mg | Calcium: 56mg | Iron: 4mg

    How to Slice Garlic

    November 12, 2018 by Joss Dyckson Leave a Comment

    Check out this guide on how to slice garlic like a professional chef, including the techniques for peeling and slicing thin slices.

    Garlic bulbs on wooden plate.

    Garlic is a favorite food of many who can appreciate its robust, bitter and spicy flavor. With a multitude of uses in dishes from all across the world, you'd have to look far and wide for someone who doesn't love this little plant.

    But while many can appreciate garlic for its flavor, they're not as likely to make use of it fresh in their cooking. This might have something to do with how simple it is to sprinkle your dish with some garlic powder instead.

    Whether you use a sharp knife or a mandolin for those paper thin cuts, learning how to chop garlic and slice garlic is a must for every chef.

    You can choose between vertical and horizontal slices; in any case, always protect your fingers!

    [feast_advanced_jump_to]

    Gather These Items

    Garlic bulb and cloves on wooden table.
    • garlic cloves - as many as the recipe calls for
    • small paring knife
    • chef's knife
    • cutting board

    Step #1. Peel the Garlic

    Garlic clove skin getting peeled with small knife.

    Remove the garlic peel using a small knife. Or, you can use this awesome trick to peel an entire garlic bulb in 20 seconds!

    Step #2. Slice the Garlic Vertically

    Woman's hands slicing garlic clove with small knife.

    Carefully cut the clove into thin vertical slices using a small knife, keeping fingers away.

    Alternatively, you can use a mandolin and slide the garlic down the mandolin using a hand guard.

    Step #3. Slice the Garlic Horizontally

    Thin slices of garlic on cutting board with a knife.

    Credit: Photo by depositphotos.com

    To make horizontal slices instead, lay the garlic clove on its side on the cutting board. Use a chef's knife to make thin slices from the top of the clove to the bottom.

    Again, a mandolin can also be used for horizontal slices.

    Step #4. Ready to Use

    Sliced garlic on cutting board.

    Use the sliced garlic to add to stir fries (such as my kimchi udon stir fry) and roasted vegetables or make garlic chips.

    Now that you've got the skills you'll need to slice garlic like a pro, why not learn how to roast garlic.

    While any kind of precise knife skills can be a bit intimidating, all you need is a little practice and some reliable tools to master your craft. A garlic mandolin or a sharp knife can both be a great tool for those paper thin garlic slices.

    Sliced garlic on cutting board.

    More Kitchen Tutorials to Consider

    • Raw egg in plastic bag held by hand.
      How to Sous Vide Eggs
    • Mango pineapple smoothie in two glasses with skewered mango on top.
      How to Make a Mango-Pineapple Smoothie
    • Crispy kale chips in dish on wooden background.
      How to Make Crispy Kale Chips
    • Brown rice in bowl with mushrooms.
      How to Cook Brown Rice on the Stove

    If you tried this tutorial for How to Slice Garlic or any other recipe on my website, please let me know how it went in the 📝 comments below. And please share the post!

    📋Recipe

    Sliced garlic.
    Print Pin
    5 from 1 vote

    How to Slice Garlic

    Check out how to slice garlic like a professional chef, including the techniques for peeling and slicing.
    Course Condiment, Flavoring
    Cuisine American
    Diet Gluten Free, Vegan, Vegetarian
    Prep Time 5 minutes minutes
    Total Time 5 minutes minutes
    Servings 1
    Calories 4kcal
    Author Joss Dyckson

    Equipment

    • Small knife
    • Cutting board

    Ingredients

    • 1 garlic clove

    Instructions

    • Remove the garlic peel using a small paring knife.
      Garlic clove skin getting peeled with small knife.
    • Vertical Slices: Carefully cut the clove into thin vertical slices using a small knife, keeping fingers away. Alternatively, you can use a mandolin and slide the garlic down the mandolin using a hand guard.
      Woman's hands slicing garlic clove with small knife.
    • Horizontal Slices: To make horizontal slices, lay the garlic clove on its side on the cutting board. Use a knife to make thin slices from the top of the clove to the bottom.
      Thin slices of garlic on cutting board with a knife.
    • Your garlic slices are ready to be used.
      Sliced garlic on cutting board.

    Notes

    • Use the sliced garlic to add to stir fries and roasted vegetables or make garlic chips.
    • Always remember to protect your fingers.

    Nutrition

    Calories: 4kcal | Carbohydrates: 1g | Protein: 0.2g | Fat: 0.01g | Polyunsaturated Fat: 0.01g | Sodium: 1mg | Potassium: 12mg | Fiber: 0.1g | Sugar: 0.03g | Vitamin A: 0.3IU | Vitamin C: 1mg | Calcium: 5mg | Iron: 0.1mg

    Grapefruit Vanilla Cake

    November 7, 2018 by Joss Dyckson Leave a Comment

    Looking for a unique cake to serve at the next bridal shower, night in with friends, or even just a family dinner? This zesty grapefruit vanilla cake is bursting with mouthwatering flavor and luscious texture!

    Grapefruit Vanilla Cake with lavender on clear glass plate and white background.

    This unique twist on lemon poppy seed cake is sure to please even the most dedicated dessert traditionalists. With just the right amount of smooth vanilla to balance the bright flavors of grapefruit, this cake is the perfect kind of sweet. Everyday ingredients make this cake a cinch to whip up.

    Frosted in simple, elegant white icing infused with grapefruit juice, delivers just the right hint of citrusy flavor that is more mild than lemon juice.

    Decorated with beautiful, edible flowers, this grapefruit cake looks like it took hours to make but it's as quick as my Christmas coffee cake. Tiny poppy seeds and vanilla bean specks add delicate texture to each bite.

    I also make this electric skillet yogurt cake and chocolate mug cake you might like.

    [feast_advanced_jump_to]

    Ingredients

    Grapefruit cake ingredients prepped and labeled.
    • pink grapefruit - Zested and juiced. A ripe grapefruit will have a vibrant, consistent color that ranges from yellow to a deep pink or red. The skin of a ripe grapefruit should be smooth and firm, but slightly springy to the touch. Avoid grapefruit that feels too hard or has a rough, shriveled skin.
    • buttermilk - If you don't have buttermilk on hand, you can easily make your own with 1 cup milk (whole, 2%, or skim) and 1 tablespoon lemon juice or white vinegar. Add the lemon juice or vinegar to the milk, stir, and let it sit for about 5-10 minutes until it curdles slightly.
    • vanilla extract - Plus some vanilla powder (optional but recommended).
    • flour - You can use all-purpose flour or cake flour.
    • baking powder + baking soda - Leavening agent.
    • canola oil - Can also use avocado oil or safflower oil.
    • poppy seeds - The seeds add a slight crunch to the cake in every bite.
    • edible flowers - Optional. They will give your cake aesthetic appeal, adding elegance and sophistication as well as enhanced flavor. I highly recommend using them. Lavender, for example, adds a subtle floral note.

    *Check recipe card for full ingredient amounts.

    How to Make Grapefruit Vanilla Cake

    Grapefruit zest and sugar in bowl.

    Step 1. Heat oven to 350ºF (180ºC). Butter and flour a bundt cake pan. In a bowl, combine the grapefruit zest and sugar and rub with your fingers until it looks like wet sand.

    Eggs and buttermilk in bowl.

    Step 2. Whisk in the buttermilk, grapefruit juice, vanilla and eggs, until smooth.

    Grapefruit cake batter in bowl with poppy seeds.

    Step 3. In a separate bowl, whisk together the flour, baking powder, baking soda, vanilla powder and salt. Add the dry ingredients into the buttermilk mixture. Then, add the oil and poppy seeds and mix until combined.

    Grapefruit cake batter in bundt pan.

    Step 4. Pour batter into prepared pan. Bake until a toothpick inserted into the center comes out clean, about 45 to 60 minutes. Let it sit and cool in the pan for 10 minutes before flipping it over onto a baking rack to finish cooling.

    Grapefruit juice and icing sugar in bowl.

    Step 5. In a small bowl, mix the powdered sugar with the grapefruit juice and vanilla and whisk until you get a smooth icing.

    Grapefruit cake getting drizzled with icing.

    Step 6. Drizzle the icing over the cake and decorate with edible flowers.

    Chef's Note: You can add a bit more or less grapefruit juice depending on how thick you like the icing.

    Grapefruit vanilla cake cut open on clear glass plate.

    Step 7. Serve!

    Joss' Tips

    • Accidentally over-baked your cake? No worries! Follow this tutorial to make your cake moist after baking.
    • Make your own Vanilla Powder. It's easy, fun and any leftover vanilla powder will last ages in the cupboard. It will add some luxuriousness to your cake, making it extra fancy for your dinner party or bridal shower.

    Grapefruit Vanilla Cake FAQs

    How long can you store grapefruit cake at room temperature?

    This cake can be stored, covered, at room temperature for up to 3 days.

    How long can you refrigerate it?

    It keeps in the fridge for up to 7 days.

    Can you freeze it?

    Yes! Once cooled, cover it well with plastic wrap and place into a freezer bag or airtight container. Freeze for up to 3 months.

    Grapefruit cake with grapefruit icing and edible flowers on clear glass plate.

    More Dessert Recipes to Consider

    • Papaya cream with cassis in wine glass.
      Papaya Cream
    • Skillet s'mores with colored marshmallows stacked on plate.
      Easy Skillet S’mores
    • Grasshopper pie in white pie plate.
      Grasshopper Pie
    • Valentine's Day cake slice on white plate with fresh strawberry slices.
      Valentine's Day Red Velvet Sheet Cake

    If you tried this Grapefruit Vanilla Cake Recipe or any other recipe on my website, please leave a 🌟 star rating and let me know how it went in the 📝 comments below. And please share the recipe!

    📋Recipe

    Grapefruit cake with dried edible flowers and icing drizzle.
    Print Pin
    5 from 1 vote

    Grapefruit Vanilla Cake

    This zesty, grapefruit vanilla cake is bursting with mouthwatering flavor and luscious texture! A unique twist on lemon poppy seed cake is sure to please even the most dedicated dessert traditionalists.
    Course Dessert
    Cuisine American
    Diet Vegetarian
    Prep Time 10 minutes minutes
    Cook Time 45 minutes minutes
    Total Time 55 minutes minutes
    Servings 10
    Calories 353kcal
    Author Joss Dyckson

    Equipment

    • Bundt cake pan

    Ingredients

    For the Cake

    • 1 grapefruit zested
    • 1 cup sugar
    • ½ cup buttermilk
    • ½ cup grapefruit juice freshly squeezed
    • 1 teaspoon vanilla extract
    • 3 large eggs
    • 1 ¾ cup all-purpose flour
    • 1 ½ teaspoons baking soda
    • ½ teaspoon baking powder
    • ½ teaspoon vanilla powder or 1 teaspoon vanilla extract
    • ¼ teaspoon sea salt
    • ⅔ cup canola oil
    • 1 tablespoon poppy seeds
    • edible flowers optional

    For the Icing

    • ½ cup powdered sugar
    • 2 teaspoons grapefruit juice or enough to reach desired consistency
    • ¼ teaspoon vanilla powder or ½ teaspoon vanilla extract
    US Customary - Metric

    Instructions

    • Heat oven to 350ºF (180ºC). Butter and flour a bundt cake pan. In a large bowl, combine the grapefruit zest and sugar and rub with your fingers until it looks like wet sand.
      Grapefruit zest and sugar in bowl.
    • Whisk in the buttermilk, grapefruit juice, vanilla and eggs, until smooth.
      Eggs and buttermilk in bowl.
    • In a separate bowl, whisk together the flour, baking powder, baking soda, vanilla powder and salt. Add the dry ingredients into the buttermilk mixture. Then, add the oil and poppy seeds and mix until combined.
      Grapefruit cake batter in bowl with poppy seeds.
    • Pour the batter into the prepared pan. Bake until a toothpick or skewer inserted into the center comes out clean, about 45 to 60 minutes.
      Grapefruit cake batter in bundt pan.
    • Let it sit and cool in the pan for 10 minutes before flipping it over onto a baking rack to finish cooling.
    • In a small bowl, mix the powdered sugar with the grapefruit juice and vanilla. Whisk until you get a smooth icing (you can add a bit more or less grapefruit juice depending on how thick you like the icing).
      Grapefruit juice and icing sugar in bowl.
    • Drizzle the icing over the cake and decorate with edible flowers. Serve!
      Grapefruit cake getting drizzled with icing.

    Video

    Notes

    • Make your own Vanilla Powder.
    • This cake can be stored, covered, at room temperature for up to 3 days, in the fridge for up to 7 days or in the freezer for up to 3 months.
    • A ripe grapefruit will have a vibrant, consistent color that ranges from yellow to a deep pink or red. The skin of a ripe grapefruit should be smooth and firm, but slightly springy to the touch. Avoid grapefruit that feels too hard or has a rough, shriveled skin.
    • If you don't have buttermilk on hand, you can easily make your own with 1 cup milk (whole, 2%, or skim) and 1 tablespoon lemon juice or white vinegar. Add the lemon juice or vinegar to the milk, stir, and let it sit for about 5-10 minutes until it curdles slightly.

    Nutrition

    Calories: 353kcal | Carbohydrates: 45g | Protein: 4g | Fat: 17g | Saturated Fat: 1g | Cholesterol: 50mg | Sodium: 283mg | Potassium: 112mg | Sugar: 28g | Vitamin A: 90IU | Vitamin C: 3.5mg | Calcium: 56mg | Iron: 1.5mg

    How to Chop Fresh Ginger Root

    November 5, 2018 by Joss Dyckson Leave a Comment

    Ginger is a root vegetable that produces a fragrant smell and is commonly used to season Indian and Asian cuisine. Ginger can be used in tea, gingerbread coffee syrup and candy making. It smells and tastes amazing in stir fry sauces and tofu marinades, and there are many more ways to use it.

    But first you need to know how to peel, chop and store fresh ginger root.

    Fresh ginger root on large green leaf.

    I love using it fresh in drinks like my mango ginger cocktail or cooked in stir fries like this ground beef and cabbage stir fry.

    Follow this pro tutorial with each step laid out so that you can get to using it in your favorite food and drink without having to use a grinder or food processor.

    [feast_advanced_jump_to]

    What You Will Need

    Fresh ginger root on leaf on cutting board.
    • a piece of ginger root - Picking your fresh ginger is an important step. You want a piece that isn't too wrinkly or thick-skinned and you want to avoid a ginger root that has any mold on it. It should be firm with thinner skin that can easily be peeled with your nail.
    • small spoon - For peeling the ginger.
    • knife - For chopping. Can use a chef's knife or santoku knife.

    Steps to Chop Ginger

    Ginger root under running water.

    Step #1. Clean the ginger. Clean the ginger root under running water, making sure you remove any leftover dirt.

    Ginger root in hands with a spoon.

    Step #2. Peel the skin. Using a small spoon, remove the skin of the ginger. It should come off easily.

    Ginger root peeled on cutting board.
    Ginger root cut into strips.

    Step #3. Cut into long strips. Cut the peeled ginger root into long slices.

    Ginger root strips on cutting board.

    Step #4. Chop. Chop the slices into thin cubes (just like you would chop garlic in this tutorial). You can keep chopping for finer pieces if needed.

    Ginger root chopped on cutting board with knife.

    Step #5. Use. The chopped ginger is ready to use!

    How to Use Chopped Ginger

    Ginger sauce in small bowl.

    Sweet & sour marinade.

    • Marinades. You can make an easy marinade for fish, pork, chicken or other meat by mixing the chopped ginger, soy sauce, sesame oil and a pinch of honey.
    • Stir Fries. It can be a great addition to a bok choy mushroom stir fry or this kimchi and tofu stir fry.
    • Directly into Cooking. You can also add the chopped ginger (fresh or frozen) directly to stir fries, rice and soups.
    • Baking. Try adding it to your baking, such as in cookies, muffins and breads or these gingerbread cake pops.
    • Steep. Steep it in hot water for a ginger tea.
    • Smoothies. Add it to your favorite smoothies like this papaya smoothie.
    • Infuse. Use it to infuse water or a simple syrup. Learn how to make a simple syrup here.

    Storage Tips

    • Fridge Storage: If you don't plan on using your ginger immediately after cutting it, you can blot it with paper towels and then place in a sealed plastic bag. It is important to push the air out. You can store your sealed ginger for up to 1 to 2 weeks in your refrigerator. To extend that time up to a few months, you can preserve it in dry sherry or wine.
    • Freezer Storage: You can also freeze your chopped ginger. To do this, place your ginger in small portions on a parchment lined baking sheet. Place the tray in the freezer and let the ginger freeze solid. After the ginger is frozen, remove the portions from the baking sheet and place in a freezer bag. To use, you can let it thaw for a few minutes or add directly to hot dishes that you're preparing. Use immediately after thawing.

    Recipe FAQs

    Do you peel ginger before chopping?

    For young ginger with thin skin, it's okay to skip peeling. Peel thicker-skinned ginger before chopping, especially if you're chopping it into bigger pieces and not finely.

    Why is ginger so hard to cut?

    Ginger can be hard to cut because it has a lot of fibers that go in the same direction as the root.

    Freshly chopped ginger root on cutting board with knife.

    More Cooking Tutorials to Sharpen Your Skills

    • Vanilla bean powder in small dish with spoon.
      How to Make Vanilla Powder
    • Sliced garlic.
      How to Slice Garlic
    • 4 colors of coffee beans on wooden board with a mug of coffee on the side.
      How to Roast Coffee Beans
    • Fresh dill.
      How to Chop Dill

    If you tried this recipe tutorial for 🫚 How to Chop Fresh Ginger Root or any other recipe on my website, please leave a 🌟 star rating and let me know how it went in the 📝 comments below. And please share the recipe!

    📋Recipe

    Fresh ginger root on large green leaf.
    Print Pin
    5 from 1 vote

    How to Chop Fresh Ginger Root

    In this tutorial I will walk you through how to peel and chop fresh ginger root, plus provide some suggestions on how to use your freshly cut ginger.
    Course Flavoring, Side Dish
    Cuisine American
    Diet Vegan, Vegetarian
    Prep Time 5 minutes minutes
    Total Time 5 minutes minutes
    Servings 1
    Calories 6kcal
    Author Joss Dyckson

    Equipment

    • Cutting board
    • Knife

    Ingredients

    • 1 piece ginger root

    Instructions

    • Clean the ginger root under running water, making sure you remove any leftover dirt.
      Ginger root under running water.
    • Using a small spoon, remove the skin of the ginger. It should come off easily.
      Ginger root in hands with a spoon.
    • Cut the peeled ginger root into long slices.
      Ginger root cut into strips.
    • Chop the slices into small cubes. You can keep chopping for finer pieces if needed. The chopped ginger is ready to use!
      Ginger root chopped on cutting board with knife.

    Notes

    • Picking ginger: Picking your fresh ginger is an important step. You want a piece that isn't too wrinkly or thick-skinned and you want to avoid a ginger root that has any mold on it. It should be firm with thinner skin that can easily be peeled with your nail.
    • Fridge Storage: If you don't plan on using your ginger immediately after cutting it, you can blot it with paper towels and then place in a sealed plastic bag. It is important to push the air out. You can store your sealed ginger for up to 1 to 2 weeks in your refrigerator. To extend that time up to a few months, you can preserve it in dry sherry or wine.
    • Freezer Storage: You can also freeze your chopped ginger. To do this, place your ginger in small portions on a parchment lined baking sheet. Place the tray in the freezer and let the ginger freeze solid. After the ginger is frozen, remove the portions from the baking sheet and place in a freezer bag. To use, you can let it thaw for a few minutes or add directly to hot dishes that you're preparing. Use immediately after thawing.

    Nutrition

    Calories: 6kcal | Carbohydrates: 1g | Protein: 0.1g | Fat: 0.1g | Saturated Fat: 0.01g | Polyunsaturated Fat: 0.01g | Monounsaturated Fat: 0.01g | Sodium: 1mg | Potassium: 29mg | Fiber: 0.1g | Sugar: 0.1g | Vitamin C: 0.3mg | Calcium: 1mg | Iron: 0.04mg

    Mini Taco Cups

    October 31, 2018 by Joss Dyckson 3 Comments

    Want to liven up Taco Tuesday? Why not consider these easy, mini taco cups? You can make this fun and easy appetizer with just 20 minutes in the oven and they are so delicious! There's no need to purchase special wrappers or fry them in hot oil. Your guests will be amazed that they were made by you.

    Baked taco cups in white dish on colorful cloth.

    With fresh ingredients, zesty spices, juicy ground meat and buttery guacamole, every bite is bursting with flavor. They are great for parties and make great, kid-friendly snacks.

    I'm personally always on the lookout for something I can throw together with my everyday kitchen ingredients. With this recipe, you can customize it with what you have on hand, taco bar-style and fancy ingredients aren't required.

    If you can't have your tacos without cheese, add shredded cheese or nacho cheese sauce. Like it spicy? Add some hot sauce. That is the beauty of tacos!

    [feast_advanced_jump_to]

    🛒 Ingredients

    Mini taco cup ingredients labeled.
    • Mexican corn tortillas - These should range from 4" to 6". You can use flour tortillas if desired.
    • ground meat - You can stick to the classic beef or go with something lower in calories like ground chicken or turkey. For a vegan option, go for veggie ground, which is easy to find these days.
    • cumin powder - I love adding cumin to most of my Mexican recipes. It is great for enhancing the savory flavor of meat.
    • taco seasoning - Or Mexican seasoning or chili powder.
    • tomato - I like to use Roma tomatoes because they are meaty and less watery but you can also use beefsteak or tomatoes on the vine.
    • fresh cilantro - Simply leave out if cilantro is a no-go for you.

    *Check recipe card for ingredient amounts.

    🌮 How to Make Taco Cups

    Muffin tin with corn tortillas.

    Step 1. Prep tortillas. Preheat oven to 350ºF. Place the tortilla halves in the muffin tin cavities, creating mini taco cups.

    Baked taco cups in muffin tin.

    Step 2. Bake. Bake the tortilla cups in the preheated oven until crispy, about 20 minutes. Keep an eye on them! Let cool.

    Chef's Note: To make the cups with the tacos, you are basically just pushing them in and maneuvering them to fit. If you see them tearing in a couple of places, that is normal and perfectly fine.

    Onions in pan.

    Step 3. Cook onion. Meanwhile...heat the olive oil in a skillet over medium heat. Add the chopped onion and green onion, and cook for 5 minutes.

    Ground beef in pan.

    Step 4. Add meat. Add the ground meat and cook until fully cooked, about 5 minutes. Mix in the cumin powder and taco seasoning. Season and remove from heat.

    Guacamole in a bowl.

    Step 5. Mash avocado. In a bowl, mash the avocado and mix it with the lemon juice. Add salt and pepper, to taste.

    Taco cups with guacamole on decorative plate.

    Step 6. Fill the mini taco cups. Fill the tortilla cups with the ground meat, tomatoes, mashed avocado and fresh cilantro.

    Baked taco cups in white dish.

    Step 7. Serve. Serve the mini tortilla cups!

    ⭐ You might also like my slow cooker Mexican soup.

    👉 Joss' Top Tip

    My trick to make the tortillas more flexible and to avoid tearing is to microwave them for 15 seconds or so. Then, immediately push them into the muffin tin cavities while they are still warm. For more details, check out how to heat corn tortillas so they don't break.

    🔪 Make Ahead Prep

    • The ground meat filling and the veggies can be prepped a day or two in advance but make sure to refrigerate everything in separate containers.
    • The ground meat can be reheated when it's time to fill the tortilla cups.
    • Do not make the guacamole until just before serving time to keep it fresh and bright green.
    • You can bake the tortilla cups, let them cool fully and store in an airtight container at room temperature (in a cool, dark place like a cupboard or pantry) for up to 2-3 days.

    ❓ Mini Taco Cups FAQs

    What is in taco seasoning?

    Taco seasoning usually consists of a mixture of paprika, onion and garlic powder, chili powder, oregano, cumin and salt.

    How long do leftovers last in the fridge?

    This appetizer is best served on the day of preparation but you can store leftovers in the fridge in an airtight container for up to 2 to 3 days without the avocado. The toppings should be stored separately.

    How do you reheat the empty taco cups?

    You can reheat them in a 350ºF oven for about 5 to 10 minutes.

    How do you reheat the mini taco cups with the meat filling?

    The mini taco cups with the meat can be reheated in the oven for about 10 minutes at 350°F to retain the crispiness.

    Why are my tortilla cups soggy at the bottom?

    This is possibly due to under-baking the cups. Bake until they are crispy all the way through before cooling. Also, make sure the meat filling isn't liquidy and allow it to cool slightly before adding to the cups. Another great tip is to add some shredded cheese to the bottom of the cups before adding the other filling ingredients.

    Baked taco cups in white dish with lentils.

    ❤️ More Mouth Watering Taco Recipes

    • Taco in a bag with forks and toppings on the side.
      How to Make Walking Tacos (aka Taco in a Bag)
    • Taco pasta salad in a bowl with forks on the side.
      Taco Pasta Salad
    • Grilled halibut tacos on brown serving tray.
      Grilled Halibut Tacos
    • Bison Tacos

    Sometimes, nothing quite satisfies a craving like homemade Mexican food. If you tried this Mini Taco Cups Recipe or any other recipe on my website, please leave a 🌟 star rating and let me know how it went in the 📝 comments below. And please share the recipe!

    📋Recipe

    Baked taco cups in white dish with lentils on decorative cloth.
    Print Pin
    5 from 4 votes

    Mini Taco Cups

    These mini taco cups are easy to make and so delicious! With fresh ingredients, zesty spices, juicy ground meat and buttery guacamole, every bite is bursting with flavor.
    Course Appetizer, Snack
    Cuisine American, Mexican
    Prep Time 15 minutes minutes
    Cook Time 30 minutes minutes
    Total Time 45 minutes minutes
    Servings 24 taco cups
    Calories 76kcal
    Author Joss Dyckson

    Equipment

    • Muffin tin
    • Frying pan

    Ingredients

    • 12 Mexican corn tortillas cut in half
    • 1 tablespoon olive oil
    • ½ cup yellow onion chopped
    • 2 green onions chopped
    • 1 cup ground meat lean ground beef, ground chicken, etc.
    • 1 teaspoon cumin powder
    • 1 tablespoon taco seasoning or Mexican seasoning or chili powder
    • 1 avocado
    • 2 teaspoons lemon juice or to taste
    • 1 large tomato chopped
    • fresh cilantro chopped
    • salt and pepper to taste
    US Customary - Metric

    Instructions

    • Preheat oven to 350ºF.
    • Place the tortilla halves in the muffin tin cavities, creating small baskets/cups. (You are basically just pushing them in and maneuvering them to fit. If you see them tearing in a couple places, that is normal. My trick is to microwave the tortillas for 15 seconds or so to make them more flexible.)
      Muffin tin with corn tortillas.
    • Bake the tortilla cups in the preheated oven until crispy, about 20 minutes. Keep an eye on them! Let cool.
      Baked taco cups in muffin tin.
    • Meanwhile...heat the olive oil in a skillet over medium heat. Add the chopped onion and green onion, and cook for 5 minutes.
      Onions in pan.
    • Add the ground meat and cook until fully cooked, about 5 minutes. Mix in the cumin powder and taco seasoning. Season with salt and pepper, to taste, and remove from heat.
      Ground beef in pan.
    • In a bowl, mash the avocado and mix it with the lemon juice. Add salt and pepper, to taste.
      Guacamole in a bowl.
    • Fill the tortilla cups with the ground meat, tomatoes, mashed avocado and fresh cilantro.
      Taco cups with guacamole on decorative plate.
    • Serve!
      Baked taco cups in white dish.

    Video

    Notes

    • Leftover storage: These taco cups are best served on the day of preparation but you can store leftovers in the fridge in an airtight container for up to 2 to 3 days without the avocado. The toppings should be stored separately.
    • Reheating: The taco cups with the meat can be reheated in the oven for about 10 minutes at 350°F to retain the crispiness. For the taco cups only, you can reheat them in a 350ºF oven for about 5 to 10 minutes.
    • Make ahead prep:
      • The ground meat filling and the veggies can be prepped a day in advance but make sure to store everything separately. Don't make the guacamole until serving time to keep it nice and fresh.
      • The ground meat can be reheated when it's time to fill the tortilla cups.
      • You can bake the tortilla cups, let them cool fully and store in an airtight container at room temperature (in a cool, dark place like a cupboard or pantry) for up to 2-3 days.

    Nutrition

    Calories: 76kcal | Carbohydrates: 8g | Protein: 3g | Fat: 4g | Saturated Fat: 1g | Trans Fat: 1g | Cholesterol: 7mg | Sodium: 63mg | Potassium: 114mg | Fiber: 2g | Sugar: 1g | Vitamin A: 126IU | Vitamin C: 2mg | Calcium: 17mg | Iron: 1mg

    How to Chop Garlic

    October 29, 2018 by Joss Dyckson Leave a Comment

    Garlic is one of those ingredients that seems to make the most ordinary recipe more flavorful, fresh and interesting. Numerous appetizers and main dishes use garlic, so knowing how to chop garlic the right way can make your recipe come together fast and easy. I hope you will find this step by step tutorial useful and easy to remember going forward in your cooking adventures.

    Garlic bulbs on wooden plate.
    [feast_advanced_jump_to]

    Love That Garlic Aroma

    Fresh or cooked, garlic is one of my favorite smells in the kitchen!

    • Chopping it releases the pungent aroma.
    • It bursts with flavor when sautéed and added to your favorite recipe.
    • It will add dimension and freshness that is accomplished only with fresh, healthy ingredients.

    Difference Between Minced, Chopped & Sliced Garlic

    Minced, chopped and sliced garlic on wooden cutting board.

    The above image shows the difference between minced, chopped and sliced garlic.

    • Sliced: Sliced garlic is fine vertical slices from the whole garlic clove. You can use it to make crispy garlic chips or in stir fries.
    • Chopped: Chopped garlic consists of larger pieces of the garlic clove and is great added to soups, stir fries (such as my kimchi shrimp stir fry) and pickling recipes: pickled eggs and hot pickled sausage are my favorites.
    • Minced: Minced garlic is much finer than chopped garlic. It is used in dips and sauces to add garlicky flavor without throwing off the texture with garlic chunks. I use it in my recipe for grilled pickles and garlic dip. I also like using it in mashed potatoes.

    What You Will Need to Chop Garlic

    Garlic bulb and cloves on wooden table.
    • garlic cloves - as many as the recipe requires
    • a small paring knife - to peel the cloves
    • a wide, flat knife - known as a chef's knife
    • cutting board

    Instructions

    Garlic getting peeled with knife.

    Step #1. Peel the Cloves. Remove the peel using a small knife.

    Garlic clove pressed under chef's knife with woman's hand.

    Step #2. Smash the Cloves. Smash the peeled clove with a large flat knife (chef's knife) to flatten the garlic.

    ⭐Pro Tip: A clove of garlic is one of the smaller, round pieces in the whole garlic. Here is a tip to separate the cloves and make chopping them easier. Use either a larger knife or the back of a wooden spoon to smash the garlic bulb. One good smash with your hand on it will separate the membranes and the cloves.

    Chef's knife slicing garlic.

    Step #3. Cut into Strips. Cut the smashed clove lengthwise, forming long strips.

    Chef's knife chopping garlic on wooden cutting board.

    Step #4. Chop. Chop the strips into small cubes.

    ⭐Pro Tip: Keep the point of the knife on the cutting board, moving the knife up and down the garlic strips to chop as finely as needed.

    Chef's knife chopping garlic on wooden cutting board.
    Chopped garlic on cutting board.

    Step #5. Ready to Use. Now your chopped garlic is ready to use in many dishes!

    Storage Tips

    • If you aren't using it right away, store the chopped garlic in an airtight container in the fridge for up to 3 days.
    • You can also freeze it in a freezer safe container for up to 3 months. You can freeze it with olive oil in ice cube trays and add them directly to a hot pan when sautéing or stir frying.

    Bonus: How to Mince Garlic

    Garlic press with minced garlic.

    Either continue to chop until the garlic pieces are much finer, or use a garlic press (the easy, quick way).

    With a garlic press, you can easily mince garlic in seconds. Simply place one peeled clove (with some garlic presses, you can skip the peeling) at a time into the press and squeeze the handles together. Out comes minced garlic!

    Minced garlic on cutting board.

    Sample Preparation: Garlic Bread

    Garlic bread.

    Serve with butter and salt over freshly baked bread or in this pumpkin garlic naan bread and enjoy!

    Recipe FAQs

    Do you peel garlic before chopping?

    Yes, it is best to peel the garlic before chopping.

    What happens if you don't peel garlic?

    Papery garlic skins aren't tasty or easy to eat, but they can be used to add great flavor to soups and stock.

    ❤️More Recipes With Garlic You Will Love

    • Roasted garlic head/bulb in tin.
      How to Roast Garlic in the Oven (Cloves, Bulbs + in Foil)
    • Chickpea and salmon salad in bowl with lemon slices.
      Easy Chickpea Salmon Salad
    • Baked bison sliders in white casserole dish.
      Baked Bison Sliders
    • Bison stew in bowl with fresh thyme.
      Bison Stew

    What are some of your favorite recipes that use 🧄garlic? If you tried this recipe tutorial for How to Chop Garlic or any other recipe on my website, please leave a 🌟 star rating and let me know how it went in the 📝 comments below. And please share the recipe!

    📋Recipe

    Chopped garlic on cutting board with blue background.
    Print Pin
    5 from 1 vote

    How to Chop Garlic

    Knowing how to chop garlic the right way can make your recipe come together fast and easy. You can add your freshly chopped garlic to many dishes!
    Course Condiment
    Cuisine American
    Diet Vegan, Vegetarian
    Prep Time 5 minutes minutes
    Total Time 5 minutes minutes
    Servings 1
    Calories 4kcal
    Author Joss Dyckson
    Cost $0.67

    Equipment

    • Cutting board
    • Small knife
    • Chef's Knife

    Ingredients

    • 1 garlic clove or as many as needed

    Instructions

    • Remove the peel from the garlic clove using a small knife.
      Garlic getting peeled with knife.
    • Smash the peeled clove with a flat knife on a cutting board.
      Garlic clove pressed under chef's knife with woman's hand.
    • Cut the smashed clove lengthwise, forming long strips.
      Chef's knife slicing garlic.
    • Chop the strips into small cubes. Keep the point of the knife on the cutting board, moving the knife up and down the garlic strips to chop as finely as needed.
      Chef's knife chopping garlic on wooden cutting board.
    • The chopped garlic is ready to use.
      Chopped garlic on cutting board.

    Notes

    • If you aren't using it right away, store it in an airtight container in the fridge for up to 3 days.
    • You can also freeze it in a freeze safe container for up to 3 months.
    • You can freeze it with olive oil in ice cube trays and add them directly to a hot pan when sautéing or stir frying.

    Nutrition

    Calories: 4kcal | Carbohydrates: 1g | Protein: 0.2g | Fat: 0.01g | Polyunsaturated Fat: 0.01g | Sodium: 1mg | Potassium: 12mg | Fiber: 0.1g | Sugar: 0.03g | Vitamin A: 0.3IU | Vitamin C: 1mg | Calcium: 5mg | Iron: 0.1mg

    Electric Skillet Temperature Guide

    October 24, 2018 by Joss Dyckson 6 Comments

    Whether you are a home cook who enjoys the ease of an electric skillet (aka. electric frying pan), or you are in search of the perfect cookware for your next camping trip, tailgate, or other outdoor outings, an electric skillet provides lots of versatility when it comes to cooking.

    In fact, they can be used similarly to a traditional skillet to prepare many of your favorite foods, including pancakes, bacon, hamburgers, and steaks, to golden perfection, provided you know the correct temperature settings, which this electric skillet temperature guide will help you with.

    Electric skillet temperature table.

    On some models, the electric skillet temperature settings may be low, medium, and high, while other models have a degree Fahrenheit temperature control setting.

    Some also include a notification light to indicate when the appliance has reached the desired temperature as well as a time control to signal when cooking has ended.

    Keep in mind that the following are guidelines and each different electric pan model may vary. However, the basic electric frying pan temperature settings are as follows:

    [feast_advanced_jump_to]

    What is Medium Heat on an Electric Skillet?

    Cooking thermometer. inthekitch.net

    Many recipes for an electric skillet require a medium heat setting. However, given the various electric skillet cooking temperatures available, it may be difficult to know for sure which setting is medium.

    Provided you are using a skillet with a Fahrenheit setting, the medium setting is usually around 300 degrees Fahrenheit on most models, while the medium-high setting is between 350 to 375 degrees Fahrenheit.

    Low heat is 200°F or simmer (some electric skillets have a minimum temperature of 250°F which would be the low setting in that case) and high heat is 400°F or higher. Looking through the product manual for your particular model can be helpful.

    HEAT SETTINGELECTRIC SKILLET TEMP
    Low200°F
    Medium-Low250°F - 275°F
    Me​dium300°F
    Medium-High350°F - 375°F
    High400°F+

    What Temperature for Pancakes?

    Pancakes piled on a plate with chocolate chips and maple syrup.

    When cooking pancakes in an electric skillet, the temperature for pancakes is between 350°F to 400°F. Depending on your model, you may need to lower the heat if the pancakes are cooking too quickly. Cook the pancakes for 2 to 3 minutes or until they are golden brown. My method is to cook for 2 minutes (when bubbles form), then flip and cook for 1 minute longer.

    Since electric frying pan cooking temperatures differ, it is suggested that you try making a test pancake first to ensure the skillet is set at the correct temperature. If the test pancake browns too fast on the bottom before it is ready to be turned, then adjust the heat setting to a lower temperature for the rest of the batch for the perfect pancakes.

    What Temperature to Cook Bacon?

    Raw bacon on a clear, glass plate, wooden background.

    To determine what temp to cook bacon in an electric skillet, begin by adjusting the knob on the temperature controller to 325°F, or medium heat. 

    Once the indicator light goes off, indicating the chosen temperature has been reached, place the bacon in the skillet, and then allow it to brown evenly, about 4 to 5 minutes on each side, 8 to 10 minutes total cooking time for both sides, depending on the thickness of the bacon.

    If the bacon cooks unevenly, adjust the temperatures up or down to learn what temperature to fry bacon using your specific device.

    What Temperature to Cook Sausage?

    Fried Sausages image.

    Your electric frying pan can be used to make a variety of different sausages. For a sausage link, set the temperature control to between 300°F and 325°F.

    Once the indicator light goes off, signaling the desired temperature setting is met, add the sausage and allow it to brown for approximately 20 to 30 minutes.

    For a pre-cooked sausage, set the temperature dial to between 325°F and 350°F. Cook for 10 to 12 minutes.

    What Temperature is Simmer?

    Simmer on Temperature Dial image.

    An electric skillet can also be used to simmer a variety of foods from meats to sauces. There should be a 'SIMMER' option on the temperature control.

    To simmer foods and sauces, set the temperature to 350°F on the temperature control and then allow the liquid to come to a boil. Once the liquid comes to a boil, adjust the temperature control setting to 'SIMMER' (or 200°F) for the remainder of the cooking time.

    Temperature to Cook Eggs

    Fried egg on white plate with chopped dill.

    To make eggs in an electric skillet adjust the temperature to cook  the eggs between 250°F-275°F. Once the indicator light goes off, indicating the desired temperature has been reached, add the egg mixture to the skillet, and then scramble the eggs for 3 to 5 minutes until done.

    For fried eggs, adjust the temperature setting to 275°F and then allow the eggs to cook for 3 to 5 minutes or until they reach desired doneness.

    Temperature to Cook Potatoes

    How to Bake Potatoes in the Oven - Step 1 image. basket of potatoes. inthekitch.net

    An electric frying pan can be used to make a variety of potato dishes vs baking potatoes in the oven or in a pan, including crispy brown potatoes and country fried potatoes.

    For country fried potatoes, turn the temperature control knob to 325°F, and then once the indicator light goes off, signaling it has reached the desired setting, add the potatoes to the skillet and allow them to cook for 10 to 12 minutes until they are done.

    For crispy brown potatoes, adjust the temperature control setting to 350°F, and then once the indicator light signals off, indicating the desired temperature setting has been reached, add the potatoes and allow them to cook for 10 to 12 minutes until they are golden brown and crispy.

    You can also try your hand at my electric skillet scalloped potatoes.

    What Temperature to Cook Biscuits?

    Skillet Biscuits on wooden background.

    An electric skillet allows you to make warm, fluffy biscuits in just a matter of minutes. There are a couple of methods you can try: baking or frying. They require different temperatures.

    To bake biscuits, place the lid on the electric skillet, and then set the dial to the desired temperature. (You are going to want to bake them around 425ºF. They generally require higher heat.)

    Place the biscuit dough into a baking pan. Once the skillet has preheated, remove the lid, and place a wire rack into the bottom of the skillet.

    Place the baking pan onto the wire rack and then place the lid of the skillet back on. Allow the biscuits to bake until they are golden brown.

    To fry the biscuits in oil in the electric skillet, follow this recipe. You will use a temperature of 400ºF.

    What Temperature to Fry Chicken in an Electric Skillet?

    Electric skillet fried chicken in weaved basket with garlic mayo on the side and green napkins.

    To make the perfect fried chicken in your electric skillet, fry chicken in a high smoking point oil heated to 375°F.

    The average time to deep fry the various chicken parts can vary. Chicken which includes the bones typically requires more cooking time compared to boneless chicken. You will fry the chicken until it is golden brown and fully cooked.

    However, because some types of electric skillets may regulate temperature slightly different from others, use a meat thermometer to ensure the internal temperature of the chicken is at least 165°F before removing from the oil.

    What Temperature to Cook Pork Chops?

    For basic, brown ½" thick pork c hops, turn the temperature setting to between 325°F and 375°F. Once the indicator light shuts off, add the pork chop and then allow it to brown approximately 15 to 20 minutes, flipping halfway through the cooking time.

    For ¾" pork chops, set the dial to between 325°F and 375°F and cook for 20 to 25 minutes.

    Skillet Pork Chops in skillet with garlic and thyme.

    For breaded chops, adjust the temperature control to 375°F. Once the indicator signal clicks off, add the pork chop to the skillet and allow it to brown for about 5 minutes per side for a total cooking time of approximately 10 to 12 minutes.

    Make sure the pork chops are cooked to an internal temperature of 145°F and have a 3-minute rest time.

    What Temperature to Cook Hamburgers?

    Juicy Hamburger on a cutting board with fries.

    An electric skillet is a great tool for making hamburgers of every size.

    For a basic ½" thick hamburger, adjust the temperature control setting to 350°F, and then once the indicator light goes off, add the hamburger patty to the skillet and allow it to sear evenly on each side, 8-12 minutes in total.

    For a more rare burger, allow the burger to cook about 2 to 4 minutes per side for a total cooking time of between 4 to 8 minutes.

    Our Recipe for Electric Skillet Burgers

    What Temperature to Cook Steak?

    An electric skillet makes it easy to practice cooking a variety of different steak cuts to seared, tender, juicy perfection. Rare steak should reach an internal te mperature of 130°F to 140°F. Medium steak should reach an internal temperature of 160°F.

    Juicy Steak image surrounded by peppercorns and thyme.

    To prepare a 1" thick steak cut, set the temperature control setting to between 350°F and 400°F. Once the indicator light goes off, add the steak to the skillet and allow it to sear about 3-3 ½ minutes on each side for a rare steak, 5-6 minutes per side for a medium steak.

    To prepare a 1 ½" thick steak, set the temperature to between 350°F and 400°F. Sear the steak on each side 4-5 minutes for rare, and 9-10 minutes on each side for medium.

    For cubed or Minute steak, adjust the temperature control to 400°F. Once the indicator light goes off, allow the steak to evenly brown on both sides for about 2 to 3 minutes.

    Or you can give this electric skillet steak recipe with herb butter a try.

    What Temperature to Cook a Roast?

    Sliced pot roast on a serving dish with carrots and potatoes.

    An electric frying pan can also be used to make roasts, braised meats, and many other slow-cooked meals.

    To make a basic three to four-pound roast in yo ur electric skillet, set the temperature control to 400°F. Once the indicator signal goes off, place the meat in the skillet and then brown it on all sides, it should take about 10 to 12 minutes in total.

    Once the meat is browned, adjust the temperature down to 200°F/250°F, depending on the model. Once you have added your desired additions, cover the skillet with a lid and allow it to simmer until done.

    For a three to four-pound roast, it should take approximately 2 ½ to 3 hours in your skillet. Also, be sure to check the roast periodically to add a small amount of liquid to the bottom of the skillet to avoid scorching.

    What Temperature to Cook Berry or Fruit Cobbler?

    Peach cobbler in an electric skillet on grey background.

    Electric Skillet Peach Cobbler Recipe (pictured)

    Yes, your electric skillet can even be used to make skillet berry cobbler. To make a basic fruit cobbler using your electric skillet, set the temperature to 275°F for about 25 minutes, or 200°F for a slower cook. You don't want to go any higher than 275°F or the bottom of the cobbler is likely to become burnt and it will be hard to clean.

    Add your favorite frozen or fresh berries, or you could also substitute apples or peaches to the skillet on top of the batter and then allow the cobbler to simmer until the top is browned and the fruit is bubbling.

    Conclusion

    Hopefully, this guide has left you with a greater appreciation for your electric skillet and the many different ways the electric can be used to prepare delicious, hearty meals. Or, if you have yet to experience this handy kitchen gadget, hopefully, this guide has helped eliminate the intimidation of using one. I have a guide for how to use an electric skillet for continued reading, if needed.

    Overall, an electric frying pan is a handy tool that enables you to prepare a variety of meals in just one pot, which helps save time, money, and kitchen space.

    In the end, cooking the perfect foods using your electric skillet comes down to experience. These temperatures are a guide. The more you practice and get to know temperatures for different dishes, the better the results will be.

    If you enjoyed this guide, and share the enthusiasm of cooking with an electric skillet, please feel free to leave a comment as well as pass the tips offered in this article onto others.

    How to Braise Beef

    October 22, 2018 by Joss Dyckson 2 Comments

    Achieving delicious, mouthwatering beef will no longer be a secret after following this step by step guide on how to braise beef. This delicacy of a meal is slowly-cooked on the stove with red wine and stock until fall-apart tender.

    Braised beef with pureed vegetables on white dish.

    Braised beef is a culinary delight known for its rich flavor and tender texture. Braising brings out a pronounced umami flavor, which is the result of slow-cooking the meat with ingredients like the beef broth and wine.

    The long cooking process allows the flavors of the beef, broth, herbs, and spices to meld together in a way that is similar to my slow cooker bison stew with red wine.

    If you love cooking with beef, check out more of my hearty & delicious beef recipes.

    [feast_advanced_jump_to]

    What is Braising?

    Braising is a cooking method using dry and wet heat, in which meat is seared at high heat and then covered and simmered for a long period of time in a pot with some liquid.

    Slow cooking beef, just like I do in this electric skillet beef roast, results in the most juicy and flavorful beef you can imagine. Without using this braising technique, certain cuts of beef end up tough and chewy, which is not how you want your beef dinner to turn out.

    Ingredients

    Diced vegetables on cutting board.
    Raw beef roast on white dish.

    Before starting the recipe, make sure you have collected and prepped all of the ingredients.

    • beef roast - such as chuck, eye roast, brisket, blade roast or shank
    • Worcestershire sauce
    • canola oil - or peanut oil
    • brown sugar - I use dark brown sugar.
    • celery
    • leeks - clean them very well because they tend to have grit in the layers
    • yellow onions - can substitute with white onions if desired
    • carrots
    • red bell peppers - you can substitute with green or yellow bell peppers if desired
    • garlic
    • bay leaves - to enhance the flavor
    • beef stock - or beef broth
    • red wine - my favorite red wine to use is cabernet sauvignon
    • tomato purée - canned

    *Check recipe card for ingredient amounts.

    Instructions

    Raw beef roast seasoned with salt and pepper.

    Step #1. Season the Beef. Season the beef with salt, pepper, brown sugar and Worcestershire sauce.

    Beef roast searing in pan with tongs.

    Step #2. Sear the Beef. In a large skillet, pot or Dutch oven at high heat, add the canola oil. Sear the beef roast on all sides, until browned. Remove from pot/pan and reserve.

    Beef roast seared in pan.
    Vegetables in pan.

    Step #3. Cook the Vegetables. Using the same pot, heat a little more canola oil. Add all the vegetables and the bay leaves. Cook for about 5 minutes.

    Beef in pan with vegetables.

    Step #4. Return Beef to Pan. Add the beef back to the pan and lower the heat to medium-low.

    Braised beef in pan with vegetables and tomato puree.

    Step #5. Add Liquid. Add the beef stock, red wine and tomato purée.

    Braised beef in pan with vegetables.

    Step #6. Braise. Cover the pan or pot with a lid and cook for approximately 2 hours at low heat (you can add more wine, stock or water if it's getting too dry). It should be tender and fall apart with a fork.

    Pureed vegetables in blender jar.

    Step #7. Blend the Vegetables. Remove the bay leaves. Transfer the vegetables and sauce to a blender and blend until smooth.

    Braised beef with pureed vegetables on white dish.

    Step #8. Serve! Slice the braised beef and serve it with the puréed vegetable sauce.

    Now it's time to dive in and eat some braised beef that has been cooked to an exquisite tenderness, after spending 2 hours sitting in a robust red wine sauce.

    This dish is sure to be the highlight of any dinner party and a highly requested meal in your home.

    Serve with a potato galette or oven baked potatoes for a filling dinner that is sure to satisfy even the hungriest guest.

    Braised Beef FAQs

    How long can you store leftover braised beef in the fridge?

    The braised beef should be stored in an airtight container in the fridge for up to 3 to 4 days.

    Can you freeze the leftovers?

    It can be frozen for up to 3 months.

    Do you have to sear beef before braising?

    Browning the meat beforehand is recommended, as it enhances the appearance and adds a depth of flavor. However, some believe that skipping the browning step results in a sweeter taste. If you test it out for yourself, let me know the results!

    Braised beef with pureed vegetable sauce on white dish.

    🥩More Meat Dishes You Will Love

    • Triple meat sub sandwich on parchment lined cutting board.
      Triple Meat Sub Sandwich
    • Circular charcuterie board with meat, cheese, breadsticks, nuts, apricots and olives.
      How to Make a Charcuterie Board
    • Bison chanterelle mushroom meat sauce in jar.
      Bison and Chanterelle Meat Sauce
    • Marinated flank steak cooking on charcoal grill.
      How to Grill Carne Asada

    If you tried this recipe tutorial for How to Braise Beef or any other recipe on my website, please leave a 🌟 star rating and let me know how it went in the 📝 comments below. And please share the recipe!

    📋Recipe

    Braised beef with pureed vegetables on white dish.
    Print Pin
    5 from 1 vote

    How to Braise Beef

    Achieving delicious, mouthwatering beef will no longer be a secret after following this step by step guide on how to braise beef. This delicacy of a meal is slowly-cooked on the stove with red wine and stock until fall-apart tender.
    Course Main Course
    Cuisine American
    Prep Time 30 minutes minutes
    Cook Time 2 hours hours
    Total Time 2 hours hours 30 minutes minutes
    Servings 4
    Calories 643kcal
    Author Joss Dyckson

    Equipment

    • Large pot or Dutch oven
    • Blender

    Ingredients

    • 2 pounds beef roast chuck, eye roast, brisket, blade roast or shank
    • 2 tablespoons brown sugar
    • 2 tablespoons worcestershire sauce
    • 2 tablespoons canola oil or peanut oil
    • ½ cup celery chopped
    • 1 cup leeks chopped
    • 1 cup yellow onions chopped
    • 1 cup carrots chopped
    • 1 cup red bell peppers chopped
    • 2 tablespoons garlic minced
    • 2 bay leaves
    • 1 cup beef stock might need more for braising if it gets dry
    • 1 cup red wine
    • 1 cup canned tomato purée
    • salt & pepper
    US Customary - Metric

    Instructions

    • Season the beef with salt, pepper, brown sugar and Worcestershire sauce.
    • In a large skillet, pot or Dutch oven at high heat, add the canola oil. Sear the beef roast on all sides, until browned. Remove from pot/pan and reserve.
    • Using the same pot, heat a little more canola oil. Add all the vegetables and the bay leaves. Cook for about 5 minutes.
    • Add the beef back to the pan and lower the heat to medium-low.
    • Add the beef stock, red wine and tomato purée.
    • Cover the pan with a lid and cook for approximately 2 hours at low heat (you can add more wine, stock or water if it's getting too dry). It should be tender and fall apart with a fork.
    • Remove the bay leaves. Transfer the vegetables and sauce to a blender and blend until smooth.
    • Slice the beef roast and serve it with the puréed vegetable sauce.

    Notes

    • The leftover braised beef and vegetable sauce should be stored in an airtight container in the fridge for up to 3 to 4 days.
    • It can be frozen for up to 3 months.
    • Browning the meat beforehand is recommended, as it enhances the appearance and adds a depth of flavor. However, some believe that skipping the browning step results in a sweeter taste. If you test it out for yourself, let me know the results!

    Nutrition

    Calories: 643kcal | Carbohydrates: 30g | Protein: 48g | Fat: 34g | Saturated Fat: 12g | Polyunsaturated Fat: 4g | Monounsaturated Fat: 18g | Trans Fat: 2g | Cholesterol: 156mg | Sodium: 476mg | Potassium: 1632mg | Fiber: 4g | Sugar: 16g | Vitamin A: 7316IU | Vitamin C: 65mg | Calcium: 122mg | Iron: 8mg

    Fish Sticks with Sweet Mayo

    October 17, 2018 by Joss Dyckson 1 Comment

    If you are looking for a way to prepare deliciously golden and crispy fish sticks at home without the additives, I have a fantastic recipe for you that comes with a delicious sweet mayo dipping sauce! It's far tastier in the end than the alternative.

    Fish sticks in a white ramekin, dip on the side.

    We all know kids love fish and chips, and what could go wrong with such a quick and tasty dinner? Even though they are enjoyable, it's common knowledge that store-bought frozen, breaded fish fillets are usually filled with sodium, preservatives, and a number of fillers that kids just don't need.

    For this recipe, your most important ingredients are a few white fish fillets, breading ingredients, and oil! As a bonus, I've whipped up a tangy dipping sauce for the fish sticks. What kid wouldn't love that?!

    My kids think these are the best and prefer them to store-bought. They're especially great for a special back to school dinner alongside some kimchi fries or baked turnip fries for a healthier option. The fish stick sauce is a big hit!

    What I love is the breading sticks perfectly to the fish without coming apart and they are perfectly seasoned.

    I also have this electric skillet fried fish recipe and kimchi tacos with breaded cod that you might like.

    SUMMARIZE & SAVE THIS CONTENT ON

    ChatGPT
    Google AI
    Perplexity
    Grok
    [feast_advanced_jump_to]

    Ingredients

    Fish sticks with dipping sauce ingredients labeled on light blue, wooden background.
    • eggs - To help the breading to stick.
    • bread crumbs - I use seasoned breadcrumbs.
    • white fish fillets - My favorite are cod (tastes great and it's a cheaper fish) and halibut (amazing taste and texture but more expensive). You're looking for firm, meaty fish. You can also go with haddock or tilapia but they will be a bit thinner than cod and halibut.
    • cooking oil - Such as canola or peanut oil. They have a high smoke point which is perfect for frying.
    • Worcestershire sauce - This will be for the fish stick dipping sauce. It's an English, fermented sauce with punchy, umami flavor. A little goes a long way.

    *Check recipe card for ingredient amounts.

    How to Make Fish Sticks with Sauce

    Fish stick breading ingredients in 3 separate dishes, numbered.

    Step 1. Bread the fish. In 3 separate shallow dishes, place the flour mixture, beaten eggs and breadcrumbs. Cut the fish into strips and dip them into the flour, then eggs, then breadcrumbs.

    Fish sticks frying in pan.

    Step 2. Fry the fish. Heat 1 to 2 cups of cooking oil over medium-high heat in a deep skillet. Carefully add the fish strips to the pan in batches. Fy until golden and crispy on both sides.

    Fish stick sauce in small bowl with small wooden spoon.

    Step 3. Make the fish stick sauce. To make the special dip, simply mix the ketchup, mayonnaise and Worcestershire sauce together.

    Fish sticks in a white ramekin and sweet mayo dip in the side.

    Step 4. Serve. Serve the crispy, breaded fish with the homemade sauce and lemon wedges.

    Joss' Top Tips

    • In all honesty, the trickiest part of this recipe is the slicing of the fillets into sticks. My suggestion would be to make the slices lengthwise and then cut those pieces in half if the fillets are particularly long.
    • The fish sticks may be as thin or chunky as you like, just note that the wider the sticks, the fewer you'll have in the end. Once you've sliced them, the rest of the recipe is easy.
    • Keep your hands clean in between breading the fillets to avoid clumps in your breading.
    • Keep the thickest fish pieces in the middle of the pan as that tends to be where the oil gets the hottest.
    • For perfectly golden fish sticks: If the fish stick breading is getting too dark within the 2 minutes of frying per side, turn the heat down a touch. You want it to be simultaneously golden brown on the outside and cooked all of the way through on the inside.

    Storage & Reheating Instructions

    • The fish stick sauce should last, covered in the fridge, for up to two weeks.
    • The fish sticks should be refrigerated in a covered container for up to 3 to 4 days.
    • Reheating: They can be reheated in the oven at 350°F for 10 to 15 minutes.
    Fish sticks in a white ramekin on green and white wooden background.

    More Kid-Friendly Recipes to Try

    • Baked taco cups in white dish with lentils on decorative cloth.
      Mini Taco Cups
    • Sloppy Joe with chips in the background.
      Electric Skillet Sloppy Joes
    • Summer mango pomegranate soda in glasses with blue umbrellas.
      Summer Mango-Pomegranate Soda
    • Moist, frosted pumpkin cupcakes on yellow plate.
      Super Moist Pumpkin Cupcakes

    Have you prepared homemade fish sticks before? If you tried this Fish Sticks Recipe with Sweet Mayo Sauce or any other recipe on my website, please leave a 🌟 star rating and let me know how it went in the 📝 comments below. And please share the recipe!

    📋Recipe

    Golden fish sticks in ramekin.
    Print Pin
    5 from 9 votes

    Fish Sticks with Sweet Mayo

    If you are looking for a way to prepare crispy fish sticks at home without the additives, I have a fantastic recipe for you here that comes with a delicious sweet mayo dipping sauce!
    Course Main Course
    Cuisine American
    Prep Time 15 minutes minutes
    Cook Time 4 minutes minutes
    Total Time 19 minutes minutes
    Servings 4
    Calories 460kcal
    Author Joss Dyckson

    Ingredients

    For the Fish Sticks

    • 2 eggs
    • ½ cup all-purpose flour
    • 1 tablespoon paprika powder
    • 1 teaspoon salt
    • 1 cup seasoned bread crumbs
    • 4 white fish fillets such as cod or halibut
    • 1-2 cups cooking oil for frying
    • 1 lemon cut into wedges
    • sea salt

    For the Sweet Mayo Dip

    • ¼ cup ketchup
    • ¼ cup mayonnaise
    • 1 tablespoon Worcestershire sauce
    US Customary - Metric

    Instructions

    • Beat the eggs in a medium bowl. Add the flour, paprika and salt in a separate bowl and whisk together.
      2 eggs, ½ cup all-purpose flour, 1 tablespoon paprika powder, 1 teaspoon salt
    • Place the bread crumbs in another separate bowl or shallow dish.
      1 cup seasoned bread crumbs
    • Pat the fillets dry with paper towel and slice them into small strips. Add them to the flour to coat them and then shake off the excess.
      4 white fish fillets
    • Dip the flour-coated fish pieces into the egg and then press them into the breadcrumbs, until covered. Place them all on a large tray.
    • Heat 1 to 2 cups of cooking oil over medium-high heat in a deep skillet. Carefully add the fish sticks to the pan in batches (4-5 at a time so the oil doesn't cool off--this way the fish won't absorb so much oil).
    • When they are golden and crispy on both sides (about two minutes per side), remove them to a baking rack with paper towel underneath to catch the excess oil. Immediately sprinkle them with a touch of sea salt and let cool for a few minutes because they will be very hot on the inside.
    • To make the dip, simply mix the ketchup, mayonnaise and Worcestershire sauce together.
      ¼ cup ketchup, ¼ cup mayonnaise, 1 tablespoon Worcestershire sauce
    • Serve the fish sticks with the dip and lemon wedges.

    Notes

    • White fish: My favorite white fish fillets for fish sticks are cod (tastes great and it's a cheaper fish) and halibut (amazing taste and texture but more expensive). It's best to go with firm, meaty white fish. You can also go with haddock or tilapia but they will be a bit thinner than cod and halibut.
    • Sauce storage: The fish stick sauce should last, covered in the fridge, for up to two weeks.
    • Fish stick storage: The fish sticks should be refrigerated in a covered container for up to 3 to 4 days.
    • Reheating: They can be reheated in the oven at 350°F for 10 to 15 minutes, until hot and crispy.
    • Tips:
      • Keep your hands clean in between breading the fillets to avoid clumps in your breading.
      • Keep the thickest pieces in the middle of the pan as that tends to be where the oil gets the hottest.
      • If the fish stick breading is getting too dark within the 2 minutes of frying per side, turn the heat down a touch. You want it to be simultaneously golden brown on the outside and cooked all of the way through on the inside.

    Nutrition

    Calories: 460kcal | Carbohydrates: 28g | Protein: 41g | Fat: 20g | Saturated Fat: 3g | Polyunsaturated Fat: 6g | Monounsaturated Fat: 11g | Trans Fat: 1g | Cholesterol: 167mg | Sodium: 581mg | Potassium: 640mg | Fiber: 2g | Sugar: 2g | Vitamin A: 981IU | Vitamin C: 1mg | Calcium: 73mg | Iron: 3mg

    How to Cook Crispy Bacon - 3 Ways

    October 15, 2018 by Joss Dyckson Leave a Comment

    Extra crispy, golden bacon adds the perfect flair to a variety of dishes. There are numerous techniques for cooking it, but finding the best way to achieve a crisp texture and rich color can be challenging. In this step by step guide, we will teach you how to cook deliciously golden, crispy bacon that will make your meals stand out using three convenient methods: grill pan, oven, and microwave.

    Crispy bacon in grill pan.

    It is a hearty staple for breakfast and pairs wonderfully with fluffy scrambled eggs. It accentuates creative omelettes (like my kimchi omelette) filled with an array of brightly colored vegetables, provides a satisfying, crisp texture nestled within a sandwich and gives dinnertime meals an additional zing of flavor. Your home is about to be filled with the mouth-watering scent of cooking bacon.

    [feast_advanced_jump_to]

    Chef's Notes - Before you begin

    • Cooking times will vary depending on how thick the bacon is. These are the times that worked for me. Regular bacon strips will cook faster than thick-cut and get crispy quicker. I recommend checking after 10 minutes (and every few minutes after that) to avoid burning the bacon. Eventually you will get to know the baking time for your oven and your favorite brand of bacon strips!
    • If using frozen bacon, be sure to thaw it in the fridge first.
    • Also, keep in mind that bacon does get a little more crispy as it cools.

    Ingredients

    Raw bacon on a clear, glass plate, wooden background.

    Grab a package of bacon, some tongs and cooking tool of choice.

    Option #1. Using a Grill Pan

    This method can get a bit messy but it's quicker than using the oven.

    Bacon in grill pan.

    Step 1: Place bacon strips in pan. Place the bacon in the cold grill pan on the stove. Turn the heat to medium and fry until crispy on the bottom.

    Bacon in grill pan.

    Step 2: Flip. Turn it over and continue grilling until it's golden and crispy on both sides (about 7 to 10 minutes total).

    Option #2. Using an Oven

    I prefer the oven method over the stove-top because it is less messy and there is less active time. The bacon strips get cooked more evenly.

    Raw bacon on foil-lined sheet pan.

    Step 1: Preheat oven. Preheat an oven to 400ºF. Place the bacon strips on a baking sheet covered with aluminum foil (do not overlap the bacon).

    Bacon in the oven on foil-lined sheet pan.

    Step 2: Bake until crispy. Bake in the preheated oven until the bacon strips are very crispy and get a nice golden color (about 15 to 20 minutes). If you like it extra crispy, you can go a few minutes longer but keep an eye on them. There is no need to flip the bacon.

    👩🏻‍🍳Chef's Note: Placing the strips on a rack over the foil-lined pan is optional; if you are using thick cut bacon, they may benefit from this.

    Option #3. In the Microwave

    This is the quickest option, but some people like to avoid using a microwave.

    Raw bacon on paper towel-covered plate.

    Step 1: Arrange strips on plate. Place the bacon on a microwaveable plate covered with paper towels.

    Raw bacon on paper towel in microwave.

    Step 2: Microwave. Microwave on full-power for about 2 minutes. Open the microwave, turn over the bacon, and cook for about 2 more minutes, until cooked through and crispy.

    Final Step: Remove Excess Grease

    Crispy bacon in paper towel.

    Using paper towels, remove the excess grease from the crispy bacon. Serve & enjoy!

    Serving Suggestions

    Crispy bacon wrap on plate.

    Crispy bacon egg wrap.

    You can add crispy bacon to a wrap with these kimchi scrambled eggs and take a lunch from great to amazing!

    • Serve it alongside Mexican chorizo eggs and toast for a classic breakfast with a spicy twist.
    • Add some crunch to sandwiches, burgers and English muffins.
    • Chop up the strips into bacon bits and serve over baked potatoes.

    Top Tips

    • For the pan method, always start with a cold pan. This way the fat will slowly melt out of the bacon as it heats up and help make it more crispy. Putting bacon in a hot pan makes the fat seize up, leaving you with soggy slices instead.
    • Which method to use? When you are pressed for time, try the microwave method to quickly prepare a meal on-the-go. Use the grilling or baking options when you have more time.
    • Alternative temperature for oven method. You can also bake the strips at 375ºF but it will take a bit longer to cook (about 5 minutes longer in my oven) so I prefer 400ºF.
    • Save the Grease. If you wish to use the bacon grease for cooking, let it cool for about 15 minutes, drain it into a glass jar and save it in the fridge. You can use it to make gravies or infuse rice, like this kimchi bacon fried rice, with smoky flavor.
    • Sweeten it. If you want to try candied bacon, sprinkle some brown sugar over the strips before baking in the oven.

    Crispy Bacon FAQs

    How do you store the cooked bacon?

    Transfer the cooled bacon strips to a covered container and store in the fridge for up to 5 days. It can be frozen for 1 to 2 months.

    Is bacon crispier in the oven or in a pan?

    In my experience, cooking bacon in the oven is better in terms of crispiness. You can get the bacon crispier without the mess, especially if you put the bacon on a rack over a sheet pan, which helps the strips render more fat.

    Why won't my bacon get crispy in the oven?

    Make sure the bacon slices are spread out in one layer and have sufficient space between them; if they overlap, they won't get as crispy. If you're cooking a lot of bacon at one time, use two pans.

    More Cooking Tutorials to Sharpen Your Skills

    • Chopped garlic on cutting board with blue background.
      How to Chop Garlic
    • Fried tofu on serving plate.
      How to Fry Tofu
    • Bunch of fresh asparagus over pan.
      How to Cook Asparagus on the Stove
    • Roasted garlic head/bulb in tin.
      How to Roast Garlic in the Oven (Cloves, Bulbs + in Foil)

    Please let me know which method is your favorite. If you tried this 🥓recipe tutorial for How to Cook Crispy Bacon or any other recipe on my website, please leave a 🌟 star rating and let me know how it went in the 📝 comments below. And please share the recipe!

    📋Recipe

    Crispy bacon in grill pan with tongs.
    Print Pin
    5 from 1 vote

    How to Cook Crispy Bacon - 3 Ways

    I will show you how to cook bacon to crispy perfection using 3 different methods: grill pan, oven and microwave. Extra crispy, golden bacon adds the perfect flair to a variety of dishes.
    Course Breakfast, Side Dish, Snack
    Cuisine American
    Prep Time 1 minute minute
    Cook Time 5 minutes minutes
    Total Time 6 minutes minutes
    Servings 12 strips
    Calories 33kcal
    Author Joss Dyckson

    Equipment

    • Tongs

    Ingredients

    • 1 package bacon

    Instructions

    Option #1. Using a Grill Pan

    • Place the bacon in the cold grill pan on the stove. Turn the heat to medium and fry until crispy on the bottom.
      Bacon in grill pan.
    • Turn it over and continue grilling until it's golden and crispy on both sides (about 7 to 10 minutes total).
      Bacon in grill pan.

    Option #2. Using an Oven

    • Preheat an oven to 400ºF. Place the bacon strips on a baking sheet covered with aluminum foil (do not overlap the bacon).
      Raw bacon on foil-lined sheet pan.
    • Bake in the preheated oven, until the bacon strips are very crispy and get a nice golden color (about 15 to 20 minutes). If you like it extra crispy, you can go a few minutes longer but keep an eye on them. There is no need to flip the bacon.
      Bacon in the oven on foil-lined sheet pan.

    Option #3. In the Microwave

    • Place the bacon on a microwaveable plate covered with paper towels.
      Raw bacon on paper towel-covered plate.
    • Microwave on full-power for about 2 minutes. Open the microwave, turn over the bacon, and cook for about 2 more minutes, until cooked through and crispy.
      Raw bacon on paper towel in microwave.

    Final Step for All 3 Methods:

    • Using paper towels, remove the excess grease from the bacon. Serve & enjoy!
      Crispy bacon in paper towel.

    Notes

    • Frozen bacon: If using frozen bacon, be sure to thaw it in the fridge first.
    • Cool pan: For the pan method, always start with a cold pan. This way the fat will slowly melt out of the bacon as it heats up and help make it more crispy. Putting bacon in a hot pan makes the fat seize up, leaving you with soggy slices instead.
    • Baking rack: Placing the strips on a rack over the foil-lined pan in the oven is optional; if you are using thick cut bacon, they may benefit from this.
    • Crispiness: Keep in mind that bacon gets more crispy when it cools.
    • Cooking times will vary depending on how thick the bacon is. These are the times that worked for me. Regular bacon strips will cook faster than thick-cut and get crispy quicker. I recommend checking after 10 minutes (and every 5 minutes after that) to avoid burning the bacon. Eventually you will get to know the baking time for your oven and your favorite brand of bacon strips!
    • Alternative temp: You can also bake the strips at 375ºF but it will take a bit longer to cook (about 5 minutes longer in my oven) so I prefer 400ºF.
    • Candied bacon: If you want to try candied bacon, sprinkle some brown sugar over the strips before baking in the oven.
    • Save the grease: If you wish to use the bacon grease for cooking, let it cool for about 15 minutes, drain it into a glass jar and save it in the fridge.
    • Storage: Transfer the cooled bacon strips to a covered container and store in the fridge for up to 5 days. It can be frozen for 1 to 2 months.

    Nutrition

    Calories: 33kcal | Carbohydrates: 0.1g | Protein: 2g | Fat: 2g | Saturated Fat: 1g | Polyunsaturated Fat: 0.4g | Monounsaturated Fat: 1g | Trans Fat: 0.01g | Cholesterol: 7mg | Sodium: 119mg | Potassium: 35mg | Vitamin A: 3IU | Calcium: 1mg | Iron: 0.1mg

    Chocolate Chunk Almond Cookies

    October 10, 2018 by Joss Dyckson Leave a Comment

    There's nothing better than the smell of chocolate chip cookies baking in the oven. Unless, of course, they're laden with copious amounts of delicious chocolate chunks and slivered almonds as in these Chocolate Chunk Almond Cookies.

    Top view of cookies on a white plate with cookie jar on the side.

    These cookies are the perfect treat to snack on at home. They're also ideal for bringing to a potluck as they travel well and cater to a variety of tastes. However, leave out the nuts in case of allergies.

    You could even combine the mix and add it to a jar for a chocolate chip cookie food gift idea.

    [feast_advanced_jump_to]

    Ingredients

    The combination of chocolate chips, chocolate chunks, and slivered almonds give these cookies the ultimate mix of sweet, nutty, and crunchy with every bite.

    • butter - softened
    • superfine sugar - This is a sugar with finer granules. It's also labelled as 'caster sugar' or 'berry sugar'.
    • large eggs
    • vanilla extract
    • flour
    • baking soda
    • baking powder
    • salt
    • milk chocolate chips
    • milk chocolate bars - I like to use Cadbury.
    • slivered almonds - These are almonds that have been peeled and sliced into small strips.

    🍪You might also like these electric skillet oatmeal cookies.

    Chocolate chunk cookies on a white plate with a cookie jar in the background.

    How to Make Them

    They couldn't be simpler to make. It starts with a basic creamed butter mixture which is then blended with just the right amount of dry ingredients to give them a wonderfully light texture. Then they are baked to golden, crispy perfection.

    1. Combine wet ingredients. Preheat oven to 350°F. Cream the butter and sugar. Add the eggs and vanilla. Mix.
    2. Add dry ingredients. Sift flour, baking soda, baking powder and salt together. Add to butter mixture. Combine well.
    3. Add chocolate and almonds. Break the chocolate bars into chunks. Add chocolate bar chunks, chocolate chips and almonds to the dough and mix.
    4. Bake. Roll into balls and place on a cookie sheet. Bake for 10-12 minutes in the preheated oven.
    5. Serve. Let cool and serve.

    *You can also check out the video in the recipe card to see how they're made.

    Storage

    These cookies can be stored in a container at room temperature for up to 2 to 3 weeks, but eat within 3 days for best results. After this time they can begin to dry out and just don't taste as good.

    I like to freeze them so that they stay fresh for longer. They can be frozen for up to 8 to 12 months. You can also freeze the cookie dough. Either transfer the whole batch of cookie dough to a container or freeze individual portions.

    Scoop portions of cookie dough onto a parchment-lined baking sheet and freeze them until solid. Then, transfer the individual frozen cookie dough portions to a freezer bag and back into the freezer.

    To bake the frozen cookie dough, you can either thaw it in the fridge overnight or bake the individual portions straight from frozen. It will take a little longer to bake from frozen.

    Chocolate chunk cookies on a white plate with a cookie jar in the background.

    More Delicious Chocolate Recipes to Try

    • Red velvet cake pops in white dish on white wooden background.
      Red Velvet Cake Pops
    • Naked chocolate cake pops on black dish with yellow cloth.
      Naked Cake Pops
    • Hot chocolate spoons on serving tray.
      Hot Chocolate Spoons
    • Skillet s'mores with colored marshmallows stacked on plate.
      Easy Skillet S’mores

    If you tried this 🍪 Chocolate Chunk Almond Cookies Recipe or any other recipe on my website, please leave a 🌟 star rating and let me know how it went in the 📝 comments below. And please share the recipe!

    📋Recipe

    Top view of cookies on a white plate with cookie jar on the side.
    Print Pin
    5 from 3 votes

    Chocolate Chunk Almond Cookies

    These cookies are loaded with chocolate chips, chocolate chunks and almonds. They're perfect for snacking on or bringing to a potluck.
    Course Dessert
    Cuisine American
    Prep Time 10 minutes minutes
    Cook Time 10 minutes minutes
    Total Time 20 minutes minutes
    Servings 48 cookies
    Calories 138kcal
    Author Joss Dyckson

    Ingredients

    • 1 cup butter softened
    • 2 cups caster sugar
    • 2 large eggs
    • 1 teaspoon vanilla extract
    • 3 ⅛ cups flour
    • 1 teaspoon baking soda
    • 1 tablespoon baking powder
    • ½ teaspoon salt
    • 1 ½ cups milk chocolate chips
    • 2 large milk chocolate bars
    • ⅓ cup slivered almonds
    US Customary - Metric

    Instructions

    • Preheat oven to 350°F. Cream the butter and sugar. Add the eggs and vanilla.  Mix.
      1 cup butter, 2 cups caster sugar, 2 large eggs, 1 teaspoon vanilla extract
    • Sift flour, baking soda, baking powder and salt together. Add to butter mixture. Combine well.
      3 ⅛ cups flour, 1 teaspoon baking soda, 1 tablespoon baking powder, ½ teaspoon salt
    • Break the chocolate bars into chunks. Add chocolate bar chunks, chocolate chips and almonds to the dough and mix.
      1 ½ cups milk chocolate chips, 2 large milk chocolate bars, ⅓ cup slivered almonds
    • Roll into balls and place on a cookie sheet. Bake for 10-12 minutes in the preheated oven.
    • Let cool and serve.

    Video

    Notes

    • These cookies can be stored in a container at room temperature for up to 2 to 3 weeks, but eat within 3 days for best results. After this time they can begin to dry out and just don't taste as good.
    • I like to freeze them so that they stay fresh for longer. They can be frozen for up to 8 to 12 months.
    • You can also freeze the cookie dough. Either transfer the whole batch of cookie dough to a container or freeze individual portions. Scoop portions of cookie dough onto a parchment-lined baking sheet and freeze them until solid. Then, transfer the individual frozen cookie dough portions to a freezer bag and back into the freezer.
    • To bake the frozen cookie dough, you can either thaw it in the fridge overnight or bake the individual portions straight from frozen. It will take a little longer to bake from frozen.

    Nutrition

    Calories: 138kcal | Carbohydrates: 19g | Protein: 2g | Fat: 6g | Saturated Fat: 4g | Polyunsaturated Fat: 0.3g | Monounsaturated Fat: 1g | Trans Fat: 0.2g | Cholesterol: 19mg | Sodium: 85mg | Potassium: 47mg | Fiber: 1g | Sugar: 13g | Vitamin A: 142IU | Vitamin C: 0.03mg | Calcium: 23mg | Iron: 1mg

    HUNGRY FOR MORE? TRY OUR:

    Plum Crumble with Vanilla Ice Cream

    How to Make Ceviche (Step by Step)

    October 8, 2018 by Joss Dyckson 2 Comments

    For a truly authentic seafood dish that is simple yet exquisite, here's a recipe detailing how to make ceviche. A national dish of Peru, ceviche has been a South American delicacy for generations.

    Ceviche on a yellow plate.

    For a taste of the coastal regions of South America, a good ceviche made with fish provides a savor of the sea in a visually beautiful dish with a delicious mix of flavors.

    Due to its raw-fish nature, the spicy delectability of a good ceviche requires fresh assembly and immediate service for full enjoyment.

    Whether you prefer it cooked in lime or lemon juice for a short period of time or for longer, you'll discover that this easy ceviche dish can serve as a delicate seafood serving at any time of year. The variety of fish fillets that work with this dish make it the best ceviche recipe for versatility.

    Using fresh white fish fillets of your own choosing, you can make this homemade ceviche while preparing other side dishes like basic guacamole, sweet potatoes, grilled avocado, plantain, or corn to accompany it.

    When served as an appetizer, you can follow up with these halibut fish tacos or skillet enchiladas.

    The entire preparation is simple and this tutorial takes the guesswork out of making this dish. Enjoy!

    [feast_advanced_jump_to]

    Ceviche Ingredients

    Ceviche ingredients on cutting board.

    Prepare all ingredients before starting to cook. You'll need:

    • fresh white fish fillets - Such as sea bass, mahi mahi, tilapia, tuna, mackerel or halibut. If you're new to ceviche, prawns are a great place to start-they're a bit easier to work with, though the texture's a little different than fish. Still delicious, just in their own way!
    • limes or lemons - The juice will be used to cure the raw fish.
    • white onion - Finely slice your onion-thinner is better here! The citrus juice will gently pickle it, softening that sharp, oniony bite and adding just the right zing and crunchy texture.
    • red chili peppers - To kick up the flavor with some heat.
    • fresh cilantro leaves - To add fresh, herbaceous flavor. You can substitute with chives if you don't like cilantro in recipes.

    *Check recipe card for ingredient amounts.

    Regional & Creative Variations

    • Mexican Twist: tomato + avocado + jalapeño (creamy and spicy all in one)
    • Ecuadorian Shrimp Twist: boiled shrimp + tomato‑clamato base (more liquidy--almost like a soup)
    • Fusion Twist: Add mango, pistachios or hearts of palm (or come up with your own unique twist)

    Step by Step Instructions

    A knife slicing into raw white fish on cutting board.

    Step #1. Slice the fish. Cut the fish in slices using a chef's knife or other large knife.

    Cubed raw white fish on cutting board with knife.

    Step #2. Cube the fish. Cut the fish slices into cubes.

    Glass bowl with raw white fish and a lemon/lime juicer.

    Step #3. Add citrus juice. Add the lime or lemon juice to the fish cubes, making sure they are all covered in it.

    Glass bowl with cubed raw white fish and lemon juice.

    Step #4. Rest. Let the fish sit in the lime juice for at least 30 minutes or up to 4 hours in the fridge to cure. The time it takes will depend on your taste.

    Metal bowl and glass bowl with lemon juice pouring out.

    Step #5. Drain the juice. Drain the lime juice from the fish.

    Ceviche in a glass bowl with onion, cilantro and red chili peppers.

    Step #6. Add the veg. Add the onion, chilies, cilantro leaves, salt and pepper to the fish. Add some fresh lime juice (as much as you like).

    Ceviche in a glass bowl with a spoon.

    Step #7. Mix well. Gently mix it all together.

    Ceviche on a yellow plate.

    Step #8. Serve. Serve and enjoy immediately!

    Joss' Top Tip

    Make sure the fish you use is as fresh as possible! Look for the sushi-grade label for its freshness. Sushi grade means it is safe to eat raw.

    How to Make Ceviche FAQs

    What is ceviche?

    Ceviche is a Peruvian dish consisting of fresh, raw fish or shrimp that is cured with lemon or lime juice. Vegetables and spices are added after curing and then it is served immediately. It can be served as an appetizer or a main dish with sides.

    Where is ceviche from?

    Ceviche originates in Northwest Peru.

    How long does ceviche last?

    Because ceviche consists of raw fish that is cured, it is best consumed immediately. However, it can be stored in the refrigerator in an airtight container for a maximum of 2 days. As it continues to sit, the texture will change and may become unappetizing.

    Ceviche on yellow plate garnished with fresh cilantro.

    ❤️ More Fish Recipes You Will Love

    • Golden fish sticks in ramekin.
      Fish Sticks with Sweet Mayo
    • Bacon wrapped scallops with parsley on blue plate.
      Bacon Wrapped Scallops (Oven)
    • Kimchi cod tacos in serving dish.
      Kimchi Tacos
    • Salmon fillet with grilled lemon slices on top.
      How to Cook Salmon with Skin (Crispy)

    If you tried this recipe tutorial for How to Make Ceviche or any other recipe on my website, please leave a 🌟 star rating and let me know how it went in the 📝 comments below. And please share the recipe!

    📋Recipe

    Ceviche on yellow plate.
    Print Pin
    5 from 2 votes

    How to Make Ceviche

    For a truly authentic seafood dish that is simple yet exquisite, here's a recipe detailing how to make ceviche. A national dish of Peru, ceviche has been a South American delicacy for generations.
    Course Appetizer, Main Course
    Cuisine Peruvian
    Diet Low Salt
    Prep Time 5 minutes minutes
    Resting time 30 minutes minutes
    Total Time 35 minutes minutes
    Servings 2
    Calories 271kcal
    Author Joss Dyckson

    Ingredients

    • 2 fresh white fish fillets such as sea bass, mahi mahi, tilapia, tuna or halibut
    • 5-6 limes juiced--or lemons
    • ½ white onion sliced finely
    • 2 red chili peppers finely chopped
    • 1 handful cilantro leaves finely chopped
    • salt and pepper
    US Customary - Metric

    Instructions

    • Cut the fish in slices using a chef's knife or other large knife.
      A knife slicing into raw white fish on cutting board.
    • Cut the fish slices into cubes.
      Cubed raw white fish on cutting board with knife.
    • Add the lime or lemon juice to the fish cubes, making sure they are all covered in it.
      Glass bowl with raw white fish and a lemon juicer.
    • Let the fish sit in the lime juice for at least 30 minutes or up to 4 hours in the fridge to cure. The time it takes will depend on your taste.
      Glass bowl with cubed raw white fish and lemon juice.
    • Drain the lime juice from the fish.
      Metal bowl and glass bowl with lemon juice pouring out.
    • Add the onion, chilies, cilantro leaves, salt and pepper to the fish. Add some fresh lime juice (as much as you like).
      Ceviche in a glass bowl with onion, cilantro and red chili peppers.
    • Mix well.
      Ceviche in a glass bowl with a spoon.
    • Serve and enjoy!
      Ceviche on a yellow plate.

    Video

    Notes

    • Make sure the fish you use is as fresh as possible. Look for the sushi-grade label for its freshness. Sushi grade means it is safe to eat raw.
    • You can also use prawns.
    • Because ceviche consists of raw fish that is cured, it is best consumed immediately.
    • However, it can be stored in the refrigerator in an airtight container for a maximum of 2 days. As it continues to sit, the texture will change and may become unappetizing.

    Nutrition

    Calories: 271kcal | Carbohydrates: 32g | Protein: 38g | Fat: 4g | Saturated Fat: 1g | Polyunsaturated Fat: 1g | Monounsaturated Fat: 1g | Cholesterol: 85mg | Sodium: 100mg | Potassium: 1081mg | Fiber: 9g | Sugar: 10g | Vitamin A: 623IU | Vitamin C: 210mg | Calcium: 101mg | Iron: 3mg

    Juicy Herb Roasted Chicken & Blackberry Gravy

    October 3, 2018 by Joss Dyckson Leave a Comment

    Sometimes it becomes hard to find new ideas to add into the rotation for tasty dinners. This juicy, herb-roasted chicken with blackberry gravy is not only delicious, but it also adds a unique way to change up Thanksgiving dinner or a special meal with friends and family.

    Roasted Chicken and vegetables on a serving plate with blackberry gravy in the background.
    [feast_advanced_jump_to]

    🍽️ A Modern Twist for a Memorable Family Feast

    Both children and adults will love the addition of the sweet blackberry sauce. This is a special meal best enjoyed with friends and family.

    This would be an amazing option instead of your typical Thanksgiving turkey. It would be a modern spin on a classic meal, and it would certainly have guests talking. Roast a small chicken for an intimate gathering, or choose a larger bird for a festive family feast.

    This savory pumpkin galette and chicken pot pie pasty are also unique thanksgiving meal ideas you might want to check out.

    🍗 Herb Roasted Chicken & Blackberry Gravy Ingredients

    Roasted Chicken:

    • whole chicken - about 5 pounds--opt for a fresh, free-range chicken
    • mixed fresh herbs - thyme, rosemary, bay leaf, oregano
    • lemon - halved
    • olive oil - don't need extra virgin--just pure olive oil
    • garlic clove - chopped
    • butter - melted
    • yellow onions - or white onions
    • carrots - chopped
    • celery sticks - chopped
    • yellow potatoes - cleaned & chopped
    • salt & pepper - to taste

    Blackberry Gravy:

    • fresh blackberries - cleaned & without the leaves
    • sugar - I use white sugar
    • white wine - such as Sauvignon Blanc or Chardonnay
    • lemon - juiced

    💬If you prefer a savory gravy, you could always try a chicken gravy or even a tomato gravy but to me the blackberry flavor really makes the dish stand out!

    🔪 How to Make it

    Roasted Chicken:

    1. Preheat and clean. Preheat oven to 425ºF. Clean the chicken inside and out. Pat dry.
    2. Stuff the chicken. Add salt and pepper to the inside of the chicken. Stuff the cavity with the mixed herbs, lemon halves, olive oil and garlic. Brush the chicken with the butter and sprinkle again with salt and pepper. Tie the legs together and tuck the wing tips under the body.
    3. Prep the vegetables. Place the onions, carrots, celery, and potatoes in a roasting pan. Toss with salt, pepper, herbs and olive oil. Spread around the bottom of the roasting pan and place the chicken on top.
    4. Roast. Roast the chicken for 1 ½ hours, or until the juices run clear when you cut between a leg and thigh (you can also use a thermometer for ease and accuracy - the internal temperature needs to be 165°F). Remove from the oven and tent with aluminum foil for about 20 minutes.
    5. Serve. Slice the chicken. Serve it with the veggies and blackberry gravy.

    Blackberry Gravy:

    1. Combine. Combine the blackberries, sugar and water in a saucepan and bring to medium heat. Stir until the sugar dissolves, about 3 minutes.
    2. Cook. Add the wine and let it cook for 3 more minutes. Add the lemon juice and pinch of salt. Cook for 20 minutes more or until the blackberries have softened.
    3. Process. Process in a blender and serve with the juicy, herb-roasted chicken. You can strain the seeds out with a fine mesh strainer, if desired.
    Roasted chicken stuffed with vegetables and herbs on plate with blackberry gravy on the side.

    ✅ Tips For Success

    • Prep the Chicken Properly: Make sure to pat the chicken dry with paper towels before seasoning. A dry surface will help the skin crisp up beautifully during roasting.
    • Stuff Loosely: When stuffing the chicken cavity, don't overfill it. Allow space for hot air to circulate and cook the vegetables evenly.
    • Monitor the Temperature: Roast the chicken until an instant-read thermometer inserted into the thickest part of the thigh (not touching bone) reads 165°F (74°C), to make sure the chicken is fully cooked and safe to eat.
    • Carve Carefully: To get clean cuts, use a sharp knife to carve the chicken.

    🥗 What to Serve it With

    • Sides: While this herb roasted chicken & blackberry gravy dinner is a full meal it likely doesn't need many side dishes but here are some ideas: the classic thanksgiving dressing is a no brainer as well as white wine asparagus risotto and pearl barley (check out my tutorial for how to cook pearl barley). If you happen to be serving it over the holidays, try this easy Christmas salad.
    • Drinks: Try my pumpkin martini or pumpkin punch.
    • Dessert: This blackberry galette, translucent pumpkin pie, simple plum crumble and homemade apple crisp are all great choices.

    🌡️ Leftover Roasted Chicken & Blackberry Gravy Storage

    • Chicken and vegetables: Leftover chicken and vegetables can be stored in an airtight container in the fridge for up to 4 days.
    • Blackberry Gravy: The blackberry gravy can also be covered and stored in the fridge for up to 7 days or you can freeze it for up to 3 months. Thaw in the refrigerator.
    Roasted chicken stuffed with vegetables and herbs on plate.

    🧡🤎 More Fall Favorites to Try

    • Golden fish sticks in ramekin.
      Fish Sticks with Sweet Mayo
    • Pumpkin spice coffee creamer pouring into glass mug of coffee.
      Homemade Pumpkin Spice Coffee Creamer
    • Potato galette with basil pesto sliced in half.
      Savory Potato Galette
    • Creamy pumpkin soup in soup bowls.
      Savory Creamy Pumpkin Soup

    If you tried this 🌿🍗 Juicy Herb Roasted Chicken & Blackberry Gravy Recipe or any other recipe on my website, please leave a 🌟 star rating and let me know how it went in the 📝 comments below. And please share the recipe!

    📋Recipe

    Roasted chicken with fresh herbs, vegetables and blackberry gravy.
    Print Pin
    5 from 3 votes

    Juicy Herb Roasted Chicken & Blackberry Gravy

    This juicy, herb-roasted chicken with blackberry gravy is not only delicious, but it also adds a unique way to change up Thanksgiving dinner or a special meal with friends and family.
    Course Main Course
    Cuisine American
    Prep Time 20 minutes minutes
    Cook Time 1 hour hour 30 minutes minutes
    Resting Time 20 minutes minutes
    Total Time 2 hours hours 10 minutes minutes
    Servings 6
    Calories 462kcal
    Author Joss Dyckson

    Ingredients

    For the Roasted Chicken

    • 1 whole chicken about 5 pounds
    • 1 bunch mixed fresh herbs thyme, rosemary, bay leaf, oregano
    • 1 lemon halved
    • 3 tablespoons olive oil
    • 1 garlic clove chopped
    • 1 tablespoon butter melted
    • 2 yellow or white onions chopped
    • 2 carrots chopped
    • 2 celery sticks chopped
    • 2 cups yellow potatoes cleaned & chopped
    • salt & pepper to taste

    For the Blackberry Gravy

    • 2 cups fresh blackberries cleaned
    • ¼ cup sugar
    • 3 tablespoons water
    • ½ cup white wine
    • 1 small lemon juiced
    • 1 pinch salt
    US Customary - Metric

    Instructions

    Roasted Chicken

    • Preheat oven to 425ºF. Clean the chicken inside and out. Pat dry.
    • Add salt and pepper to the inside of the chicken. Stuff the cavity with the mixed herbs, lemon halves, olive oil and garlic.
      1 bunch mixed fresh herbs, 1 lemon, 3 tablespoons olive oil, 1 garlic clove
    • Brush the chicken with the butter and sprinkle again with salt and pepper. Tie the legs together and tuck the wing tips under the body.
      1 tablespoon butter
    • Place the onions, carrots, celery, and potatoes in a roasting pan. Toss with salt, pepper, herbs and olive oil. Spread around the bottom of the roasting pan and place the chicken on top.
      2 yellow or white onions, 2 carrots, 2 celery sticks, 2 cups yellow potatoes
    • Roast the chicken for 1 ½ hours, or until the juices run clear when you cut between a leg and thigh (you can also use a thermometer for ease and accuracy - the internal temperature needs to be 165°F).
    • Remove from the oven and tent with aluminum foil for about 20 minutes.
    • Slice the chicken. Serve it with the veggies and blackberry gravy.

    Blackberry Gravy

    • Combine the blackberries, sugar and water in a saucepan and bring to medium heat. Stir until the sugar dissolves, about 3 minutes.
      2 cups fresh blackberries, ¼ cup sugar, 3 tablespoons water
    • Add the wine and let it cook for 3 more minutes.
      ½ cup white wine
    • Add the lemon juice and pinch of salt. Cook for 20 minutes more or until the blackberries have softened.
      1 small lemon
    • Process in a blender and serve with the roasted chicken. You can strain the seeds out with a fine mesh strainer, if desired.

    Notes

    • Leftover chicken storage: Leftover chicken and vegetables can be stored in an airtight container in the fridge for up to 4 days.
    • Blackberry gravy storage: The blackberry sauce can also be covered and stored in the fridge for up to 7 days or you can freeze it for up to 3 months. Thaw in the refrigerator.
    • Prep the Chicken Properly: Make sure to pat the chicken dry with paper towels before seasoning. A dry surface will help the skin crisp up beautifully during roasting.
    • Stuff Loosely: When stuffing the chicken cavity, don't overfill it. Allow space for hot air to circulate and cook the vegetables evenly.
    • Monitor the Temperature: Roast the chicken until an instant-read thermometer inserted into the thickest part of the thigh (not touching bone) reads 165°F (74°C), to make sure the chicken is fully cooked and safe to eat.
    • Carve Carefully: To get clean cuts, use a sharp knife to carve the chicken.

    Nutrition

    Calories: 462kcal | Carbohydrates: 16g | Protein: 29g | Fat: 31g | Saturated Fat: 8g | Cholesterol: 113mg | Sodium: 152mg | Potassium: 741mg | Fiber: 3g | Sugar: 3g | Vitamin A: 3790IU | Vitamin C: 24.6mg | Calcium: 65mg | Iron: 3.9mg

    How to Cook Asparagus on the Stove

    October 1, 2018 by Joss Dyckson 2 Comments

    This method for how to cook asparagus on the stove is quick and delivers satisfying results. Whether you prefer white asparagus or green asparagus, the end results are delicious when you follow this tutorial step by step.

    Seasoned, cooked asparagus on a plate.
    [feast_advanced_jump_to]

    Why This Recipe Works

    Properly cooking veggies like asparagus can seem intimidating, but when you prepare these bright green stalks simply and in a healthy manner, you really can't go wrong. You can also grill asparagus or roast it in the oven, but this stovetop method of cooking asparagus is quite quick and painless.

    Asparagus has elegant texture and taste and doesn't require fancy bells and whistles to enhance it. All you need is a large pan for boiling and then sautéing the asparagus in olive oil, and you'll create the ultimate fresh and nutritional side dish.

    Cooking up a pan of yummy asparagus can put you in a better frame of mind. That's right; the veggie is filled with tryptophan. The amino acid can elevate one's mood.

    Stovetop Asparagus Ingredients

    Fresh green asparagus on a wooden rack.

    Prepare all of the ingredients before starting to cook:

    • asparagus spears - You can use green or white asparagus but note that white make take longer because they are usually thicker.
    • garlic cloves - To enhance the flavor.
    • olive oil - Just use regular olive oil; there is no need for the more expensive extra virgin because we are cooking with it.
    • sea salt & pepper - Freshly ground is best.

    *Check recipe card for ingredient amounts.

    ⭐You might also want to check out my tutorial for how to cook brown rice on the stove. Asparagus and rice make a delicious pairing.

    Instructions

    Asparagus stems getting gut off with knife on cutting board.

    Step #1. Cut the asparagus tips. Cut the asparagus tips off (leaving just the greenest parts).

    Asparagus stems getting peeled on wooden cutting board.

    Step #2. Peel off the hard parts. Using a potato peeler, remove any hard parts so the stems are very soft to the touch.

    Adding asparagus stems to pan with boiling water.

    Step #3. Boil water. Add some water to a skillet (enough to be about ¾ inch deep), add a pinch of salt and bring to a boil. Once it's boiling, add the asparagus.

    Asparagus cooking in frying pan.

    Step #4. Boil asparagus. Boil the asparagus for about 5 to 10 minutes (depending on the thickness), or until they are bright and tender.

    Cooked asparagus in a pan with tongs.

    Step #5. Remove asparagus. Remove the asparagus from the water and reserve.

    Garlic and olive oil in a frying pan.

    Step #6. Fry garlic. Remove the water from the frying pan. Turn the heat down to medium and add the olive oil. Once the olive oil heats, add the garlic cloves and cook them until they are golden-brown.

    Asparagus in frying pan with metal tongs.

    Step #7. Return asparagus to pan. Return the cooked asparagus to the pan and mix them thoroughly with the olive oil and garlic.

    Asparagus on plate with flake salt.

    Step #8. Season & serve. Sprinkle with some sea salt and pepper. Serve! It is best served immediately but leftovers can be refrigerated.

    Storage & Reheating Tips

    Cooked asparagus: If you cover the cooked asparagus properly in an air-tight container it should last up to 3 to 5 days in the fridge. Reheat it in the pan or in the microwave.

    Uncooked asparagus: Uncooked asparagus can be stored in the refrigerator for up to 5 days. It's time to throw them away when the ends become dark/mushy.

    To extend freshness: If you want the asparagus to stay fresher longer, trim the ends and stand them up in a jar or container with an inch of water so that the ends stay moist. Alternatively, you could wrap the trimmed ends in moist paper towel inside of a zip-top bag.

    Recipe FAQs

    Why does asparagus make your pee smell?

    Not everyone will notice a smell in their urine after eating asparagus, but if you do, it's because the asparagus breaks down into by products containing sulfur. When you pee, the byproducts immediately evaporate and give off an odor.

    Why does asparagus make your pee green?

    Asparagus can give your urine a slightly greenish tinge and this is thought to be due to the pigments not being damaged in the digestive process, possibly because of lower acidity in the stomach.

    Should asparagus be soaked in water before cooking?

    While some individuals opt to give their asparagus a brief water bath, I personally find this step to be superfluous. Ensuring a thorough cleaning to eliminate any grit is essential, but I don't believe going beyond that is required.

    How do you cook asparagus without it getting stringy?

    Trimming off the woody ends is one way to do this, as they can be tough to chew and lead to stringy asparagus. Opt for a higher cooking temperature to maintain that nice, al dente texture.

    Should you snap asparagus before cooking?

    While snapping is a widely favored approach for asparagus prep, it may come as a surprise that it tends to be wasteful. This is why I chop about 1" to 2" of the ends off and peel the hard outer layer instead.

    Seasoned, cooked asparagus on a plate.

    ❤️More Vegetable Side Dishes You Will Love

    • Kimchi and crab slaw in bowl with green onions and black sesame seeds.
      Kimchi Slaw
    • Grilled broccoli on plate with tongs.
      How to Grill Broccoli
    • Grilled corn on wooden board.
      How to Grill Corn on the Cob
    • Golden turnip fries on parchment lined serving board with dip.
      Baked Turnip Fries

    If you tried this recipe tutorial for How to Cook Asparagus on the Stove or any other recipe on my website, please leave a 🌟 star rating and let me know how it went in the 📝 comments below. And please share the recipe!

    📋Recipe

    Bunch of fresh asparagus over pan.
    Print Pin
    5 from 3 votes

    How to Cook Asparagus on the Stove

    This method for how to cook asparagus on the stove is quick and delivers satisfying results. All you need is a large pan for boiling and then sautéing the asparagus in olive oil, and you'll create the ultimate fresh and nutritional side dish.
    Course Side Dish
    Cuisine American
    Diet Low Salt
    Prep Time 5 minutes minutes
    Cook Time 10 minutes minutes
    Total Time 15 minutes minutes
    Servings 2
    Calories 147kcal
    Author Joss Dyckson

    Equipment

    • Skillet

    Ingredients

    • 8 to 10 asparagus stems cleaned--or 1 bundle
    • 2 tablespoons olive oil
    • 2 garlic cloves chopped
    • freshly ground sea salt & pepper
    US Customary - Metric

    Instructions

    • Cut the asparagus tips off (leaving just the greenest parts).
      Asparagus stems getting gut off with knife on cutting board.
    • Using a potato peeler, remove any hard parts so the stems are very soft to the touch.
      Asparagus stems getting peeled on wooden cutting board.
    • Add some water to a skillet (enough to be about ¾ inch deep), add a pinch of salt and bring to a boil. Once it's boiling, add the asparagus.
      Adding asparagus stems to pan with boiling water.
    • Boil the asparagus for about 5 to 10 minutes (depending on the thickness), or until they are bright and tender.
      Asparagus cooking in frying pan.
    • Remove the asparagus from the water and reserve.
      Cooked asparagus in a pan with tongs.
    • Remove the water from the skillet. Turn the heat down to medium and add the olive oil. Once the olive oil heats, add the garlic cloves and cook them until they are golden-brown.
      Garlic and olive oil in a frying pan.
    • Return the cooked asparagus to the pan and mix them thoroughly with the olive oil and garlic.
      Asparagus in frying pan with metal tongs.
    • Sprinkle with some sea salt and pepper.
      Asparagus on plate with flake salt.
    • Serve
      Seasoned, cooked asparagus on a plate.

    Notes

    • If you cover the cooked asparagus properly it should last up to 3 to 5 days in the fridge.
    • Reheat it in the pan or in the microwave.
    • Uncooked asparagus can be stored in the refrigerator for up to 5 days. It's time to throw them away when the ends become dark/mushy. If you want the asparagus to stay fresher longer, trim the ends and stand them up in a jar or container with an inch of water so that the ends stay moist. Alternatively, you could wrap the trimmed ends in moist paper towel inside of a zip-top bag.

    Nutrition

    Calories: 147kcal | Carbohydrates: 3g | Protein: 1g | Fat: 14g | Saturated Fat: 2g | Sodium: 2mg | Potassium: 129mg | Fiber: 1g | Sugar: 1g | Vitamin A: 485IU | Vitamin C: 4.5mg | Calcium: 21mg | Iron: 1.4mg

    Oster Electric Skillet Reviews

    September 26, 2018 by Joss Dyckson 2 Comments

    They're big and they're small. Round and square. Colors run the gamut from black to apple red. If anything, today's electric frying pan comes in so many permutations, it's smart to assess your needs before you peruse our Oster electric skillet reviews so when you shop, you find exactly the one that's right for you.

    preparing food oster electric skillet image

    Electric skillets have been around for nearly half a century. The electric skillet in the Smithsonian is yellow--an extremely popular appliance color in the 1970s--and the dome cover is large enough to prepare a side of beef with room left over for potatoes and carrots.

    A rare treasure? It was back in the day, so if you fast forward to today's electric skillet models, you could find some of them to be so sophisticated, perhaps they will share display space within the museum's Domestic Furnishings collection some day. Will those modern-day models be Osters? Hard to say.

    But Oster has been around long enough to be considered a national treasure, so it's understandable why you're limiting your search to electric frying pans made by this company alone.

    [feast_advanced_jump_to]

    Quick Comparison

    ModelFeatures
    Oster 12" x 16" Titanium Infused DuraCeramic
    Oster ceramic skillet.
    CHECK PRICE ➜
    Size: 16"
    Material: Multi
    Nonstick?: Yes
    Lid: Tempered Glass
    Dishwasher Safe?: No
    Steam Vent?: Yes
    Stay-Cool Handles?: Yes
    Temp. Range: Simmer to 420°F
    Warranty: 1 year Limited
    Oster Model #CKSTSKFM12W-ECO
    Oster 12 inch electric skillet
    CHECK PRICE ➜
    Size: 12"
    Material: Multi
    Nonstick?: Yes
    Lid: Tempered Glass
    Dishwasher Safe?: No
    Steam Vent?: Yes
    Stay-Cool Handles?: Yes
    Temp. Range: Simmer to 420°F
    Warranty: 1 year Limited
    Titanium Infused Duraceramic Skillet Oster 12 Inch black electric skillet
    CHECK PRICE ➜
    Size: 12"
    Material: Titanium-Infused DuraCeramic
    Nonstick?: Yes
    Lid: Tempered Glass
    Dishwasher Safe?: No
    Steam Vent?: Yes
    Stay-Cool Handles?: Yes
    Temp. Range: Simmer to 420°F
    Warranty: 1 year

    Serendipity? You Decide

    John Oster was only 15 when he emigrated to the U.S., but he quickly established himself as a tool and die maker before moving from Chicago to Racine, Wisconsin. He and three associates became so skilled at producing blades for hair clippers that they set up shop in 1921 and never looked back.

    Never one to run out of innovative ideas, Oster bought patents for a number of products, none of which had anything to do with hair. He also bred cattle and remained such a legend, he was inducted into the Barber Hall of Fame in 1972-the exact year the aforementioned yellow Smithsonian relic was first introduced to the housewares market.

    Before producing household appliances, Oster made motors for military airplanes, buying the Stevens Electric Company in 1946. With the name, he became the owner of products Stevens had designed, including a liquefying blender which unleashed a long list of products that ultimately included electric skillets. An odd journey? Not for John Oster whose state-of-the-art products continue to make life easier for cooks to this day!

    12 Things to Look for When Choosing an Oster Electric Skillet

    1. Choose a size. If storage is an issue, measure the area you can dedicate to your appliance before buying.
    2. Determine your price range. Are you looking for versatility or is simplicity your buying ethos?
    3. What do you cook most often? Will you prepare food for crowds or just for yourself?
    4. Do you prefer a specific skillet shape? Square and oblong models hold more food than circular ones.
    5. Will you deep fry food? If so, your skillet must be capable of operating at temperatures over 350 degrees F.
    6. Are soups and stews family favorites? The higher the sides the better your ability to prepare these dishes.
    7. Handles. Does the model you're considering have a heat-resistant handle? These are safer and more convenient.
    8. Material. Are you partial to stainless steel or aluminum; non-stick coating or not?
    9. Lid. Will a solid metal lid suffice, or do you prefer a glass lid that allows you to monitor your foods?
    10. Vent. Does the skillet have a steam vent? Without one, liquids could boil over the sides and make a mess.
    11. Cleaning. How much effort will be involved in cleaning your skillet; must it be dishwasher friendly?
    12. Warranty. Does the skillet you like best come with a repair and/or replacement warranty that covers you if you're not happy with your purchase?

    The Pros and Cons

    PROS

    • These appliances can fry, sauté, brown, grill, steam and bake.
    • Ideal for camping trips where electrical outlets are available.
    • They keep food perpetually warm and can replace chafing dishes when hosting crowds.
    • They can be lifesavers for students living in dorms with no kitchen access.
    • When the weather gets hot, you don't have to heat your oven to prepare dishes.
    • Temperature gauges/probes keep foods at optimal recipe temperatures while they cook.
    • Temperature dial on Oster models has both Fahrenheit and Celsius readings.

    CONS

    • Folks happy to use a regular frying pan or griddle for cooking tasks may find these appliances superfluous.
    • Do you have limited storage room? Even small electric frying pans can hog cabinet space to stow the skillet, dome lid and power attachments. 
    • Cheap electric frying pans can result in temperature fluctuations or inconsistent temperature maintenance during the cooking process.
    • On these models, the temperature dial goes up in 50° increments with no markings in between. (Example: It jumps from 320°F to 370°F so it is harder to estimate where 350°F is without a marking.)

    Why Choose an Oster Electric Frying Pan?

    There are plenty of electric frying pans on today's market that will set you back some serious dollars, but you can count on Oster to keep prices in the affordable range, so they don't bust a family's budget.

    Read enough Oster duraceramic electric skillet reviews and you'll conclude that this type of surface is both practical and efficient. Whether you need a larger surface to prepare meals for crowds or a small one designed to conserve space and energy, you should find what you seek in this collection.

    Although we're featuring affordable models in this review--you're going to find plenty to love about the branded appliances profiled below.

    The Reviews

    #1. oster 12" x 16" titanium infused duraceramic electric skillet

    Oster electric skillet

    Sleek, black and featuring a 16- x 12-inch body, this affordable electric skillet serves a multitude of purposes while taking up relatively little room on counter tops or in cabinets.

    The tempered glass lid will trap moisture and heat to accelerate cooking time and there's a temperature probe control that's easy to set and adjust before or during the cooking process.

    Cool-touch handles are a boon to cooks who can forget to grab potholders and mitts while hustling to get a meal on the table.

    PROS

    • Get all the features you need at a price that won't empty your wallet.
    • Cool-touch handles
    • Titanium Infused DuraCeramic non-stick ceramic coating means you can cut back on adding fats and oils to your recipes.
    • The 16" size is great for large servings
    • PFOA and PTFE free

    CONS

    • There have been complaints about the non-stick coating wearing off.
    • There can be uneven heating.
    • Not dishwasher safe
    BUY HERE

    #2. oster 12" electric skillet

    Oster 12 inch electric skillet

    Small but mighty, this black, 12-inch square DuraCeramic electric appliance comes with a full complement of Oster's bells and whistles: a tempered glass lid, adjustable temperature control probe, non-stick interior and exterior surfaces for fast clean-up and the brand's signature cool-touch handles that help cooks avoid accidental burns. This product is a lifesaver for folks living in small quarters. I personally own this model and I enjoy cooking with it.

    PROS

    • Heats up quickly and cooks a variety of dishes.
    • Takes less storage space than the 16".
    • Coated exterior and interior walls can easily be cleaned by hand.
    • Cool-touch handles safeguard hands and fingers from being burned.

    CONS

    • Not dishwasher safe.
    • Skillet surface may not heat up evenly.
    • The surface appearance does deteriorate over time but that doesn't affect the cooking.
    • I still find it needs some oil when cooking to make clean up easier.
    BUY HERE

    #3. Oster Titanium Infused DuraCeramic Electric Skillet

    Oster 12 Inch black electric skillet

    If you pride yourself on a stylish kitchen and have the room to leave it out and wait for compliments, this 12-inch black electric frying pan will do the trick.

    There's more to love: This stylish appliance also has an integrated pour and strain lid with 2 different sizes so you can strain liquids easily. The thumb-pads protect your thumbs from the hot lid while draining.

    No worries about cooking surfaces because the PTFE- and PFOA-free ceramic coating surface cooks up to 30% faster than ordinary nonstick surfaces. There's a steam vent in the tempered glass lid to displace pressure and the cool-touch handles are stylish and practical.

    PROS

    • Cleanup is fairly easy with the non-stick surace. A little bit of baking soda gets rid of stubborn stains.
    • Includes strainers of 2 different sizes in the lid.
    • PFOA- and PTFE-free surface cooks up to 30-percent faster for time and energy savings.

    CONS

    • The fact that it cannot be cleaned in the dishwasher may turn some users off.
    • Smaller than the 16" skillet.
    BUY HERE

    Conclusion

    Have you identified the Oster electric skillet that's right for you? If you're a fan of the option to strain liquids easily and directly from the skillet, the Titanium Infused Black 12: DuraCeramic Electric Skillet is right up your alley. On the other hand, if you're cooking for a larger gathering and a spacious appliance is your idea of the perfect electric frying pan, your choice is clear with Oster's 16-incher.

    Of course, the second model in this trio checks off boxes cited earlier in this article: it's a great substitute for a plethora of other appliances, gives you precise cooking temperatures and comes with desired safety features. You'll find plenty to like about the glass lid that gives you a peek into your recipe's progress and the small amount of space it takes up.

    More Buying Guides to Consider

    • Stainless steel electric skillet isolated on white background.
      The Best Stainless Steel Electric Skillet (Top Picks)
    • Ceramic electric skillet on counter.
      Top 5 Choices for the Best Ceramic Electric Skillet
    • Home coffee roaster with lid.
      The Best Home Coffee Roaster: Top 5 Picks Reviewed
    • Purple cake pop maker.
      Finding the Best Cake Pop Maker For Your Needs

    If you enjoyed this buying guide for Oster Electric Skillets or any other post on my website, please let me know what you thought in the 📝 comments below. And please share the post!

    How to Cook Brown Rice on the Stove

    September 24, 2018 by Joss Dyckson 2 Comments

    Brown rice is an inexpensive grain that can become the hearty base for a variety of gourmet meals. Use this step by step guide on how to cook brown rice on the stove to expertly introduce this grain into your meal plans for a dish that is both tasty and healthy.

    Cooked brown rice in wooden bowl.

    I love incorporating grains into my meals including cooked pearl and hulled barley, quinoa and of course, brown rice. They can add texture, flavor, and diversity to your meal, plus they're filling without being overly heavy.

    One of my favorites to add rice to is Mexican shredded chicken and this kimchi rice bowl, but there are endless meal options, including vegetarian and meat-based.

    [feast_advanced_jump_to]

    What is the Difference Between Brown and White Rice?

    Despite all of the opinions about which rice is healthier, people should know that brown rice IS white rice. The only difference is that brown rice still has its husks, bran and germ. This makes it much more beneficial if you are wanting to add fiber to your diet.

    Brown rice tends to have a nuttier flavor than white rice. It is filling, and will add nutrition to your recipes that white rice cannot. Because of this loss in nutrition when removing these components, white rice tends to be fortified with these nutrients (meaning they're added back to the rice). Brown rice is also lower in calories and carbs.

    ⭐ I also have a recipe tutorial for how to cook asparagus on the stove if you're interested!

    Ingredients

    This recipe makes 2 servings of brown rice. You can scale up the servings using the slider on the recipe card.

    Dry brown rice in clear bowl with a spoon.
    Mushrooms in clear bowl.
    • brown rice - I like to use long grain brown rice for its light and fluffy texture. The grains remain separated when cooked.
    • olive oil - To fry the mushrooms. It will also help improve the flavor and texture of the rice. You can substitute with another oil if desired.
    • green onions - For a flavor boost (optional).
    • dried mushrooms - This can be a mixture of porcini, maitake, shiitake, portobello, chanterelle, etc.

    *Check recipe card for full ingredient list with amounts.

    Steps for Cooking Brown Rice on the Stove

    Brown rice in sieve with water running over it.

    Step #1. Clean the rice. Rinse the rice in a sieve under cool water.

    Pot on stove with hot water and brown rice.

    Step #2. Bring water to a boil. Place the rice in a deep pot. Boil the water and add it to the pot along with a pinch of salt. Bring back to a boil. Lower heat to low and cover with the lid.

    Pot on stove with lid.

    Step #3. Cook. Let it cook and steam for 20 minutes. Remove from heat, keep covered and let sit for 10 minutes.

    Mushrooms and green onions in frying pan.

    Step #4. Fry the mushrooms. Meanwhile, heat olive oil in a skillet over medium heat. Add the green onion and dried mushrooms and cook for 2 minutes. Reserve.

    Brown rice in pot with fork.

    Step #5. Fluff the rice. Once the rice is ready, fluff the grains using a fork.

    Brown rice with mushrooms in clear bowl.

    Step #6. Combine ingredients. Combine the rice with the scallions and mushrooms. Season with salt to taste. Serve!

    Serving Suggestions

    This brown rice dish makes an excellent side dish to protein-based meals like Cajun blackened chicken, bison steak or even fried tofu.

    Prefer to eat it all on its own? No problem. This brown rice with the mushrooms and vegetables is a great vegetarian or vegan dinner or lunch option.

    Storage

    • Refrigerate. You can store your cooked rice covered in the fridge for up to 5 days.
    • Freeze. Freeze it for up to 6 months.
    • Reheat. To reheat on the stove, add a couple of tablespoons of water or broth per cup of cooked rice. Cook and stir over medium heat for about 5 minutes or until heated through. It can also be microwaved.

    Brown Rice Recipe FAQs

    How long does it take to cook brown rice?

    Brown rice can be cooked on the stove relatively quickly. In this recipe, it only requires 20 minutes plus 10 minutes of resting time.

    What is the ratio of water to brown rice?

    To cook brown rice on the stove, just use a 2 to 1 ratio of water to rice. So, for 1 cup of rice, add 2 cups of water or broth. You can also check the package for the best ratio.

    What happens if you don't rinse brown rice?

    If you skip rinsing brown rice before cooking, it might turn out a bit stickier. Rinsing gets rid of extra starch on the grains, making the cooked rice fluffier. It also helps remove any debris and can give the rice a milder taste. But, rinsing is optional, and some folks might skip it for simplicity.

    Brown rice in brown bowl with mushrooms.

    ❤️ Rice Filled Recipes to Check Out

    • Kimchi bacon fried rice on a plate on brown background.
      Kimchi Bacon Fried Rice
    • Greek lemon chicken thighs and baby potatoes on plate.
      Easy Skillet Greek Lemon Chicken Thighs
    • Risotto in bowl with asparagus and lemon zest.
      Electric Skillet Asparagus Risotto
    • Kimchi shrimp stir fry in bowl on wooden background.
      Kimchi Shrimp Stir Fry

    Did this easy recipe change your mind about including brown rice 🍚 in your meal plan? If you tried this recipe tutorial for How to Cook Brown Rice on the Stove or any other recipe on my website, please leave a 🌟 star rating and let me know how it went in the 📝 comments below. And please share the recipe!

    📋Recipe

    Brown rice in bowl with mushrooms.
    Print Pin
    5 from 1 vote

    How to Cook Brown Rice on the Stove

    Use this step by step guide on how to cook brown rice to expertly add this grain to your meal plans! Brown rice can be cooked on the stove relatively quickly and easily.
    Course Side Dish
    Cuisine American
    Diet Low Salt, Vegan, Vegetarian
    Prep Time 10 minutes minutes
    Cook Time 22 minutes minutes
    Total Time 32 minutes minutes
    Servings 2
    Calories 431kcal
    Author Joss Dyckson

    Equipment

    • Deep pot
    • Skillet
    • Fine mesh sieve

    Ingredients

    • 1 cup brown rice
    • 2 cups water
    • 1 tablespoon olive oil
    • ¼ cup green onions chopped
    • ½ cup dried mushrooms soaked (can be a mixture of mushrooms)
    • salt to taste
    US Customary - Metric

    Instructions

    • Rinse the rice in a sieve under cool water.
      1 cup brown rice
      Brown rice in sieve with water running over it.
    • Place the rice in a deep pot. Boil the water and add it to the pot along with a pinch of salt. Bring back to a boil. Lower heat to low and cover with the lid.
      2 cups water
      Pot on stove with hot water and brown rice.
    • Let it cook and steam for 20 minutes. Remove from heat, keep covered and let sit for 10 minutes.
      Pot on stove with lid.
    • Meanwhile, heat olive oil in a skillet over medium heat. Add the green onion and dried mushrooms and cook for 2 minutes. Reserve.
      1 tablespoon olive oil, ¼ cup green onions, ½ cup dried mushrooms
      Mushrooms and green onions in frying pan.
    • Once the rice is ready, fluff the grains using a fork. Combine the rice with the scallions and mushrooms.
      Brown rice in pot with fork.
    • Season if desired and serve.
      Brown rice with mushrooms in clear bowl.

    Notes

    • Dried mushrooms can include a mixture of porcini, maitake, shiitake,  portobello, chanterelle, etc.
    • You can store your cooked rice covered in the fridge for up to 5 days.
    • You can also freeze leftovers for up to 6 months.
    • To reheat on the stove, add a couple of tablespoons of water or broth per cup of cooked rice. Cook and stir over medium heat for about 5 minutes or until heated through. It can also be microwaved.

    Nutrition

    Calories: 431kcal | Carbohydrates: 79g | Protein: 8g | Fat: 10g | Saturated Fat: 1g | Polyunsaturated Fat: 2g | Monounsaturated Fat: 6g | Sodium: 19mg | Potassium: 397mg | Fiber: 4g | Sugar: 0.4g | Vitamin A: 125IU | Vitamin C: 3mg | Calcium: 48mg | Iron: 2mg

    Pumpkin & Garlic Naan Bread

    September 19, 2018 by Joss Dyckson 6 Comments

    Nothing beats the inviting aroma and hearty taste of a freshly-made yeasted bread. However, when the prospect of making bread causes you to have to plan out a lengthy, detailed schedule to keep track of its multiple risings and baking steps, the idea of a homemade loaf can quickly lose its appeal.

    Enter Pumpkin Naan Bread. This style of Indian yeasted bread requires only one rise and is baked in a skillet (much like a pancake) in mere minutes. Individually portioned bread from scratch in just two hours? It almost sounds too good to be true, but rest assured, it is not.

    Pumpkin naan bread stacked on a decorative plate with freshly chopped parsley.

    This version, a pumpkin and garlic naan bread, adds a sweet and savory twist to the traditional naan.

    This naan bread is both a treat on its own or as an exciting accompaniment to your next family dinner. Think of pairing it with an Indian curry, like chana masala or chicken tikka masala, or some butter chicken for a nice balance of spiciness and sweetness.

    You can also try it with this savory pumpkin soup or red lentil soup. It is absolutely perfect for sopping up all of the extra liquid in your bowl.

    Top view of pumpkin naan bread stacked on a decorative plate with a plant and forks on the side.

    This easy recipe is a must for the next time you are craving homemade bread. Besides, it may be the greatest way to use up that extra can of pumpkin purée that has been stuck in your pantry since last Thanksgiving. (Don't worry! There is absolutely no judgement on that one.)

    Pumpkin naan bread stacked on a decorative plate with freshly chopped parsley.

    Have you already ran to your kitchen to make this recipe? What did you think of the sweet and savory flavors? Enjoy all of the pumpkin and garlic goodness!

    📋Recipe

    Pumpkin naan bread stacked on a decorative plate.
    Print Pin
    5 from 4 votes

    Pumpkin & Garlic Naan Bread

    This version of naan bread, with pumpkin and garlic, adds a sweet and savory twist to the traditional naan.
    Course Bread, Side Dish
    Cuisine American, Indian
    Diet Vegetarian
    Prep Time 40 minutes minutes
    Cook Time 16 minutes minutes
    Resting Time 1 hour hour
    Total Time 1 hour hour 56 minutes minutes
    Servings 8 pieces
    Calories 230kcal
    Author Joss Dyckson

    Ingredients

    • 1 cup warm water
    • 2 tablespoons honey
    • 1 package active dry yeast 2 teaspoons
    • 3 ½ cups all purpose flour
    • ¼ cup pumpkin purée
    • 2 teaspoons salt
    • ½ teaspoon baking powder
    • 1 egg
    • 2 garlic cloves chopped
    • 2 tablespoons fresh parsley leaves
    US Customary - Metric

    Instructions

    • Stir together warm water and honey until the honey has dissolved. Sprinkle in the yeast, stir carefully and let it sit until the yeast is foamy (about 10 minutes).
      1 cup warm water, 2 tablespoons honey, 1 package active dry yeast
    • In a large bowl, add the flour, pumpkin purée, salt, baking powder, egg and chopped garlic. Add the yeast mixture and mix with your hands until it's smooth and you're able to form a ball. (It will be a bit sticky, don't worry, it's normal, and you can add a bit more flour if needed).
      3 ½ cups all purpose flour, ¼ cup pumpkin purée, 2 teaspoons salt, ½ teaspoon baking powder, 1 egg, 2 garlic cloves
    • Remove from bowl and continue kneading until the dough has a soft texture.
    • Grease the mixing bowl with cooking oil, place the dough back and cover. Let it rest until the dough has nearly doubled in size (this normally takes about 1 or 1 ½ hours).
    • Once the dough is ready, transfer it to a floured surface. Cut it into 8 separate pieces.
    • Heat a large skillet to medium-high heat.
    • Roll each piece out with a rolling pin, creating a thin oval, and place them one at a time in the skillet. Cook for 1 minute (or until it begins to form bubbles), flip it and cook it for one more minute on the other side.
    • Serve sprinkled with fresh parsley.
      2 tablespoons fresh parsley leaves

    Notes

    • Once cooled, this pumpkin naan bread can be stored at room temperature for up to three days in a plastic bag.
    • It can be frozen for up to 2 months.

    Nutrition

    Calories: 230kcal | Carbohydrates: 48g | Protein: 7g | Fat: 1g | Saturated Fat: 0.3g | Polyunsaturated Fat: 0.3g | Monounsaturated Fat: 0.3g | Trans Fat: 0.003g | Cholesterol: 20mg | Sodium: 594mg | Potassium: 127mg | Fiber: 2g | Sugar: 5g | Vitamin A: 1306IU | Vitamin C: 2mg | Calcium: 29mg | Iron: 3mg

    How to Chop Dill

    September 17, 2018 by Joss Dyckson 2 Comments

    With just a couple of easy steps, you'll have freshly chopped dill for garnishes, dips, hot and cold dishes and more, with this easy tutorial for how to chop dill. Fresh dill weed is a fantastic option if you are looking for a pop of flavor in your dish.

    Fresh dill.

    If you have only purchased dried dill until now, the idea of selecting and chopping fresh dill may feel rather intimidating. But you can easily prepare and store it properly to unlock its fullest flavor.

    Dill can bruise easily, so how you chop it matters. I will show you exactly how to do it, the ideal knife to use and a few simple tips to keep it fresh and flavorful.

    When you're finished, try using it in my dill pickle cream cheese, easy red lentil dill soup and honey dill sauce.

    [feast_advanced_jump_to]

    What You Will Need

    Fresh dill in small dish.
    • fresh dill - Be sure to select the best leaves and stems for consumption (very green and fresh).
    • cutting board - To protect your countertop.
    • sharp knife - You can use a chef's knife, rocker knife or your favorite chopping knife, etc.
    • Kitchen scissors - This is optional, to remove the large stems.

    Instructions for How to Chop Dill Step by Step

    Water running over fresh dill in mesh strainer.

    Step 1. Wash. Transfer the dill to a strainer and wash it under cool, running water to remove dirt and/or other residue.

    Fresh dill getting dried in kitchen towel.

    Step 2. Dry. Transfer the rinsed dill to a clean fabric towel and pat it dry carefully. A salad spinner can also be helpful for drying.

    Fresh dill and scissors.

    Step 3. Remove Stems. Remove the large stems using kitchen scissors or your hands. Thin, small stems are okay to leave.

    Fresh dill separated from stems.

    Step 4. Separate Leaves. Separate the stems from the leaves.

    Chef's Note: You can save the stems for another use to improve the flavor of soups or other preparations.

    Fresh dill getting chopped with knife.

    Step 5. Chop. On a cutting board with a sharp knife, chop the dill fronds into small pieces from one end to the other.

    For finer chopped dill: continue chopping, using a rocking motion back and forth.

    Fresh, chopped dill in small dish.

    Step 6. Use. Your dill is now ready to use!

    Rocking Cutting Technique

    The above video shows exactly how to use the rocking motion with a chef's knife to chop the dill.

    Fresh Dill Uses

    Runny egg with freshly chopped dill.

    Use fresh, chopped dill in recipes like sunrise eggs with sea salt and dill (pictured above) as well as:

    • this dill dip recipe for vegetables
    • pesto
    • dill salmon mousse
    • smoked salmon salad
    • to garnish different preparations
    • even Mediterranean flavored meatballs can benefit from the use of fresh dill

    Joss' Top Tip

    Holding the knife at a slight angle will release the most flavor and aroma. Don't over-chop or the dill can become bruised and watery.

    Dill Weed FAQs

    What are dill fronds?

    Dill fronds are simply the leafy parts of the herb.

    How do you store fresh dill before chopping?

    If you are storing the dill before use, refrain from rinsing it. Once dill is rinsed, it won't last as long. For best results, choose a long storage container to fit the bundle of sprigs. Add an inch or two of water in the container, and place the dill within. Snap the lid closed and store within the fridge. With frequent water changes, your dill sprigs may last up to two weeks. You can also opt for a food saver container.

    How do you store fresh dill after chopping?

    Store your freshly chopped dill in a container in the crisper drawer of the fridge for up to 1 week. You can also freeze it in freezer bags for up to 6 to 12 months.

    How do you store dill in ice cubes?

    Add the chopped dill to the cavities of an ice cube tray, about half full. Cover each cube with olive oil. Cover with plastic wrap and freeze until solid. Remove from tray and add to freezer bags. They can be added directly to stir fries or meat as it's cooking.

    How much fresh dill to use in place of dried dill?

    You can use a ratio of 3:1 for fresh to dried dill. For example, for one teaspoon of dried dill, replace it with 1 tablespoon (3 teaspoons) of fresh dill. The flavor will be unparalleled when comparing it with dried dill!

    Fresh dill in dish.

    More Expert Kitchen Tutorials to Try

    • Raw egg in plastic bag held by hand.
      How to Sous Vide Eggs
    • Sliced garlic.
      How to Slice Garlic
    • Brown rice in bowl with mushrooms.
      How to Cook Brown Rice on the Stove
    • Cocktail syrups infusing in bottles.
      How to Prepare Cocktail Syrups

    If you tried this 📋 recipe tutorial for How to Chop Dill or any other recipe on my website, please leave a 🌟 star rating and let me know how it went in the 📝 comments below. And please share the recipe!

    📋Recipe

    Fresh dill.
    Print Pin
    5 from 1 vote

    How to Chop Dill

    With just a couple of steps, you'll have freshly chopped dill for garnishes, dips and to add fresh flavor to many dishes, hot and cold, with this easy tutorial for how to chop dill.
    Course Flavoring, garnish
    Cuisine American
    Diet Vegan, Vegetarian
    Prep Time 5 minutes minutes
    Total Time 5 minutes minutes
    Servings 1
    Calories 0.4kcal
    Author Joss Dyckson

    Equipment

    • Cutting board
    • Sharp knife
    • Kitchen scissors
    • Strainer

    Ingredients

    • 1 bunch fresh dill

    Instructions

    • Transfer the dill to a strainer and wash it under cool, running water to remove dirt and/or other residue.
    • Transfer the rinsed dill to a clean fabric towel and pat it dry carefully.
    • Remove the large stems using kitchen scissors. You can also use your hands if desired.
    • Separate the stems from the leaves. You can save the stems for another use to improve flavor in soups or other preparations.
    • On a cutting board with a sharp knife, chop the dill fronds into small pieces from one end to the other. For finer chopped dill, continue chopping, using a rocking motion back and forth.
    • Your dill is ready to use.

    Notes

    • Nutrition Information: The nutrition info is for one bunch of fresh dill. This can vary depending on the size of your bunch, etc.
    • Dill selection: Be sure to select the best leaves and stems for consumption (very green and fresh).
    • Dill fronds: Dill fronds are simply the leafy parts of the herb.
    • Type of knife: You can use a chef's knife, rocker knife or your favorite chopping knife, etc.
    • Cutting at a slight angle: Holding the knife at a slight angle will release the most flavor and aroma.
    • Storage before chopping: If you are storing the dill before use, refrain from rinsing it. Once dill is rinsed, it won't last as long. For best results, choose a long storage container to fit the bundle of sprigs. Add an inch or two of water in the container, and place the dill within. Snap the lid closed and store within the fridge. With frequent water changes, your dill sprigs may last up to two weeks.
    • Storage after chopping: Store your freshly chopped dill in a container in the crisper drawer of the fridge for up to 1 week. You can also freeze it in freezer bags for up to 6 to 12 months.
    • Ice cube oil storage: Add the chopped dill to the cavities of an ice cube tray, about half full. Cover each cube with olive oil. Cover with plastic wrap and freeze until solid. Remove from tray and add to freezer bags. They can be added directly to stir fries or meat as it's cooking.

    Nutrition

    Calories: 0.4kcal | Carbohydrates: 0.1g | Protein: 0.03g | Fat: 0.01g | Monounsaturated Fat: 0.01g | Sodium: 1mg | Potassium: 7mg | Fiber: 0.02g | Vitamin A: 77IU | Vitamin C: 1mg | Calcium: 2mg | Iron: 0.1mg

    Creamy Tomato Gnocchi

    September 12, 2018 by Joss Dyckson 3 Comments

    This creamy tomato gnocchi recipe with a pea purée is a winning combination of complementary flavors. The cheeses and variety of fresh herbs pair together for a truly delectable dish. The dish works well as a filling, vegetarian main dish.

    Gnocchi and pea puree with sundried tomatoes in dish.

    I love indulging in cheesy dishes from time to time-like in this how to bake brie cheese recipe tutorial-but with this main dish, the asiago adds a depth of flavor that perfectly satisfies that cheese craving.

    The pea purée adds a unique flavor and sweetness that balances the richness. It is sure to become a crowd pleaser-especially among vegetarian guests!

    I sometimes serve it with a white asparagus recipe or tomato burrata salad but it's great on its own, too. You can check out more tasty vegetarian recipes here.

    [feast_advanced_jump_to]

    The Best Things About This Dish

    • ready in only 45 minutes
    • creamy, cheesy and packed with flavor
    • can work with store-bought or homemade gnocchi
    • vegetarian-friendly but meat-lovers still love it
    • the sauces can be made in-advance

    Ingredients

    Creamy tomato gnocchi with pea puree ingredients labeled.
    • heavy cream - You can use light cream if preferred.
    • green peas - I use frozen peas--sweet variety works best.
    • potato gnocchi - I use pre-made gnocchi from the grocery store. You can find it dry or fresh. I find that dry gnocchi is cheaper, usually less than half the price.
    • asiago cheese - You can find asiago in blocks or wedges in the deli area. I don't recommend the containers of pre-shredded cheese because they aren't great at melting into the milk.
    • cornstarch - To thicken the sauce.
    • oil-packed sun-dried tomatoes - These will need to be drained well. If you can find the pre-sliced ones, get those. They are chewy and full of flavor! I also use them in my tuna and sun-dried tomato casserole.
    • chives - Not pictured.

    *Check recipe card for ingredient amounts.

    How to Make Creamy Tomato Gnocchi

    Green peas with cream and onions in saucepan.

    Step 1. Cook onions and peas. Melt the butter in a saucepan over medium-low heat. Add the onions, cover and sweat until softened. Add the peas and cream, bring to a boil and gently simmer for 5 minutes.

    Pea puree in saucepan on wooden background.

    Step 2. Purée and reserve. Once cooled, purée the pea mixture. Season with salt and pepper. Return to saucepan on the lowest heat to keep warm, stirring occasionally.

    Chef's Note: I like to use an immersion blender for the purée.

    Cheese sauce in saucepan.

    Step 3. Make cheese sauce. Mix the asiago cheese with ½ cup milk in a small saucepan over medium-low heat. Add the cornstarch slurry to the cheese/milk mixture, stirring constantly until thickened.

    Cheese sauce with herbs in saucepan.

    Step 4. Add fresh herbs. Stir fresh herbs and sun-dried tomatoes into the cheese sauce. Season with salt and pepper.

    Gnocchi in pot of boiling water.

    Step 5. Cook gnocchi. Bring a large pot of salted water to boil. Cook the gnocchi in several batches.

    Gnocchi and pea puree with sundried tomatoes in dish. A fork and knife on the side.

    Step 6. Serve. Transfer the gnocchi to a serving dish, pour the cheese sauce over and toss gently to mix. Serve with the pea purée on the side or drizzled on top.

    Joss' Top Tip

    Don't overcook the gnocchi - They get mushy quickly! You will know it's ready when the gnocchi float to the top.

    Side Suggestions

    Although this creamy tomato gnocchi is filling all on its own, you may still want some side options.

    • Consider a simple side dish when serving creamy gnocchi as a main course.
    • A simple green salad (like this hemp seed cucumber salad) or vegetable (grilled broccoli) is a good addition.
    • Add garlic bread (or garlic pumpkin naan bread) or even bread sticks with the meal to soak up the extra sauce and not waste any of the delicious flavor.
    • As for a drink suggestion, try a glass of Sauvignon Blanc or Chianti.

    Creamy Tomato Gnocchi FAQs

    Can you freeze leftover pea purée?

    Yes! Leftover pea purée can be frozen for up to 3 months or refrigerated for up to 3 days.

    How long does cooked gnocchi last in the fridge?

    Store leftovers in the fridge, covered, for up to 2 to 3 days.

    Can you freeze the dish after cooking?

    You can, but the cheese sauce and gnocchi might have an altered texture when thawed. Freeze cooled leftovers in a freezer-safe container for up to 2 months. Thaw the gnocchi and sauce completely in the refrigerator overnight. Reheat stovetop or in the microwave.

    Creamy tomato gnocchi on blue and white plate with sundried tomatoes and pea purée.

    More Delicious Main Dishes to Try

    • Roasted chicken with fresh herbs, vegetables and blackberry gravy.
      Juicy Herb Roasted Chicken & Blackberry Gravy
    • Beef tenderloin covered in mushroom sauce
      Beef Tenderloin (With Bourbon Sauce)
    • Chicken fried breaded burger on plate.
      Chicken-Fried Breaded Hamburgers
    • Chicken pasty pie slice on clear glass plate with a fork.
      Chicken Pasty Pie

    If you tried this Creamy Tomato Gnocchi Recipe or any other recipe on my website, please leave a 🌟 star rating and let me know how it went in the 📝 comments below. And please share the recipe!

    📋Recipe

    Creamy tomato gnocchi in bowl with pea purée.
    Print Pin
    5 from 4 votes

    Creamy Tomato Gnocchi

    This cheesy, creamy tomato gnocchi and pea purée are a surprisingly, perfect combination. The dish works well as a filling, vegetarian main dish.
    Course Main Course
    Cuisine Italian
    Diet Vegetarian
    Prep Time 15 minutes minutes
    Cook Time 30 minutes minutes
    Total Time 45 minutes minutes
    Servings 4
    Calories 493kcal
    Author Joss Dyckson

    Equipment

    • Blender
    • Slotted spoon

    Ingredients

    Pea Purée

    • ½ cup butter
    • ½ yellow or white onion chopped
    • ½ pound green peas sweet variety works best--I use frozen peas
    • ⅔ cup heavy cream

    Gnocchi

    • ¾ cup asiago cheese freshly grated
    • ¾ cup milk divided
    • 1 tablespoon cornstarch
    • ¼ cup fresh parsley chopped
    • 2 tablespoons fresh chives snipped
    • 1 tablespoon fresh thyme leaves
    • 1 tablespoon fresh basil chopped
    • ¼ cup oil-packed sun-dried tomatoes drained and chopped
    • 17.5 ounces potato gnocchi
    • salt and pepper to taste
    US Customary - Metric

    Instructions

    Pea Purée

    • Melt the butter in a small saucepan over medium-low heat. Add the onions, cover the lid and sweat until softened, about 5 minutes. Add peas and cream. Bring to a boil and simmer gently for 5 minutes.
      ½ cup butter, ½ yellow or white onion, ½ pound green peas, ⅔ cup heavy cream
    • Once cooled, pour into a blender and purée the pea mixture. Season with salt and pepper, to taste. Return to saucepan on the lowest heat to keep warm, stirring occasionally.

    Gnocchi

    • Mix the asiago cheese with ½ cup milk in a small saucepan over medium-low heat. Stir until melted.
      ¾ cup asiago cheese
    • In a separate small bowl, combine the cornstarch with ¼ cup milk. Add to the cheese/milk mixture, stirring constantly until thickened.
      1 tablespoon cornstarch
    • Remove from heat. Stir in fresh herbs and sun-dried tomatoes. Season with salt and pepper, to taste.
      ¼ cup fresh parsley, 2 tablespoons fresh chives, 1 tablespoon fresh thyme leaves, 1 tablespoon fresh basil, ¼ cup oil-packed sun-dried tomatoes
    • Bring a large pot of salted water to boil. Cook the gnocchi in several batches for approximately 2 minutes or until they rise to the surface.
      17.5 ounces potato gnocchi
    • Using a slotted spoon, transfer the gnocchi to a serving dish. Pour the cheese sauce over the gnocchi and toss gently to mix.
    • Serve with the pea purée on the side for guests. Desired amount can be drizzled on top.

    Notes

    • I use pre-made potato gnocchi from the grocery store. You can find it dry or fresh, both work.
    • Don't overcook the gnocchi - It gets mushy quickly!
    • Consider a simple side dish when serving creamy gnocchi as a main course, such as a green salad or roasted vegetables.
    • Leftover pea purée can be frozen or refrigerated for later use.
    • Store leftover gnocchi in the fridge, covered, for up to 2 to 3 days.
    • You can freeze the leftover gnocchi dish, but the cheese sauce and gnocchi might have an altered texture when thawed. Freeze cooled leftovers in a freezer-safe container for up to 2 months. Thaw the gnocchi and sauce completely in the refrigerator overnight. Reheat stovetop or in the microwave.

    Nutrition

    Calories: 493kcal | Carbohydrates: 52g | Protein: 15g | Fat: 26g | Saturated Fat: 16g | Polyunsaturated Fat: 1g | Monounsaturated Fat: 7g | Trans Fat: 1g | Cholesterol: 67mg | Sodium: 824mg | Potassium: 324mg | Fiber: 5g | Sugar: 5g | Vitamin A: 1605IU | Vitamin C: 28mg | Calcium: 339mg | Iron: 5mg

    How to Bake Potatoes in the Oven 3 Ways

    September 10, 2018 by Joss Dyckson 1 Comment

    In this recipe, you will learn how to bake potatoes in the oven to perfection, using 3 of the best and most popular methods. Master the techniques of baking them directly on the oven rack, wrapping them in foil, and crafting them into aesthetic Hasselback-style creations.

    Loaded yellow potato on plate with fork.

    Potatoes are inexpensive and hearty, making them a staple in American kitchens and across the globe.

    Baked potatoes are the perfect side dish to meat such as carne asada, grilled bison steaks, braised beef and much more. But you can also make the potato the center of the meal depending on the toppings you add; a loaded potato or two is enough for me.

    I'll go into the why and how for each method so that you can choose the best option for dinner tonight. Enjoy!

    [feast_advanced_jump_to]

    How to Bake Potatoes Directly on the Oven Rack

    Baking potatoes directly on the oven rack without foil is easy and will result in a crispier skin.

    Ingredients

    Baked potatoes ingredients prepped on wooden board and labeled.
    • potatoes - you can use your favorite potatoes like red, yellow or white but I used russet for this tutorial
    • butter - one tablespoon for each potato

    *Check recipe card for ingredient amounts.

    Steps

    Potatoes getting prepped for baking image collage.

    Step #1. Clean the potatoes. Preheat oven to 400°F. Clean the potatoes well and then dry them with a kitchen towel (Image 1).

    Step #2. Prick potatoes. Prick the potatoes all over with a fork (Image 2).

    Step #3. Bake. Place the potatoes on the middle oven rack and bake for 45 to 60 minutes - until soft all the way through (Image 3).

    Step #4. Cool. Let cool for 10 to 15 minutes (Image 4).

    Baked potato getting popped open steps collage.

    Step #5. Criss-cross. Puncture a criss-cross pattern into the top of each potato, using a fork (Image 5).

    Step #6. Pop it open. Pop it open by applying pressure to the ends of the potato with your fingers (Image 6).

    Step #7. Add butter. Add butter and fluff with a fork (Image 7).

    Step #8. Season. Season with salt and pepper (Image 8).

    Baked potato on plate with fork in it.

    Step #9. Serve. Serve and enjoy!

    How to Bake Potatoes in the Oven In Foil

    Wrapping potatoes in foil will give them a softer skin instead of a crispy one. The foil will trap the heat and essentially steam the potato. Another foil pack side dish you could serve with this style of potato is my grilled asparagus in foil.

    Ingredients

    Baked potatoes in foil ingredients prepped on wooden board and labeled.
    • Yukon Gold potatoes - also known as yellow potatoes--cleaned well and skin on
    • sour cream - I like full fat sour cream but feel free to use light
    • bacon bits - either prepared from the grocery store or homemade for an even better option (check out this tutorial for how to cook crispy bacon and then dice them into small pieces)

    *Check recipe card for ingredient amounts.

    Chef's Note: These potatoes would also taste amazing slathered in a beer cheese sauce!

    Steps

    Bake potato in foil steps collage.

    Step #1. Prick potato. Preheat oven to 450°F. Prick the potatoes all over with a fork (Image 1).

    Step #2. Wrap in foil. Wrap the potatoes up in foil squares (Image 2).

    Step #3. Bake. Place directly on middle oven rack and bake for 45 to 60 minutes, until soft all the way through (Image 3).

    Step #4. Cool. Remove the potatoes to a cutting board and let cool for 10 minutes or until you can handle them (Image 4).

    Baked potato with butter and toppings steps collage.

    Step #5. Cut criss cross. Remove the foil and cut a criss-cross into the top of each potato using a fork (Image 5).

    Step #6. Pop it. Pop it open by squeezing the ends of the potato with your fingers (Image 6).

    Step #7. Add butter. Add butter (½ tablespoon butter for each potato) and let it melt into it as you fluff the potato with a fork (Image 7).

    Step #8. Add toppings. Top with sour cream, bacon bits, chives, salt and pepper (Image 8).

    Loaded baked potato on plate with fork.

    Step #9. Serve. Serve and enjoy!

    How to Make Hasselback Potatoes

    Have you wanted to try your hand at Hasselback style potatoes? The number of thin slices and perfect crispiness gives them an aesthetic look. Hasselbacks are delicious and a fast, creative way to serve potatoes, especially for a dinner party or holiday meal next to the bison chuck roast or roast chicken with blackberry gravy.

    The combination of Italian seasonings and aromatic olive oil in this recipe will bring this side dish to a new level as they crisp up in the oven and become infused with spices.

    Ingredients

    How to Bake Potatoes in the Oven - Step 1 image. basket of potatoes. inthekitch.net

    Prepare all ingredients before starting to cook. Preheat oven to 450ºF.

    • potatoes - use whatever you have on hand
    • olive oil - pure olive oil works perfectly
    • fresh herbs - such as thyme, oregano and rosemary
    • sea salt and pepper - freshly ground for best results

    *Check recipe card for ingredient amounts.

    Steps

    Prepping of hasselback potatoes image collage.

    Step #1. Clean the potatoes. Wash and rinse the potatoes (don't peel them). Dry them with a clean kitchen towel (Image 1).

    Step #2. Place potato on spoon. Place a potato on a large spoon (Image 2).

    Step #3. Slice the potato. Make very close slices into the potato until you reach the spoon, so the potato slices will hold together by the bottom. Do this all across the top of the potato. Repeat with remaining potatoes (Image 3).

    Step #4. Combine olive oil and herbs. Roughly chop the herbs. Mix the olive oil and fresh herbs together (Image 4).

    Hasselback style potatoes getting baked image collage.

    Step #5. Brush potatoes. Place the potatoes on a baking tray. Use a basting brush to spread the olive oil and herbs over the potatoes. Try to get into the slices as well with the oil (Image 5).

    Step #6. Season. Sprinkle them with freshly ground salt and pepper (Image 6).

    Step #7. Bake. Bake the potatoes until they are golden brown with crisp edges, about 60 minutes. This completely depends on the size of the potatoes. Keep an eye on them! If they are looking dry while baking, baste them with a little more olive oil - this makes them nice and crispy (Image 7).

    Step #8. Serve. Serve and enjoy (Image 8)!

    Joss' Top Tips for How to Bake Potatoes

    General:

    • Foil side: It doesn't normally matter what side of the foil is on the outside of the potato, but always check the manufacturer's instructions on the box of foil, just in case.
    • Poke holes: If you don't poke holes into the potatoes, you run the risk of them exploding in the oven and creating a big mess. While this might not happen every time, it can and has happened to many cooks.
    • Potato size: If you're baking the potatoes directly on the oven rack, make sure they are large enough to not fall through the grates.
    • Estimate bake time: Weigh your potatoes to estimate bake time (for example: at 400°F, 60 minutes per pound of potatoes). This time will vary but it's helpful to get a general estimate.

    For the Hasselback potatoes:

    If you don't have a large enough spoon for the potato, try placing chopsticks on either side of the potato to stop the knife from going right through. By placing the potato in a large spoon or on chopsticks, it is the best way to keep it stable and secure for the knife.

    This stability provides a far safer option for creating such thin slices within the potato and doubles as an easy way to ensure the knife doesn't cut completely through.

    Personally, I just put the potato on the cutting board and start slicing from one end to the other, being careful not to go all the way through. But the spoon or the chopsticks can make it a lot easier for you; especially if you're a beginner.

    Serving Suggestions

    • Serve these delicious potatoes with meaty main dishes like my bison stew and bison short ribs, or lighter mains like blackened chicken and crispy skin-on salmon.
    • They also taste amazing covered in ham gravy, Cajun tomato gravy or this easy sawmill gravy.
    • For a bright, citrusy option, serve the potatoes with Greek lemon chicken thighs.

    Baked Potato FAQs

    What are hasselback potatoes?

    A classic Hasselback potato is sliced through halfway to three-quarters across the top of the potato (before baking) in order to give it an aesthetic, fanned look while maintaining the structure of the whole potato.

    How long does it take to bake potatoes in the oven?

    It normally takes around 1 hour at 400°F to fully bake a potato, but the time will greatly vary depending on the size of the potato and the temperature of the oven. Bake the potatoes until they are tender all of the way through.

    How can you tell if potatoes are baked all the way through?

    You can check the potatoes for doneness by piercing them with a knife or fork. If there is little resistance, they are ready. You can also check if the internal temperature has reached 210°F.

    How long do baked potatoes last in the fridge?

    Baked potatoes can be stored in the refrigerator in an airtight container for up to 3 to 4 days. Do not store them in the foil for food safety purposes.

    How do you reheat them?

    You can use a microwave (quickest option), air fryer or 350°F oven until heated through.

    Loaded baked potato on plate.

    More Cooking Tutorials to Sharpen Your Skills

    • Bunch of fresh asparagus over pan.
      How to Cook Asparagus on the Stove
    • Cajun French fries in basket.
      How to Make Cajun Fries
    • Cooked barley on a spoon.
      How to Cook Barley
    • 3 colors of roux in ramekins on white wooden background.
      How to Make a Roux

    If you tried this recipe tutorial for 🥔 How to Bake Potatoes in the Oven 3 Ways or any other recipe on my website, please leave a 🌟 star rating and let me know how it went in the 📝 comments below. And please share the recipe!

    📋Recipe

    Baked and stuffed potato on plate.
    Print Pin
    5 from 4 votes

    How to Bake Potatoes in the Oven 3 Ways

    In this recipe, you will learn three of the best methods for how to bake potatoes to perfection in the oven. Master the techniques of baking them directly on the oven rack, wrapping them in foil, and crafting them into aesthetic Hasselback-style creations.
    Course Side Dish
    Cuisine American
    Diet Low Salt
    Prep Time 10 minutes minutes
    Cook Time 1 hour hour
    Total Time 1 hour hour 10 minutes minutes
    Servings 4
    Calories 229kcal
    Author Joss Dyckson

    Equipment

    • Baking tray
    • Basting brush
    • Foil

    Ingredients

    Technique #1: Directly on the Oven Rack Without Foil

    • 4 large russet potatoes cleaned and skin on
    • 4 tablespoons butter
    • salt and pepper to taste

    Technique #2: In Foil

    • 4 Yukon Gold potatoes also known as yellow potatoes--cleaned and skin on
    • 2 tablespoons butter
    • 8 tablespoons sour cream this equals ½ cup - 2 tablespoons per potato
    • 4 tablespoons bacon bits
    • 4 tablespoons fresh chives chopped
    • salt and pepper to taste

    Technique #3: Hasselback Style

    • 4 potatoes cleaned and skin on
    • 2 tablespoons olive oil
    • fresh thyme, oregano and rosemary
    • freshly ground sea salt and pepper to taste
    US Customary - Metric

    Instructions

    Technique #1: Directly on the Oven Rack Without Foil

    • Preheat oven to 400°F. Prick the potatoes all over with a fork so that they don't end up exploding in the oven.
    • Place on the middle oven rack and bake for 45 to 60 minutes - until soft all the way through. Let cool for 10 to 15 minutes.
    • Cut a criss-cross into the top of the potato, using a fork. Pop it open with your fingers.
    • Add butter and fluff with a fork. Season with salt and pepper. Serve.

    Technique #2: In Foil

    • Preheat oven to 450°F. Prick the potatoes all over with a fork. Wrap in foil squares.
    • Place directly on middle oven rack and bake for 45 to 60 minutes, until soft all the way through.
    • Remove the potatoes to a cutting board and let sit for 10 minutes or until you can handle them. Remove the foil and cut a criss-cross into the top of the potato using a fork.
    • Pop it open with your fingers, add butter and let it melt into it as you fluff the potato with a fork.
    • Top with sour cream, bacon bits, chives, salt and pepper. Serve!

    Technique #3: Hasselback Style

    • Preheat oven to 450°F. Place a potato on a large spoon.
    • Make very close slices into the potato until you reach the spoon, so the potato slices will hold together by the bottom. Do this all across the top of the potato. Repeat with remaining potatoes.
    • Roughly chop the herbs. Mix the olive oil and fresh herbs together. Place the potatoes on a baking tray. Use a basting brush to spread the olive oil and herbs over the potato. Try to get into the slices as well with the oil. Sprinkle them with freshly ground salt and pepper.
    • Bake the potatoes until they are golden brown with crisp edges, about 60 minutes. This completely depends on the size of the potatoes. Keep an eye on them! If they are looking dry while baking, baste them with a little more olive oil.
    • Serve.

    Notes

    • COOKING TIP: If you don't have a large enough spoon for the hasselback potato, try placing chopsticks on either side of the potato to stop the knife from going right through. The spoon or the chopsticks method can make it a lot easier for you.
    • Storage: Baked potatoes can be stored in the refrigerator in an airtight container for up to 3 to 4 days. Do not store them in the foil.
    • Reheat: You can use a microwave (quickest option), air fryer or 350°F oven until heated through.
    • Foil side: It doesn't matter what side of the foil is on the outside.
    • Poke holes in the potato: If you don't poke holes into the potatoes, you run the risk of them exploding in the oven and creating a big mess.
    • Potato size for oven rack: If you're baking the potatoes directly on the oven rack, make sure they are large enough to not fall through the grates.

    Nutrition

    Calories: 229kcal | Carbohydrates: 37g | Protein: 4g | Fat: 8g | Saturated Fat: 1g | Polyunsaturated Fat: 1g | Monounsaturated Fat: 5g | Sodium: 13mg | Potassium: 897mg | Fiber: 5g | Sugar: 2g | Vitamin A: 4IU | Vitamin C: 42mg | Calcium: 26mg | Iron: 2mg

    Iced Lemon Mousse

    September 5, 2018 by Joss Dyckson 26 Comments

    There's something about lemons that makes them synonymous with summer's long, lazy days and leisurely pace, and maybe that's why we like them so much in desserts. Iced Lemon Mousse, with only 4 ingredients, provides lemon lovers with an alternative to traditional favorites such as lemon meringue pie, lemon drops or lemon bars.

    Iced lemon mousse in small jars with lime garnish.
    [feast_advanced_jump_to]

    📜The Details on Iced Lemon Mousse

    If you love lemony treats that make your taste buds tingle, you will love this frozen lemon mousse (these graham wafer lemon bars are also amazing). It is packed with creamy lemony goodness without making you feel weighed down.

    This elegant dessert option is ideal for any occasion that calls for something sweet and cold that's delightfully light and fresh. They are served in mini dessert cups or jars (like my cheesecake in a jar) making them perfect to feed a crowd or if you simply want a smaller portioned treat that you can grab and go.

    The evaporated milk provides a full-bodied velvety texture that pairs perfectly with the tang of sugared lemons, while the sweet biscuit topping adds just the right amount of crunch.

    This mousse dessert is simple to make and can be prepared in advance of the festivities so that all you have to do when it's time for the evening's grand finale is take it out of the freezer. Fresh lemons are always available, making this an excellent go-to dessert for any time of the year.

    🍋Ingredients

    Iced lemon mousse ingredients labeled.
    • evaporated milk - Make sure to get full fat evaporated milk for the mousse to properly whip up.
    • sugar - I use white granulated sugar.
    • lemons - We will be using the zest and juice of the lemons plus lemon slices to garnish the dessert.
    • graham wafer crackers - Also called graham crackers. They are a type of sweet, flavored cracker made from graham flour.

    *Check recipe card for ingredient amounts.

    Chef's Note: I use 4 ounce jars for this recipe. You can use whatever dessert dishes you have on hand or even shot glasses, but keep in mind the serving size will change. You can also make this a full size dessert by using stemless wine glasses.

    🥣How to Make Iced Lemon Mousse

    Graham crumbs in small jars.

    Step 1. Chill the evaporated milk, bowl and whisk in the refrigerator for about 2 hours (or 30 minutes in the freezer). Place the crushed biscuits in the bottom of dessert glasses or mini jars. Set aside.

    Evaporated milk and sugar in bowl with electric hand mixer.

    Step 2. Using an electric whisk, whisk together the evaporated milk with the sugar in a large bowl for 2 minutes, until frothy.

    Chef's Note: You might not need all of the crumbs; I use about 1 to 2 heaping teaspoons per 4 ounce jar.

    Whipped evaporated milk in bowl with spatula.

    Step 3. Slowly drizzle in the lemon juice while you continue whisking for another 1 to 2 minutes, until it's expanded in size, thick and fluffy. Fold in the lemon zest.

    Iced lemon mousse and graham crumbs in jars.

    Step 4. Spoon the lemon mousse over the biscuits. Transfer to a freezer and freeze them for at least 2 hours before serving.

    Iced lemon mousse in small jars on white wooden background.

    Step 5. Garnish with lemon slices and a bit more of the crushed graham crackers, if desired. Serve!

    ✔️Joss' Tips

    Graham crackers in bag with rolling pin.
    • Crush your own wafers. If possible, don't use prepared graham wafer crumbs for this recipe. The texture just isn't quite the same, in my opinion. Crush the biscuits yourself for best results. It's okay to leave some bigger chunks.
    • To crush the biscuits: you can place them in a zip-top bag, squeeze the air out and seal it. Place on a hard surface like a counter or cutting board and tap/roll over the bag with the rolling pin (pictured above).
    • Garnish suggestion: Candy some lime or lemon slices for an added sweet touch.
    • Chill the milk well. I like to put a can of evaporated milk in the fridge the night before making this dessert. This ensures it's chilled enough for whipping.
    • Use a baking sheet. When freezing, use a baking sheet to place the jars on to keep the jars upright.

    ❓Recipe FAQs

    How long can you store it in the freezer?

    The nice thing about this frozen lemon mousse is you don't have to worry about it deflating. It can be frozen for about 3 months.

    Can you use a stand mixer for this recipe?

    You can use a stand mixer or hand mixer; both will work for this recipe.

    Iced lemon mousse dessert in mini jars.

    🩷More Frozen Desserts You Will Love

    • Papaya cream with cassis in wine glass.
      Papaya Cream
    • Mochi ice cream ball on small dish.
      How to Make Mochi Ice Cream (Video)
    • Halloween ice cream in glass ice cream dish with spooky candies and decor.
      Halloween Ice Cream
    • Grasshopper pie in white pie plate.
      Grasshopper Pie

    If you tried this 🍋 Iced Lemon Mousse Recipe or any other recipe on my website, please leave a 🌟 star rating and let me know how it went in the 📝 comments below. And please share the recipe!

    📋Recipe

    Iced lemon mousse in small jars.
    Print Pin
    5 from 14 votes

    Iced Lemon Mousse

    Iced lemon mousse provides lemon lovers with an alternative to traditional favorites. They are served in mini dessert cups or jars making them perfect to feed a crowd or if you simply want a smaller portioned treat that you can grab and go.
    Course Dessert
    Cuisine French
    Diet Vegetarian
    Prep Time 10 minutes minutes
    Freezing Time 2 hours hours
    Total Time 2 hours hours 10 minutes minutes
    Servings 10 mini jars
    Calories 127kcal
    Author Joss Dyckson

    Equipment

    • Electric hand mixer
    • small jars

    Ingredients

    • 1 can evaporated milk full fat (12 oz./354 mL)
    • ½ cup sugar
    • ⅓ cup lemon juice freshly squeezed
    • zest of 1 lemon
    • 1 cup graham wafer crackers crushed
    • lemon slices lime slices work too
    US Customary - Metric

    Instructions

    • Cool the evaporated milk, bowl and whisk in the refrigerator for about 2 hours (or 30 minutes in the freezer).
    • Place the crushed biscuits in the bottom of dessert glasses or mini jars. You might not need all of the crumbs; I use about 1 to 2 heaping teaspoons per 4 ounce jar. Set aside.
    • Using an electric whisk, whisk together the evaporated milk with the sugar in a large bowl for 2 minutes, until frothy.
    • Slowly drizzle in the lemon juice while you continue whisking for another 1 to 2 minutes, until it's expanded in size, thick and fluffy. Fold in the lemon zest.
    • Spoon the lemon mousse over the biscuits. Transfer to a freezer and freeze them for at least 2 hours before serving.
    • Garnish with lemon slices and a bit more of the crushed graham crackers, if desired. Serve!

    Video

    Notes

    • The nice thing about this frozen mousse is you don't have to worry about it deflating. It can be frozen for about 3 months.
    • Suggestion: Candy the lime or lemon slices for an added sweet touch.
    • I like to put a can of evaporated milk in the fridge the night before making this dessert. This ensures it's chilled enough for whipping.
    • To crush the biscuits, you can place them in a zip-top bag, squeeze the air out and seal it. Place on a hard surface like a counter or cutting board and tap/roll over the bag with the rolling pin.
    • When freezing, use a baking sheet to place the jars on to keep the jars upright.
    • You can use a stand mixer or hand mixer; both will work for this recipe.
    • If possible, don't use prepared graham wafer crumbs for this recipe. The texture just isn't quite the same, in my opinion. Crush the biscuits yourself for best results. It's okay to leave some bigger chunks.
    • You can also make this a full size dessert by using stemless wine glasses for serving.

    Nutrition

    Calories: 127kcal | Carbohydrates: 21g | Protein: 3g | Fat: 4g | Saturated Fat: 2g | Polyunsaturated Fat: 0.1g | Monounsaturated Fat: 1g | Cholesterol: 10mg | Sodium: 97mg | Potassium: 133mg | Fiber: 0.4g | Sugar: 16g | Vitamin A: 85IU | Vitamin C: 5mg | Calcium: 101mg | Iron: 0.5mg

    How to Fry Tofu

    September 3, 2018 by Joss Dyckson 1 Comment

    In just a few simple steps and about 15 minutes, you can learn how to fry tofu in a pan that is crispy, golden and delicious.

    Fried tofu on serving plate.

    Tofu is more accessible than ever before. This soy-based protein has exploded in popularity thanks to its unique texture, adaptable flavor, and vegetarian-friendliness.

    Crispy on the outside (without using cornstarch) and soft on the inside, fried tofu tastes great dipped in sauce or as an addition to salads, rice bowls or stir-fries (like in my kimchi tofu stir fry). I also use it in Korean tofu kimchi soup. It's like a blank palette for sauces like the simple but flavorful honey-soy sauce we are making here.

    Since fried tofu can be incorporated into many different meals, just as you would fried chicken, this is definitely a recipe to keep close at hand and I hope you enjoy it.

    With 5 ingredients and four easy steps, you will have delicious, crispy, golden tofu that's ready to eat.

    [feast_advanced_jump_to]

    Ingredients

    Firm tofu labeled with knife on cutting board.
    Honey soy marinade and black and white sesame seeds in small bowls - labeled.

    Prepare all of these ingredients before starting to cook:

    • tofu - Firm or extra firm (I prefer extra firm for stir frying so that it's less likely to crumble).
    • soy sauce - Soy sauce comes in two main types: light and dark. Light soy sauce is saltier with a thinner consistency, while dark soy sauce is aged longer, resulting in a slightly thicker texture and a more robust, sweet flavor. I use light in this recipe as it is ideal for a marinade and great for adding flavor to stir fries.
    • sesame oil - Be sure to pick up toasted sesame oil which is dark golden-brown in color.
    • black and white sesame seeds - To garnish and add a bit more crunch.

    *Check recipe card for full ingredient amounts.

    👩🏻‍🍳 Chef's Note: For an extra but optional step, you can reduce the moisture in the tofu brick to make it crispier and better able to absorb the marinade. Head here for tofu pressing steps.

    Steps For How to Fry Tofu

    Skewered tofu cubes on cutting board.

    Step #1. Cut the Tofu. Drain the tofu block and pat it dry. Slice it into cubes and insert them onto wooden skewers.

    Cubed tofu on cutting board with soy sauce mixture.

    Step #2. Coat the Tofu with Sauce. Mix the soy sauce and honey together in a small bowl. Coat the tofu pieces with the sauce/tofu marinade using a pastry brush.

    Skewered, cubed tofu in frying pan.

    Step #3. Fry the Tofu. Heat the sesame oil in a skillet over medium-high heat. Fry the tofu skewers, rotating until the tofu is golden brown on every side.

    Fried tofu on a stick.

    Step #4. Serve. Sprinkle with sesame seeds and serve with rice and vegetables if desired. Serve the pan-fried tofu as a main dish or side.

    Top Pro Tips

    • Make sure to use firm or extra-firm tofu and have the pan nice and hot in order to achieve a golden, crispy crust with a more solid texture.
    • After placing the tofu cubes in the pan, resist the urge to touch them for a few minutes to allow a golden crust to form.

    Storage & Reheating

    • Fridge: Any leftover cooked tofu can be stored in an airtight container in the fridge for up to 5 days.
    • Freezer: It can also be frozen for up to 3 months.
    • Thaw: Thaw in the refrigerator and reheat in the microwave, oven or pan.

    FAQs for How to Fry Tofu in a Pan

    Do you need to dry tofu before frying?

    Before frying tofu in most recipes, make sure to drain it well and pat it dry. This does help with flavor and crispiness because wet tofu doesn't soak up marinades or spices properly and can cause splattering in the pan.

    Can you fry tofu in oil?

    Frying tofu in hot oil gives it a delightful crispy outer layer, a rich flavor, and a beautiful golden hue to each piece.

    Should you marinate tofu before frying?

    This isn't a necessary step, but if you want to give the tofu more time to soak up the flavors of the marinade, you can marinate for at least 30 minutes or overnight.

    What type of pan is best for frying tofu?

    Opt for a non-stick pan when cooking tofu to prevent sticking. Ensure the pan is coated with oil for better results.

    Fried tofu on serving plate.

    More Stir Fries You Will Love

    • Ground beef stir fry with veggies in bowl with chopsticks.
      Ground Beef Stir Fry
    • Bok choy stir fry in frying pan.
      Bok Choy Stir Fry
    • Kimchi shrimp stir fry in bowl on wooden background.
      Kimchi Shrimp Stir Fry
    • Kimchi udon in a bowl with chop sticks.
      Kimchi Udon Stir Fry

    If you tried this 📋 recipe tutorial for How to Fry Tofu in a Pan or any other recipe on my website, please leave a 🌟 star rating and let me know how it went in the 📝 comments below. And please share the recipe!

    📋Recipe

    Fried tofu on serving plate.
    Print Pin
    5 from 3 votes

    How to Fry Crispy Tofu

    In just a few simple steps, you can learn how to fry delicious tofu in a pan in about 15 minutes or less. Crispy on the outside and soft on the inside, fried tofu tastes great dipped in sauce or as an addition to salads, rice bowls or stir-fries.
    Course Main Course, Side Dish
    Cuisine American
    Diet Vegetarian
    Prep Time 5 minutes minutes
    Cook Time 8 minutes minutes
    Total Time 13 minutes minutes
    Servings 4
    Calories 127kcal
    Author Joss Dyckson

    Equipment

    • Wooden skewers
    • Skillet

    Ingredients

    • 14 ounces tofu firm or extra firm - 1 package
    • ¼ cup soy sauce I use light
    • 1 tablespoon honey
    • ¼ cup toasted sesame oil
    • black and white sesame seeds to garnish
    US Customary - Metric

    Instructions

    • Drain the tofu block and pat it dry. Slice it into cubes and insert them onto wooden skewers.
      14 ounces tofu
      Skewered tofu cubes on cutting board.
    • Mix the soy sauce and honey together in a small bowl. Coat the tofu pieces with the sauce using a pastry brush.
      ¼ cup soy sauce, 1 tablespoon honey
      Cubed tofu on cutting board with soy sauce mixture.
    • Heat the sesame oil in a skillet over medium-high heat. Fry the tofu skewers, rotating until the tofu is golden brown on every side.
      ¼ cup toasted sesame oil
      Skewered, cubed tofu in frying pan.
    • Sprinkle with sesame seeds and serve.
      Fried tofu on serving plate.

    Notes

    • Top Tip: Make sure to use firm or extra-firm tofu and have the pan nice and hot in order to achieve a golden, crispy crust with a more solid texture.
    • Fridge Storage: Any leftover cooked tofu can be stored in an airtight container in the fridge for up to 5 days.
    • Freezer Storage: It can also be frozen for up to 3 months.
    • To Thaw: Thaw in the refrigerator and reheat in the microwave, oven or pan.
    • For Extra Crispy Tofu: For an extra but optional step, you can reduce the moisture in the tofu brick to make it crispier and better able to absorb the marinade. Head here for tofu pressing steps.

    Nutrition

    Calories: 127kcal | Carbohydrates: 4g | Protein: 10g | Fat: 8g | Saturated Fat: 1g | Polyunsaturated Fat: 4g | Monounsaturated Fat: 3g | Sodium: 814mg | Potassium: 31mg | Fiber: 1g | Sugar: 2g | Vitamin C: 0.01mg | Calcium: 127mg | Iron: 2mg

    Savory Creamy Pumpkin Soup

    August 29, 2018 by Joss Dyckson 2 Comments

    When the first chill of autumn hits the air, I am instantly in a "soup" mood. There is something so cozy about warming up with a bowl of delicious, hearty soup. Get some good use out of your garden produce this fall with this savory, creamy pumpkin soup recipe. It uses everyone's favorite fall staple, pumpkin, for a nutritious and delicious meal.

    Pumpkin soup in white porcelain soup bowls.
    [feast_advanced_jump_to]

    Fall's Favorite Warm-Up

    With ginger, cumin and fresh pumpkin, this savory soup takes warm and comforting to the max.

    The best part of this recipe, aside from the yummy taste, is how crazy easy it is to prepare! In just 30 minutes you can have a hearty meal on the table. Plus, who can say no to a pumpkin recipe in autumn? That and leek and potato soup are cozy fall favorites that I can't stay away from.

    You can check out some more of my warm and cozy fall recipes here.

    Featured Comment

    From Monica: ⭐⭐⭐⭐⭐ "I made this soup with the last of the pumpkins. It was delicious. Very filling as well. I have tasted the Pumpkin & Garlic Naan Bread as well and believe that these two would go together very well."

    Ingredients

    Pumpkin soup ingredients labeled.
    • fresh pumpkin - small pumpkins usually taste better than large ones
    • small carrots - carrots add a natural sweetness to the soup to balance the flavors as well as add bolder orange color
    • medium yellow onions - while yellow onions are the best for this soup you can also try sweet onions or white onions
    • vegetable broth - or chicken broth if you prefer
    • orange juice - I like to use unsweetened
    • ginger - choose ginger that feels firm and heavy for its size--avoid pieces that feel soft or spongy, as they may be old or starting to rot
    • Greek yogurt - for some creaminess

    *Check recipe card for ingredient amounts.

    Chef's Note: After you've prepped the pumpkin, if you don't want to throw away the seeds, check out my posts on how to clean and roast squash seeds and pumpkin seed milk.

    How to Make Savory Pumpkin Soup

    Pumpkin and broth in pot.

    Step 1. Simmer. Place the pumpkin, carrot, onion, garlic and vegetable broth in a pot. Bring to a boil and then reduce heat and let simmer rapidly until pumpkin is tender, about 20 minutes.

    Greek yogurt drizzle in glass dish with spoon.

    Step 2. Make the yogurt drizzle. While the vegetables are being cooked, mix the Greek yogurt with the cumin powder, salt and pepper.

    Pumpkin soup blended in pot.

    Step 3. Blend. Remove from heat and blend with an immersion blender until smooth. Return to medium heat and add the orange juice, ginger, salt and pepper. Cook until heated through.

    Pumpkin soup in soup bowl with Greek yogurt drizzle and thyme.

    Step 4. Serve. Serve the savory pumpkin soup in bowls, drizzled with the Greek yogurt sauce.

    Joss' Top Tip

    Depending on the sweetness of the pumpkin, sometimes I like to add a touch of sugar or agave nectar to enhance the flavor of the soup.

    Serving Suggestions

    • Try this comforting pumpkin soup for a filling lunch or quick and easy dinner. Everyone will be asking for seconds.
    • Serve with with crusty bread, pretzel bread, garlic toast points or even this fall pumpkin garlic naan bread to soak up the pumpkin goodness.
    • When you add a drizzle of the creamy Greek yogurt dressing on top, you're in for a flavor explosion! If you're in the mood for something with a little more tang, use sour cream instead or ranch dressing with sour cream.
    • If you're serving it in the evening for guests, pair it with this festive fall pumpkin punch.

    Savory Creamy Pumpkin Soup FAQs

    How long can you refrigerate leftovers?

    When the soup has cooled, store it in an airtight container in the fridge for up to 5 days.

    Can you freeze savory pumpkin soup?

    Yup! It can be frozen for up to 3 months. Here's a tip: put a date on the container so that you don't lose track of the time it's been in there.

    How do you make pumpkin soup thicker?

    You can try adding in some flour or cornstarch. You could also add more pumpkin and carrots; once you cook and purée them into the soup, it should end up thicker.

    Pumpkin soup in white porcelain soup bowl.

    More Delicious Fall Soups to Try

    • Homemade roasted garlic tomato soup in white soup bowl.
      Homemade Roasted Garlic Tomato Soup
    • Tom yum soup with shrimp in bowls.
      Thai Tom Yum Seafood Soup
    • Red lentil and dill soup in bowl.
      Easy Red Lentil Soup
    • Mango soup in white bowl with spices on top.
      Mango Soup

    If you tried this Savory Creamy Pumpkin Soup Recipe or any other recipe on my website, please leave a 🌟 star rating and let me know how it went in the 📝 comments below. And please share the recipe!

    📋Recipe

    Creamy pumpkin soup in soup bowls.
    Print Pin
    5 from 4 votes

    Savory Creamy Pumpkin Soup

    This savory, creamy, pumpkin soup recipe uses everyone's favorite fall staple, pumpkin, for a nutritious and delicious soup. It's drizzled with a creamy, Greek yogurt sauce.
    Course Soup
    Cuisine American
    Diet Low Calorie, Low Fat, Vegetarian
    Prep Time 10 minutes minutes
    Cook Time 20 minutes minutes
    Total Time 30 minutes minutes
    Servings 4
    Calories 139kcal
    Author Joss Dyckson

    Equipment

    • Immersion blender

    Ingredients

    For the Soup

    • 4 cups pumpkin peeled and cut into large pieces
    • 2 small carrots peeled and cut into large pieces
    • 2 medium yellow onions cut into large pieces
    • 2 garlic cloves chopped
    • 4 cups vegetable broth
    • 1 cup orange juice
    • 2 teaspoons ginger minced
    • salt and pepper to taste

    For the Creamy Drizzle

    • 1 cup Greek yogurt
    • 2 teaspoons cumin powder
    • salt and pepper to taste
    US Customary - Metric

    Instructions

    • Place the pumpkin, carrot, onion, garlic and vegetable broth in a pot. Bring to a boil and then reduce heat and let simmer rapidly until pumpkin is tender, about 20 minutes.
      4 cups pumpkin, 2 small carrots, 2 medium yellow onions, 2 garlic cloves, 4 cups vegetable broth
    • While the vegetables are being cooked, mix the Greek yogurt with the cumin powder, salt and pepper.
      1 cup Greek yogurt, 2 teaspoons cumin powder
    • Remove from heat and blend with an immersion blender until smooth. Return to medium heat and add the orange juice, ginger, salt and pepper. Cook until heated through. If it's too thick, you can add a bit of water or more vegetable broth.
    • Serve in bowls drizzled with the Greek yogurt sauce.

    Notes

    • My Fave Broth: My go-to vegetable broth base for any soup is Better than Bouillon.
    • Storage: When the soup has cooled, store it in an airtight container in the fridge for up to 5 days. It can be frozen for up to 3 months. Put a date on the container so that you don't lose track of the time it's been in there.
    • To Thicken the Soup: You can try adding in some flour or cornstarch. You could also add more pumpkin and carrots; once you cook and purée them into the soup, it should end up thicker.
    • Pro Tip: Depending on the sweetness of the pumpkin, sometimes I like to add a touch of sugar or agave nectar to enhance the flavor of the soup.

    Nutrition

    Calories: 139kcal | Carbohydrates: 27g | Protein: 8g | Fat: 1g | Saturated Fat: 0.2g | Polyunsaturated Fat: 0.1g | Monounsaturated Fat: 0.2g | Trans Fat: 0.003g | Cholesterol: 3mg | Sodium: 981mg | Potassium: 777mg | Fiber: 2g | Sugar: 16g | Vitamin A: 14692IU | Vitamin C: 48mg | Calcium: 120mg | Iron: 2mg

    Stuffed Button Mushrooms

    August 27, 2018 by Joss Dyckson Leave a Comment

    Is there anything more luxurious than an appetizer of cheesy, stuffed button mushrooms? These delicious mushrooms are always a hit at dinner parties and New Year's Eve celebrations. This recipe is easy and has make-ahead options.

    Stuffed button mushrooms with fresh thyme on black serving board.

    I like my mushrooms crispy like my bacon. And the good thing is: crispy, stuffed mushrooms are actually far easier to make than you probably realize!

    With this recipe, it's as easy as chopping your ingredients, sautéing the mushrooms and onions, stuffing the mushroom caps, and letting them bake until the cheese topping is melted and golden.

    [feast_advanced_jump_to]

    Ingredients

    Stuffed button mushrooms ingredients labeled.
    • button mushrooms - Regular button mushrooms are the perfect one-bite size for this recipe. You can also use stuffing mushrooms (sometimes labeled as 'stuffers'), but they are larger so you will need less.
    • butter - Butter is used to sauté the mushroom filling. You can use salted or unsalted.
    • yellow onion - Yellow onions are great for cooking applications.
    • garlic clove - Garlic adds a rich, aromatic flavor that complements the earthy taste of mushrooms. You can check out how to chop garlic here.
    • dried herbs - I recommend thyme and oregano.

    *Check recipe card for ingredient amounts.

    How to Make Stuffed Button Mushrooms

    Butcher knife slicing a button mushroom.

    Step 1. Prep the mushrooms. Preheat oven to 375°F. Separate the stems from the mushroom caps. Dice the stems.

    Chopped mushrooms and onions in pan.

    Step 2. Fry the mushroom mixture. Heat the butter in a small frying pan over medium-low heat. Add the onions to the pan and fry until soft and golden brown. Add the diced mushroom stems and cook for 4 minutes, stirring often.

    Mushrooms and onion filling cooking in pan.

    Step 3. Add garlic. Stir in the garlic and herbs. Cook for 1 minute. Remove from heat and season with salt and pepper, to taste.

    Uncooked button mushrooms getting stuffed with filling.

    Step 4. Fill the mushroom caps. Fill each mushroom with the stuffing and place them on a baking sheet.

    Stuffed uncooked button mushrooms on parchment lined baking sheet.

    Step 5. Top with cheese. Sprinkle grated Parmesan cheese over each mushroom.

    Stuffed button mushrooms with fresh thyme sprigs.

    Step 6. Bake. Bake for 20-25 minutes or until the cheese browns a little. Allow to cool a bit before serving the stuffed button mushrooms. Garnish with fresh thyme.

    Cheese and herb stuffed button mushrooms.

    Step 6. Serve. They are ready to serve! There you have it: delectable, crispy stuffed button mushrooms made quick and simple, and who doesn't love that?

    Joss' Tips

    • Choose Fresh Mushrooms: Pick button mushrooms that are firm and white.
    • Clean Gently: Wipe mushrooms with a paper towel to clean them. Avoid soaking them in water, because they can absorb moisture and you don't want them steaming in the oven.
    • Bake Until Golden: Bake until the mushrooms are tender and the stuffing is golden brown and slightly crispy on top for best results.

    Make Ahead Instructions

    In the Fridge. You can stuff the mushrooms and store them in the fridge (before baking) 1 day in advance. Make sure they are covered well. When it's time to serve, you can take them out of the fridge, pop them onto a baking sheet and into the oven.

    In the Freezer. You can freeze stuffed mushrooms before baking for up to 3 months. First, freeze them separately on a baking sheet and then transfer to an airtight container or freezer bag and back into the freezer. You can bake them from frozen, but keep in mind they will need a little more cooking time.

    Dishes That go With Stuffed Mushrooms

    • If you're serving them with other appetizers and sides, you can try simple salads, creamy soups like potato leek soup, and toast points.
    • As for main dishes, they pair well with grilled meats like steak, chicken or pork chops, creamy pasta dishes (such as this delicious lemon basil chicken pasta) and grilled halibut tacos.
    • You can also serve them with dips: try aioli, pesto, or hummus.

    Recipe FAQs

    How do you keep stuffed mushrooms from getting soggy?

    Make sure the stuffing ingredients are not overly wet to begin with. You can also add a bit of breadcrumbs to the stuffing mixture, bake them at a higher temperature (375°F for this recipe) and avoid crowding the mushrooms on the pan. Reheat in the oven to avoid sogginess.

    How do you store the leftovers?

    Store leftover cooked mushrooms in an airtight container in the fridge for up to 4 days.

    Stuffed button mushrooms arranged on black serving board.

    More Tasty Appetizers to Try

    • Vegetarian zucchini crab cakes stacked with a dollop of tartar sauce.
      Vegetarian Zucchini 'Crab' Cakes
    • 4th of July themed charcuterie board on red plate with red, white and blue stars.
      4th of July Charcuterie Board
    • Mini caprese skewers arranged on plate with NYE decorations on the side.
      NYE Appetizer: Mini Caprese Skewers
    • Red wine cheese dip in mini slow cooker.
      Red Wine & Cheese Dip (for Mini Slow Cooker)

    If you tried this 🍄‍🟫 Stuffed Button Mushrooms Recipe or any other recipe on my website, please leave a 🌟 star rating and let me know how it went in the 📝 comments below. And please share the recipe!

    📋Recipe

    Stuffed button mushrooms on black serving tray.
    Print Pin
    5 from 6 votes

    Stuffed Button Mushrooms

    This recipe for stuffed button mushrooms is easy and mouth watering! They are baked until the cheese is perfectly melted and golden.
    Course Appetizer
    Cuisine American
    Diet Vegetarian
    Prep Time 15 minutes minutes
    Cook Time 40 minutes minutes
    Total Time 55 minutes minutes
    Servings 24 mushrooms
    Calories 26kcal
    Author Joss Dyckson

    Ingredients

    • 24 button mushrooms wiped clean
    • 2 tablespoons butter
    • 1 yellow onion diced finely
    • 1 garlic clove minced
    • 1 teaspoon dried herbs recommended: thyme and oregano
    • ¼ cup Parmesan cheese grated
    • thyme stems to decorate
    • salt and pepper to taste
    US Customary - Metric

    Instructions

    • Preheat oven to 375°F. Separate the stems from the mushroom caps. Dice the stems.
      24 button mushrooms
      Butcher knife slicing a button mushroom.
    • Heat the butter in a small frying pan over medium-low heat. Add the onions to the pan and fry until soft and golden brown (about 15 minutes). Add the diced mushroom stems and cook for 4 minutes, stirring often.
      2 tablespoons butter, 1 yellow onion
      Chopped mushrooms and onions in pan.
    • Stir in the garlic and herbs. Cook for 1 minute. Remove from heat and season with salt and pepper, to taste.
      1 garlic clove, 1 teaspoon dried herbs
      Mushrooms and onion filling cooking in pan.
    • Fill each mushroom with the stuffing and place them on a baking sheet.
      Uncooked button mushrooms getting stuffed with filling.
    • Sprinkle grated Parmesan cheese over each mushroom.
      ¼ cup Parmesan cheese
      Stuffed uncooked button mushrooms on parchment lined baking sheet.
    • Bake for 20-25 minutes or until the cheese browns a little. Allow to cool for 5 minutes or so before serving. Garnish with fresh thyme.
      Stuffed button mushrooms with fresh thyme on black serving board.

    Video

    Notes

    • Clean Gently: Wipe mushrooms with a paper towel to clean them. Avoid soaking them in water, because they can absorb moisture and you don't want them steaming in the oven.
    • Store leftover cooked mushrooms in an airtight container in the fridge for up to 4 days.
    • Reheat in the oven to avoid sogginess.
    • Make ahead instructions:
      • Fridge: You can stuff the mushrooms and store them in the fridge (before baking) 1 day in advance. Make sure they are covered well. When it's time to serve, you can take them out of the fridge, pop them onto a baking sheet and into the oven.
      • Freezer: You can freeze stuffed mushrooms before baking for up to 3 months. First, freeze them separately on a baking sheet and then transfer to an airtight container or freezer bag and back into the freezer. You can bake them from frozen, but keep in mind they will need a little more cooking time.

    Nutrition

    Calories: 26kcal | Carbohydrates: 1g | Protein: 1g | Fat: 1g | Saturated Fat: 1g | Cholesterol: 4mg | Sodium: 47mg | Potassium: 75mg | Vitamin A: 60IU | Vitamin C: 0.9mg | Calcium: 33mg | Iron: 0.4mg
    « Previous Page
    Next Page »
    Joss Dyckson author photo.

    Hi, I'm Joss!

    I am the creator and editor of In the Kitch. I am inviting you on this food journey with me to learn, grow and bring out that inner chef in you. I hope to inspire you to get creative in your own kitchen!

    More about me →

    Patriotic Recipes

    • 4th of July themed charcuterie board on red plate with red, white and blue stars.
      4th of July Charcuterie Board
    • Grilled burgers on metal flipper, grill grates in the background.
      How to Grill Frozen Burgers
    • Blueberry mojito mocktail with fresh mint in cocktail glass.
      Blueberry Mojito Mocktail
    • 4th of July pulled pork sliders on parchment lined serving tray.
      4th of July Pulled Pork Sliders
    • Canada Day raspberry cheesecake in jars with red and white spoons.
      Raspberry Cheesecake in a Jar (Canada Day Dessert)
    • Watermelon basil cocktail in wine glass with watermelon swizzle stick.
      Frozen Watermelon Basil Cocktail

    Popular

    • Cake pop frosting in bowl with spatula.
      Cake Pop Frosting & Coating
    • Collage of coffee syrups.
      12 Coffee Syrup Recipes to Upgrade Your Brew
    • Pictures of passion fruit recipes collage.
      16 Easy Passion Fruit Recipes To Make This Summer
    • BBQ buffalo wings in dish with sauce on the side.
      37 Easy and Delicious Electric Skillet Recipes
    • Peanut butter soup in a speckled bowl.
      Peanut Butter Soup
    • Corn tortillas on foil.
      How to Heat Corn Tortillas (3 Ways)

    Footer

    ↑ back to top

    In the Kitch

    • Privacy Policy
    • Terms & Conditions
    • Disclaimer
    • Accessibility Statement

    About

    • About
    • The Team

    Contact

    • Contact

    As an Amazon Associate I earn from qualifying purchases.

    Copyright © 2026 In the Kitch

    Rate This Recipe

    Your vote:


    A rating is required
    A name is required
    An email is required